
 我要评论
我要评论1 背景
springboot 是一个框架,一种全新的编程规范,他的产生简化了框架的使用,同时也提供了很多便捷的功能,比如内置 tomcat 就是其中一项,他让我们省去了搭建 tomcat 容器,生成 war,部署,启动 tomcat。
因为内置了启动容器,应用程序可以直接通过 maven 命令将项目编译成可执行的 jar 包,通过 java -jar 命令直接启动,不需要再像以前一样,打包成 war 包,然后部署在 tomcat 中。那么内置 tomcat 是如何实现的呢
2 tomcat 启动过程及原理
2.1 下载一个 springboot 项目
在这里下载一个项目 https://start.spring.io/ 也可以在 idea 新建 springboot-web 工程.
<dependency>
    <groupid>org.springframework.boot</groupid>
    <artifactid>spring-boot-starter-web</artifactid>
</dependency>
点击 pom.xml 会有 tomcat 依赖
<dependency>
<groupid>org.springframework.boot</groupid>
<artifactid>spring-boot-starter-tomcat</artifactid>
<version>2.1.2.release</version>
<scope>compile</scope>
</dependency>
2.2 从启动入口开始一步步探索
点击进入 run 方法
public static configurableapplicationcontext run(class<?> primarysource,
string... args) {
return run(new class<?>[] { primarysource }, args);
}

//继续点击进入run方法
public static configurableapplicationcontext run(class<?>[] primarysources,
string[] args) {
return new springapplication(primarysources).run(args);
}
进入到这个 run 方法之后就可以看到,我们认识的一些初始化事件。主要的过程也是在这里完成的。
2.3 源码代码流程大致是这样
/**
* run the spring application, creating and refreshing a new
* {@link applicationcontext}.
* @param args the application arguments (usually passed from a java main method)
* @return a running {@link applicationcontext}
*/
public configurableapplicationcontext run(string... args) {
stopwatch stopwatch = new stopwatch();
stopwatch.start();
configurableapplicationcontext context = null;
collection<springbootexceptionreporter> exceptionreporters = new arraylist<>();
/**1、配置系统属性*/
configureheadlessproperty();
/**2.获取监听器*/
springapplicationrunlisteners listeners = getrunlisteners(args);
/**发布应用开始启动事件 */
listeners.starting();
try {
/** 3.初始化参数 */
applicationarguments applicationarguments = new defaultapplicationarguments(
args);
/** 4.配置环境*/
configurableenvironment environment = prepareenvironment(listeners,
applicationarguments);

configureignorebeaninfo(environment);
banner printedbanner = printbanner(environment);
/**5.创建应用上下文*/
context = createapplicationcontext();
exceptionreporters = getspringfactoriesinstances(
springbootexceptionreporter.class,
new class[] { configurableapplicationcontext.class }, context);
/**6.预处理上下文*/
preparecontext(context, environment, listeners, applicationarguments,
printedbanner);

/**6.刷新上下文*/
refreshcontext(context);
afterrefresh(context, applicationarguments);
stopwatch.stop();
if (this.logstartupinfo) {
new startupinfologger(this.mainapplicationclass)
.logstarted(getapplicationlog(), stopwatch);
}
/** 8.发布应用已经启动事件 */
listeners.started(context);
callrunners(context, applicationarguments);
}
catch (throwable ex) {
handlerunfailure(context, ex, exceptionreporters, listeners);
throw new illegalstateexception(ex);
}

try {
/** 9.发布应用已经启动完成的监听事件 */
listeners.running(context);
}
catch (throwable ex) {
handlerunfailure(context, ex, exceptionreporters, null);
throw new illegalstateexception(ex);
}
return context;
}
代码中主要就是通过 switch 语句,根据 webapplicationtype 的类型来创建不同的 applicationcontext:
- default_servlet_web_context_class:web 类型,实例化 annotationconfigservletwebserverapplicationcontext
- default_reactive_web_context_class:响应式 web 类型,实例化 annotationconfigreactivewebserverapplicationcontext
- default_context_class:非 web 类型,实例化 annotationconfigapplicationcontext
2.4 创建完应用上下文之后,我们在看刷新上下文方法
一步步通过断点点击方法进去查看,我们看到很熟悉代码 spring 的相关代码。
@override
public void refresh() throws beansexception, illegalstateexception {
synchronized (this.startupshutdownmonitor) {
// prepare this context for refreshing.
//初始化前的准备工作,主要是一些系统属性、环境变量的校验,比如spring启动需要某些环境变量,可以在这个地方进行设置和校验
preparerefresh();

// tell the subclass to refresh the internal bean factory.
configurablelistablebeanfactory beanfactory = obtainfreshbeanfactory();

// prepare the bean factory for use in this context.
//准备bean工厂 注册了部分类
preparebeanfactory(beanfactory);

try {
// allows post-processing of the bean factory in context subclasses.
postprocessbeanfactory(beanfactory);

// invoke factory processors registered as beans in the context.
//注册bean工厂后置处理器,并解析java代码配置bean定义
invokebeanfactorypostprocessors(beanfactory);

// register bean processors that intercept bean creation.
//注册bean后置处理器,并不会执行后置处理器,在后面实例化的时候执行
registerbeanpostprocessors(beanfactory);

// initialize message source for this context.
initmessagesource();

// initialize event multicaster for this context.
//初始化事件监听多路广播器
initapplicationeventmulticaster();

// initialize other special beans in specific context subclasses.
//待子类实现,springboot在这里实现创建内置的tomact容器
onrefresh();

// check for listener beans and register them.
registerlisteners();

// instantiate all remaining (non-lazy-init) singletons.
finishbeanfactoryinitialization(beanfactory);

// last step: publish corresponding event.
finishrefresh();
}

catch (beansexception ex) {
if (logger.iswarnenabled()) {
logger.warn("exception encountered during context initialization - " +
"cancelling refresh attempt: " + ex);
}

// destroy already created singletons to avoid dangling resources.
destroybeans();

// reset 'active' flag.
cancelrefresh(ex);

// propagate exception to caller.
throw ex;
}

finally {
// reset common introspection caches in spring's core, since we
// might not ever need metadata for singleton beans anymore...
resetcommoncaches();
}
}
}
2.5 onrefresh () 方法是调用其子类实现的
也就是 servletwebserverapplicationcontext
/** 得到servlet工厂 **/
this.webserver = factory.getwebserver(getselfinitializer());
其中 createwebserver () 方法是用来启动 web 服务的,但是还没有真正启动 tomcat,只是通过 servletwebserverfactory 创建了一个 webserver,继续来看这个 servletwebserverfactory:
this.webserver = factory.getwebserver (getselfinitializer ());
这个方法可以看出 tomcatservletwebserverfactory 的实现。相关 tomcat 的实现。
2.6 tomcatservletwebserverfactory 的 getwebserver () 方法
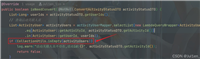
清晰的看到 new 出来了一个 tomcat.
2.7 tomcat 创建之后,继续分析 tomcat 的相关设置和参数
@override
public webserver getwebserver(servletcontextinitializer... initializers) {

/** 1、创建tomcat实例 **/
tomcat tomcat = new tomcat();
//创建tomcat工作目录
file basedir = (this.basedirectory != null) ? this.basedirectory
: createtempdir("tomcat");
tomcat.setbasedir(basedir.getabsolutepath());
connector connector = new connector(this.protocol);
tomcat.getservice().addconnector(connector);
customizeconnector(connector);
/** 2、给创建好的tomcat设置连接器connector **/
tomcat.setconnector(connector);
/** 3.设置不自动部署 **/
tomcat.gethost().setautodeploy(false);
/** 4.配置tomcat容器引擎 **/
configureengine(tomcat.getengine());
for (connector additionalconnector : this.additionaltomcatconnectors) {
tomcat.getservice().addconnector(additionalconnector);
}
/**准备tomcat的standardcontext,并添加到tomcat中*/
preparecontext(tomcat.gethost(), initializers);
/** 将创建好的tomcat包装成webserver返回**/
return gettomcatwebserver(tomcat);
}
2.8 继续点击 gettomcatwebserver 方法
找到 initialize () 方法,可以看到 tomcat.start (); 启动 tomcat 服务方法。
// start the server to trigger initialization listeners
//启动tomcat服务
this.tomcat.start();
//开启阻塞非守护进程
startdaemonawaitthread();
//tomcat.java
2.9 tomcatwebserver.java 控制台会打印这句话
tomcat started on port(s): 8080 (http) with context path ‘’
3 总结
springboot 的启动主要是通过实例化 springapplication 来启动的,启动过程主要做了如下几件事情:
配置系统属性、获取监听器,发布应用开始启动事件、初始化参数、配置环境、创建应用上下文、预处理上下文、刷新上下文、再次刷新上下文、发布应用已经启动事件、发布应用启动完成事件。而启动 tomcat 是刷新上下文 这一步。
spring boot 创建 tomcat 时,会先创建一个上下文,将 webapplicationcontext 传给 tomcat;
启动 web 容器,需要调用 getwebserver (),因为默认的 web 环境就是 tomcatservletwebserverfactory,所以会创建 tomcat 的 webserver,这里会把根上下文作为参数给 tomcatservletwebserverfactory 的 getwebserver ();启动 tomcat,调用 tomcat 中 host、engine 的启动方法。
以上为个人经验,希望能给大家一个参考,也希望大家多多支持代码网。




发表评论