1.创建spring boot项目
首先,你需要创建一个spring boot项目。你可以使用spring initializr(https://start.spring.io/)来快速生成项目结构。
2.添加异步支持依赖
在你的pom.xml文件中,确保你已经添加了spring boot的starter依赖,特别是spring-boot-starter-web,这将提供异步支持所需的依赖。
<dependency>
    <groupid>org.springframework.boot</groupid>
    <artifactid>spring-boot-starter-web</artifactid>
</dependency>
3.配置异步线程池参数
在spring boot中,你可以通过application.properties或application.yml文件来配置异步线程池的参数。以下是一个使用application.properties文件的示例:
# 异步线程池配置
async.executor.thread.core_pool_size=2
async.executor.thread.max_pool_size=10
async.executor.thread.queue_capacity=100
async.executor.thread.name.prefix=async-
async.executor.thread.keep_alive_seconds=60
async.executor.thread.await_termination_seconds=60
项目启动的时候线程池里面初始化两个线程,当两个线程都被占用了,又有新的任务进来先进入队列排队,达到队列的最大容量100,就会创建一个新的线程,只到达到最大数量10个,再有新的任务进来当前线程都不是空闲状态则会报错。
4.编写配置类以定义线程池
接下来,你需要编写一个配置类,使用@configuration注解来定义线程池。在这个配置类中,你将使用@bean注解来创建一个threadpooltaskexecutor实例,并根据application.properties中的配置来设置线程池的参数。
5.编写配置类以定义线程池
接下来,你需要编写一个配置类,使用@configuration注解来定义线程池。在这个配置类中,你将使用@bean注解来创建一个threadpooltaskexecutor实例,并根据application.properties中的配置来设置线程池的参数。
import org.springframework.beans.factory.annotation.value;
import org.springframework.context.annotation.bean;
import org.springframework.context.annotation.configuration;
import org.springframework.scheduling.annotation.enableasync;
import org.springframework.scheduling.concurrent.threadpooltaskexecutor;
import java.util.concurrent.executor;
@configuration
@enableasync
public class asyncconfig {
@value("${async.executor.thread.core_pool_size}")
private int corepoolsize;
@value("${async.executor.thread.max_pool_size}")
private int maxpoolsize;
@value("${async.executor.thread.queue_capacity}")
private int queuecapacity;
@value("${async.executor.thread.name.prefix}")
private string nameprefix;
@value("${async.executor.thread.keep_alive_seconds}")
private int keepaliveseconds;
@value("${async.executor.thread.await_termination_seconds}")
private int awaitterminationseconds;
@bean(name = "taskexecutor")
public executor taskexecutor() {
threadpooltaskexecutor executor = new threadpooltaskexecutor();
// 设置核心线程数
executor.setcorepoolsize(corepoolsize);
// 设置最大线程数
executor.setmaxpoolsize(maxpoolsize);
// 设置队列容量
executor.setqueuecapacity(queuecapacity);
// 设置线程名称前缀
executor.setthreadnameprefix(nameprefix);
// 线程空闲时的存活时间
executor.setkeepaliveseconds(keepaliveseconds);
// 关闭线程池等待任务完成的最长时间
executor.setawaitterminationseconds(awaitterminationseconds);
// 关闭线程池等待已提交线程执行完毕
executor.setwaitfortaskstocompleteonshutdown(true);
// 异常策略
executor.setrejectedexecutionhandler(new threadpoolexecutor.callerrunspolicy());
executor.initialize();
return executor;
}
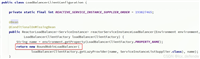
}6.编写异步任务类
现在,你可以编写一个包含异步方法的类。在这个类中,你将使用@async注解来标记需要异步执行的方法,并指定前面定义的线程池(在这个例子中是taskexecutor)。
import org.springframework.scheduling.annotation.async;
import org.springframework.stereotype.service;
@service
public class asyncservice {
    // 在需要使用异步处理的方法上添加注解
    @async("taskexecutor")
    public void executeasynctask() {
        system.out.println("执行异步任务 - " + thread.currentthread().getname());
        try {
            // 模拟长时间运行的任务
            thread.sleep(5000);
        } catch (interruptedexception e) {
            thread.currentthread().interrupt();
        }
    }
}
7.最后,在你的控制器或其他服务类中,你可以调用这个异步方法来执行异步任务。
import org.springframework.beans.factory.annotation.autowired;
import org.springframework.web.bind.annotation.getmapping;
import org.springframework.web.bind.annotation.restcontroller;
@restcontroller
public class asynccontroller {
    @autowired
    private asyncservice asyncservice;
    @getmapping("/async")
    public string handleasyncrequest() {
        asyncservice.executeasynctask();
        return "异步任务已启动";
    }
}
通过以上步骤,你就成功地在spring boot中配置了异步线程池,并编写了一个异步任务类来演示如何使用它。这样,你就可以在需要时轻松地将任务交给线程池异步执行了。
注意:
@async注解不生效
从spring容器管理的bean中调用:@async注解的方法必须是从spring容器管理的bean中调用的。如果从一个非spring管理的类中调用,那么异步效果将不会生效。
自调用问题:同一个类中的方法调用不会被spring的aop代理捕获,因此如果在一个类中调用同一个类的另一个@async方法,那么异步效果也不会生效。为了避免这个问题,可以将异步方法移动到另一个bean中,并通过依赖注入来调用。
到此这篇关于spring boot 异步线程池的使用的文章就介绍到这了,更多相关spring boot 异步线程池内容请搜索代码网以前的文章或继续浏览下面的相关文章希望大家以后多多支持代码网!


发表评论