一、核心概念解析
1. 什么是 win32 api?
win32 api(windows 32-bit application programming interface)是微软为 windows 操作系统提供的底层编程接口,包含了操作系统的核心功能(如窗口管理、文件操作、进程控制、内存管理、系统信息获取等),本质上是一组用 c/c++ 编写的原生函数。
2. c# 为什么能调用 win32 api?
c# 运行在 .net 运行时(clr)中,属于托管代码;而 win32 api 是非托管代码(直接运行在操作系统层面)。.net 提供了 p/invoke(platform invocation services,平台调用服务) 机制,这是 clr 提供的核心功能,允许托管代码调用非托管的函数(如 win32 api)。
3. p/invoke 核心要素
要在 c# 中调用 win32 api,必须满足以下条件:
- 函数签名匹配:c# 中声明的函数必须和 win32 api 的原生签名(返回值、参数类型、调用约定)一致;
- dll 导入:指定 win32 api 所在的系统 dll(如
kernel32.dll、user32.dll、advapi32.dll等); - 数据类型映射:c/c++ 的原生类型(如
dword、handle、lpcstr)需要映射到 c# 对应的类型(如uint、intptr、string)。
二、win32 api 调用的语法规则
1. 基础声明格式
在 c# 中,通过 dllimport 特性(位于 system.runtime.interopservices 命名空间)声明 win32 api 函数,核心语法如下:
using system.runtime.interopservices; // 必须引入此命名空间

class win32api
{
    // dllimport 特性指定 api 所在的 dll
    [dllimport("dll名称",
               charset = charset.ansi/unicode, // 字符集(匹配 api 要求)
               setlasterror = true/false,      // 是否捕获系统错误码
               callingconvention = callingconvention.stdcall)] // 调用约定(win32 几乎都是 stdcall)
    // 方法声明:必须是 static extern,返回值+方法名+参数列表(类型要匹配)
    public static extern 返回值类型 方法名(参数类型1 参数1, 参数类型2 参数2, ...);
}
2. 关键参数说明
| 特性参数 | 作用 |
| dllname | win32 api 所在的系统 dll 名称(如 kernel32.dll、user32.dll) |
| charset | 字符编码:charset.ansi(ansi)、charset.unicode(utf-16)、charset.auto(自动) |
| setlasterror | 设为 true 时,可通过 marshal.getlastwin32error() 获取系统错误码 |
| callingconvention | 调用约定:win32 api 默认为 stdcall(c# 默认为 winapi,等价于 stdcall) |
3. 常见类型映射(win32 → c#)
win32 api 的原生类型和 c# 类型必须严格映射,否则会导致调用失败甚至程序崩溃:
| c# 等效类型 | 说明 | ||
| dword | uint | 32 位无符号整数 | ||
| handle | intptr | 句柄(指针类型,用 intptr 兼容 32/64 位) | ||
| lpcstr | string | ansi 字符串(常量指针) | ||
| lpwstr | string | unicode 字符串(可变指针) | ||
| bool | bool/int | win32 的 bool 是 int(0 / 非 0),c# 可用 bool 兼容 | ||
| int/long | 直接映射 | ||
| void | void | 无返回值 |
三、控制台实战案例(多个场景)
环境准备
- 开发工具:visual studio(任意版本)或 vs code + .net sdk
- 创建项目:控制台应用(.net framework/.net core/.net 5+ 均可,示例用 .net 8)
- 核心命名空间:
system.runtime.interopservices(必须)
案例 1:获取系统目录(简单无参数 / 返回值)
需求:调用 kernel32.dll 中的 getsystemdirectory 函数,获取 windows 系统目录(如 c:\windows\system32)。
步骤 1:查看 win32 api 原生签名
// win32 原生声明(c/c++)
uint getsystemdirectorya(
  lpstr lpbuffer,  // 接收目录的缓冲区
  uint usize       // 缓冲区大小
);
- 返回值:实际复制到缓冲区的字符数(不含终止符);
- 字符集:
a后缀表示 ansi,w后缀表示 unicode(推荐用 unicode)。
步骤 2:c# 声明并调用
using system;
using system.runtime.interopservices; // 核心命名空间

namespace win32apidemo
{
    class program
    {
        // 1. 声明 win32 api(使用 unicode 版本 getsystemdirectoryw)
        [dllimport("kernel32.dll",           // api 所在 dll
                   charset = charset.unicode, // 匹配 w 后缀的 unicode 版本
                   setlasterror = true)]      // 启用错误码捕获
        // static extern 是固定写法,返回值 uint 对应 win32 的 uint
        private static extern uint getsystemdirectoryw(
            char[] lpbuffer,  // 字符数组作为缓冲区(替代 c 的 char*)
            uint usize        // 缓冲区大小
        );

        static void main(string[] args)
        {
            try
            {
                // 2. 准备缓冲区(系统目录最长不超过 260 字符,预留冗余)
                char[] buffer = new char[256];
                // 3. 调用 win32 api
                uint result = getsystemdirectoryw(buffer, (uint)buffer.length);

                // 4. 处理结果
                if (result == 0)
                {
                    // 调用失败,获取错误码
                    int errorcode = marshal.getlastwin32error();
                    console.writeline($"调用失败,错误码:{errorcode}");
                }
                else
                {
                    // 将字符数组转为字符串(去掉空字符)
                    string systemdir = new string(buffer).trimend('\0');
                    console.writeline($"windows 系统目录:{systemdir}");
                }
            }
            catch (exception ex)
            {
                console.writeline($"异常:{ex.message}");
            }

            console.readkey();
        }
    }
}
运行结果
windows 系统目录:c:\windows\system32
案例 2:弹出系统消息框(调用 user32.dll)
需求:调用 user32.dll 中的 messagebox 函数,弹出 windows 原生消息框(控制台程序也能调用 gui 相关 api)。
using system;
using system.runtime.interopservices;

namespace win32apidemo
{
    class program
    {
        // 1. 声明 messageboxw(unicode 版本)
        [dllimport("user32.dll", charset = charset.unicode, setlasterror = true)]
        private static extern int messageboxw(
            intptr hwnd,          // 父窗口句柄(控制台无窗口,传 intptr.zero)
            string lptext,        // 消息内容
            string lpcaption,     // 标题
            uint utype            // 消息框类型(按钮+图标)
        );

        // 定义消息框类型常量(对应 win32 的宏)
        private const uint mb_ok = 0x00000000;          // 仅 ok 按钮
        private const uint mb_iconinformation = 0x00000040; // 信息图标
        private const uint mb_okcancel = 0x00000001;     // ok + 取消按钮

        static void main(string[] args)
        {
            try
            {
                // 2. 调用 messageboxw
                int ret = messageboxw(
                    intptr.zero,                  // 无父窗口
                    "这是 c# 调用 win32 api 弹出的消息框!", // 消息内容
                    "win32 api 演示",              // 标题
                    mb_ok | mb_iconinformation    // 组合类型:ok 按钮 + 信息图标
                );

                // 3. 处理返回值(用户点击的按钮)
                switch (ret)
                {
                    case 1:
                        console.writeline("用户点击了【确定】按钮");
                        break;
                    case 2:
                        console.writeline("用户点击了【取消】按钮");
                        break;
                    default:
                        console.writeline($"返回值:{ret}(调用失败)");
                        break;
                }
            }
            catch (exception ex)
            {
                console.writeline($"异常:{ex.message}");
            }

            console.readkey();
        }
    }
}
关键说明
messageboxw的返回值:1 = 确定,2 = 取消,3 = 终止,4 = 重试,5 = 忽略等;- 消息框类型可以通过
|组合(如mb_ok | mb_iconwarning表示 ok 按钮 + 警告图标); - 控制台程序调用 gui api 时,
hwnd传intptr.zero即可。
案例 3:获取进程 id(调用 getcurrentprocessid)
需求:调用 kernel32.dll 的 getcurrentprocessid 获取当前控制台程序的进程 id。
using system;
using system.runtime.interopservices;

namespace win32apidemo
{
    class program
    {
        // 声明 getcurrentprocessid(无参数,返回 dword)
        [dllimport("kernel32.dll", setlasterror = false)] // 此函数不会失败,无需捕获错误码
        private static extern uint getcurrentprocessid();

        static void main(string[] args)
        {
            // 调用 api
            uint pid = getcurrentprocessid();
            console.writeline($"当前控制台程序的进程 id:{pid}");

            // 验证:可以在任务管理器中查看控制台程序的 pid 是否一致
            console.writeline("按任意键退出...");
            console.readkey();
        }
    }
}
运行结果
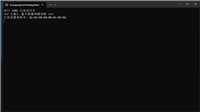
当前控制台程序的进程 id:12345
按任意键退出...
案例 4:读写 ini 文件
需求:调用 kernel32.dll 的 writeprivateprofilestring 和 getprivateprofilestring 读写 ini 配置文件(win32 原生 ini 操作)。
using system;
using system.runtime.interopservices;

namespace win32apidemo
{
    class program
    {
        // 1. 声明写 ini 的 api
        [dllimport("kernel32.dll", charset = charset.unicode, setlasterror = true)]
        private static extern bool writeprivateprofilestringw(
            string lpappname,  // 节名(ini 的 [section])
            string lpkeyname,  // 键名
            string lpstring,   // 键值
            string lpfilename  // ini 文件路径
        );

        // 2. 声明读 ini 的 api
        [dllimport("kernel32.dll", charset = charset.unicode, setlasterror = true)]
        private static extern uint getprivateprofilestringw(
            string lpappname,  // 节名
            string lpkeyname,  // 键名
            string lpdefault,  // 默认值(读取失败时返回)
            char[] lpreturnedstring, // 接收值的缓冲区
            uint nsize,        // 缓冲区大小
            string lpfilename  // ini 文件路径
        );

        static void main(string[] args)
        {
            string inipath = $"{environment.currentdirectory}\\demo.ini";

            try
            {
                // 步骤 1:写入 ini 文件
                bool writesuccess = writeprivateprofilestringw(
                    "userinfo",    // 节名
                    "username",    // 键名
                    "张三",        // 键值
                    inipath        // 文件路径
                );

                if (writesuccess)
                {
                    console.writeline($"成功写入 ini 文件:{inipath}");
                }
                else
                {
                    int errorcode = marshal.getlastwin32error();
                    console.writeline($"写入失败,错误码:{errorcode}");
                }

                // 步骤 2:读取 ini 文件
                char[] buffer = new char[1024];
                uint readlen = getprivateprofilestringw(
                    "userinfo",    // 节名
                    "username",    // 键名
                    "默认值",      // 默认值
                    buffer,        // 缓冲区
                    (uint)buffer.length, // 缓冲区大小
                    inipath        // 文件路径
                );

                if (readlen > 0)
                {
                    string value = new string(buffer).trimend('\0');
                    console.writeline($"读取到的值:{value}");
                }
                else
                {
                    console.writeline("读取失败或键不存在");
                }
            }
            catch (exception ex)
            {
                console.writeline($"异常:{ex.message}");
            }

            console.readkey();
        }
    }
}
运行结果
成功写入 ini 文件:d:\win32apidemo\bin\debug\net8.0\demo.ini
读取到的值:张三
生成的 ini 文件内容
[userinfo]
username=张三
四、常见问题与避坑指南
1. 调用失败的常见原因
- 类型不匹配:如 win32 的
dword用了 c# 的int(虽然有时能运行,但 64 位系统会出问题); - 字符集错误:调用
a后缀的 api 却用charset.unicode,或反之; - 调用约定错误:win32 api 几乎都是
stdcall,若设为cdecl会导致栈溢出; - 缓冲区大小不足:如获取系统目录时缓冲区太小,返回值为 0;
- 权限问题:部分 win32 api 需要管理员权限(如修改系统设置),需右键以管理员运行程序。
2. 如何调试 win32 api 调用?
- 启用
setlasterror = true,调用后通过marshal.getlastwin32error()获取错误码,对照 windows 错误码表 排查; - 检查 api 名称是否正确(如是否漏写
w/a后缀); - 用
intptr替代所有句柄类型(避免 32/64 位兼容性问题); - 在 try-catch 中捕获
entrypointnotfoundexception(api 名称错误)、accessviolationexception(内存访问错误)等异常。
到此这篇关于c# 调用 win32 api的实现示例的文章就介绍到这了,更多相关c# 调用 win32 api内容请搜索代码网以前的文章或继续浏览下面的相关文章希望大家以后多多支持代码网!


发表评论