1、前言
使用场景,当原本jdk1.8版本的编译环境时,突然加载一个jdk17的项目时,项目reload或maven install时经常报错language level版本问题,以下是解决方案。
2、操作步骤
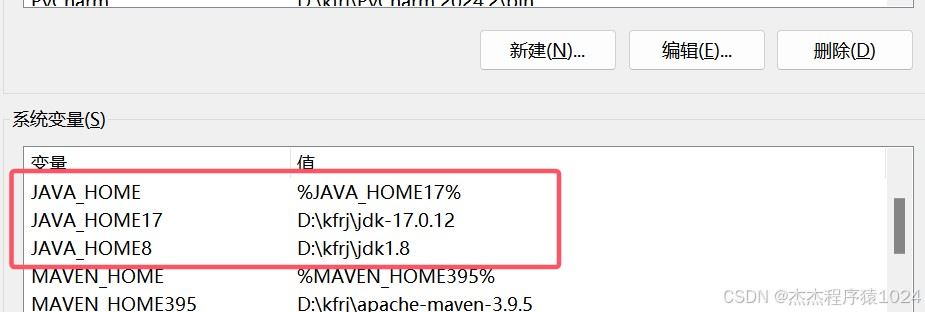
2.1 修改系统环境变量
多个jdk为了方便切换,我的环境变量是这样设置的,java_home负责切换版本,path变量就跟平时配置的一样。
需要到哪个版本就切换java_home里面的变量就行。
2.2 修改maven的配置
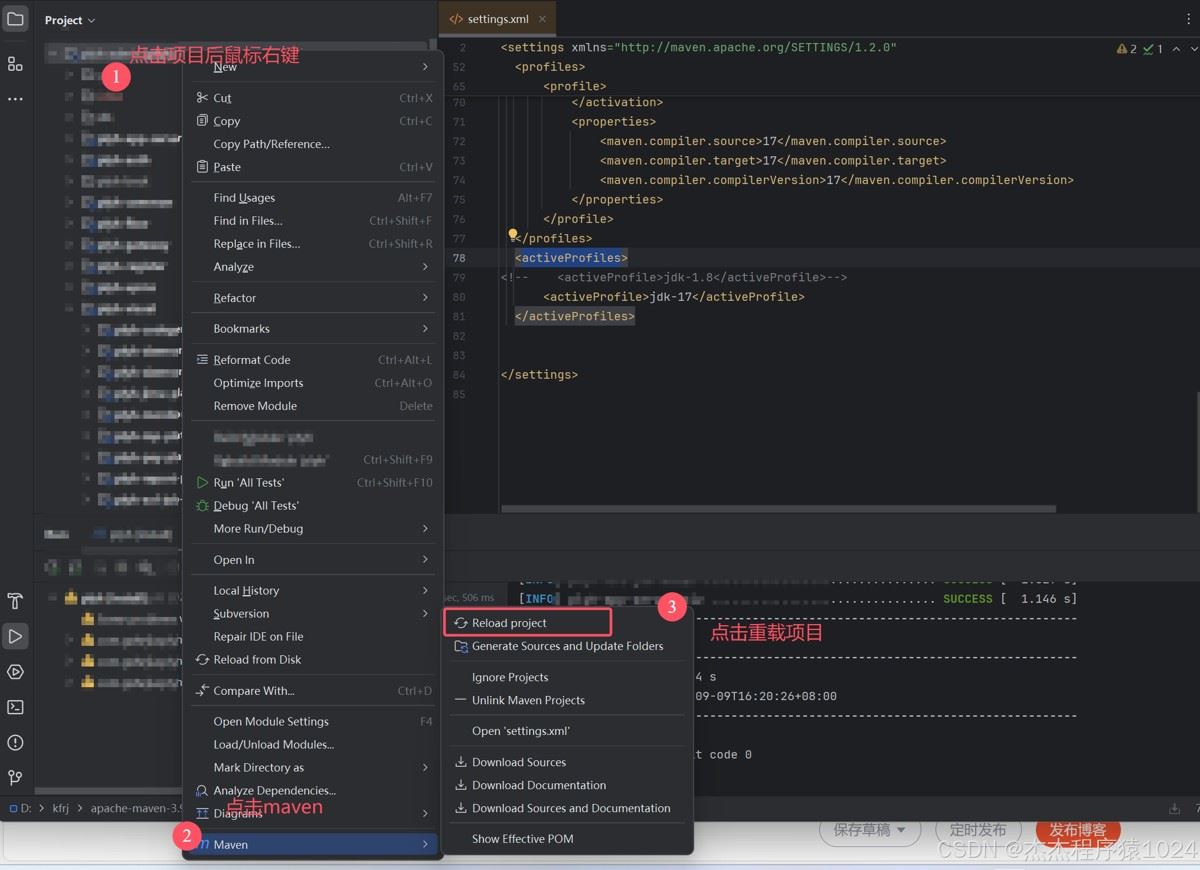
maven的配置文件在安装目录的setting.xml,需配置多个jdk的配置。
<profiles>里面配置多个jdk,<activeprofiles>里面负责切换配置。
如下方配置:
<?xml version="1.0" encoding="utf-8"?>
<settings xmlns="http://maven.apache.org/settings/1.2.0"
          xmlns:xsi="http://www.w3.org/2001/xmlschema-instance"
          xsi:schemalocation="http://maven.apache.org/settings/1.2.0 https://maven.apache.org/xsd/settings-1.2.0.xsd">
  <plugingroups>
  </plugingroups>

  <proxies>
  </proxies>

  <servers>
  </servers>

 <mirrors>
      <mirror>
        <id>alimaven</id>
        <name>aliyun maven</name>
        <url>http://maven.aliyun.com/nexus/content/groups/public/</url>
        <mirrorof>central</mirrorof>
    </mirror>
    <mirror>
      <id>aliyun</id>
      <mirrorof>central</mirrorof>
      <name>aliyun-public</name>
      <url>https://maven.aliyun.com/repository/public/</url>
    </mirror>
    <mirror>
      <id>aliyun-spring</id>
      <mirrorof>spring</mirrorof>
      <name>aliyun-spring</name>
      <url>https://maven.aliyun.com/repository/spring</url>
    </mirror>

    <!-- 中央仓库在中国的镜像 -->
    <mirror>
      <id>maven.net.cn</id>
      <name>one of the central mirrors in china</name>
      <url>http://maven.net.cn/content/groups/public/</url>
      <mirrorof>central</mirrorof>
    </mirror>
    <!-- 中央仓库1 -->
    <mirror>
        <id>repo1</id>
        <mirrorof>central</mirrorof>
        <name>human readable name for this mirror.</name>
        <url>https://repo1.maven.org/maven2/</url>
    </mirror>

  </mirrors>

  <!-- 以下是jdk配置 -->
  <profiles>
    <profile>
         <id>jdk-1.8</id>
         <activation>
             <activebydefault>true</activebydefault>
             <jdk>1.8</jdk>
          </activation>
          <properties>
              <maven.compiler.source>1.8</maven.compiler.source>
              <maven.compiler.target>1.8</maven.compiler.target>
              <maven.compiler.compilerversion>1.8</maven.compiler.compilerversion>
          </properties>
    </profile>
      <profile>
          <id>jdk-17</id>
          <activation>
              <activebydefault>true</activebydefault>
              <jdk>17</jdk>
          </activation>
          <properties>
              <maven.compiler.source>17</maven.compiler.source>
              <maven.compiler.target>17</maven.compiler.target>
              <maven.compiler.compilerversion>17</maven.compiler.compilerversion>
          </properties>
      </profile>
  </profiles>
  <activeprofiles>
<!--    <activeprofile>jdk-1.8</activeprofile>-->
      <activeprofile>jdk-17</activeprofile>
  </activeprofiles>


</settings>
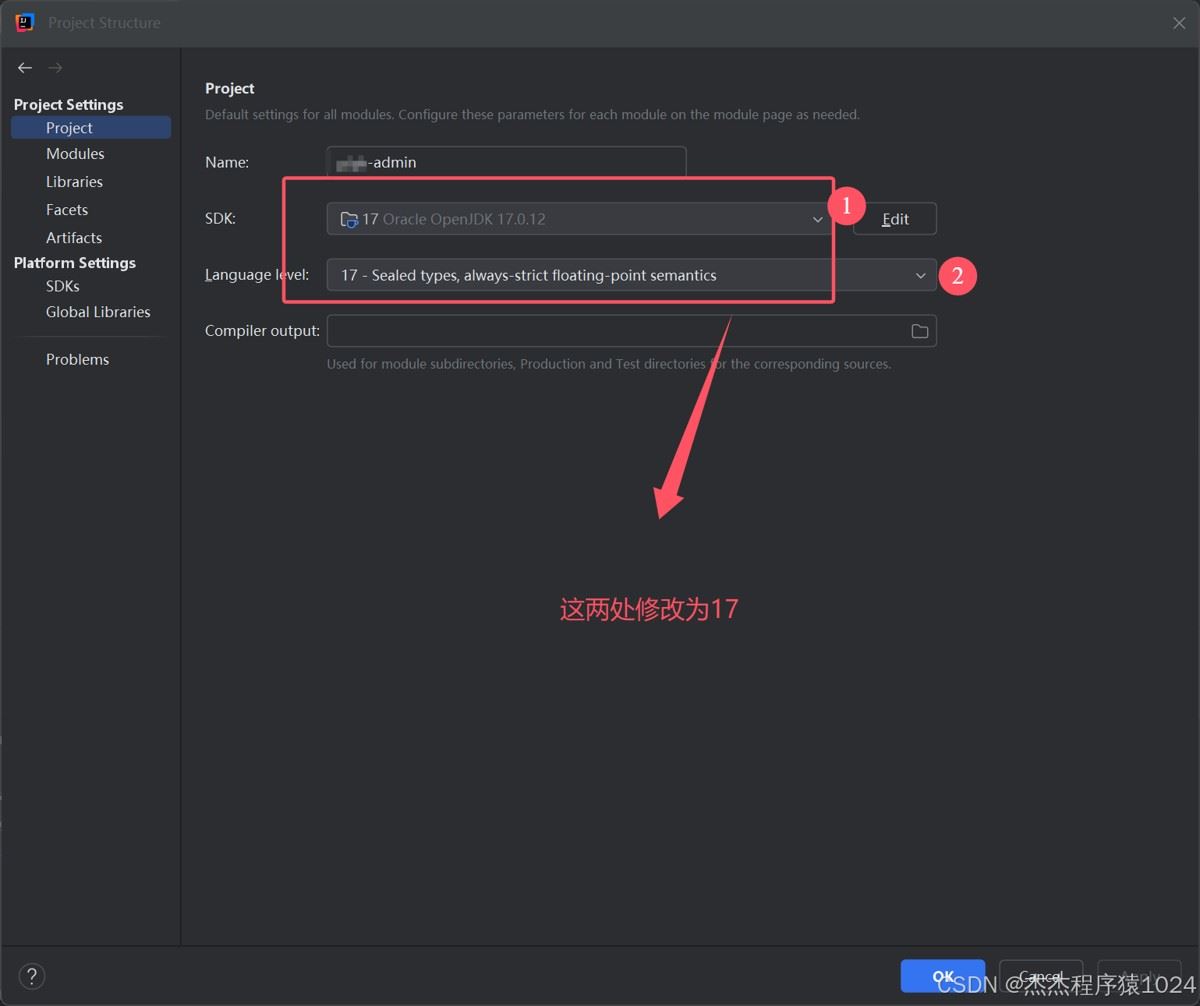
2.3 idea配置修改
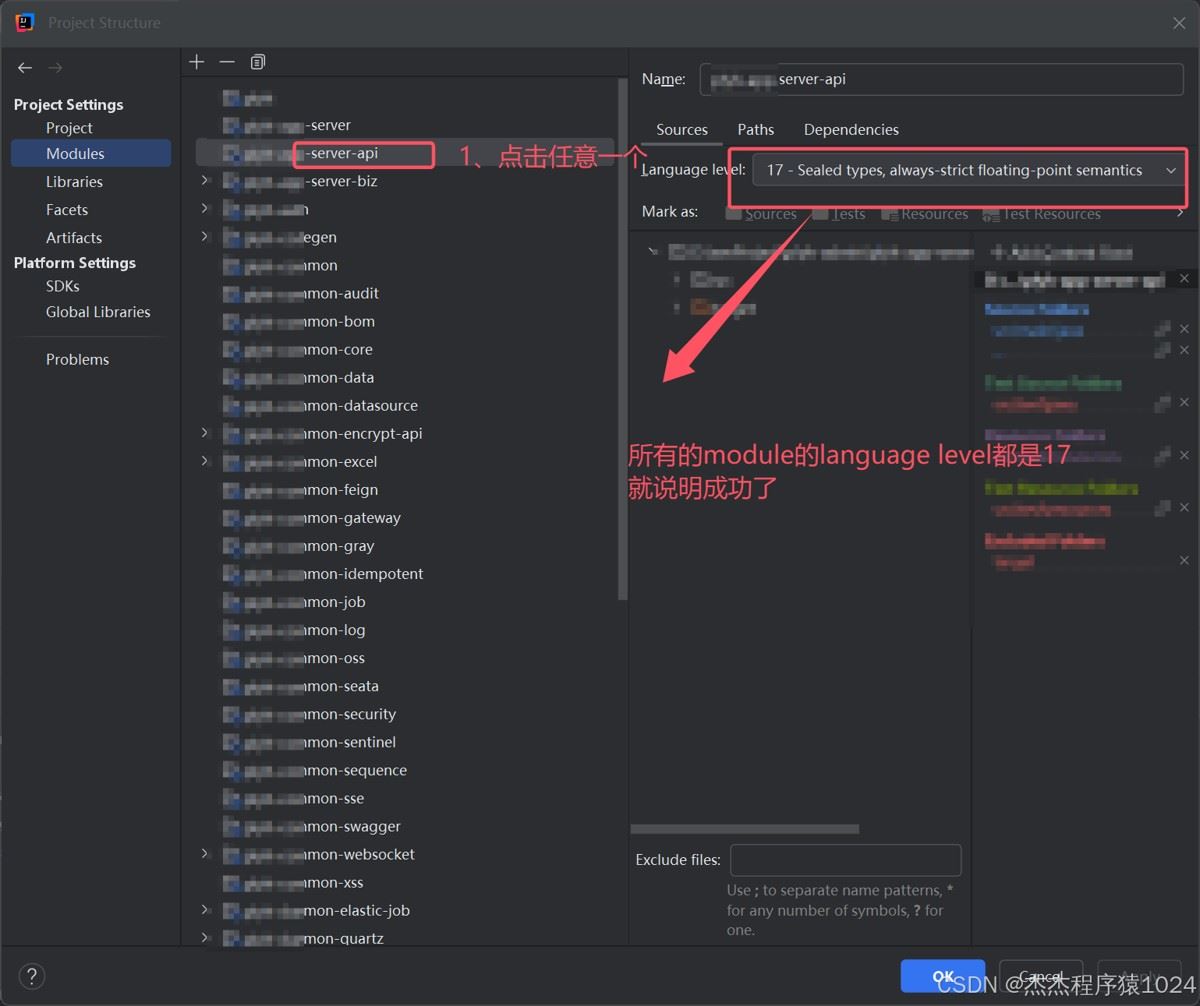
(1)模块设置菜单。

(2)模块设置jdk。
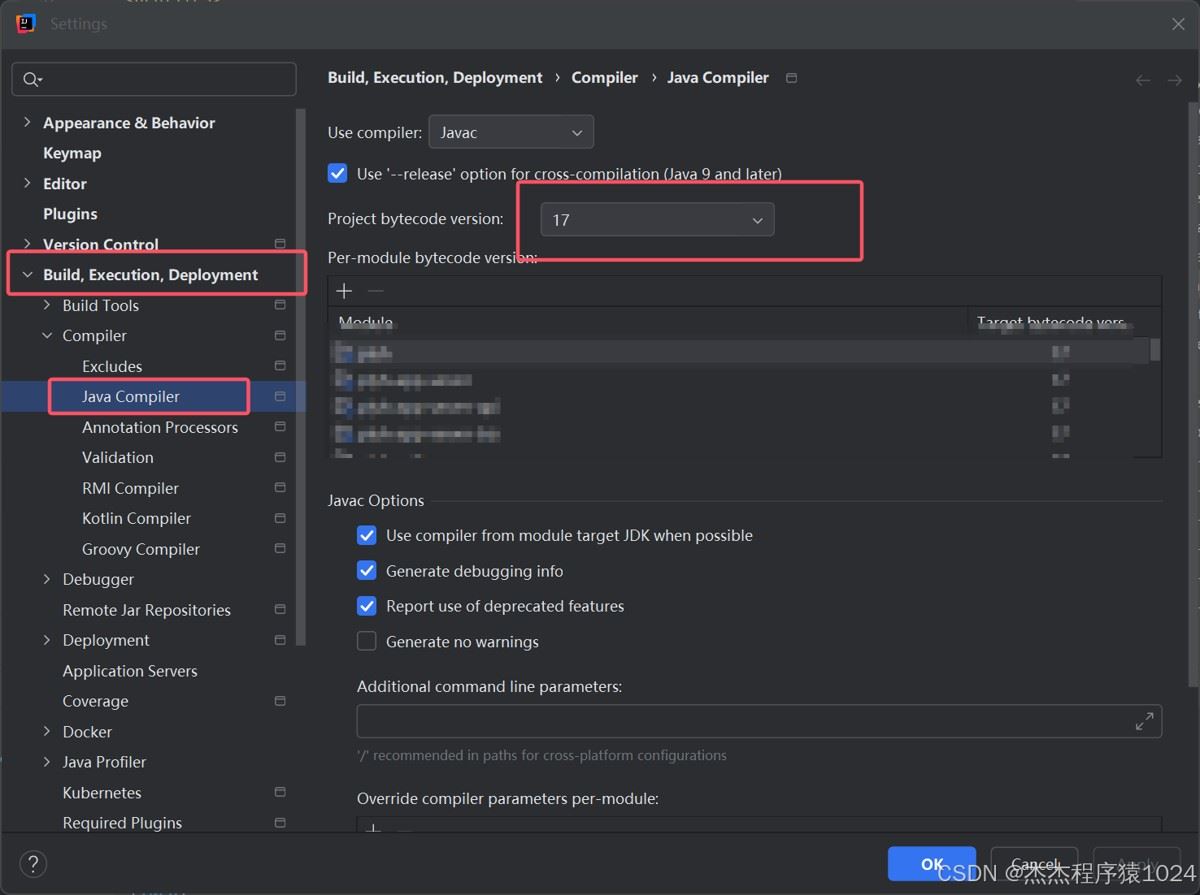
(3)idea设置:file->setting,把图片中的修改为你要的jdk版本。
(4)重载maven
(5)校验,跟(1)的步骤一样进入model setting,如下图所示:
总结
以上为个人经验,希望能给大家一个参考,也希望大家多多支持代码网。


发表评论