一、socket基础方法详解
python的socket模块提供了bsd socket api接口,以下是核心方法:
1. 构造函数
socket.socket(family=socket.af_inet, type=socket.sock_stream, proto=0)
- 参数:
family: 地址族(常用af_inet表示ipv4)type: 套接字类型(sock_stream为tcp,sock_dgram为udp)proto: 协议号(通常为0,自动选择)
2. 服务器端方法
- bind(address): 绑定ip地址和端口号(元组格式
(host, port)) - listen(backlog): 启动tcp监听,
backlog指定最大排队连接数 - accept(): 阻塞等待客户端连接,返回
(conn, address)元组
3. 客户端方法
- connect(address): 主动连接服务器
4. 数据传输
- send(bytes): 发送tcp数据(可能未发送全部数据)
- sendall(bytes): 发送全部tcp数据(推荐使用)
- recv(bufsize): 接收tcp数据(最大
bufsize字节) - sendto(bytes, address): 发送udp数据
- recvfrom(bufsize): 接收udp数据,返回
(data, address)
5. 通用方法
- close(): 关闭套接字
- setsockopt(level, optname, value): 设置套接字选项(如
so_reuseaddr)
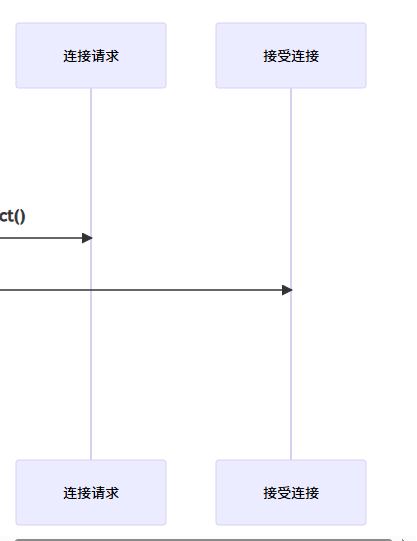
二、工作原理与实现机制
1. tcp通信流程
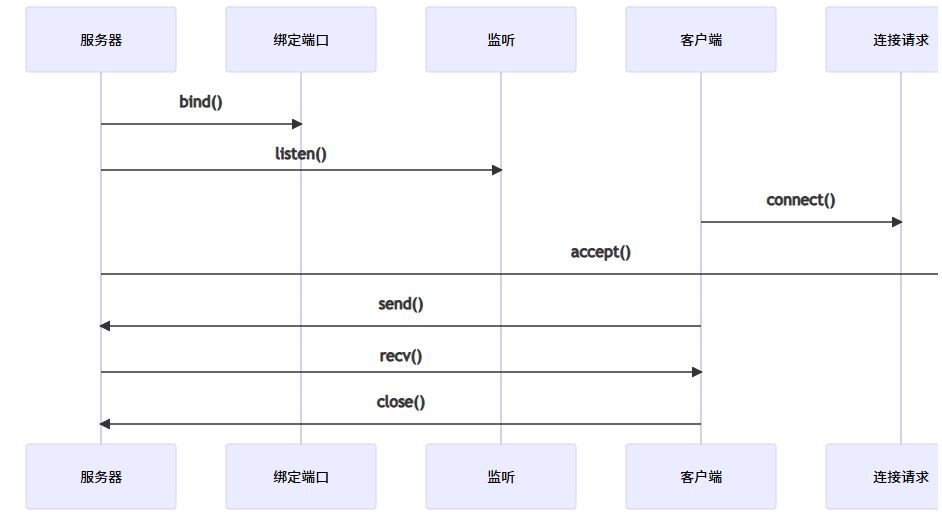
2. udp通信特点
- 无连接协议
- 数据包可能丢失或乱序
- 适合实时性要求高的场景
3. 三次握手(tcp)
- syn →
- ← syn-ack
- ack →
三、应用领域与实现代码
应用1:基础http服务器(tcp)
import socket

def start_web_server(host='', port=8080):
    with socket.socket() as s:
        s.setsockopt(socket.sol_socket, socket.so_reuseaddr, 1)
        s.bind((host, port))
        s.listen(5)
        print(f"server running on {port}")

        while true:
            conn, addr = s.accept()
            with conn:
                request = conn.recv(1024).decode()
                # 解析http请求头
                headers = request.split('\n')
                filename = headers[0].split()[1][1:] or 'index.html'

                try:
                    with open(filename, 'rb') as f:
                        content = f.read()
                    response = b'http/1.1 200 ok\n\n' + content
                except filenotfounderror:
                    response = b'http/1.1 404 not found\n\n<h1>404 error</h1>'

                conn.sendall(response)

# 使用示例
start_web_server()
应用2:多线程聊天室(tcp)
import socket
import threading

clients = []

def handle_client(client):
    while true:
        try:
            msg = client.recv(1024)
            if not msg:
                break
            for c in clients:
                if c != client:
                    c.sendall(msg)
        except:
            break
    clients.remove(client)
    client.close()

def start_chat_server(port=9000):
    with socket.socket() as s:
        s.bind(('', port))
        s.listen()
        print(f"chat server started on {port}")

        while true:
            client, addr = s.accept()
            clients.append(client)
            thread = threading.thread(target=handle_client, args=(client,))
            thread.start()

# 客户端实现需配合使用连接和发送/接收线程
应用3:文件传输(tcp)
import socket
import hashlib

def send_file(filename, host='127.0.0.1', port=6000):
    with socket.socket() as s:
        s.connect((host, port))
        with open(filename, 'rb') as f:
            file_data = f.read()
            # 计算文件哈希值
            file_hash = hashlib.md5(file_data).hexdigest().encode()
            # 先发送哈希值
            s.sendall(file_hash)
            # 发送文件数据
            s.sendall(file_data)
        print("file sent successfully")

def receive_file(port=6000):
    with socket.socket() as s:
        s.bind(('', port))
        s.listen()
        conn, addr = s.accept()
        with conn:
            # 接收哈希值
            file_hash = conn.recv(32)
            file_data = b''
            while true:
                data = conn.recv(4096)
                if not data:
                    break
                file_data += data
            # 验证完整性
            if hashlib.md5(file_data).hexdigest().encode() == file_hash:
                with open('received_file', 'wb') as f:
                    f.write(file_data)
                print("file received successfully")
            else:
                print("file corrupted")
应用4:端口扫描工具(tcp syn)
import socket
from concurrent.futures import threadpoolexecutor

def scan_port(host, port):
    with socket.socket(socket.af_inet, socket.sock_stream) as s:
        s.settimeout(1)
        try:
            s.connect((host, port))
            print(f"port {port} is open")
            return true
        except:
            return false

def port_scanner(host='127.0.0.1', start=1, end=1024):
    print(f"scanning {host}...")
    with threadpoolexecutor(max_workers=100) as executor:
        results = executor.map(lambda p: scan_port(host, p), range(start, end+1))
    return sum(results)

# 使用示例
port_scanner(end=100)
四、关键技术要点
- 地址重用:使用
so_reuseaddr选项避免端口占用问题 - 粘包处理:tcp是流式协议,需自定义消息边界(如长度前缀)
- 并发模型:
- 多线程:适合简单并发场景
- select:适合i/o多路复用
- asyncio:适合高并发异步处理
- 异常处理:必须处理
connectionreseterror等网络异常 - 数据编码:网络传输使用bytes类型,需注意编解码
以上代码示例展示了socket编程在不同场景下的典型应用,实际开发中需要根据具体需求添加错误处理、日志记录和安全机制。
到此这篇关于python socket库基础方法与应用详解的文章就介绍到这了,更多相关python socket库方法与应用内容请搜索代码网以前的文章或继续浏览下面的相关文章希望大家以后多多支持代码网!


发表评论