1.初始化vue项目
vue create my-app
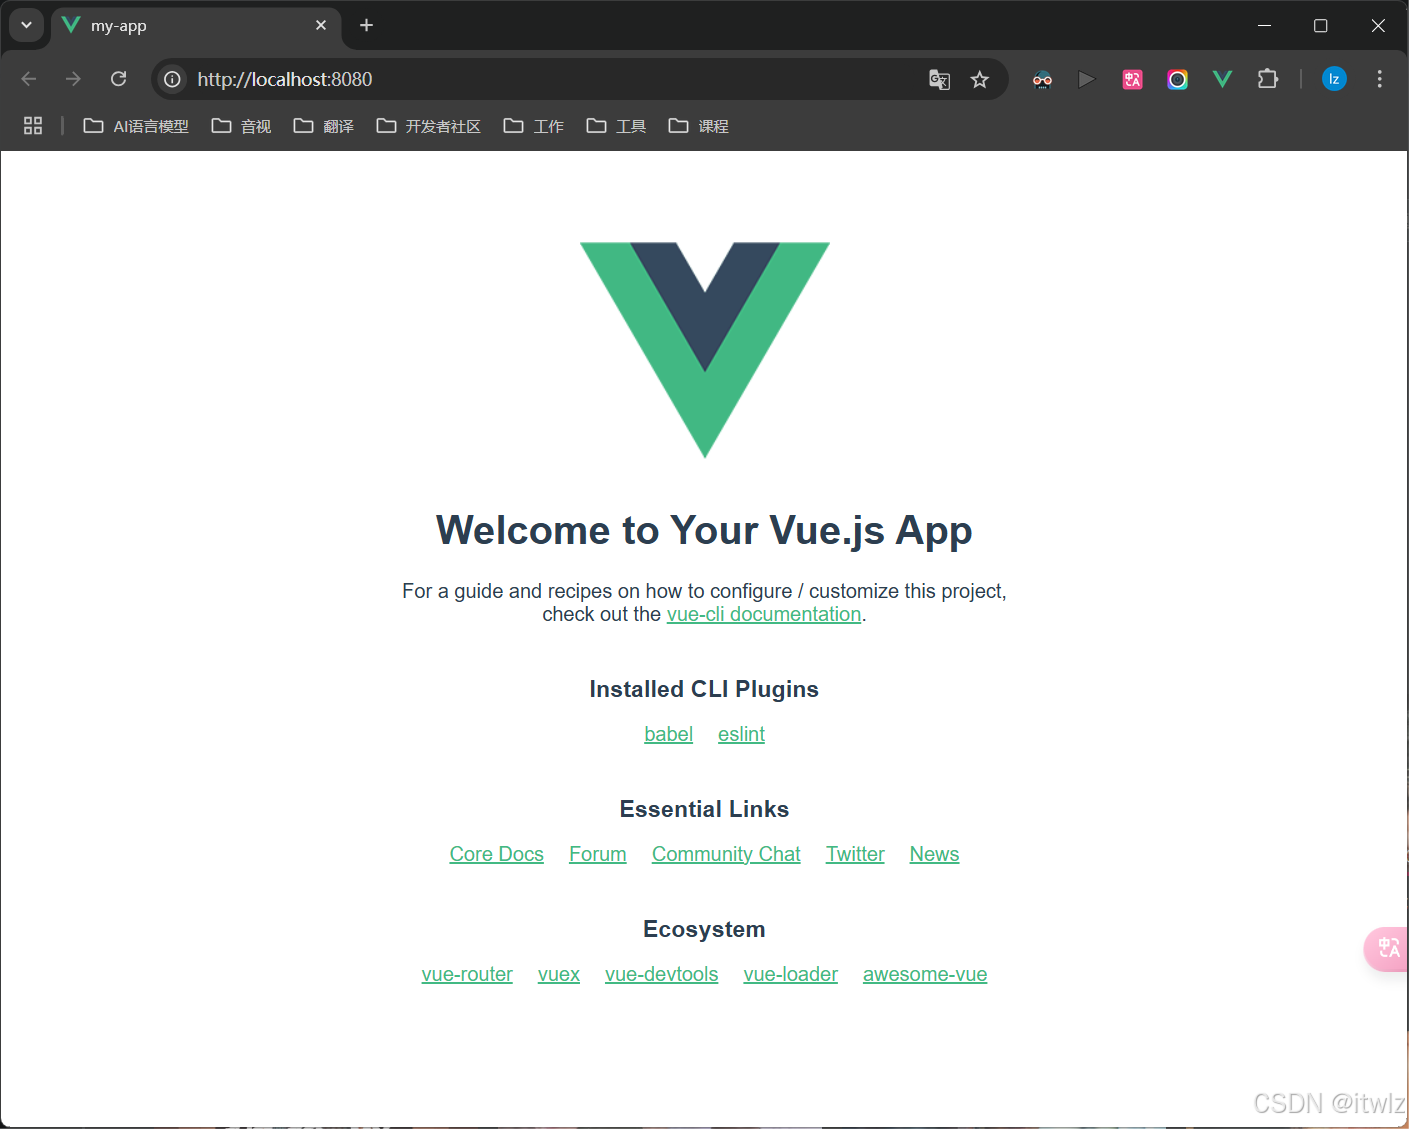
2.本地运行
npm run serve
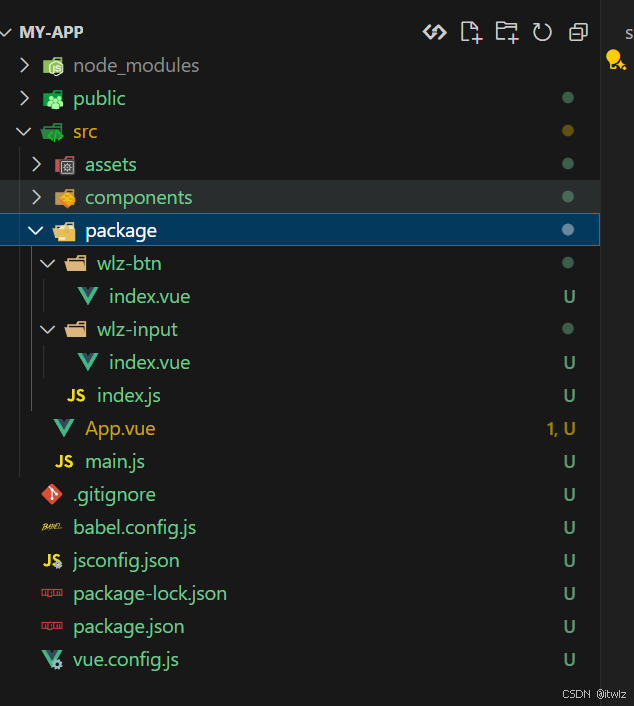
3.新增目录和文件
1. src/package/index.js
2. src/package/wlz-btn/index.vue
3. src/package/wlz-input/index.vue
// src\package\index.js
import wlzbtn from "./wlz-btn";
import wlzinput from "./wlz-input";

const componentlist = [wlzbtn, wlzinput];

const install = function (vue) {
  componentlist.foreach((com) => {
    vue.component(com.name, com);
  });
};

export default install;
<!-- src\package\wlz-btn\index.vue -->
<template>
  <button class="wlz-btn">你好呀</button>
</template>

<script>
export default {
  name: "wlzbtn",
};
</script>

<style scoped>
.wlz-btn {
  background-color: #4caf50;
  color: white;
  padding: 15px 32px;
  text-align: center;
  text-decoration: none;
  display: inline-block;
  font-size: 16px;
  margin: 4px 2px;
  cursor: pointer;
}
</style>
<!-- src\package\wlz-input\index.vue -->
<template>
  <input type="text" class="wlz-input" />
</template>

<script>
export default {
  name: "wlzinput",
};
</script>

<style scoped>
.wlz-input {
  padding: 10px;
  border: 1px solid red;
  border-radius: 4px;
  box-sizing: border-box;
}
</style>
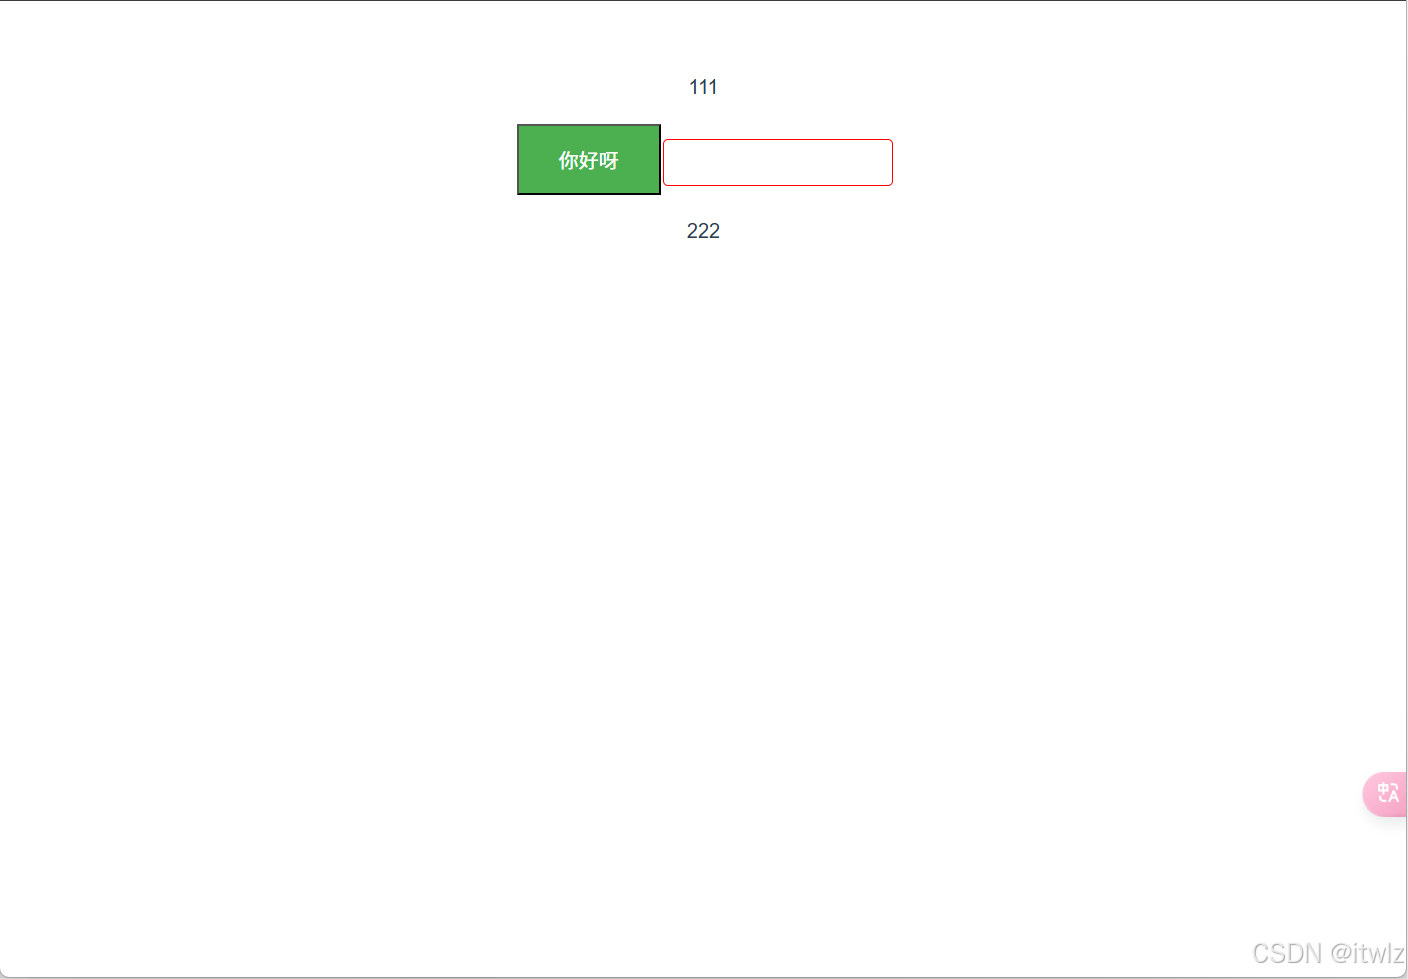
4.本地测试
<!-- src\app.vue -->
<template>
  <div>
    <p>111</p>
    <wlzbtn />
    <wlzinput />
    <p>222</p>
  </div>
</template>

<script>
import wlzbtn from "@/package/wlz-btn";
import wlzinput from "@/package/wlz-input";

export default {
  name: "app",
  components: {
    wlzbtn,
    wlzinput,
  },
};
</script>

<style>
#app {
  font-family: avenir, helvetica, arial, sans-serif;
  -webkit-font-smoothing: antialiased;
  -moz-osx-font-smoothing: grayscale;
  text-align: center;
  color: #2c3e50;
  margin-top: 60px;
}
</style>
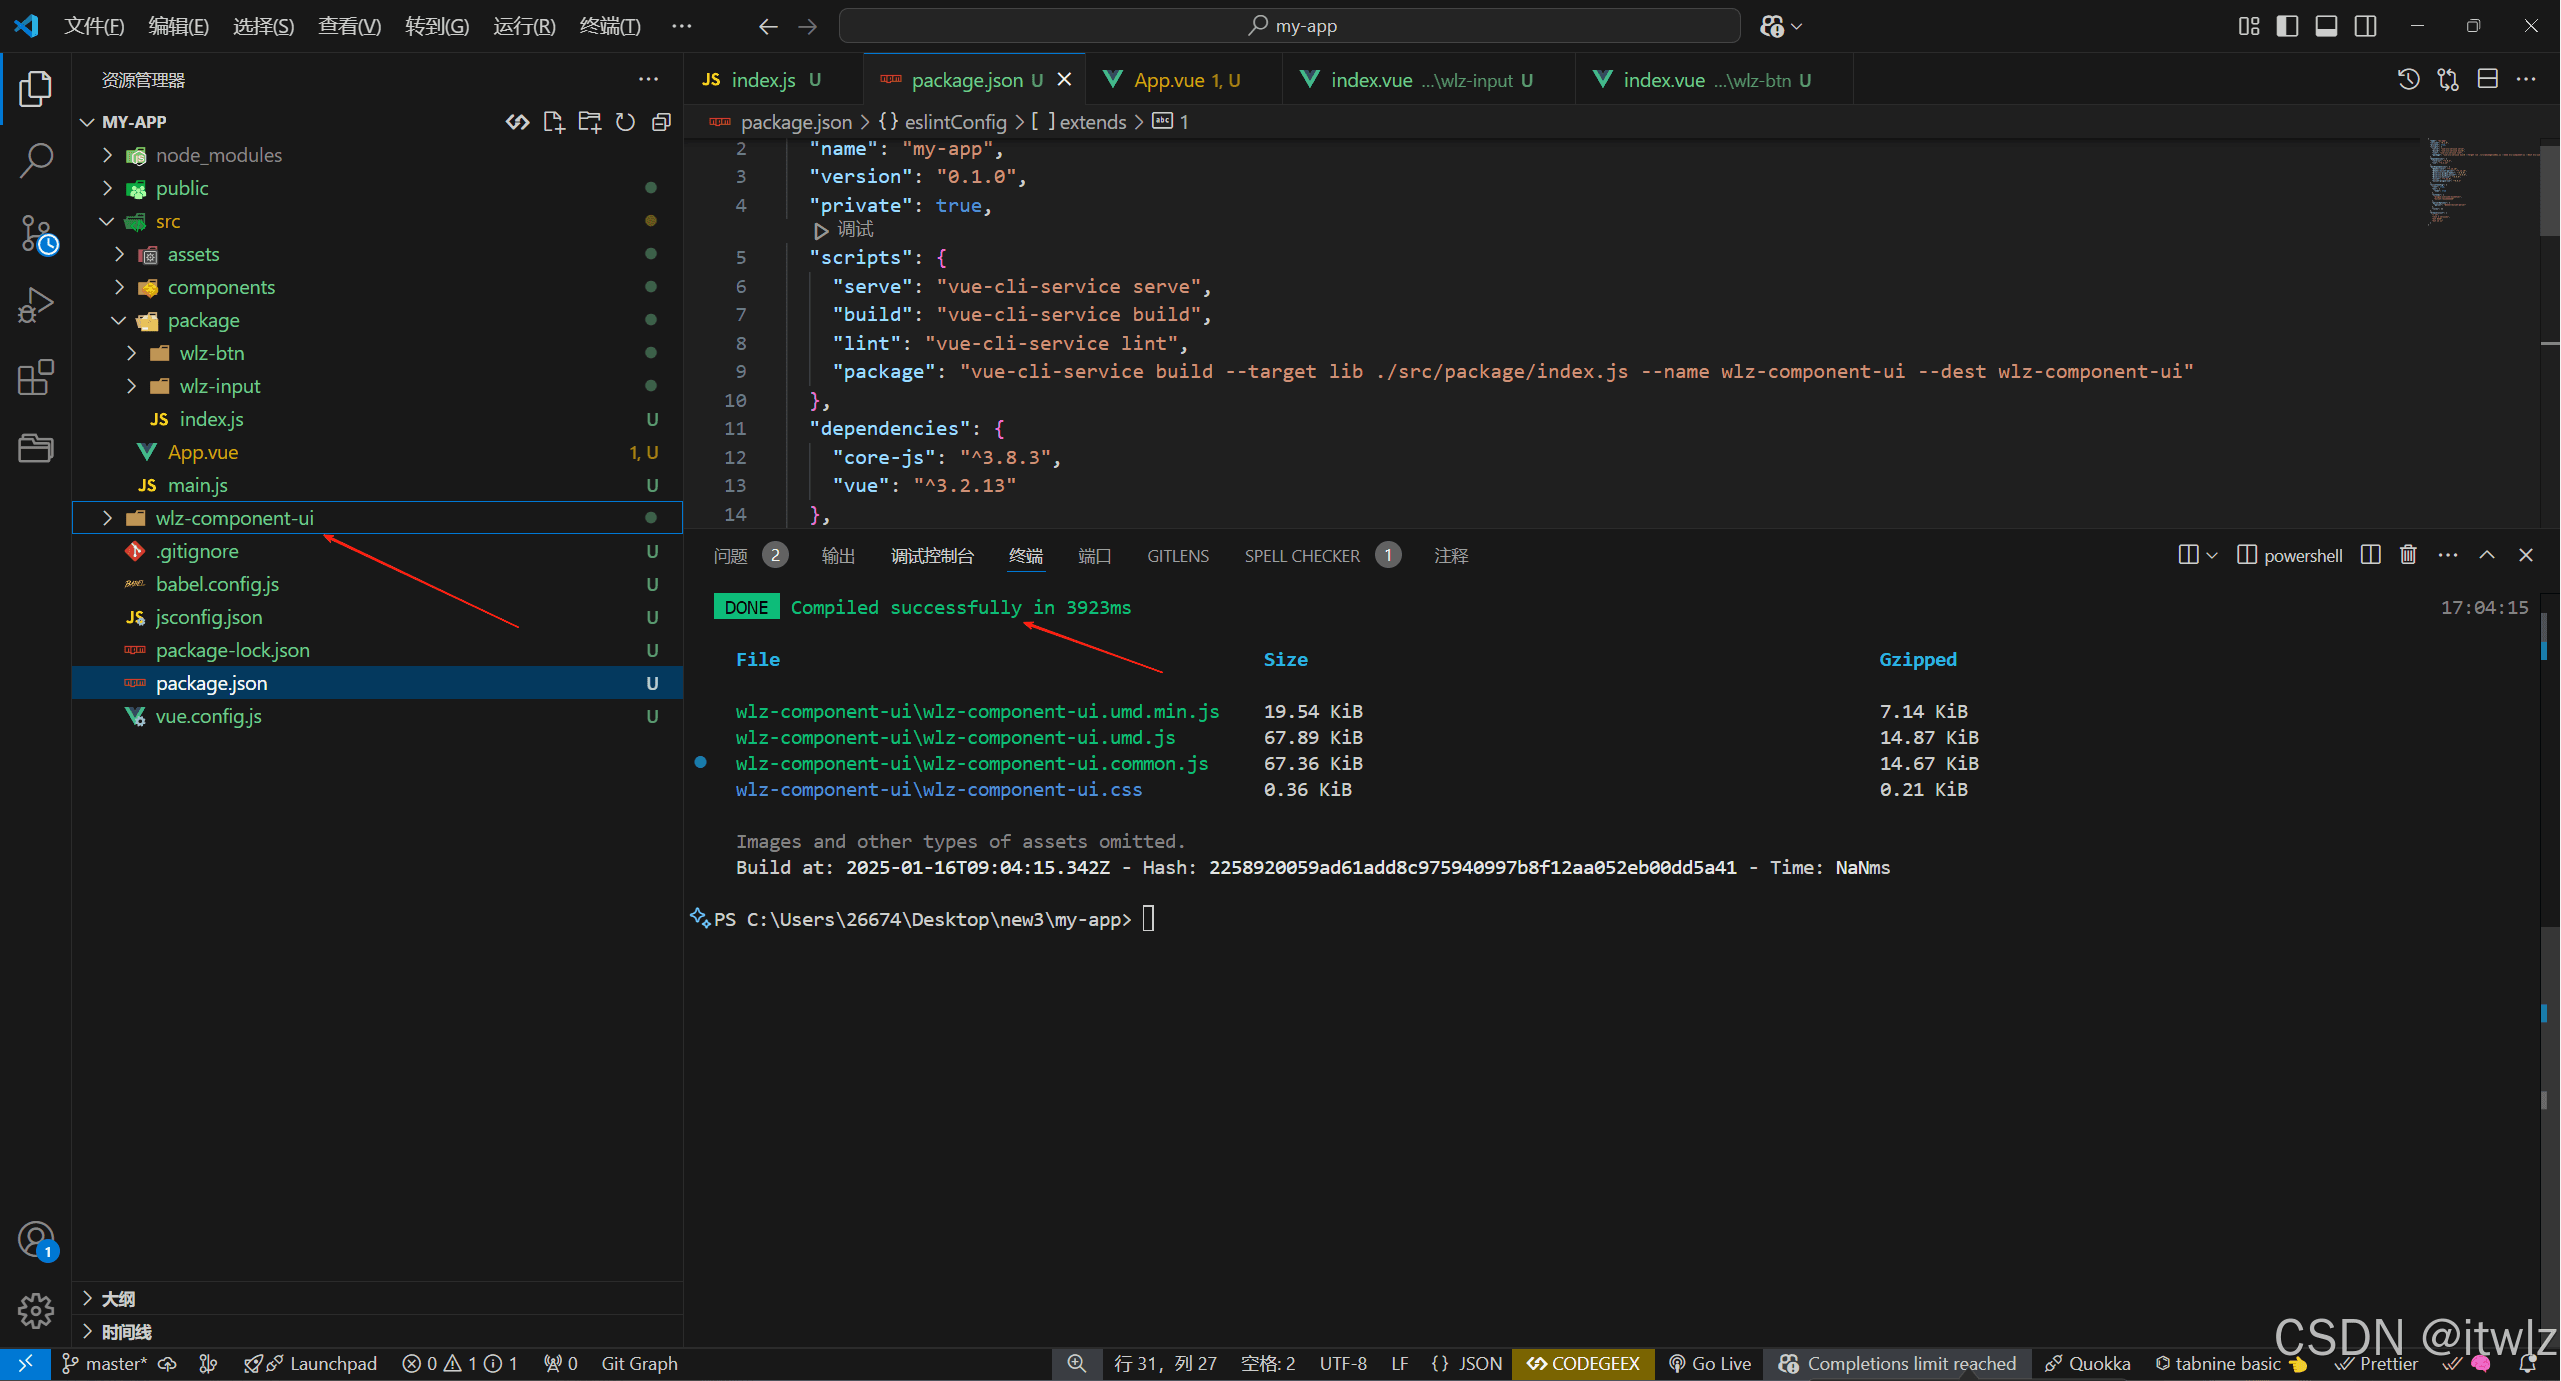
5.打包
"package": "vue-cli-service build --target lib ./src/package/index.js --name wlz-component-ui --dest wlz-component-ui"
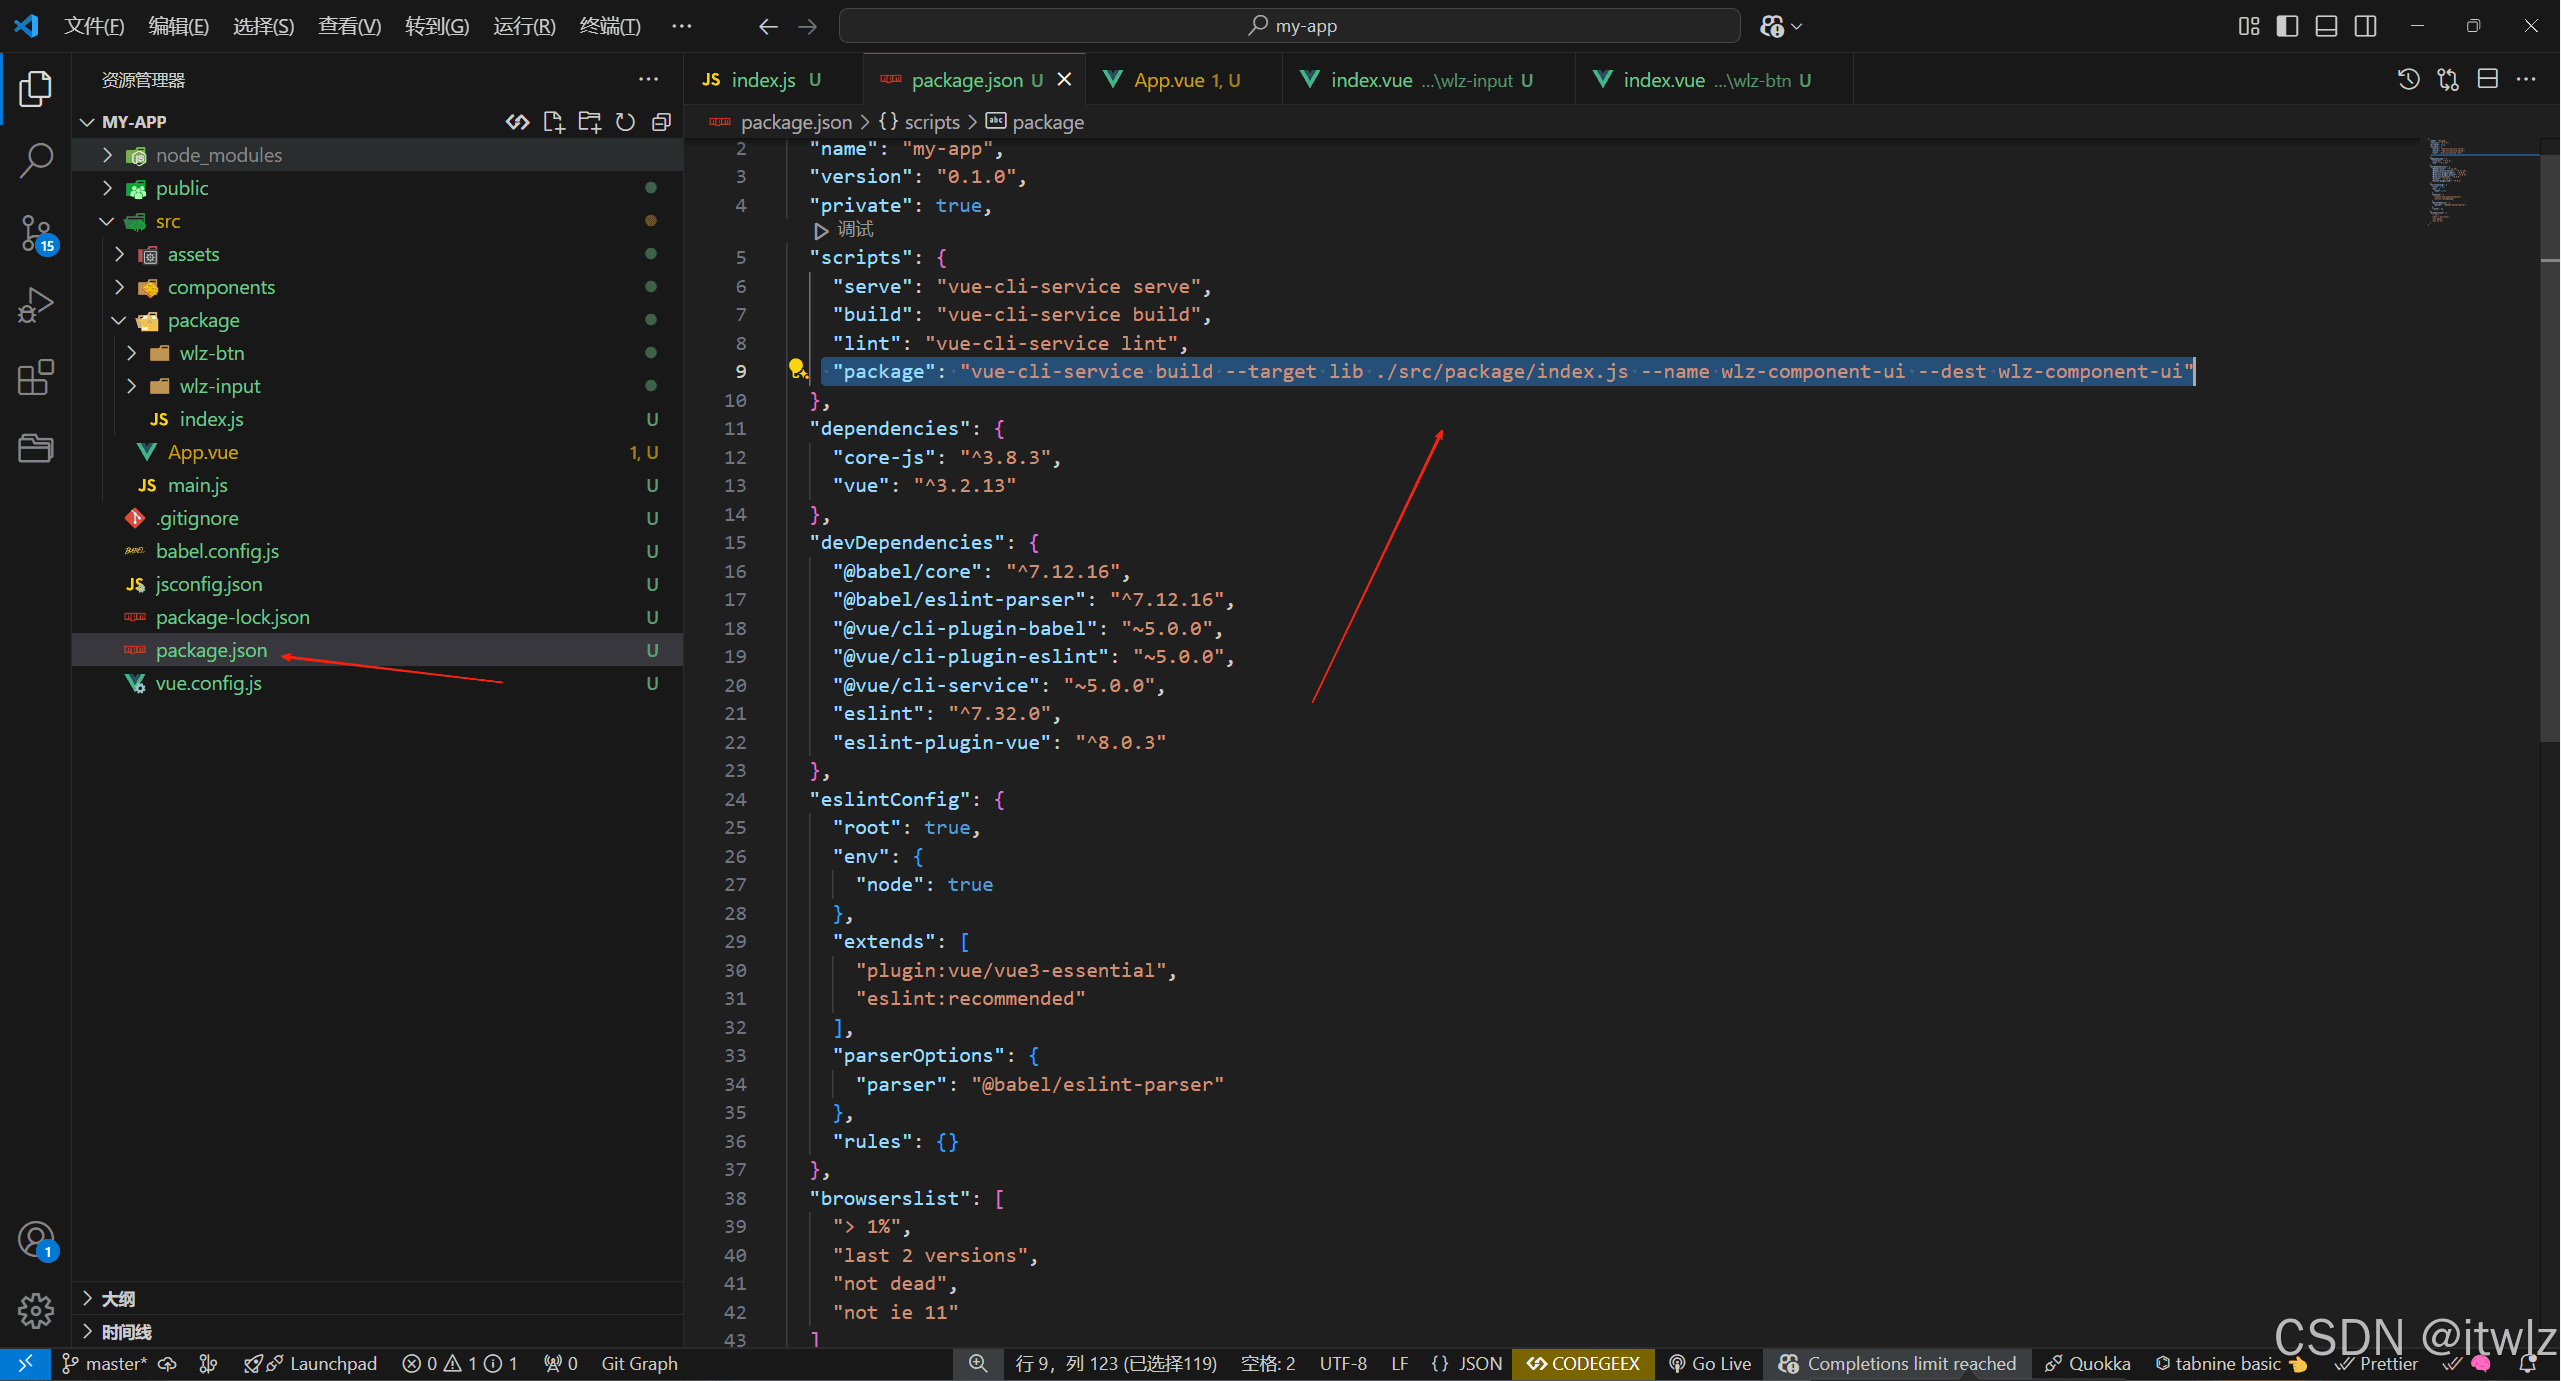
npm run package
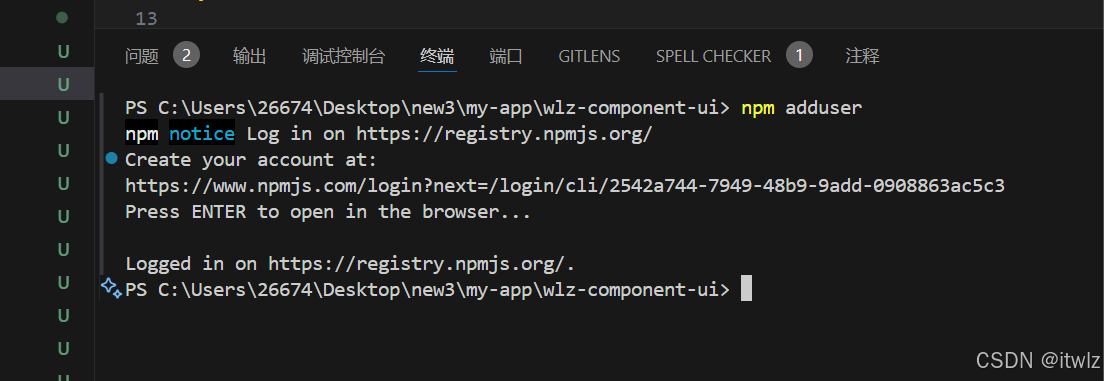
6.发布(注意!!要进入新生成的目录操作即:wlz-component-ui)
cd .\wlz-component-ui\
npm init -y
{
  "name": "wlz-ui",
  "version": "1.0.0",
  "main": "wlz-ui.common.js",
  "scripts": {
    "test": "echo \"error: no test specified\" && exit 1"
  },
  "keywords": [],
  "author": "",
  "license": "isc",
  "description": "我的ui组件库"
}
npm adduser
按回车登录
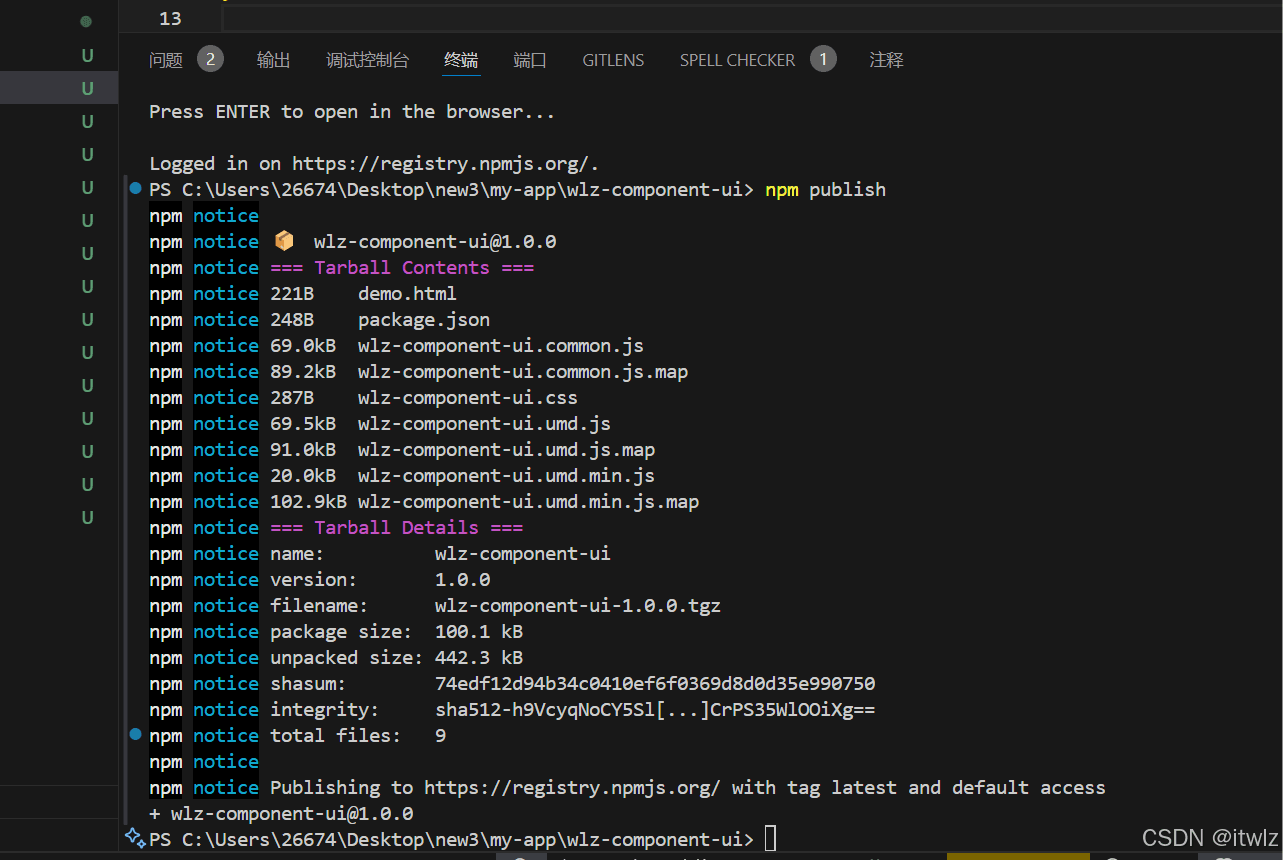
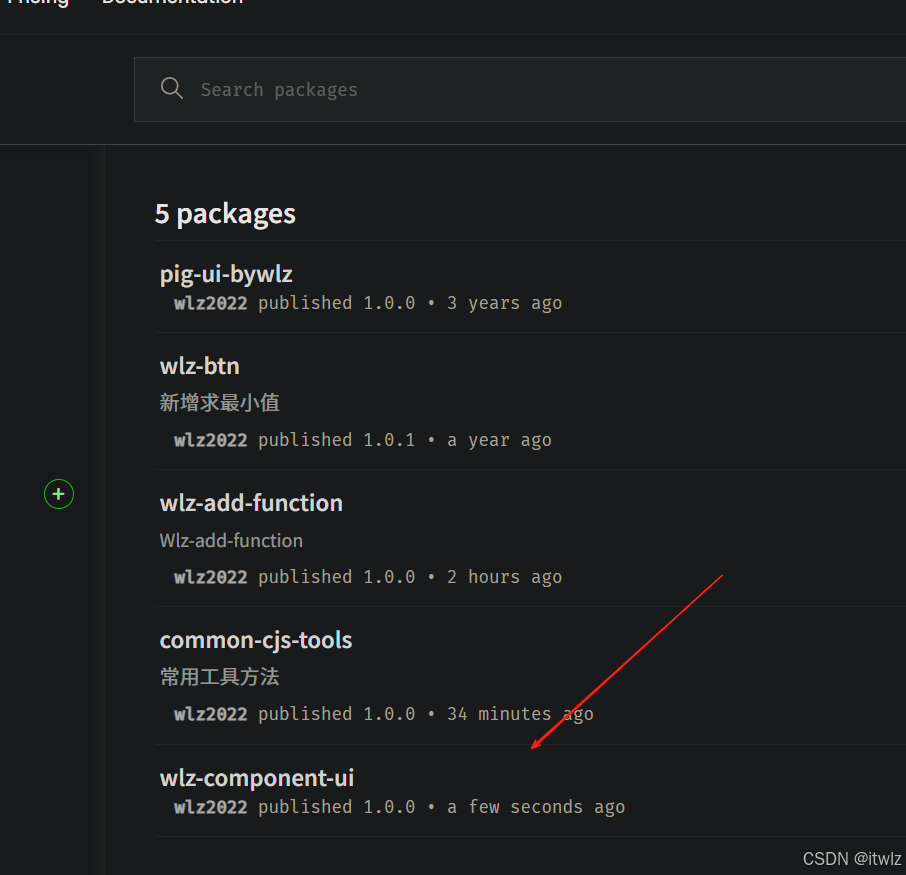
发布
npm publish
7使用
npm i wlz-component-ui
// src\main.js
import { createapp } from "vue";
import app from "./app.vue";
import wlzcomponentui from "wlz-component-ui";
import "wlz-component-ui/wlz-component-ui.css";

const app = createapp(app);
app.use(wlzcomponentui);

app.mount("#app");
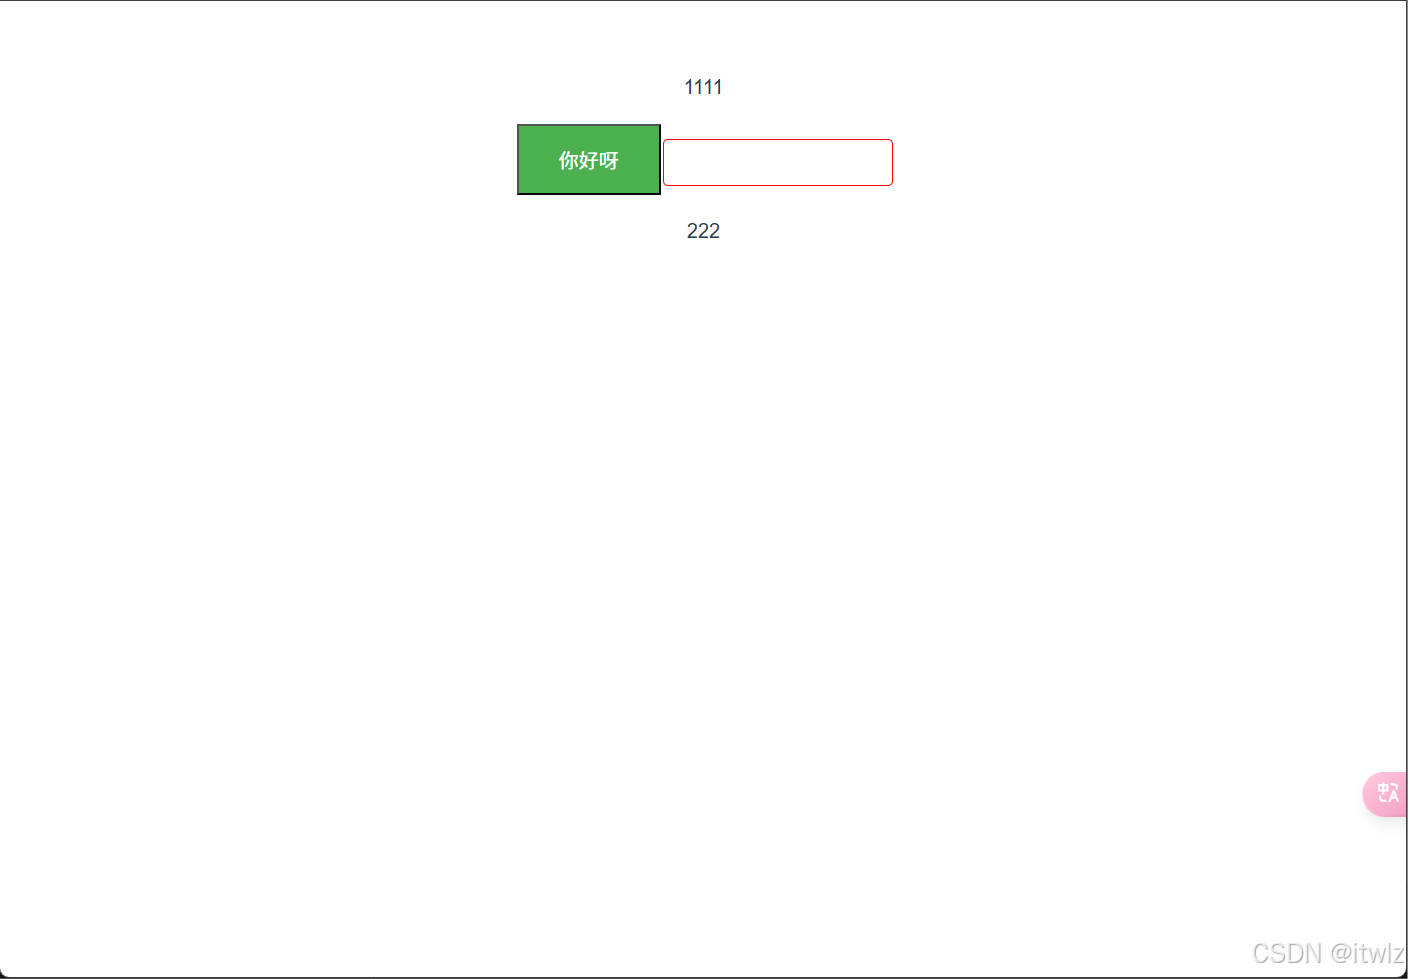
<!-- src\app.vue -->
<template>
  <div>
    <p>1111</p>
    <wlzbtn />
    <wlzinput />
    <p>222</p>
  </div>
</template>

<script>
export default {
  name: "app",
};
</script>

<style>
#app {
  font-family: avenir, helvetica, arial, sans-serif;
  -webkit-font-smoothing: antialiased;
  -moz-osx-font-smoothing: grayscale;
  text-align: center;
  color: #2c3e50;
  margin-top: 60px;
}
</style>
到此这篇关于vue3+webpack中npm发布组件的实现的文章就介绍到这了,更多相关vue3 webpack npm发布组件内容请搜索代码网以前的文章或继续浏览下面的相关文章希望大家以后多多支持代码网!


发表评论