对于高并发系统来说,有三个重要的机制来保障其高效运行,它们分别是:缓存、限流和熔断。而缓存是排在最前面也是高并发系统之所以高效运行的关键手段,那么问题来了:缓存只使用 redis 就够了吗?
1.冗余设计理念
当然不是,不要把所有鸡蛋放到一个篮子里,成熟的系统在关键功能实现时一定会考虑冗余设计,注意这里的冗余设计不是贬义词。
冗余设计是在系统或设备完成任务起关键作用的地方,增加一套以上完成相同功能的功能通道(or 系统)、工作元件或部件,以保证当该部分出现故障时,系统或设备仍能正常工作,以减少系统或者设备的故障概率,提高系统可靠性。
例如,飞机的设计,飞机正常运行只需要两个发动机,但在每台飞机的设计中可能至少会设计四个发动机,这就有冗余设计的典型使用场景,这样设计的目的是为了保证极端情况下,如果有一个或两个发动机出现故障,不会因为某个发动机的故障而引起重大的安全事故。
2.多级缓存概述
缓存功能的设计也是一样,我们在高并发系统中通常会使用多级缓存来保证其高效运行,其中的多级缓存就包含以下这些:
- 浏览器缓存:它的实现主要依靠 http 协议中的缓存机制,当浏览器第一次请求一个资源时,服务器会将该资源的相关缓存规则(如 cache-control、expires 等)一同返回给客户端,浏览器会根据这些规则来判断是否需要缓存该资源以及该资源的有效期。
- nginx 缓存:在 nginx 中配置中开启缓存功能。
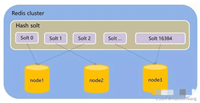
- 分布式缓存:所有系统调用的中间件都是分布式缓存,如 redis、memcached 等。
- 本地缓存:jvm 层面,单系统运行期间在内存中产生的缓存,例如 caffeine、google guava 等。
以下是它们的具体使用。
2.1 开启浏览器缓存
在 java web应用中,实现浏览器缓存可以使用 httpservletresponse 对象来设置与缓存相关的响应头,以开启浏览器的缓存功能,它的具体实现分为以下几步。
① 配置 cache-control
cache-control 是 http/1.1 中用于控制缓存策略的主要方式。它可以设置多个指令,如 max-age(定义资源的最大存活时间,单位秒)、no-cache(要求重新验证)、public(指示可以被任何缓存区缓存)、private(只能被单个用户私有缓存存储)等,设置如下:
response.setheader("cache-control", "max-age=3600, public"); // 缓存一小时
② 配置 expires
设置一个绝对的过期时间,超过这个时间点后浏览器将不再使用缓存的内容而向服务器请求新的资源,设置如下:
response.setdateheader("expires", system.currenttimemillis() + 3600 * 1000); // 缓存一小时
③ 配置 etag
etag(实体标签)一种验证机制,它为每个版本的资源生成一个唯一标识符。当客户端发起请求时,会携带上先前接收到的 etag,服务器根据 etag 判断资源是否已更新,若未更新则返回 304 not modified 状态码,通知浏览器继续使用本地缓存,设置如下:
string etag = generateetagforcontent(); // 根据内容生成etag
response.setheader("etag", etag);
④ 配置 last-modified
指定资源最后修改的时间戳,浏览器下次请求时会带上 if-modified-since 头,服务器对比时间戳决定是否返回新内容或发送 304 状态码,设置如下:
long lastmodifieddate = getlastmodifieddate();
response.setdateheader("last-modified", lastmodifieddate);
整体配置
在 spring web 框架中,可以通过 httpservletresponse 对象来设置这些头信息。例如,在过滤器中设置响应头以启用缓存:
public void dofilter(servletrequest request, servletresponse response, filterchain chain)
       throws ioexception, servletexception {
   httpservletresponse httpresponse = (httpservletresponse) response;
   // 设置缓存策略
   httpresponse.setheader("cache-control", "max-age=3600");

   // 其他响应头设置...
   chain.dofilter(request, response);
}
以上就是在 java web 应用程序中利用 http 协议特性控制浏览器缓存的基本方法。
2.2 开启 nginx 缓存
nginx 中开启缓存的配置总共有以下 5 步。
① 定义缓存配置
在 nginx 配置中定义一个缓存路径和配置,通过 proxy_cache_path 指令完成,例如,以下配置:
proxy_cache_path /path/to/cache levels=1:2 keys_zone=my_cache:10m max_size=10g inactive=60m use_temp_path=off;
其中:
- /path/to/cache:这是缓存文件的存放路径。
- levels=1:2:定义缓存目录的层级结构。
- keys_zone=my_cache:10m:定义一个名为
my_cache的共享内存区域,大小为 10mb。 - max_size=10g:设置缓存的最大大小为 10gb。
- inactive=60m:如果在 60 分钟内没有被访问,缓存将被清理。
- use_temp_path=off:避免在文件系统中进行不必要的数据拷贝。
② 启用缓存
在 server 或 location 块中,使用 proxy_cache 指令来启用缓存,并指定要使用的 keys zone,例如,以下配置:
server {
    ...
    location / {
        proxy_cache my_cache;
        ...
    }
}
③ 设置缓存有效期
使用 proxy_cache_valid 指令来设置哪些响应码的缓存时间,例如,以下配置:
location / {
    proxy_cache my_cache;
    proxy_cache_valid 200 304 12h;
    proxy_cache_valid any 1m;
    ...
}
④ 配置反向代理
确保你已经配置了反向代理,以便 nginx 可以将请求转发到后端服务器。例如,以下配置:
location / {
    proxy_pass http://backend_server;
    ...
}
⑤ 重新加载配置
保存并关闭 nginx 配置文件后,使用 nginx -s reload 命令重新加载配置,使更改生效。
2.3 使用分布式缓存
在 spring boot 项目中使用注解的方式来操作分布式缓存 redis 的实现步骤如下。
① 添加依赖
在你的 pom.xml 文件中添加 spring boot 的 redis 依赖,如下所示:
<dependencies>
    <dependency>
        <groupid>org.springframework.boot</groupid>
        <artifactid>spring-boot-starter-data-redis</artifactid>
    </dependency>
</dependencies>
② 配置 redis 连接信息
在 application.properties 或 application.yml 文件中配置 redis 的相关信息,如下所示。
# application.properties
spring.redis.host=localhost
spring.redis.port=6379
③ 启动缓存
在 spring boot 主类或者配置类上添加 @enablecaching 注解来启用缓存。
import org.springframework.cache.annotation.enablecaching;
import org.springframework.boot.springapplication;
import org.springframework.boot.autoconfigure.springbootapplication;

@springbootapplication
@enablecaching
public class application {

    public static void main(string[] args) {
        springapplication.run(application.class, args);
    }

}
④ 使用缓存
在服务类或方法上使用 @cacheable,@cacheevict,@cacheput 等注解来定义缓存行为。
例如,使用 @cacheable 注解来缓存方法的返回值:
import org.springframework.cache.annotation.cacheable;
import org.springframework.stereotype.service;

@service
public class userservice {
    @cacheable("users")
    public user finduserbyid(long id) {
        // 模拟从数据库中查询用户
        return new user(id, "alice");
    }
}
也可以使用 @cacheevict 注解来删除缓存:
import org.springframework.cache.annotation.cacheevict;
import org.springframework.stereotype.service;

@service
public class userservice {
    @cacheevict(value = "users", key = "#id")
    public void deleteuser(long id) {
        // 模拟从数据库中删除用户
    }
}
在这个例子中,deleteuser 方法会删除 "users" 缓存中 key 为 id 的缓存项。
可以使用 @cacheput 注解来更新缓存:
import org.springframework.cache.annotation.cacheput;
import org.springframework.stereotype.service;

@service
public class userservice {

    @cacheput(value = "users", key = "#user.id")
    public user updateuser(user user) {
        // 模拟更新数据库中的用户信息
        return user;
    }

}
在这个例子中,updateuser 方法会更新 "users" 缓存中 key 为 user.id 的缓存项,缓存的值是方法的返回值。
2.4 使用本地缓存
以 caffeine 本地缓存的使用为例,它在 spring boot 项目中的使用如下。
① 添加依赖
<dependency>
    <groupid>org.springframework.boot</groupid>
    <artifactid>spring-boot-starter-cache</artifactid>
</dependency>
<dependency>
    <groupid>com.github.ben-manes.caffeine</groupid>
    <artifactid>caffeine</artifactid>
</dependency>
② 配置 caffeine 缓存
在 application.properties 或 application.yml 文件中配置 caffeine 缓存的相关参数。例如:
# application.properties
spring.cache.type=caffeine
spring.cache.caffeine.spec=initialcapacity=100,maximumsize=1000,expireafterwrite=10s
这里 spring.cache.caffeine.spec 是一个 caffeine 规范字符串,用于设置初始容量、最大容量和写入后过期时间等缓存策略,其中:
- initialcapacity:初始容器容量。
- maximumsize:最大容量。
- expireafterwrite:写入缓存后 n 长时间后过期。
③ 自定义 caffeine 配置类(可选步骤)
如果需要更复杂的配置,可以创建一个 caffeine cachemanager 的配置类:
import com.github.benmanes.caffeine.cache.cache;
import com.github.benmanes.caffeine.cache.caffeine;
import org.springframework.cache.cachemanager;
import org.springframework.cache.annotation.cachingconfigurersupport;
import org.springframework.cache.interceptor.cacheresolver;
import org.springframework.context.annotation.bean;
import org.springframework.context.annotation.configuration;

@configuration
public class caffeinecacheconfig extends cachingconfigurersupport {

    @bean
    public cachemanager cachemanager() {
        caffeine<object, object> caffeine = caffeine.newbuilder()
                .initialcapacity(100)
                .maximumsize(1000)
                .expireafterwrite(10, timeunit.seconds) // 10 秒后过期
                .recordstats(); // 记录缓存统计信息

        return new caffeinecachemanager("default", caffeine::build);
    }

    @override
    public cacheresolver cacheresolver() {
        // 自定义缓存解析器(如果需要)
        // ...
        return super.cacheresolver();
    }
}
④ 开启缓存
若要利用 spring cache 抽象层,以便通过注解的方式更方便地管理缓存,需要在启动类上添加 @enablecaching 注解,如下所示:
import org.springframework.cache.annotation.enablecaching;
import org.springframework.boot.springapplication;
import org.springframework.boot.autoconfigure.springbootapplication;

@springbootapplication
@enablecaching
public class application {

    public static void main(string[] args) {
        springapplication.run(application.class, args);
    }
}
⑤ 使用注解进行缓存操作
在业务逻辑类中使用 @cacheable、@cacheevict 等注解实现数据的缓存读取和更新,和上面分布式缓存的使用相同,具体示例如下:
import org.springframework.cache.annotation.cacheable;
import org.springframework.stereotype.service;

@service
public class userservice {

    @cacheable(value = "users", key = "#id") // 假设我们有一个名为"users"的缓存区域
    public user getuserbyid(long id) {
        // 这里是真实的数据库查询或其他耗时操作
        return userrepository.findbyid(id).orelse(null);
    }

    @cacheevict(value = "users", key = "#user.id")
    public void updateuser(user user) {
        userrepository.save(user);
    }
}
课后思考
除了以上的缓存之外,还有哪些缓存可以加速程序的执行效率呢?
到此这篇关于java实现多级缓存的方法详解的文章就介绍到这了,更多相关java多级缓存内容请搜索代码网以前的文章或继续浏览下面的相关文章希望大家以后多多支持代码网!


发表评论