springboot 约定规范
starter项目的命名规范
建议自定义的starter 以 xxx-spring-boot-starter 命名,官方的starter一般都是以spring-boot-starter-为前缀。
这样做的目的是为了避免与官方或其他第三方提供的starter产生冲突或混淆。
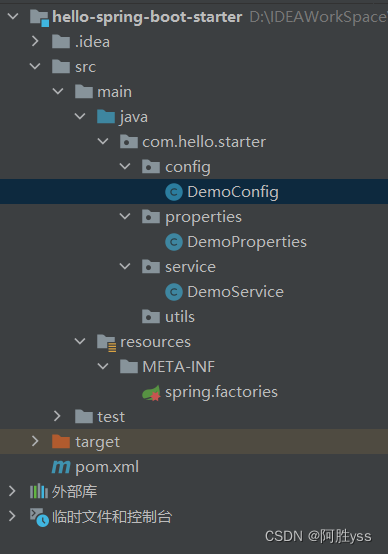
starter项目的结构规范(重要)
最核心的是 spring boot自动装配文件
作用: 用来指定我们的自动配置类,让spring boot能够在启动时自动扫描并加载它。
名称必须为 spring.factories
路径必须为resources/meta-inf/spring.factories 这是springboot的约定规范,不遵守一律失效。
- 1、在spring boot2.7版本之前:
通过meta-inf/spring.factories文件定义我们自动配置的类。
- 2、在spring boot2.7~spring boot3.0版本之间,是兼容了
meta-inf/spring/org.springframework.boot.autoconfigure.autoconfiguration.imports 和meta-inf/spring.factories 这两个文件的。
- 3、在spring boot3.0版本之后,只支持使用
meta-inf/spring/org.springframework.boot.autoconfigure.autoconfiguration.imports来自定义我们的自动配置的类。
注意!!!:springboot 2.7 版本有所变化,具体请查看springboot官网。
- hello-spring-boot-starter
pom.xml
依赖说明
- spring-boot-configuration-processor : 编译时依赖 可以帮助我们生成属性类和配置元数据,并且设置为可选依赖,避免传递给其他项目。
- spring-boot-starter : 基础依赖 提供了spring boot核心功能和默认配置
<?xml version="1.0" encoding="utf-8"?>
<project xmlns="http://maven.apache.org/pom/4.0.0"
         xmlns:xsi="http://www.w3.org/2001/xmlschema-instance"
         xsi:schemalocation="http://maven.apache.org/pom/4.0.0 http://maven.apache.org/xsd/maven-4.0.0.xsd">
    <modelversion>4.0.0</modelversion>

    <!-- 用户依赖必须指定的参数 -->
    <groupid>org.example</groupid>
    <artifactid>hello-spring-boot-starter</artifactid>
    <version>1.0-snapshot</version>

    <properties>
        <!--        jdk版本-->
        <java.version>1.8</java.version>
        <maven.compiler.source>8</maven.compiler.source>
        <maven.compiler.target>8</maven.compiler.target>
    </properties>

    <dependencies>
        <!-- 基础依赖  提供了spring boot核心功能和默认配置 -->
        <dependency>
            <groupid>org.springframework.boot</groupid>
            <artifactid>spring-boot-starter</artifactid>
            <version>2.7.18</version>
        </dependency>
        <!-- 编译时依赖 可以帮助我们生成属性类和配置元数据,并且设置为可选依赖,避免传递给其他项目。-->
        <dependency>
            <groupid>org.springframework.boot</groupid>
            <artifactid>spring-boot-configuration-processor</artifactid>
            <version>2.7.18</version>
            <optional>true</optional>
        </dependency>
    </dependencies>
</project>
starter项目的属性类
在创建一个自定义的starter项目时,我们需要编写一个属性类,用来定义我们要集成的功能模块所需的配置项,并且使用@configurationproperties注解来指定用户配置文件中的前缀。
package com.hello.starter.properties;

/**
 *  * 描述:配置信息 实体
 * @author yss
 * @date 2024/5/1
 */
import org.springframework.boot.context.properties.configurationproperties;
@configurationproperties(prefix = "demo") // 指定 用户配置文件中的前缀
public class demoproperties {
    private string saywhat;
    private string towho;

    public string getsaywhat() {
        return saywhat;
    }

    public void setsaywhat(string saywhat) {
        this.saywhat = saywhat;
    }

    public string gettowho() {
        return towho;
    }

    public void settowho(string towho) {
        this.towho = towho;
    }
}
starter项目的业务功能类
在创建一个自定义的starter项目时,我们需要编写一个或多个业务功能类,用来实现我们要集成的功能模块的具体逻辑。
package com.hello.starter.service;

/**
 * @author yss
 * @date 2024/5/1
 */
public class demoservice {
    public string saywhat;
    public string towho;
    public demoservice(string saywhat, string towho){
        this.saywhat = saywhat;
        this.towho = towho;
    }
    public string say(){
        return this.saywhat + "!  " + towho;
    }
}
starter项目的自动配置类(重要)
在创建一个自定义的starter项目时,我们需要编写一个自动配置类,用来根据属性类和业务功能类,创建相应的bean对象。springboot自动配置原理源码解读
- @enableconfigurationproperties : 启用属性类,并将其注入到配置类中。
- @conditionalonproperty: 判断用户配置文件中是否有相应的配置项,存在并且符合期望则满足条件
- @configuration : 标识这是一个配置类,用来创建和注册bean对象。
- @bean: 根据属性类和业务功能类,创建相应类型的bean对象,并注册到应用上下文中。
- @conditionalonclass: 判断业务功能类是否存在
package com.hello.starter.config;

import com.hello.starter.properties.demoproperties;
import com.hello.starter.service.demoservice;
import org.springframework.beans.factory.annotation.autowired;
import org.springframework.boot.autoconfigure.condition.conditionalonproperty;
import org.springframework.boot.context.properties.enableconfigurationproperties;
import org.springframework.context.annotation.bean;
import org.springframework.context.annotation.configuration;

/**
 * @author yss
 * @date 2024/5/1
 */
@configuration // 标识这是一个配置类,用来创建和注册bean对象。
//启用属性类,并将其注入到配置类中。
@enableconfigurationproperties(demoproperties.class)
// 判断业务功能类是否存在
@conditionalonclass(demoservice.class)
// 判断用户配置文件中是否存在指定的属性(isopen),
// 如果存在并且值与期望相符, 则满足条件(开启相应功能)。
@conditionalonproperty(
        prefix = "demo",
        name = "isopen",
        havingvalue = "true"
)
public class democonfig {
    @autowired
    private demoproperties demoproperties;

	// 根据属性类和业务功能类,创建相应类型的bean对象,并注册到应用上下文中。
    @bean(name = "demo")
    public demoservice demoservice(){
        return new demoservice(demoproperties.getsaywhat(),
        demoproperties.gettowho());
    }
}
starter项目的自动装配文件(重要)
在resources/meta-inf目录下创建一个名为spring.factories的文件,用来指定我们的自动配置类,让spring boot能够在启动时自动扫描并加载它。
以下是一个示例:
#-------starter自动装配---------
org.springframework.boot.autoconfigure.enableautoconfiguration=\
com.hello.starter.config.democonfig
打包发布
执行 mvn clean install 命令 一个自定义的starter就完成了。
做完上面这几步,我们自定义starter就完成了,下面我们来测试一下
引入依赖
在我们需要的项目中引入依赖。
<!--        自定义starter-->
<dependency>
    <groupid>org.example</groupid>
    <artifactid>hello-spring-boot-starter</artifactid>
    <version>1.0-snapshot</version>
</dependency>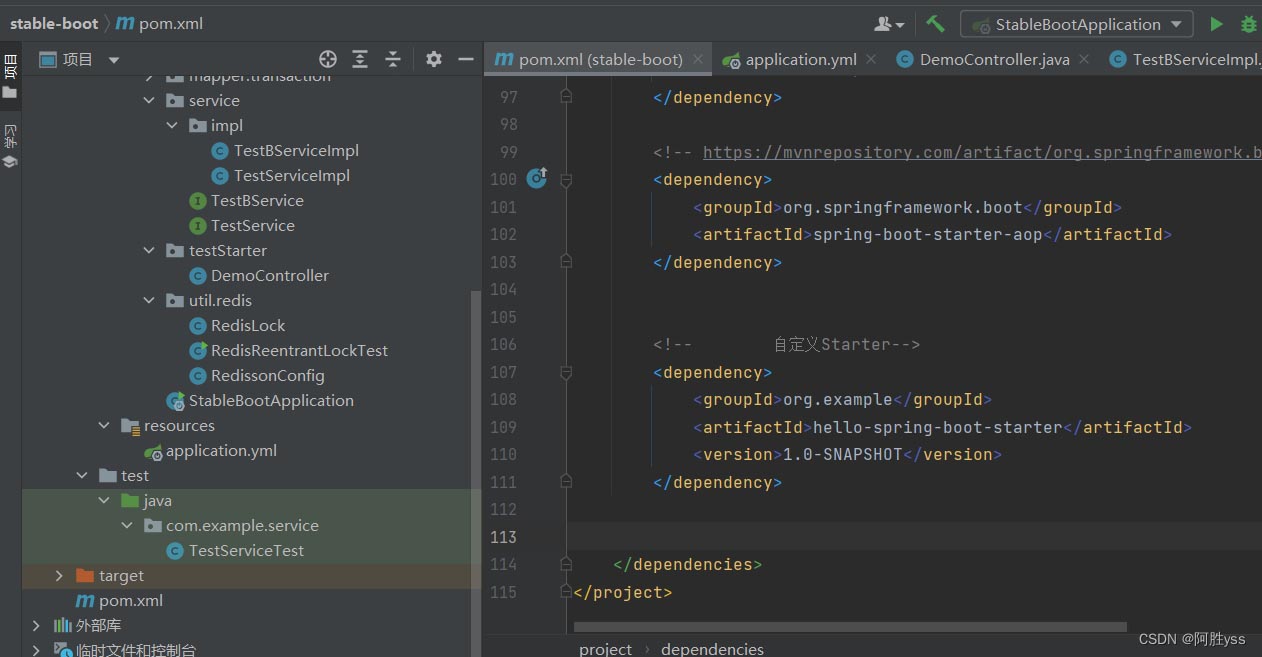
- application.yml
demo:
  # 允许 demo作为bean注入ioc容器  一定要指明 isopen  不然项目无法启动
  isopen: true
  say-what: hello
  to-who: shf
- democontroller.java
package com.example.teststarter;

import com.hello.starter.service.demoservice;
import org.springframework.web.bind.annotation.requestmapping;
import org.springframework.web.bind.annotation.restcontroller;

import javax.annotation.resource;

/**
 * @author yss
 * @date 2024/5/1
 */
@restcontroller
public class democontroller {

    @resource(name = "demo")
    private demoservice demoservice;

    @requestmapping("/say")
    public string saywhat(){
        return demoservice.say();
    }
}
启动项目并且运行
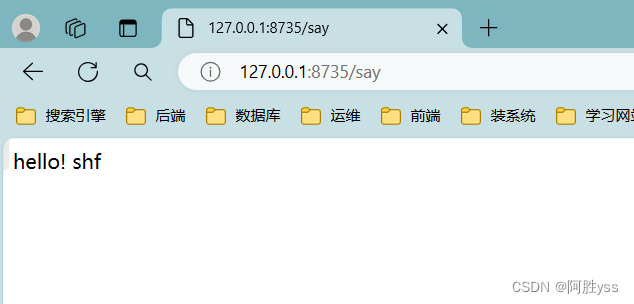
ok了!!
总结
以上为个人经验,希望能给大家一个参考,也希望大家多多支持代码网。


发表评论