一、junit5介绍
junit5是一个功能强大的单元测试框架,是junit系列的最新版本,它引入了多个改进和新特性,旨在为java应用程序提供灵活且模块化的测试支持。
1、junit5组成结构
- junit platform:这个模块提供了测试的
启动api和运行环境,是整个junit5框架的核心。它支持在不同的环境中运行测试,如命令行、ide或构建工具(例如maven、gradle) - junit jupiter:这个模块包含了junit5的
新测试编写和扩展模型,提供了全新的注解、测试方法和扩展机制 - junit vintage:为了支持旧版本的junit测试(junit3和junit4),junit5提供了vintage模块。这个模块允许开发者继续运行以前版本的测试,同时过渡到junit5
2、什么是单元测试
- 单元测试是指对软件中的
最小可测试单元进行检查和验证的过程叫单元测试 - 在
springboot中,最小可测试单元就是指方法
二、springboot整合junit5
1、快速入门
springboot版本从2.2以后,默认支持junit5
<dependency>
    <groupid>org.springframework.boot</groupid>
    <artifactid>spring-boot-starter-test</artifactid>
    <scope>test</scope>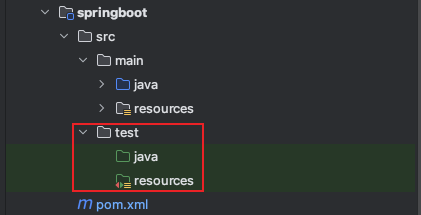
</dependency>测试类应放在src/test/java目录下
import org.junit.jupiter.api.test;
import org.springframework.boot.test.context.springboottest;
@springboottest
class myspringbootapplicationtests {
    @test
    void contextloads() {
        // 测试 spring 应用上下文是否成功加载
    }
}
2、测试类和测试方法不需要声明为public
- 在
junit4中,测试类和测试方法必须是public的,因为junit4通过反射机制要求访问公共方法 - 而
junit5则没有这种要求,测试类和方法的可见性设为包级(默认)足够 junit 5 框架执行测试- 因为 junit 5 本质上是在测试框架内部执行这些测试
- 包级别的可见性允许同一包内的类访问测试类,而不需要将其暴露为 public
3、@springboottest工作原理
它会启动整个spring容器,加载应用程序的所有bean,并创建一个完整的应用上下文。这是集成测试,因为它模拟了应用程序的真实运行环境。
查找主配置类的两种方式:
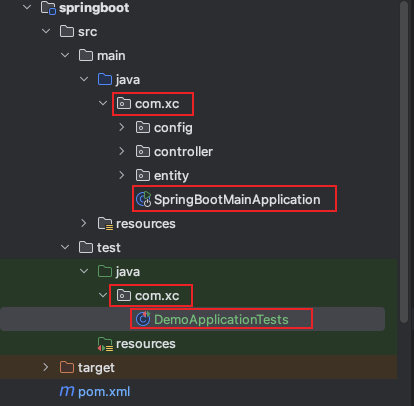
包扫描:默认情况下,@springboottest 会从测试类所在的包开始,向上查找同一包或父包中带有 @springbootapplication或@springbootconfiguration注解的类,作为应用的配置类
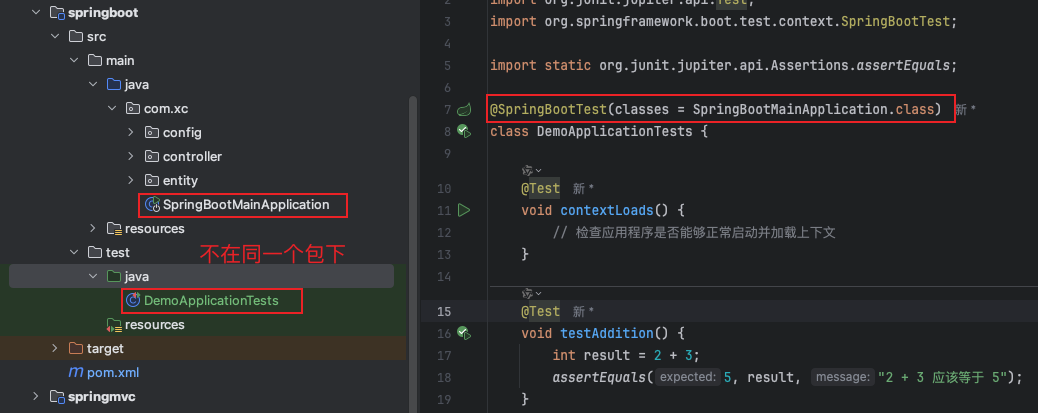
显式指定:如果 @springboottest 无法自动找到 @springbootapplication 注解的配置类,或者你希望手动指定配置类,你可以在@springboottest 注解中使用classes属性显式指定应用的配置类
4、生成单元测试类
在需要生成单元测试的类中按alt +ins,选择test(测试)
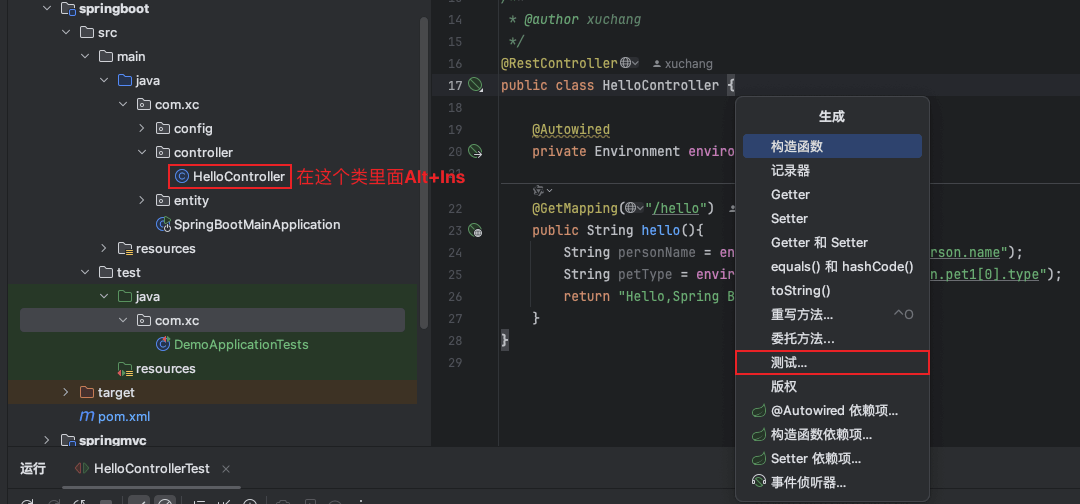
选择测试方法
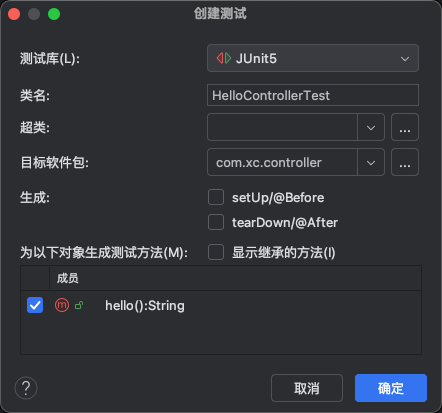
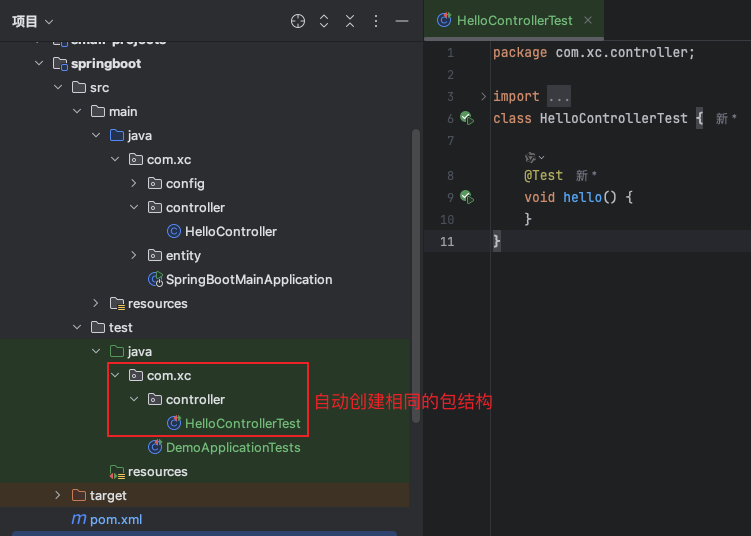
生成的测试类放入与本类相同的包结构下
三、常用注解
1、@beforeall
用于在所有测试方法之前执行的静态初始化代码
通常用于在执行所有测试之前进行一次性设置,例如建立数据库连接、初始化共享资源等
被注解的方法必须是static
@beforeall
static void setup() {
    system.out.println("running setup before all tests...");
}
2、@afterall
- 用于在
所有测试方法执行完成后运行的静态清理代码 - 通常用于释放资源、关闭连接等操作
- 被注解的方法必须是
static
@afterall
static void teardown() {
    system.out.println("running teardown after all tests...");
}
3、@beforeeach
- 用于在
每个测试方法之前执行的初始化代码 - 常用于在每个测试方法执行之前准备一些通用的数据或环境
@beforeeach
void init() {
    system.out.println("running setup before each test...");
}
4、@aftereach
- 用于在
每个测试方法之后执行的清理代码 - 常用于在每个测试方法之后恢复原状或清理一些资源
@aftereach
void cleanup() {
system.out.println("running cleanup after each test...");
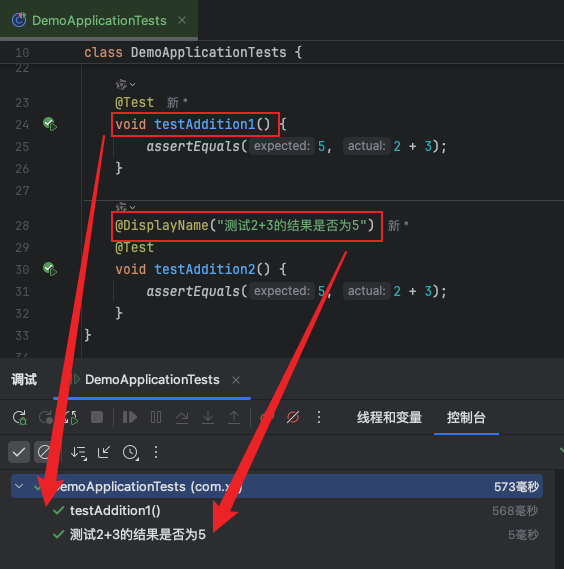
}5、@displayname
用于为测试类或测试方法提供一个更具可读性或说明性的名称,便于在测试报告中展示
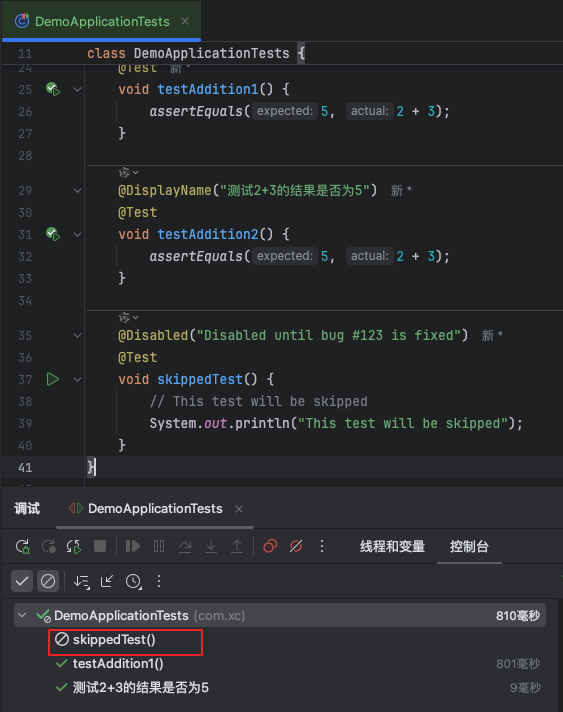
6、@disabled
当执行所有测试方法时候,@disabled注解的方法不会执行
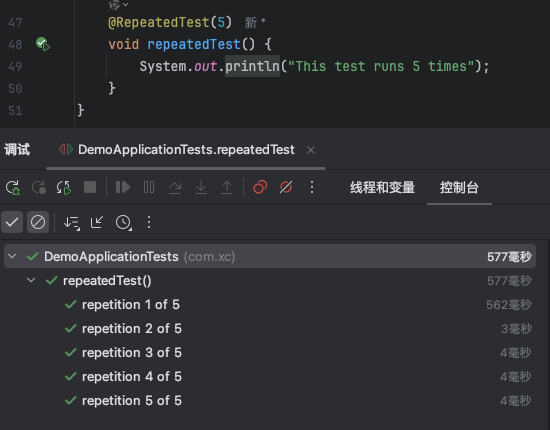
7、@repeatedtest
用于多次重复执行某个测试,可以指定重复次数
四、常用断言
断言(assertions)在单元测试中用于验证程序行为是否符合预期。junit 提供了一组用于编写断言的方法,断言的使用可以帮助判断测试是否通过。类名org.junit.jupiter.api.assertions
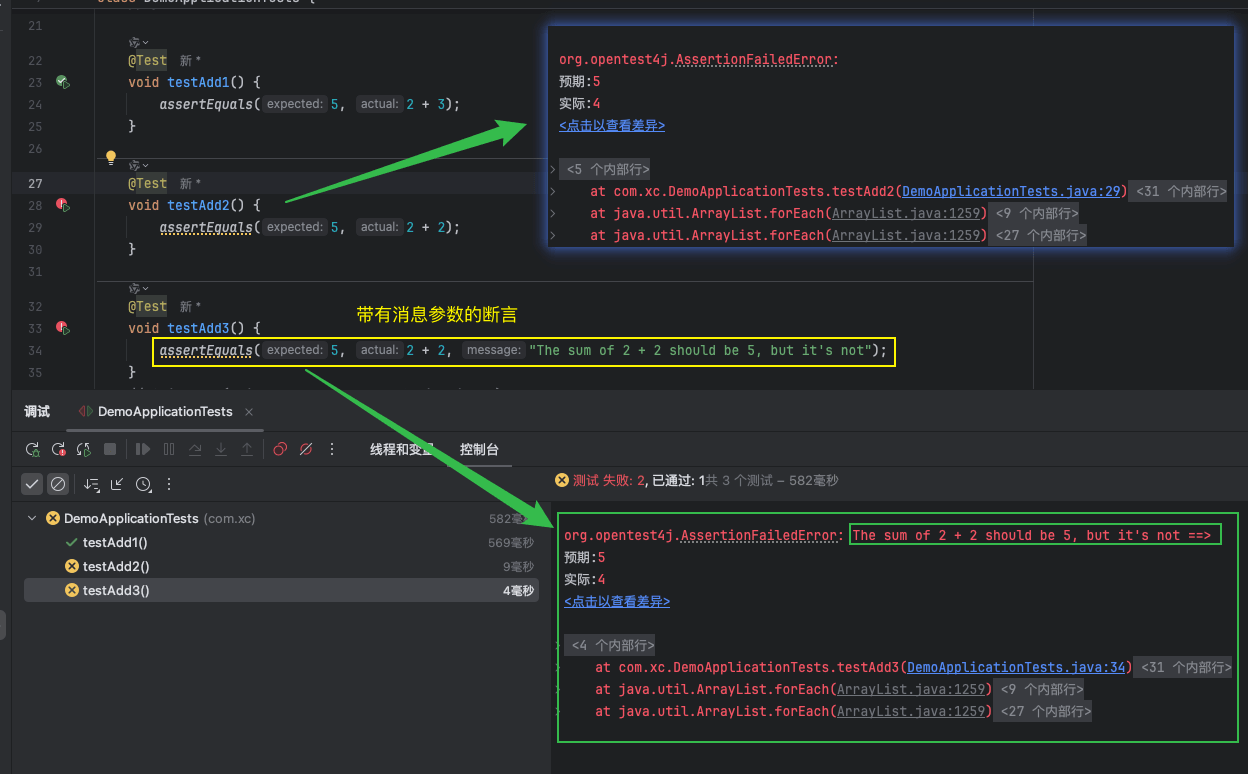
1、assertequals(expected, actual)
- 验证两个对象
是否相等 - 可以用于
各种数据类型,包括基本类型、对象等
assertequals(5, 2 + 3);
assertequals("hello", greetingservice.getgreeting());
2、assertnotequals(expected, actual)
验证两个对象是否不相等
assertnotequals(10, 2 + 3);
3、asserttrue(condition)
验证条件为true
asserttrue(5 > 3);
4、assertfalse(condition)
验证条件为false
assertfalse(3 > 5);
5、assertnull(actual)
验证对象是否为null
string str = null;
assertnull(str);
6、assertnotnull(actual)
验证对象是否不为null
string str = "hello";
assertnotnull(str);
7、assertarrayequals(expected, actual)
验证两个数组是否相等
数组的长度和元素的顺序都必须相同
int[] expected = {1, 2, 3};
int[] actual = {1, 2, 3};
assertarrayequals(expected, actual);
8、assertsame(expected, actual)
验证两个对象引用是否指向同一个对象(即是同一个对象的引用)
object obj = new object();
assertsame(obj, obj);
9、assertnotsame(expected, actual)
验证两个对象引用是否不指向同一个对象
object obj1 = new object();
object obj2 = new object();
assertnotsame(obj1, obj2);
10、fail(message)
强制使测试失败
通常用于标记不应该被执行的代码路径
if (somecondition) {
    fail("unexpected condition occurred");
}
11、带有消息参数的断言
junit的断言方法通常有一个变体,可以带有一个额外的字符串参数,用于在测试失败时提供错误消息,帮助更快找到问题。
五、@mockbean注入
1、@mockbean的主要作用
@mockbean会将应用上下文中的某个bean替换为模拟的bean(mock 对象)
@mockbean自动与spring上下文集成,允许模拟的bean被注入到需要它的其他bean中
2、@mockbean的典型用法(模拟数据层)
假设我们有一个userservice依赖于userrepository,而我们在测试中不想使用真实的userrepository,而是使用模拟对象。
@service
public class userservice {
    private final userrepository userrepository;
    public userservice(userrepository userrepository) {
        this.userrepository = userrepository;
    }
    public user getuserbyid(long id) {
        return userrepository.findbyid(id);
    }
}- 使用
@mockbean来模拟userrepository given方法模拟了userrepository.findbyid(1l)方法的调用,并定义了当该方法被调用时,willreturn表示返回一个mockuser对象
import org.junit.jupiter.api.test;
import org.mockito.bddmockito;
import org.springframework.beans.factory.annotation.autowired;
import org.springframework.boot.test.context.springboottest;
import org.springframework.boot.test.mock.mockito.mockbean;
import static org.junit.jupiter.api.assertions.assertequals;
import static org.mockito.bddmockito.given;
@springboottest
public class userservicetest {
    @autowired
    private userservice userservice;
    // 模拟 userrepository,替换掉应用上下文中的实际 bean
    @mockbean
    private userrepository userrepository;
    @test
    void testgetuserbyid() {
        // 创建模拟数据
        user mockuser = new user(1l, "john doe");
        // 使用 mockito 的 bdd 风格方法设置模拟行为
        given(userrepository.findbyid(1l)).willreturn(mockuser);
        // 调用服务层方法,验证返回值是否符合预期
        user result = userservice.getuserbyid(1l);
        assertequals("john doe", result.getname());
    }
}
到此这篇关于springboot 集成junit5的文章就介绍到这了,更多相关springboot 集成junit5内容请搜索代码网以前的文章或继续浏览下面的相关文章希望大家以后多多支持代码网!


发表评论