maven 是一个项目管理工具,可以对 java 项目进行构建、依赖管理等。使用 maven, 可以方便地构建打包javafx项目。本章前提条件是你系统已经安装并且配置好了 jdk8 和 maven,并且已经熟悉了 maven 的相关使用。
创建 javafx 项目
1. 使用maven命令行创建项目。
打开命令行或者终端,执行如下命令:
mvn archetype:generate -dgroupid=com.learn -dartifactid=javafx-learn-02 -darchetypeartifactid=maven-archetype-quickstart -dinteractivemode=false
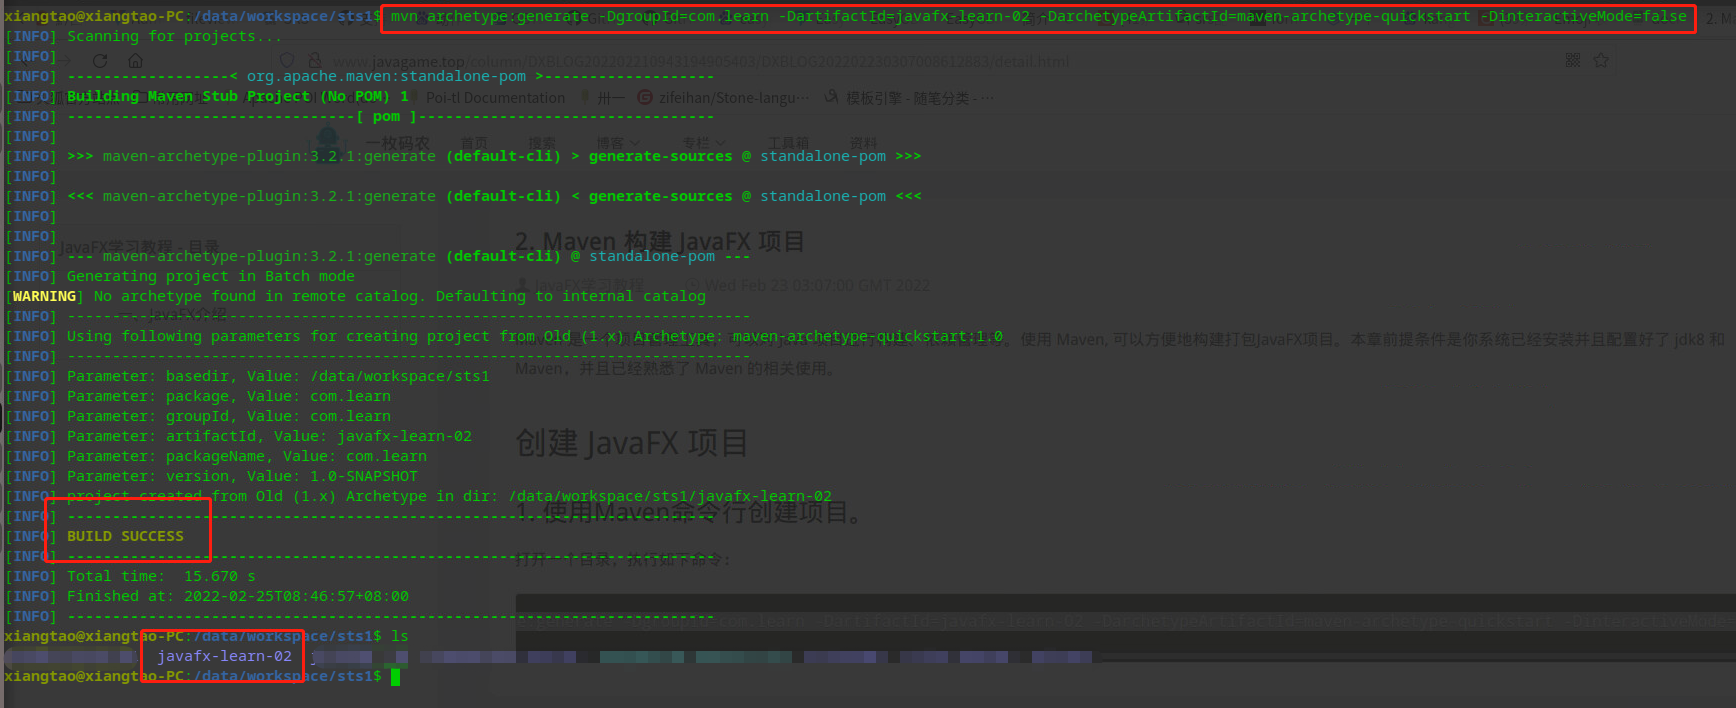
如果是第一次执行该命令,则会先下载一大堆东西,只要出现build success, 在其目录下生成了javafx-learn-02项目就代表成功了。
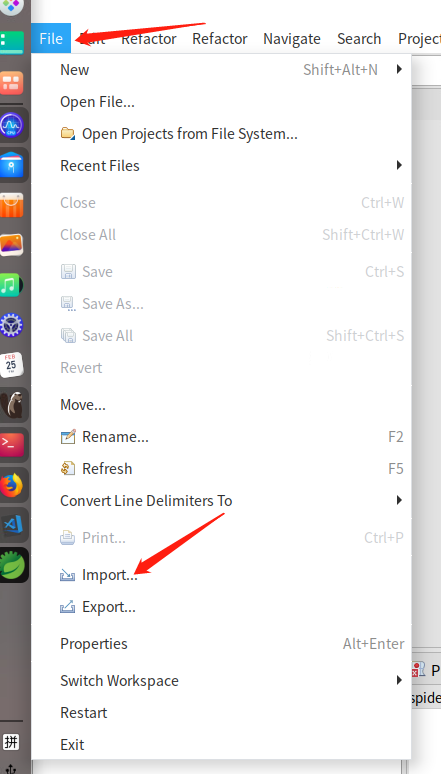
这里创建的是一个普通的 maven 项目,先把他导入到 eclipse 中(也可以使用其他开发工具开发,比如idea,vscode, sublime等等,maven的一个好处就是可以跨工具,就算用普通的文本编辑器也可以)。
打开eclipse, 选择顶上菜单file->import...,打开 eclipse 的项目导入界面。
在导入界面中选择 existing maven projects工程(内容太多的话可以在输入框中搜索 maven 过滤)。
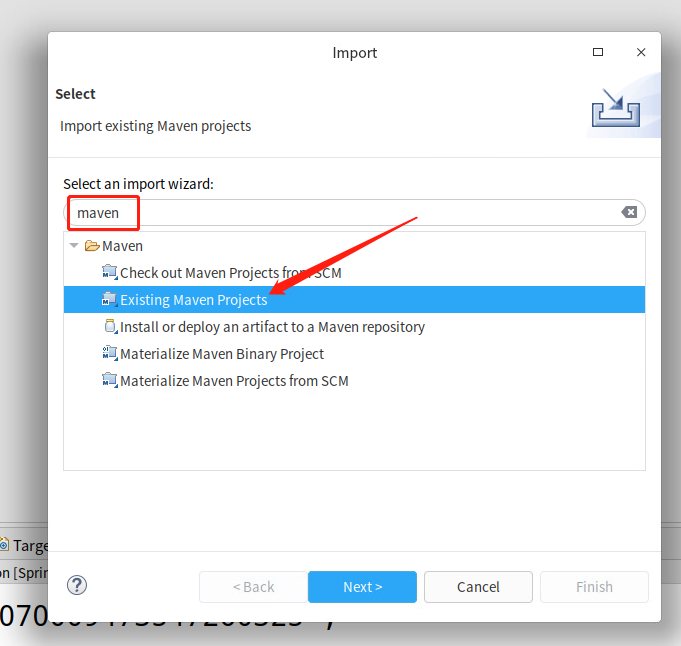
选择刚刚创建的 maven 项目。

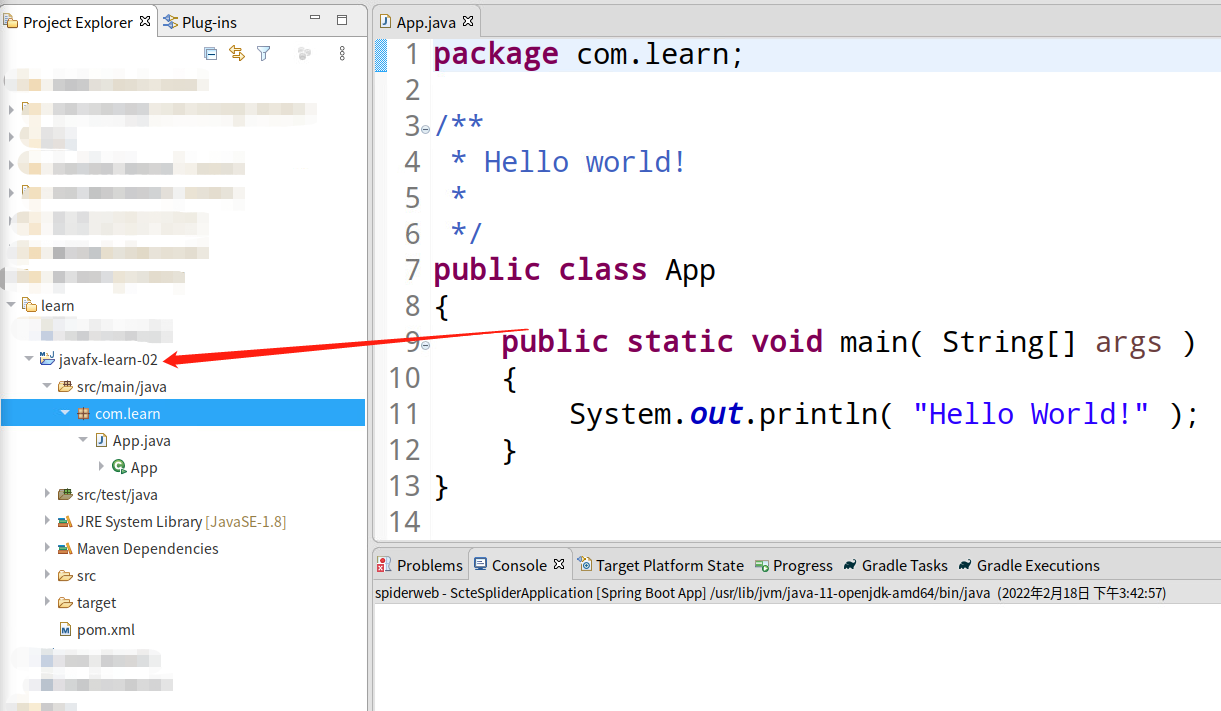
点击完成,如果项目出现在左侧项目列表中,则 maven 项目导入成功(因为我项目太多了,所以这里我 eclipse 使用了 working set 模式,这样方便对项目进行分组管理,如果没采用 working set 模式话可以不用管 learn 那个分组,只要左侧项目里有 javafx-learn-02 项目和我截图的那个有jdk显示,有maven dependencies显示, 有src/main/java 就代表导入成功了,具体 eclipse 的使用可以自行学习)。
2. 直接使用eclipse 创建 maven 项目
上面是使用命令行创建 maven 项目,使用其他 ide 或者文本开发的开发人员呢这个比较方便,但是如果使用了 eclipse 或者 idea 等支持 maven 的 ide 来开发的话,可以直接使用ide来创建maven项目。
用 eclipse 创建 maven 项目或者第一种方式中导入 maven 项目的前提是 eclipse 已经安装了 maven 插件。不过最新的 eclipse 基本都已经内置了 maven 插件,建议使用最新的 eclipse 开发。这里也不介绍了,具体安装比较简单。
打开 eclipse,选择顶上菜单 file->new->other...。
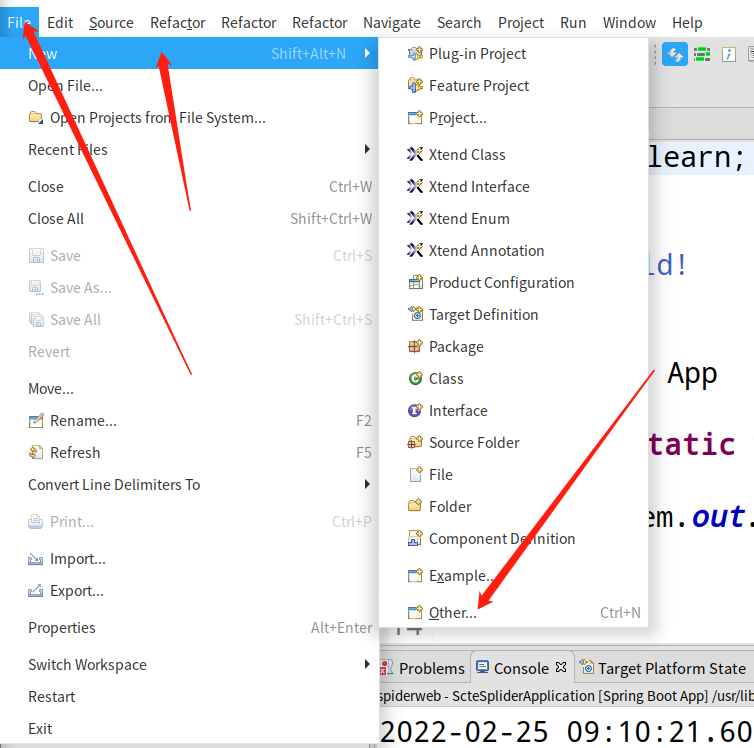
在打开的界面中选择 maven project , 可以在搜索框中输入 maven 过滤。
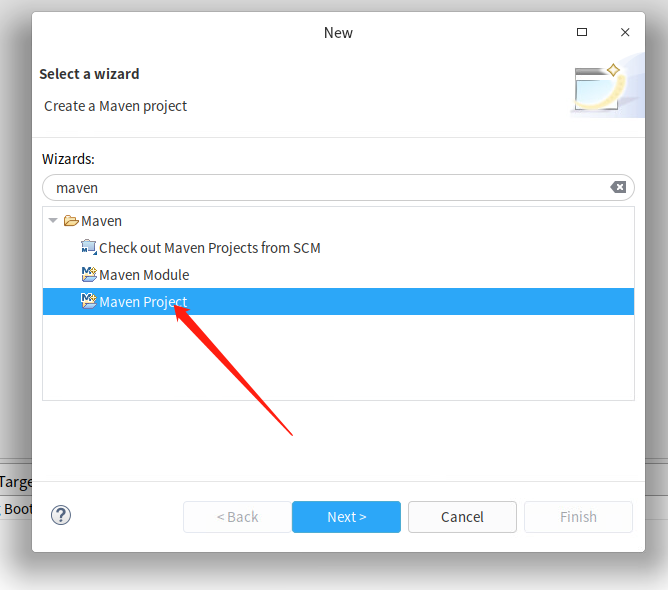
下一步的界面中勾选上:create a simple project, eclipse 的 maven 插件中提供了很多 maven 原型(可以理解为模板)来创建 maven 项目,这里只是简单的构建一个空的maven 项目,所以不需要选择原型,英文比较好的应该能读懂,勾上的意思代表创建一个经典的工程,跳过原型选择。下面那一堆可以默认,我这里选择把它添加到learn 工作集下,没选用working set的可以不用管,这里不影响。

继续点击 next, 到了下一步界面,具体填写如下。
- group id:com.learn
- artifact id: javafx-learn-maven-02
- version: 0.0.1-shapshot
- packaging: jar
具体参数都是 maven 的基础知识,这里就不介绍了,填写完成后点击 finish。

完成后在左侧项目中我们又新建好了一个 maven 项目。
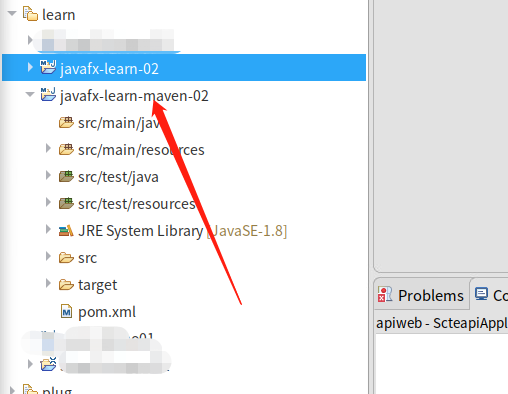
命令行新建的和eclipse新建的都是差不多一样的,后面我使用javafx-learn-maven-02这个项目,命令行新建的那个只是作为示例,我这里先删掉了。
添加 maven 的 javafx 插件。
javafx-maven-plugin 是一个 maven 的插件,用于提供在 maven 中管理 javafx 应用。比如只需要一个命令mvn jfx:run即可运行javafx应用,只需要一个命令mvn package jfx:native就可以打包 javafx 应用,很是方便。
打开项目的pom.xml,如下:
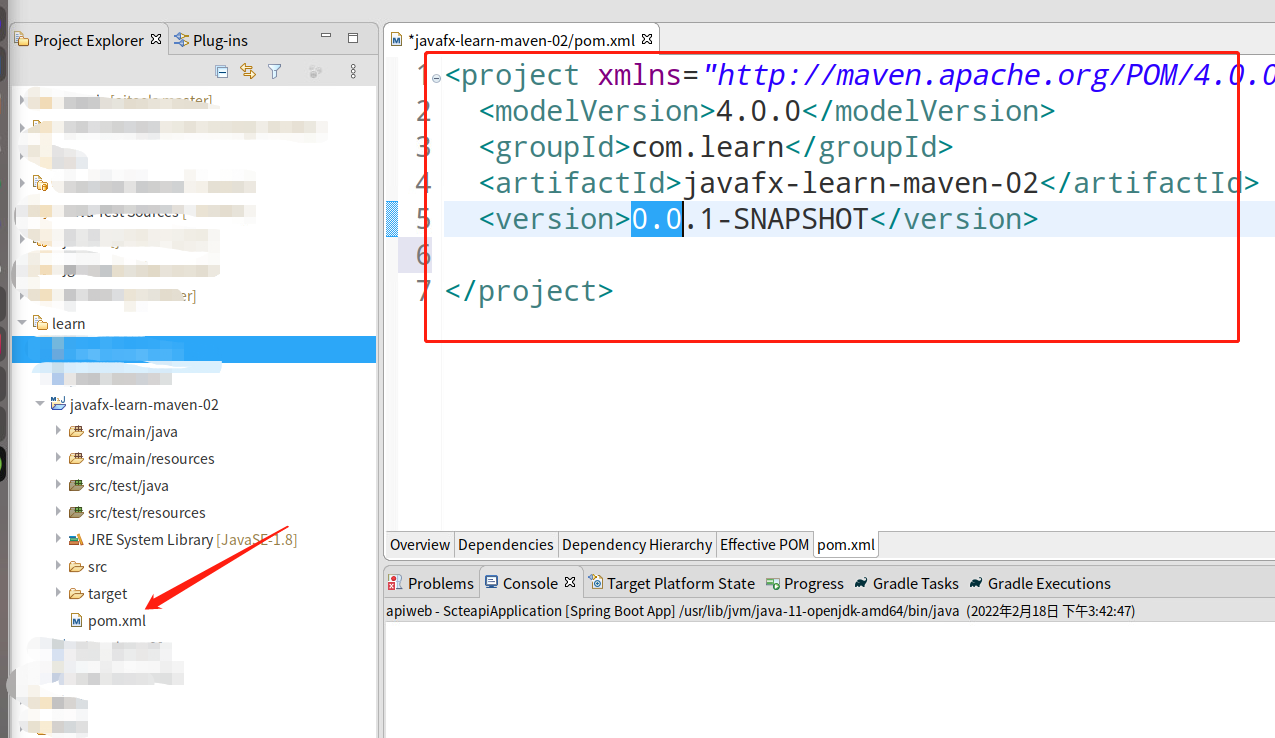
此时pom.xml是一个只包含项目基本信息的简单 xml 文件。
<project xmlns="http://maven.apache.org/pom/4.0.0"
	xmlns:xsi="http://www.w3.org/2001/xmlschema-instance"
	xsi:schemalocation="http://maven.apache.org/pom/4.0.0 https://maven.apache.org/xsd/maven-4.0.0.xsd">
	<modelversion>4.0.0</modelversion>
	<groupid>com.learn</groupid>
	<artifactid>javafx-learn-maven-02</artifactid>
	<version>0.0.1-snapshot</version>
</project>
添加 javafx-maven-plugin 插件的代码如下:
<project xmlns="http://maven.apache.org/pom/4.0.0"
	xmlns:xsi="http://www.w3.org/2001/xmlschema-instance"
	xsi:schemalocation="http://maven.apache.org/pom/4.0.0 https://maven.apache.org/xsd/maven-4.0.0.xsd">
	<modelversion>4.0.0</modelversion>
	<groupid>com.learn</groupid>
	<artifactid>javafx-learn-maven-02</artifactid>
	<version>0.0.1-snapshot</version>

	<build>
		<plugins>
			<plugin>
				<groupid>com.zenjava</groupid>
				<artifactid>javafx-maven-plugin</artifactid>
				<version>8.8.3</version>
				<configuration>
					<!-- 作者 -->
					<vendor>xiangtao</vendor>
					<!-- main方法的类 -->
					<mainclass>com.learn.learnmain02</mainclass>
					<!-- 运行文件名 -->
					<appname>${project.build.finalname}</appname>
					<!-- 图标的位置,默认位置 src/main/deploy -->
					<!--<deploydir>${basedir}/src/main/resources/images/ico/flap.ico</deploydir>-->
					<!-- 菜单 -->
					<needmenu>true</needmenu>
					<!-- 桌面图标 -->
					<needshortcut>true</needshortcut>
				</configuration>
			</plugin>
		</plugins>
	</build>
</project>
在打包的时候需要把 resource 下的资源,以及使用 systempath 导入的jar包都需要打包进去,因此继续添加 resources 配置代码:
<project xmlns="http://maven.apache.org/pom/4.0.0"
	xmlns:xsi="http://www.w3.org/2001/xmlschema-instance"
	xsi:schemalocation="http://maven.apache.org/pom/4.0.0 https://maven.apache.org/xsd/maven-4.0.0.xsd">
	<modelversion>4.0.0</modelversion>
	<groupid>com.learn</groupid>
	<artifactid>javafx-learn-maven-02</artifactid>
	<version>0.0.1-snapshot</version>

	<build>
		<plugins>
			<plugin>
				<groupid>com.zenjava</groupid>
				<artifactid>javafx-maven-plugin</artifactid>
				<version>8.8.3</version>
				<configuration>
					<!-- 作者 -->
					<vendor>xiangtao</vendor>
					<!-- main方法的类 -->
					<mainclass>com.learn.learnmain02</mainclass>
					<!-- 运行文件名 -->
					<appname>${project.build.finalname}</appname>
					<!-- 图标的位置,默认位置 src/main/deploy -->
					<!--<deploydir>${basedir}/src/main/resources/images/ico/flap.ico</deploydir>-->
					<!-- 菜单 -->
					<needmenu>true</needmenu>
					<!-- 桌面图标 -->
					<needshortcut>true</needshortcut>
				</configuration>
			</plugin>
		</plugins>

		<resources>
			<resource>
				<!--把src/main/java目录下的properties、xm文件打包打进程序中-->
				<directory>src/main/java</directory>
				<includes>
					<include>**/*.properties</include>
					<include>**/*.xml</include>
				</includes>
				<filtering>false</filtering>
			</resource>

			<resource>
				<!--把src/main/resources目录下的properties、xm文件打包打进程序中-->
				<directory>src/main/resources</directory>
				<includes>
					<include>**/*.properties</include>
					<include>**/*.xml</include>
					<include>**/*.fxml</include>
					<include>**/*.setting</include>
				</includes>
				<filtering>false</filtering>
			</resource>

			<resource>
				<!--把lib/目录下第三方jar包打进程序中,如systempath目录下的jar-->
				<directory>lib/</directory>
				<includes>
					<include>**/*.jar</include>
				</includes>
				<filtering>false</filtering>
			</resource>
		</resources>

	</build>
</project>
编写代码
新建一个包 com.learn, 在其添加 learnmain02 类,然后添加 main 方法。 这里主类需要和 javafx-maven-plugin 插件里 mainclass 属性配置的要保持一致。
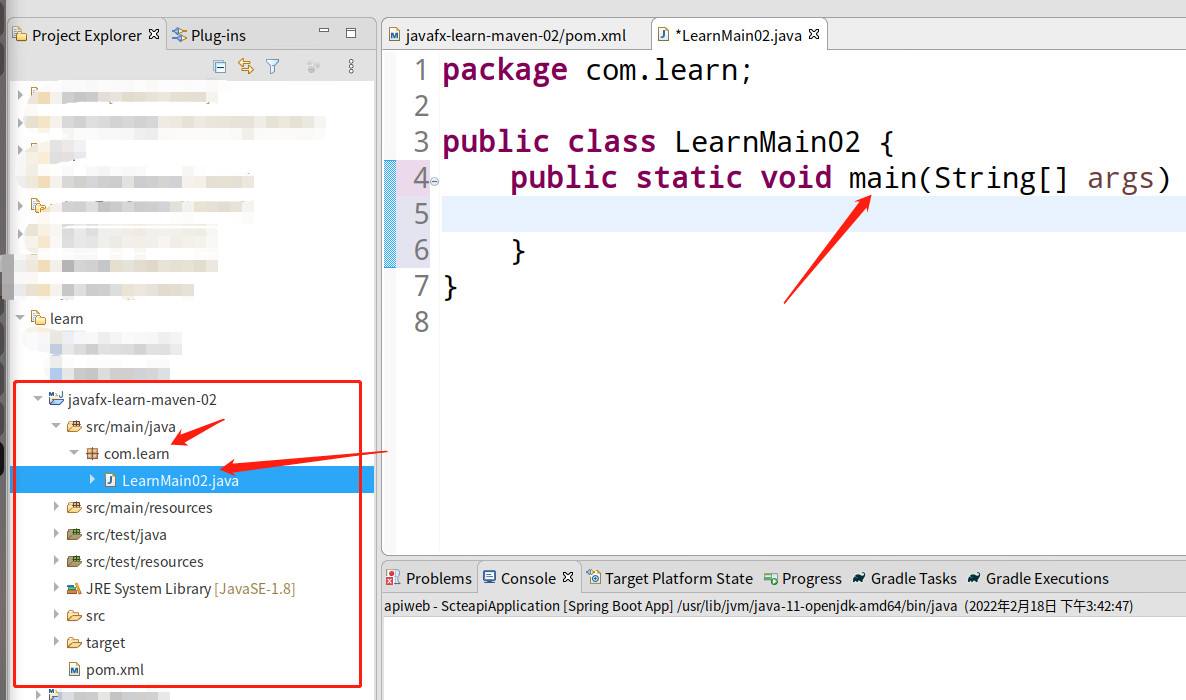
让改类继承“javafx.application.application”类,实现其start方法,然后添加main方法,main方法里启动应用,代码如下:
package com.learn;

import javafx.application.application;
import javafx.stage.stage;

public class learnmain02  extends application {

    @override
    public void start(stage primarystage) throws exception{

    }

    public static void main(string[] args) {
        launch(args);
    }
}
在 javafx 中,应用程序是由stage、scene、界面组件、容器布局等组成,stage可以简单理解为代表真个应用程序的窗口,其中scene包含在其中,scene下面包含了各种界面布局、ui控件等组件
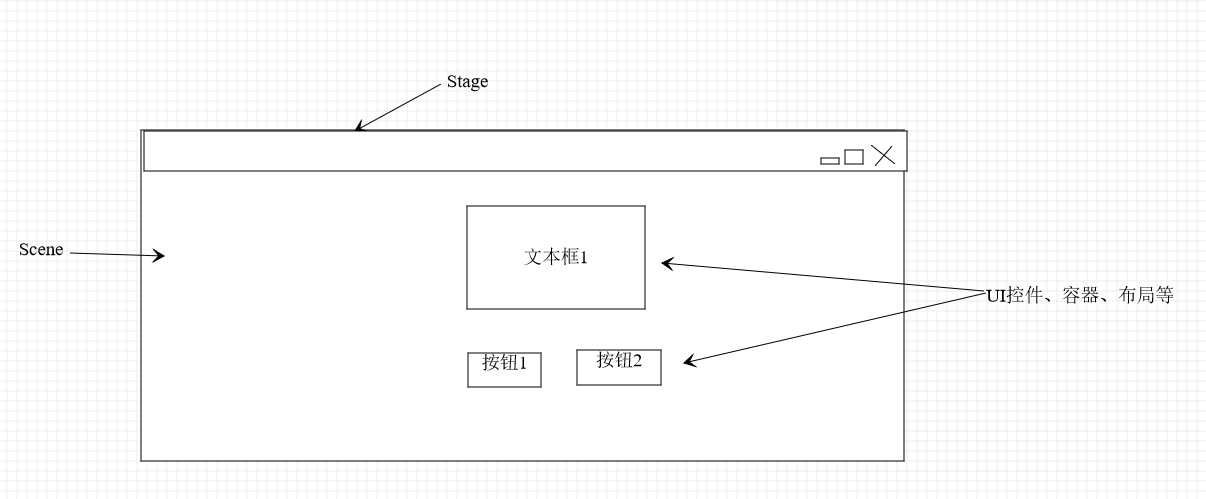
。具体可以阅读 舞台(stage)、 场景(scene) 等相关章节。
我们根据上面的思路创建一个界面:
package com.learn;

import javafx.application.application;
import javafx.stage.stage;
import javafx.scene.scene;
import javafx.scene.control.label;
import javafx.scene.layout.borderpane;

public class learnmain02 extends application {

    @override
    public void start(stage primarystage) throws exception{
    	//创建一个borderpane布局
			borderpane rootpane = new borderpane();

			//创建一个label标签,将其添加到布局的中心
			label label = new label("hello world!!!");
			rootpane.setcenter(label);

			// 创建一个800*640大小的scene,关联其布局
			scene scene = new scene(rootpane, 800, 640);

			// 设置stage的scene、标题,然后显示
			primarystage.setscene(scene);
			primarystage.settitle("javafx maven 学习示例");
			primarystage.show();
    }

    public static void main(string[] args) {
        launch(args);
    }
}
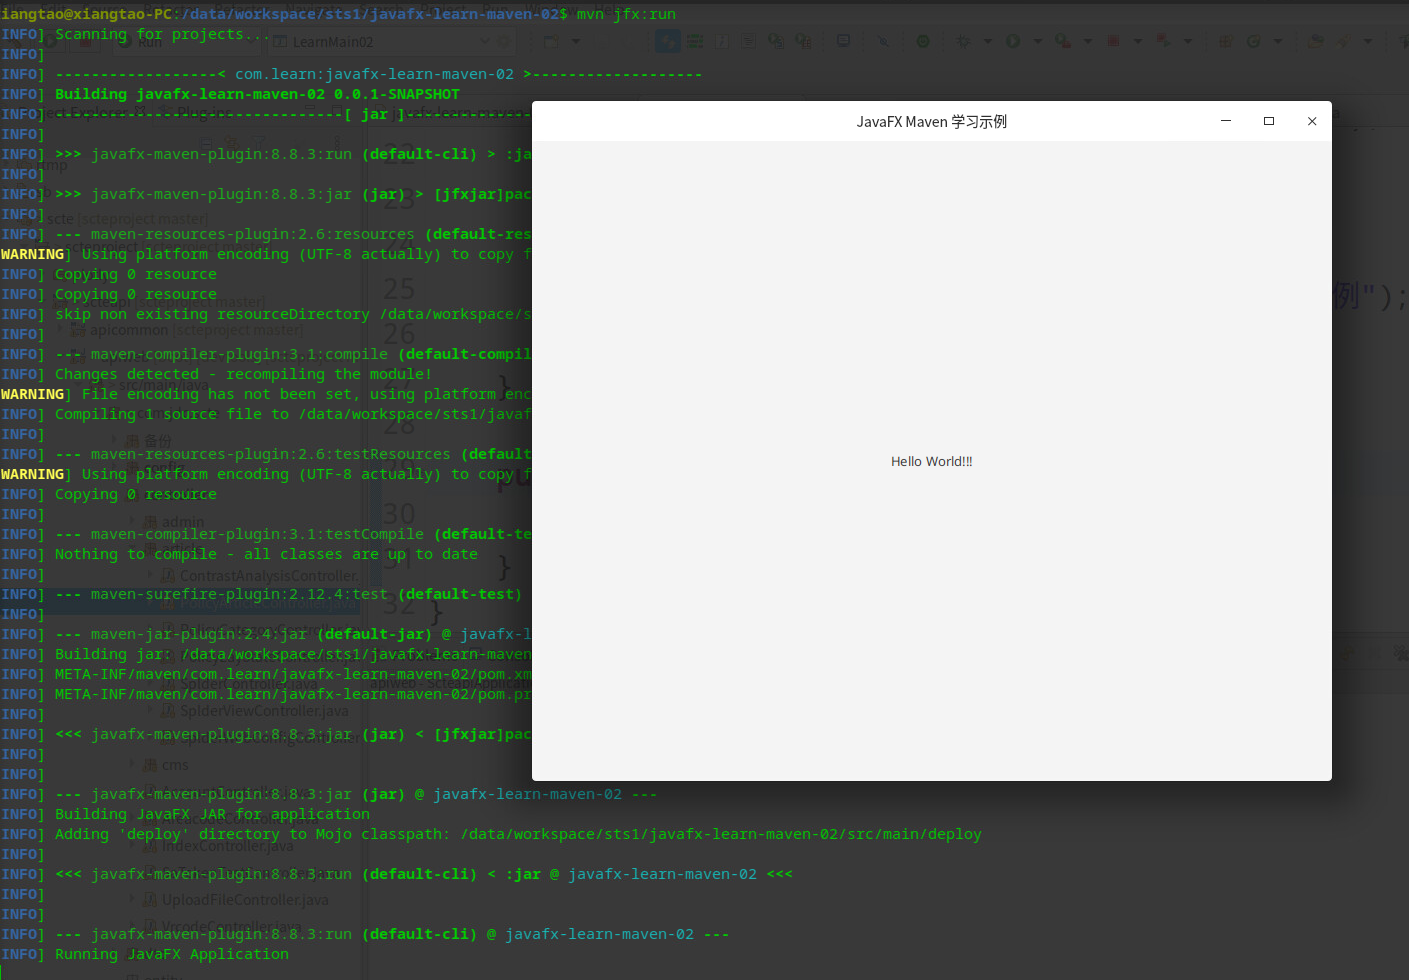
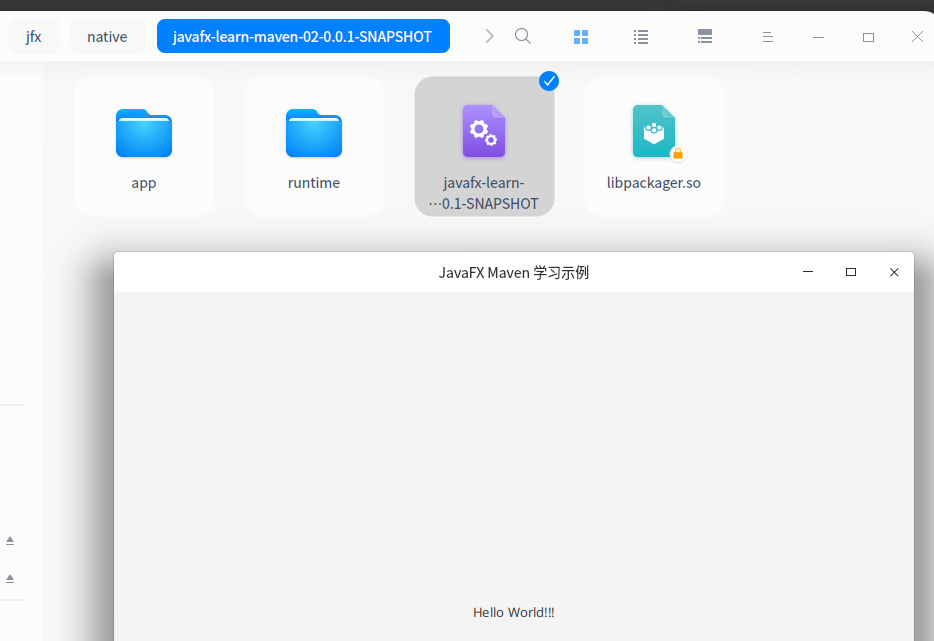
运行结果如下:

使用插件命令运行、打包
1. liunx(deepin)
打开命令行或者终端,进入到项目根目录。

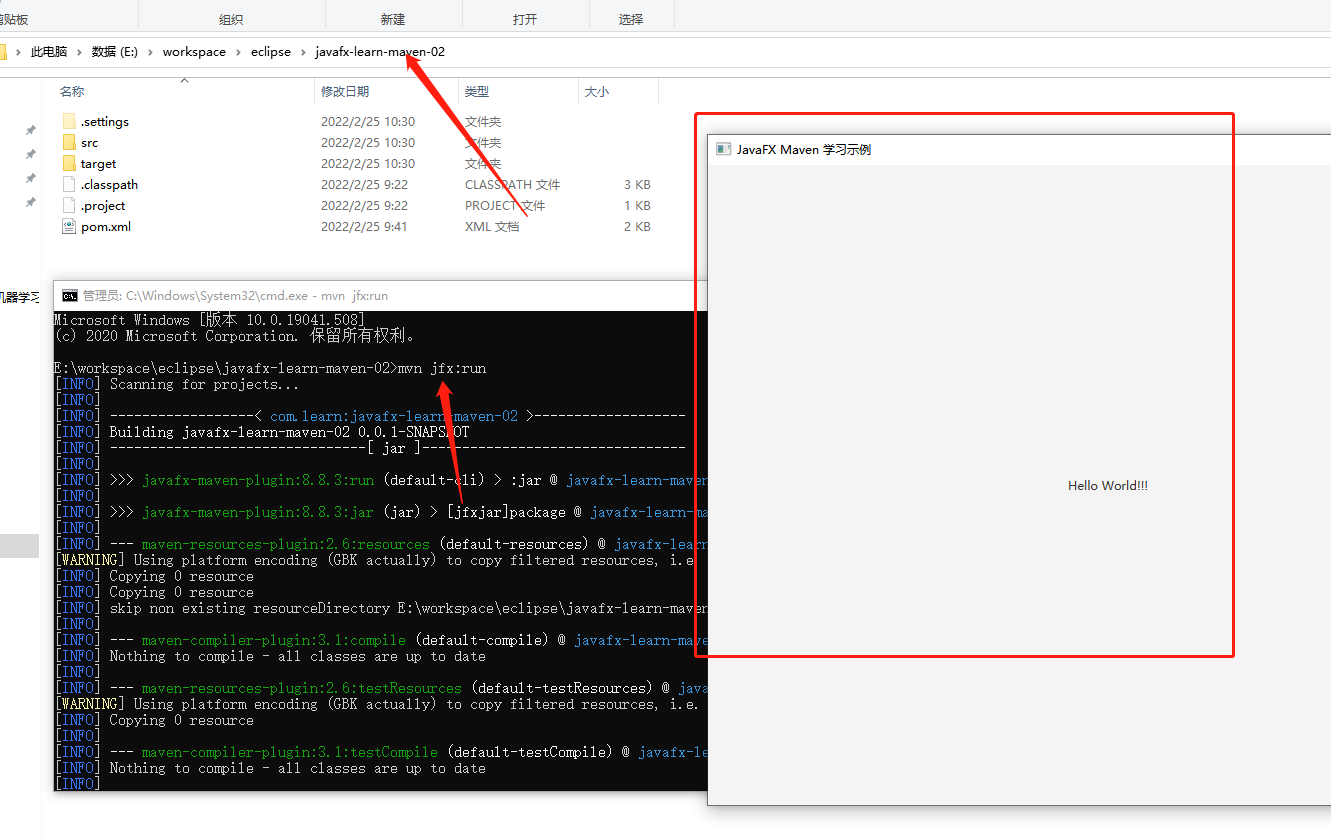
执行命令mvn jfx:run 运行 javafx 项目:
执行命令 mvn jfx:native 或者 mvn package jfx:native 打包 javafx 项目:
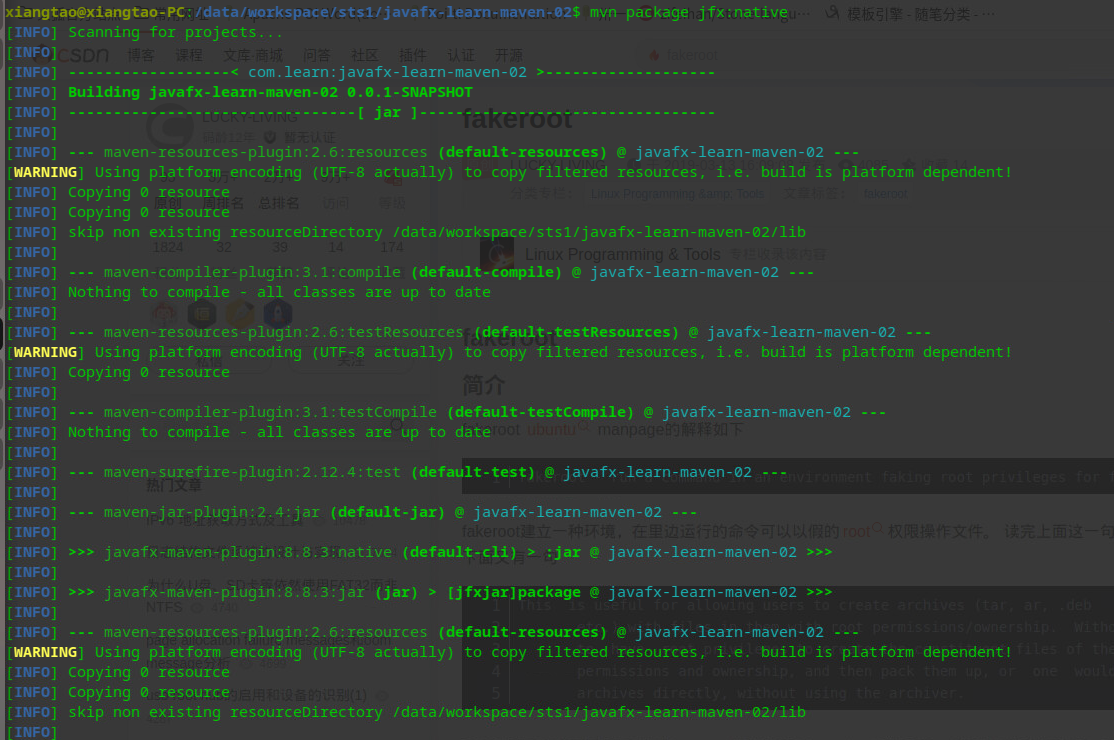
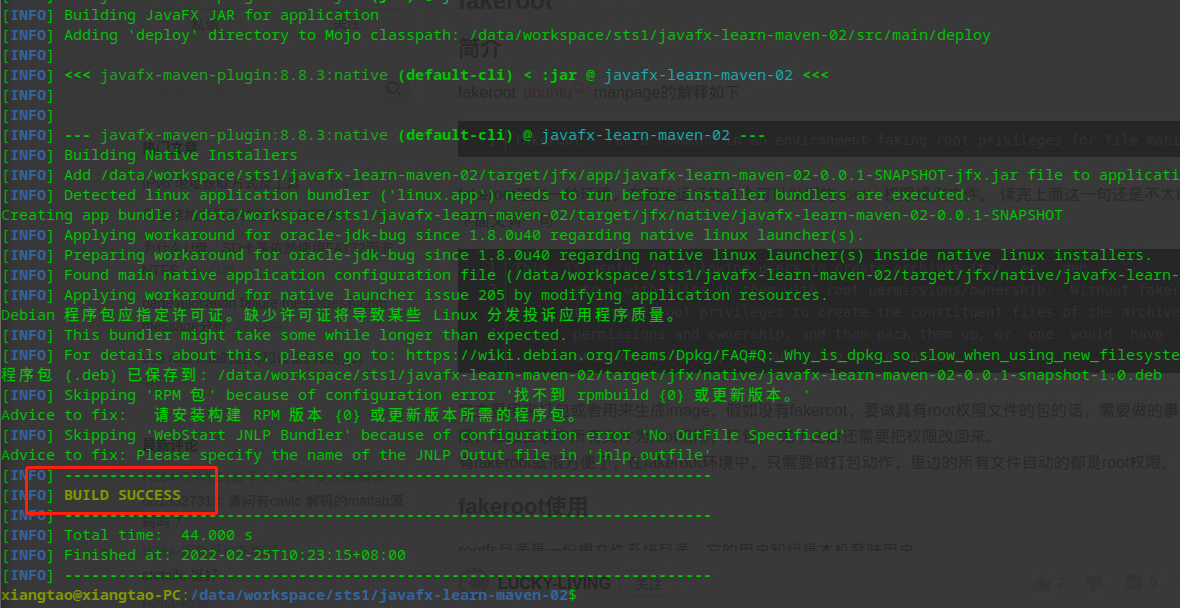
则在target/jfx目录下会生成打包后的deb文件和能直接运行的二进制文件。
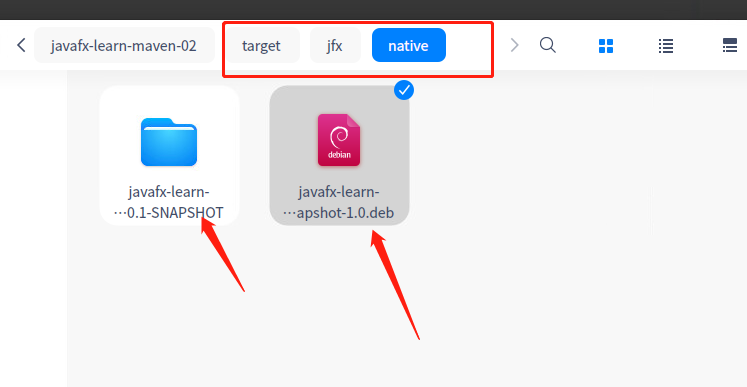
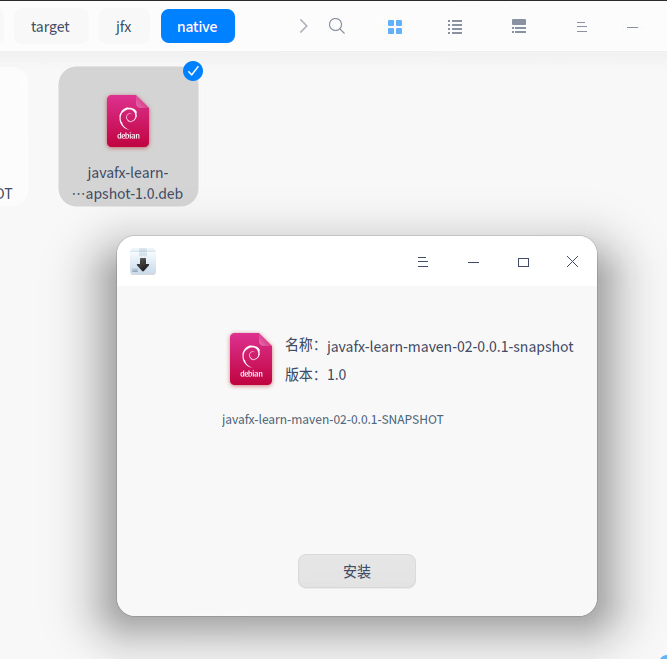
deb文件可以直接安装后使用:
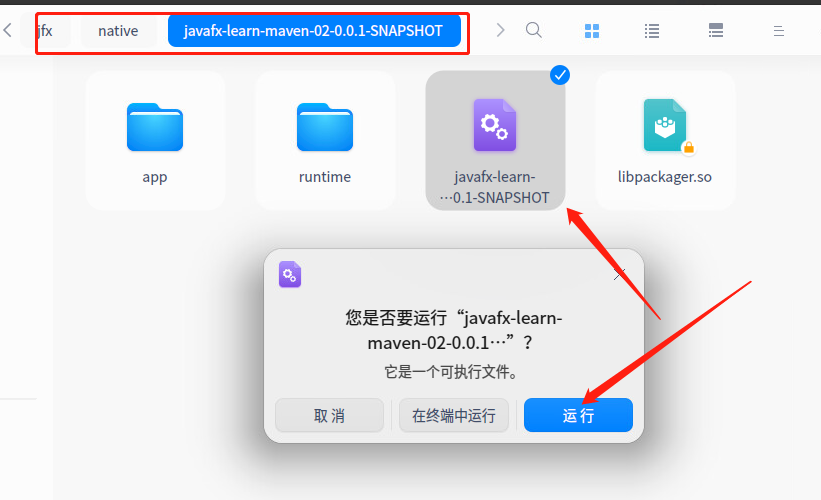
javafx-learn-maven-02-0.0.1-snapshot 目录下的二进制文件可以直接运行:
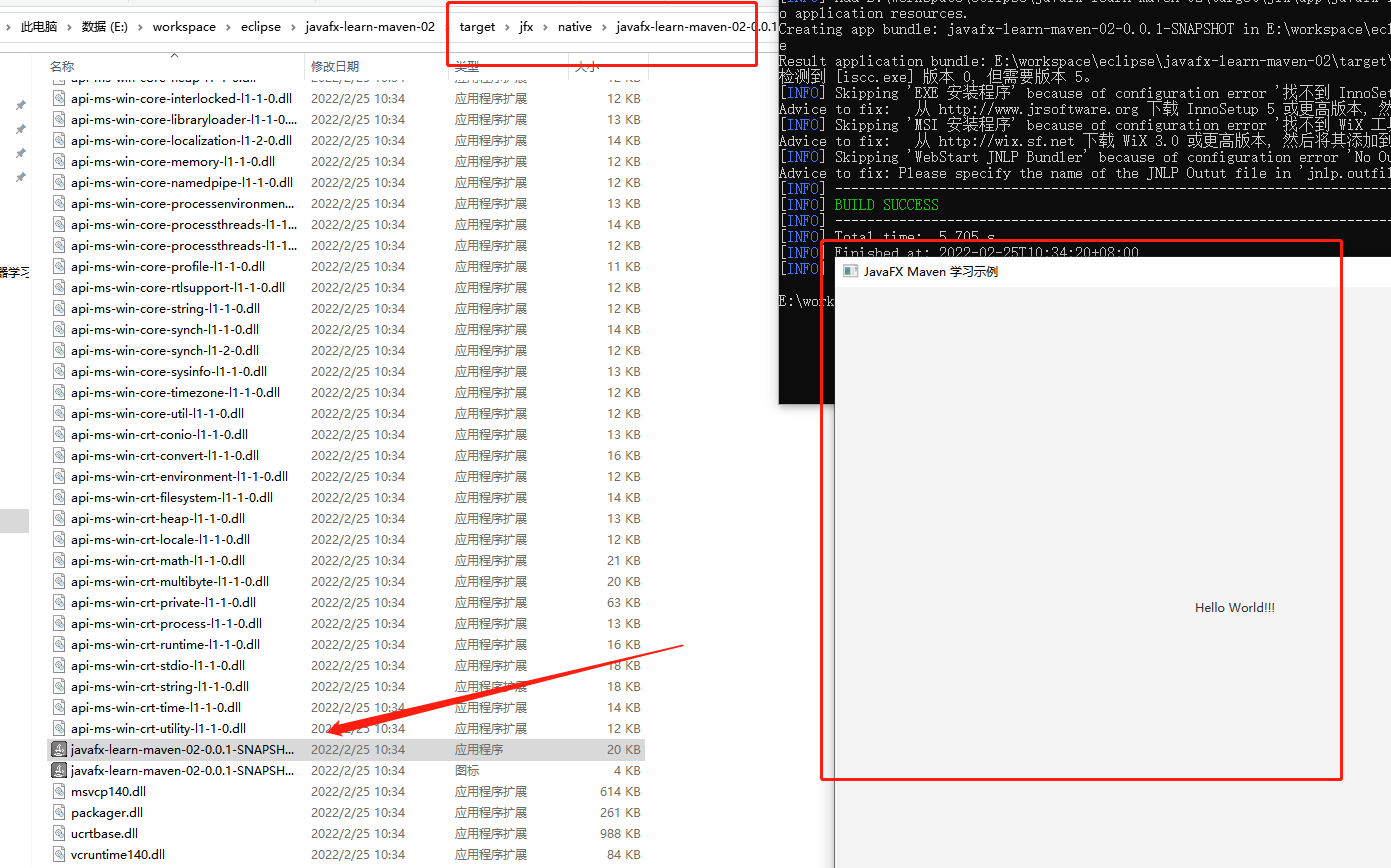
2. window
cmd打开项目执行 mvn jfx:run 可以运行项目:
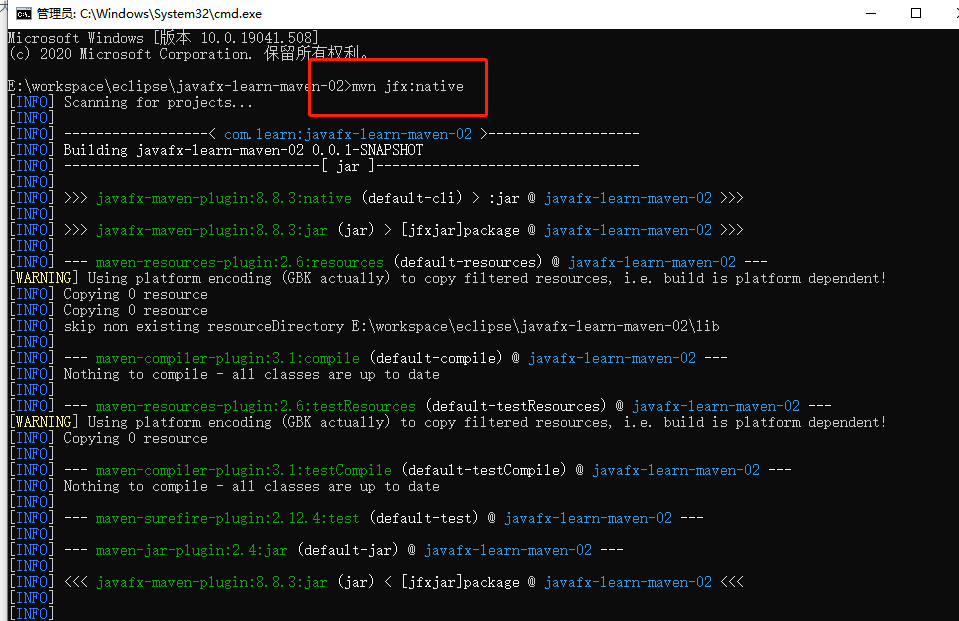
执行 mvn jfx:native 或者 mvn package jfx:native 打包项目:
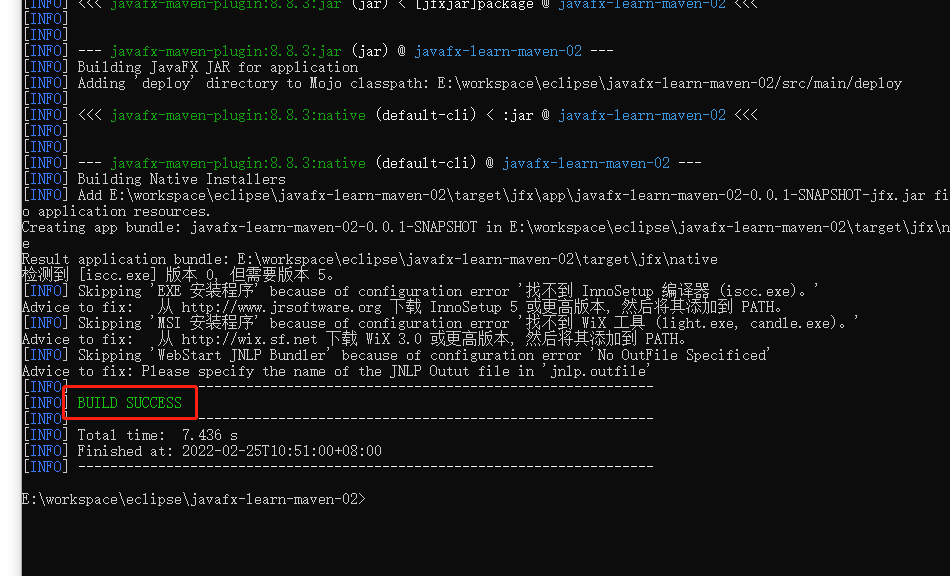
如果电脑里安装了 innosetup 的话它还会打包为一个点击下一步,下一步类似的安装的程序,我电脑里没有安装该软件,所以跳过了安装程序的生成,只打包了一个可直接运行的绿色软件。
双击exe运行:
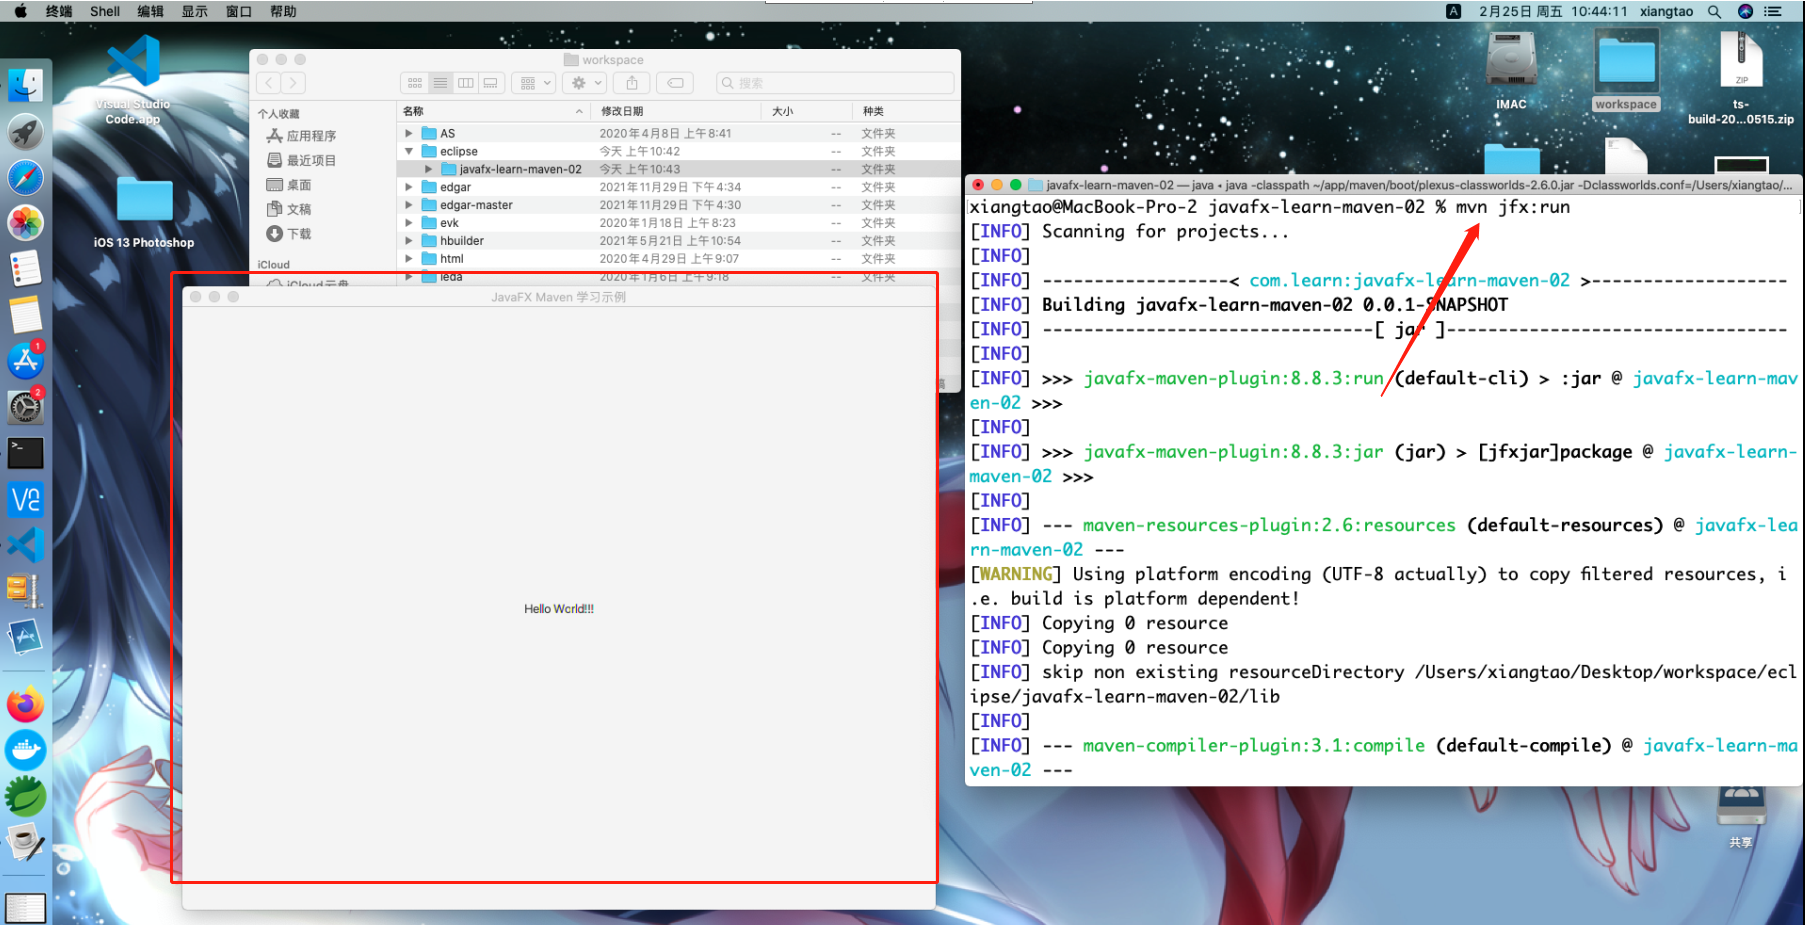
3. mac
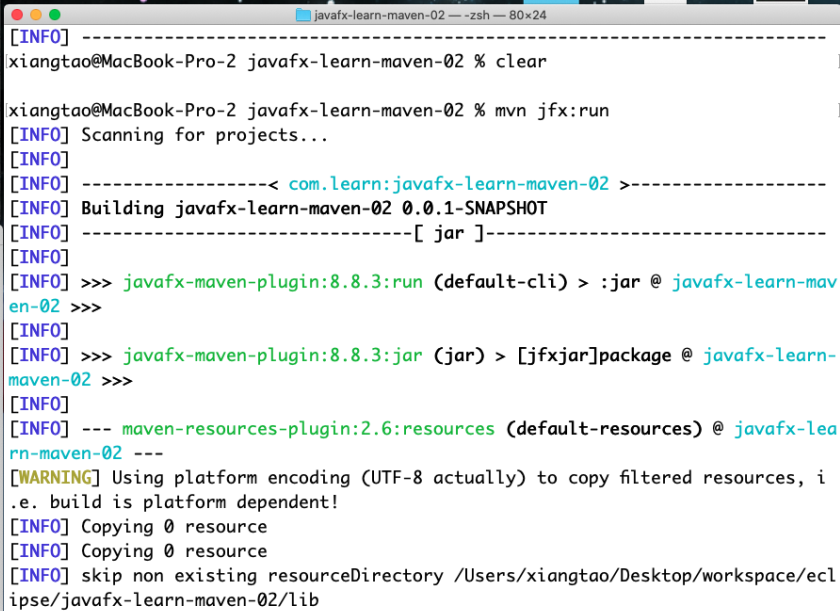
终端打开项目执行 mvn jfx:run 可以运行项目:
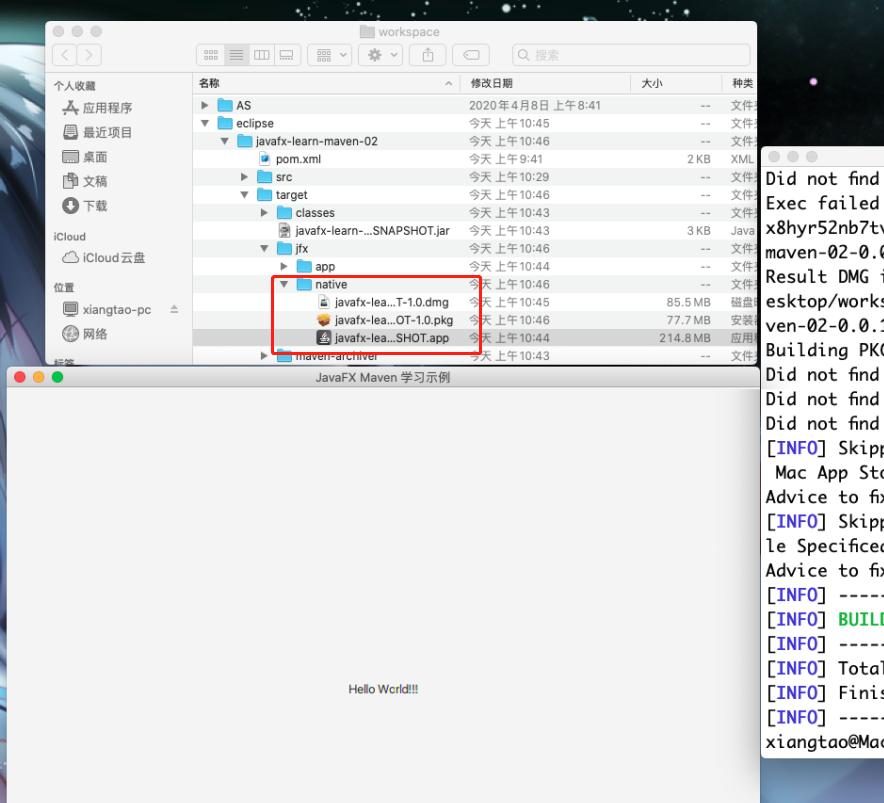
执行 mvn jfx:native 或者 mvn package jfx:native 打包项目:
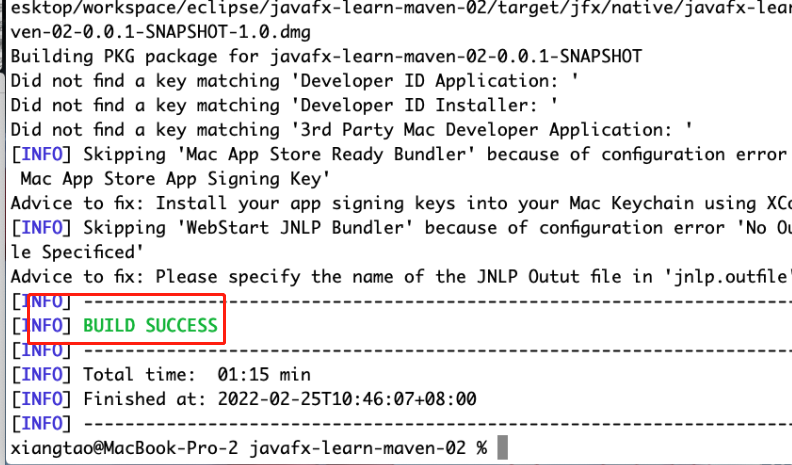
打包成功后,在 target/jfx/native 目录下会生成打包文件,这里我点击javafx...app运行效果如下:


发表评论