目录
用dreambooth对stable-diffusion-v1-5模型进行微调
(一)模型下载和环境配置
- 准备好需要微调的模型如stable-diffusion-v1-5模型
- 下载diffusers模型并进入diffusers文件夹下载相关包
git clone https://github.com/huggingface/diffusers
cd diffusers
pip install .
- 进入dreambooth文件夹下载相关包
cd examples/dreambooth
pip install -r requirements.txt
(二)数据集准备
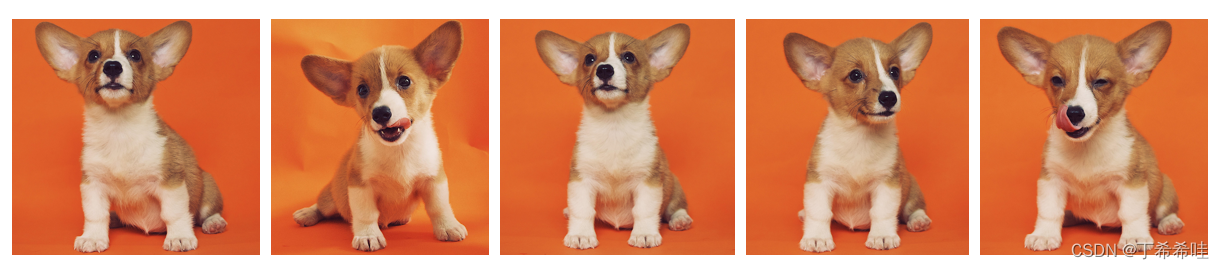
官方样例提供的数据为五张小狗照片,下载完毕后放入任意一个文件夹即可
 如果是自己的数据集,准备好图片后放入一个指定文件夹即可

(三)模型微调
- 加速器默认配置
accelerate config default
- 运行train_dreambooth文件
accelerate launch train_dreambooth.py \
  --pretrained_model_name_or_path="./stable-diffusion-v1-5"  \
  --instance_data_dir="./image_data" \
  --output_dir="./outputs" \
  --instance_prompt="a photo of a sks dog" \
  --resolution=512 \
  --train_batch_size=1 \
  --gradient_accumulation_steps=1 \
  --learning_rate=5e-6 \
  --lr_scheduler="constant" \
  --lr_warmup_steps=0 \
  --max_train_steps=400
(四)运行微调后的模型
新建一个python文件(如取名为train),保存以下代码,将对应的模型路径、prompt内容和图片名进行修改即可。
from diffusers import diffusionpipeline
import torch

pipeline = diffusionpipeline.from_pretrained("path_to_saved_model", torch_dtype=torch.float16, use_safetensors=true).to("cuda")
image = pipeline("a photo of sks dog in a bucket", num_inference_steps=50, guidance_scale=7.5).images[0]
image.save("dog-bucket.png")
运行上述python文件
python train.py
最终结果为:

用lora对stable-diffusion-v1-5模型进行微调
(一)模型下载和环境配置
- 准备好需要微调的模型如stable-diffusion-v1-5模型
- 下载diffusers模型并进入diffusers文件夹下载相关包
git clone https://github.com/huggingface/diffusers
cd diffusers
pip install .
- 进入text_to_image文件夹下载相关包
cd examples/text_to_image
pip install -r requirements.txt
(二)数据集准备
官方样例提供的数据为pokemon-blip-captions图,下载完毕后放入任意一个文件夹即可

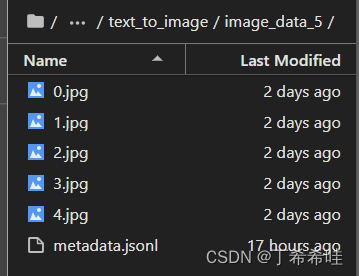
如果是自己的数据集,则需要在数据文件夹下放入相关图片和一个名为metadata.jsonl的文件(可以通过txt文件输入相关内容后修改后缀名即可),其中metadata.jsonl文件中的内容为图像名和对应的提示文本:

(三)模型微调
- 加速器默认配置
accelerate config default
- 运行text_to_image_lora.py文件
accelerate launch train_text_to_image_lora.py \
  --pretrained_model_name_or_path="../dreambooth/stable-diffusion-v1-5" \
  --dataset_name="./pokemon-blip-captions" \
  --dataloader_num_workers=8 \
  --resolution=512 \
  --center_crop \
  --random_flip \
  --train_batch_size=1 \
  --gradient_accumulation_steps=4 \
  --max_train_steps=15000 \
  --learning_rate=1e-04 \
  --max_grad_norm=1 \
  --lr_scheduler="cosine" \
  --lr_warmup_steps=0 \
  --output_dir="./output" \
  --hub_model_id="pokemon-lora" \
  --checkpointing_steps=500 \
  --validation_prompt="a pokemon with blue eyes." \
  --seed=1337
(四)运行微调后的模型
新建一个python文件(如取名为train),保存以下代码,将对应的模型路径、prompt内容和图片名进行修改即可。
from diffusers import autopipelinefortext2image
import torch

pipeline = autopipelinefortext2image.from_pretrained("runwayml/stable-diffusion-v1-5", torch_dtype=torch.float16).to("cuda")
pipeline.load_lora_weights("path/to/lora/model", weight_name="pytorch_lora_weights.safetensors")
image = pipeline("a pokemon with blue eyes").images[0]
image.save("pokemon.png")
运行上述python文件
python train.py
最终结果为:


发表评论