文章目录
使用nginx在无域名情况下使用免费证书设置https
本文学习自大佬的博客,该博客的跳转链接为https://blog.csdn.net/yxjie2/article/details/126163577。以这篇博客的知识为基础,我将我的centos上的服务成功配置为使用https://124.221.87.224跳转进入,而且没有设置域名,ssl证书也是免费的。
1.获取ssl证书
1.1 生成ssl密钥
进入网站免费生成csr文件,链接具体为https://csr.chinassl.net/generator-csr.html,输入如图内容。域名就填写ip地址即可,也可以设置真正的域名。
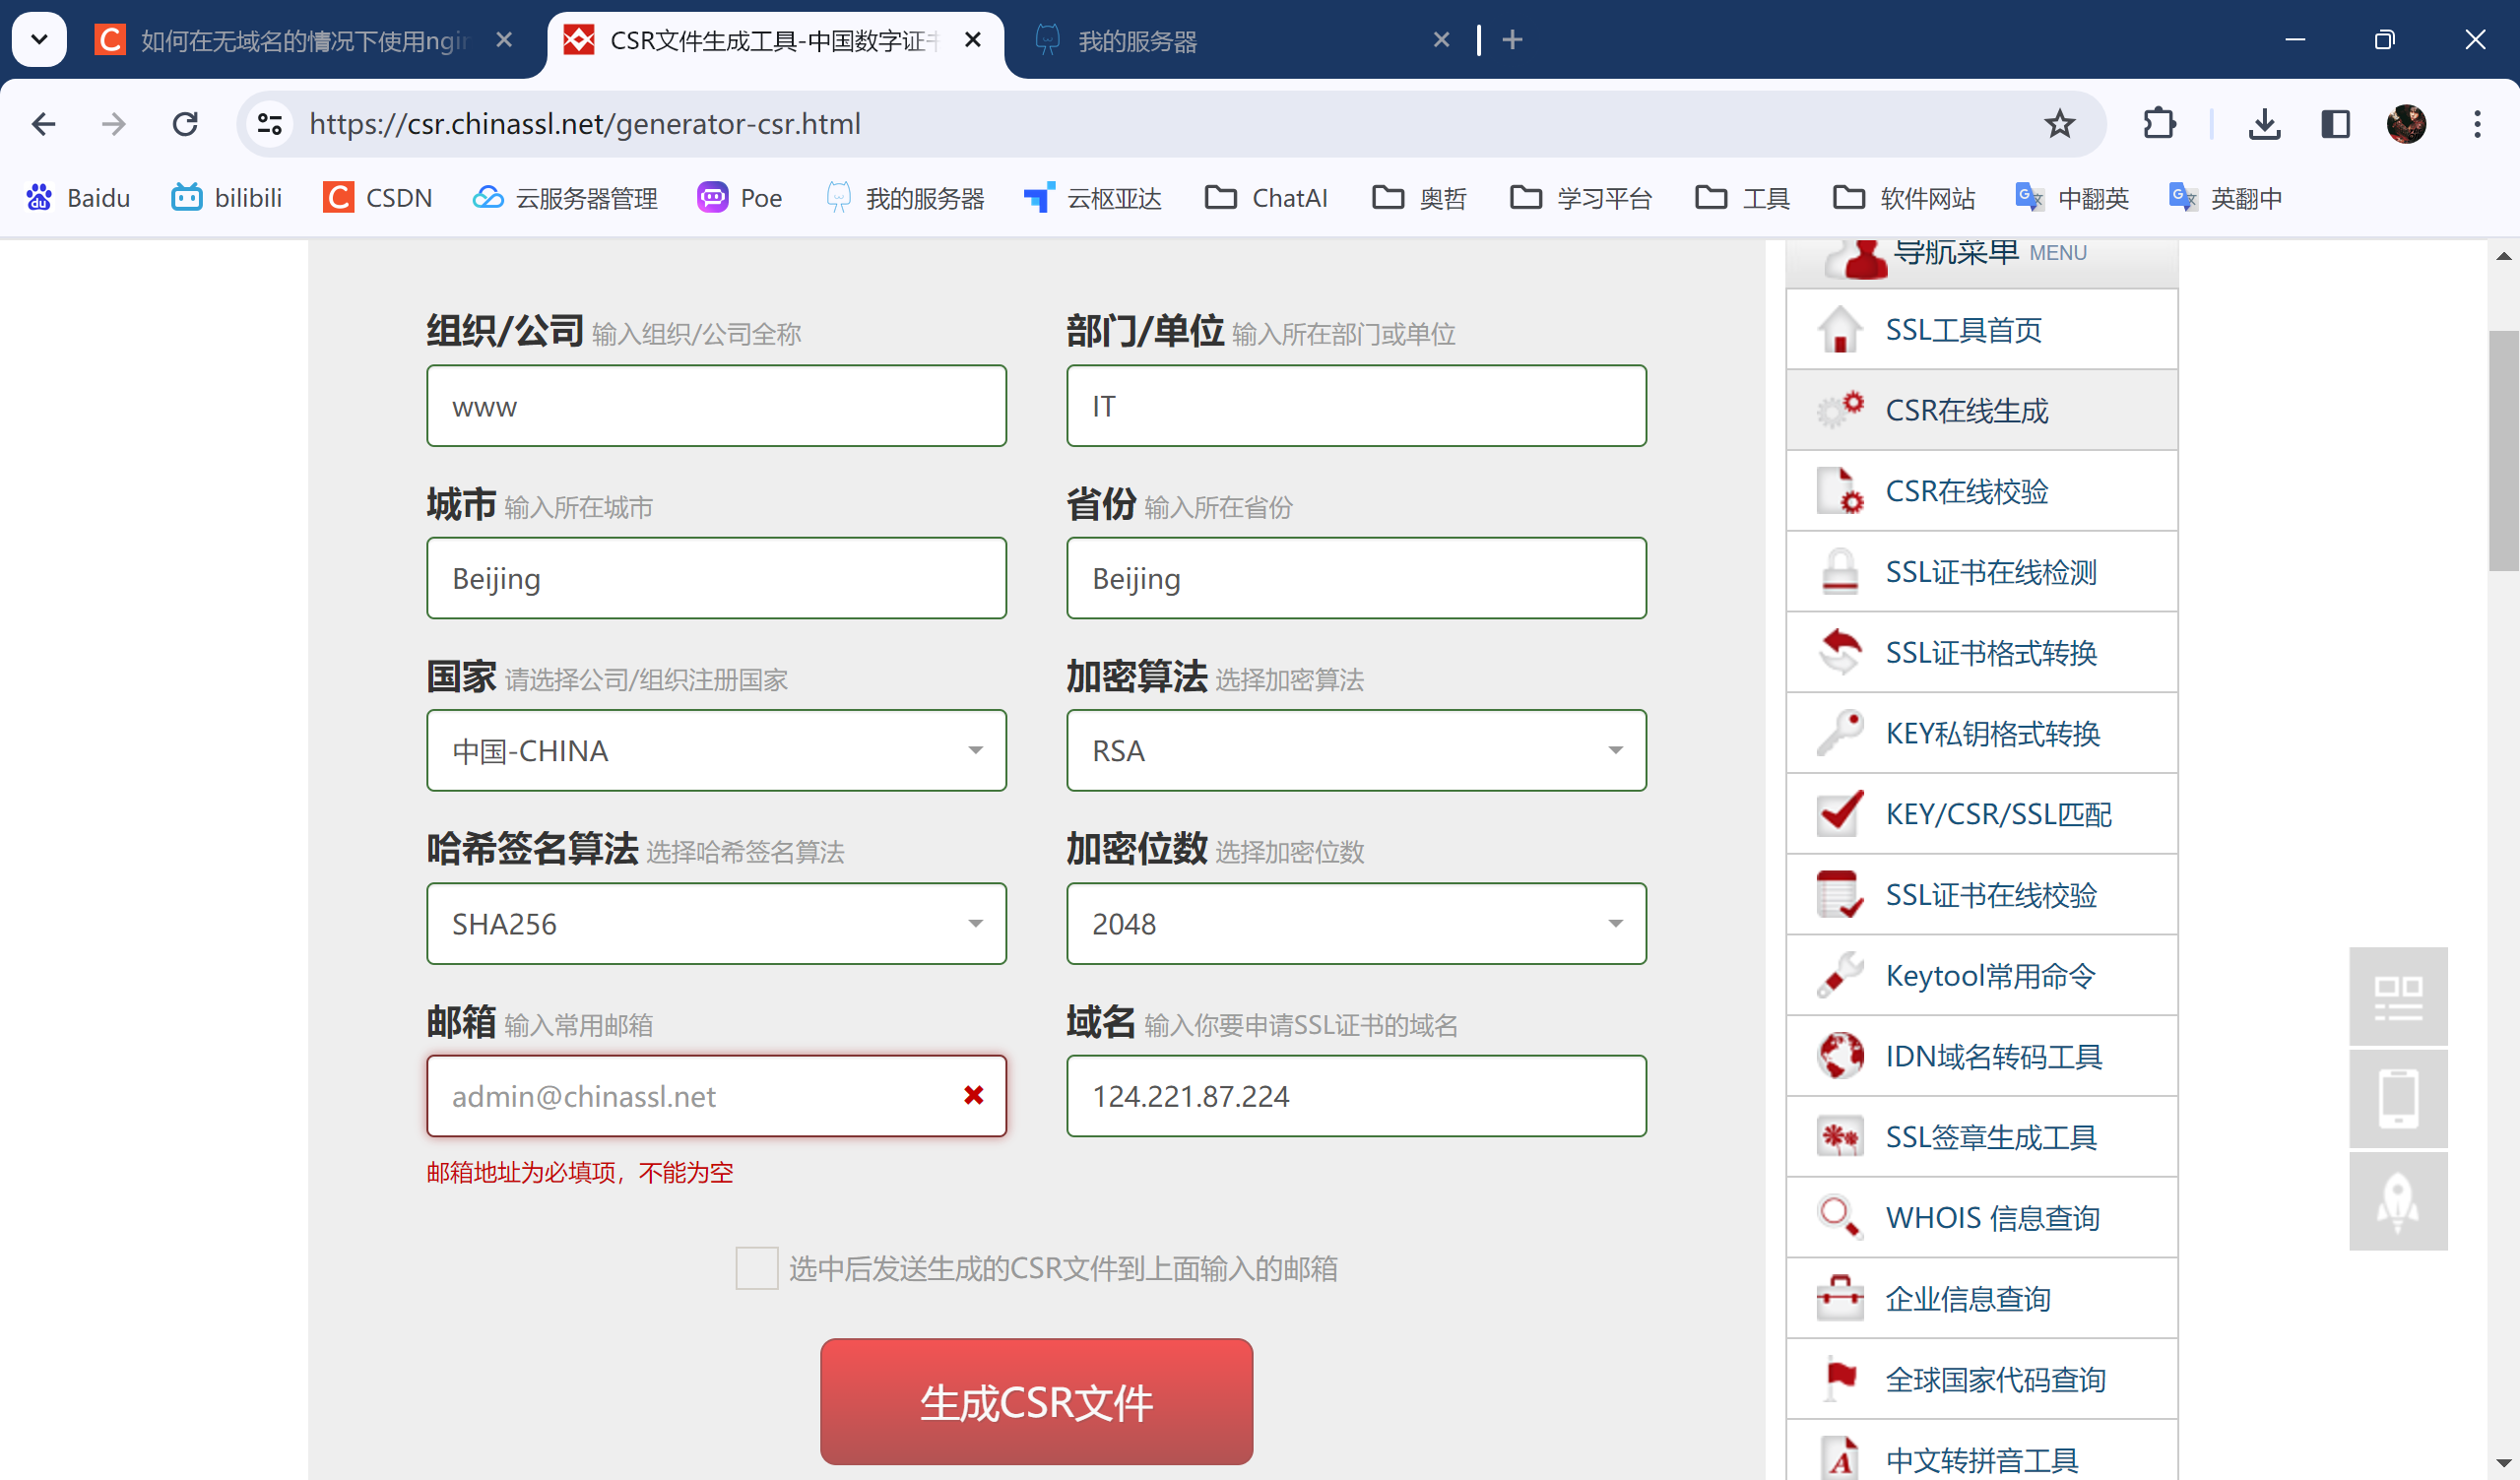
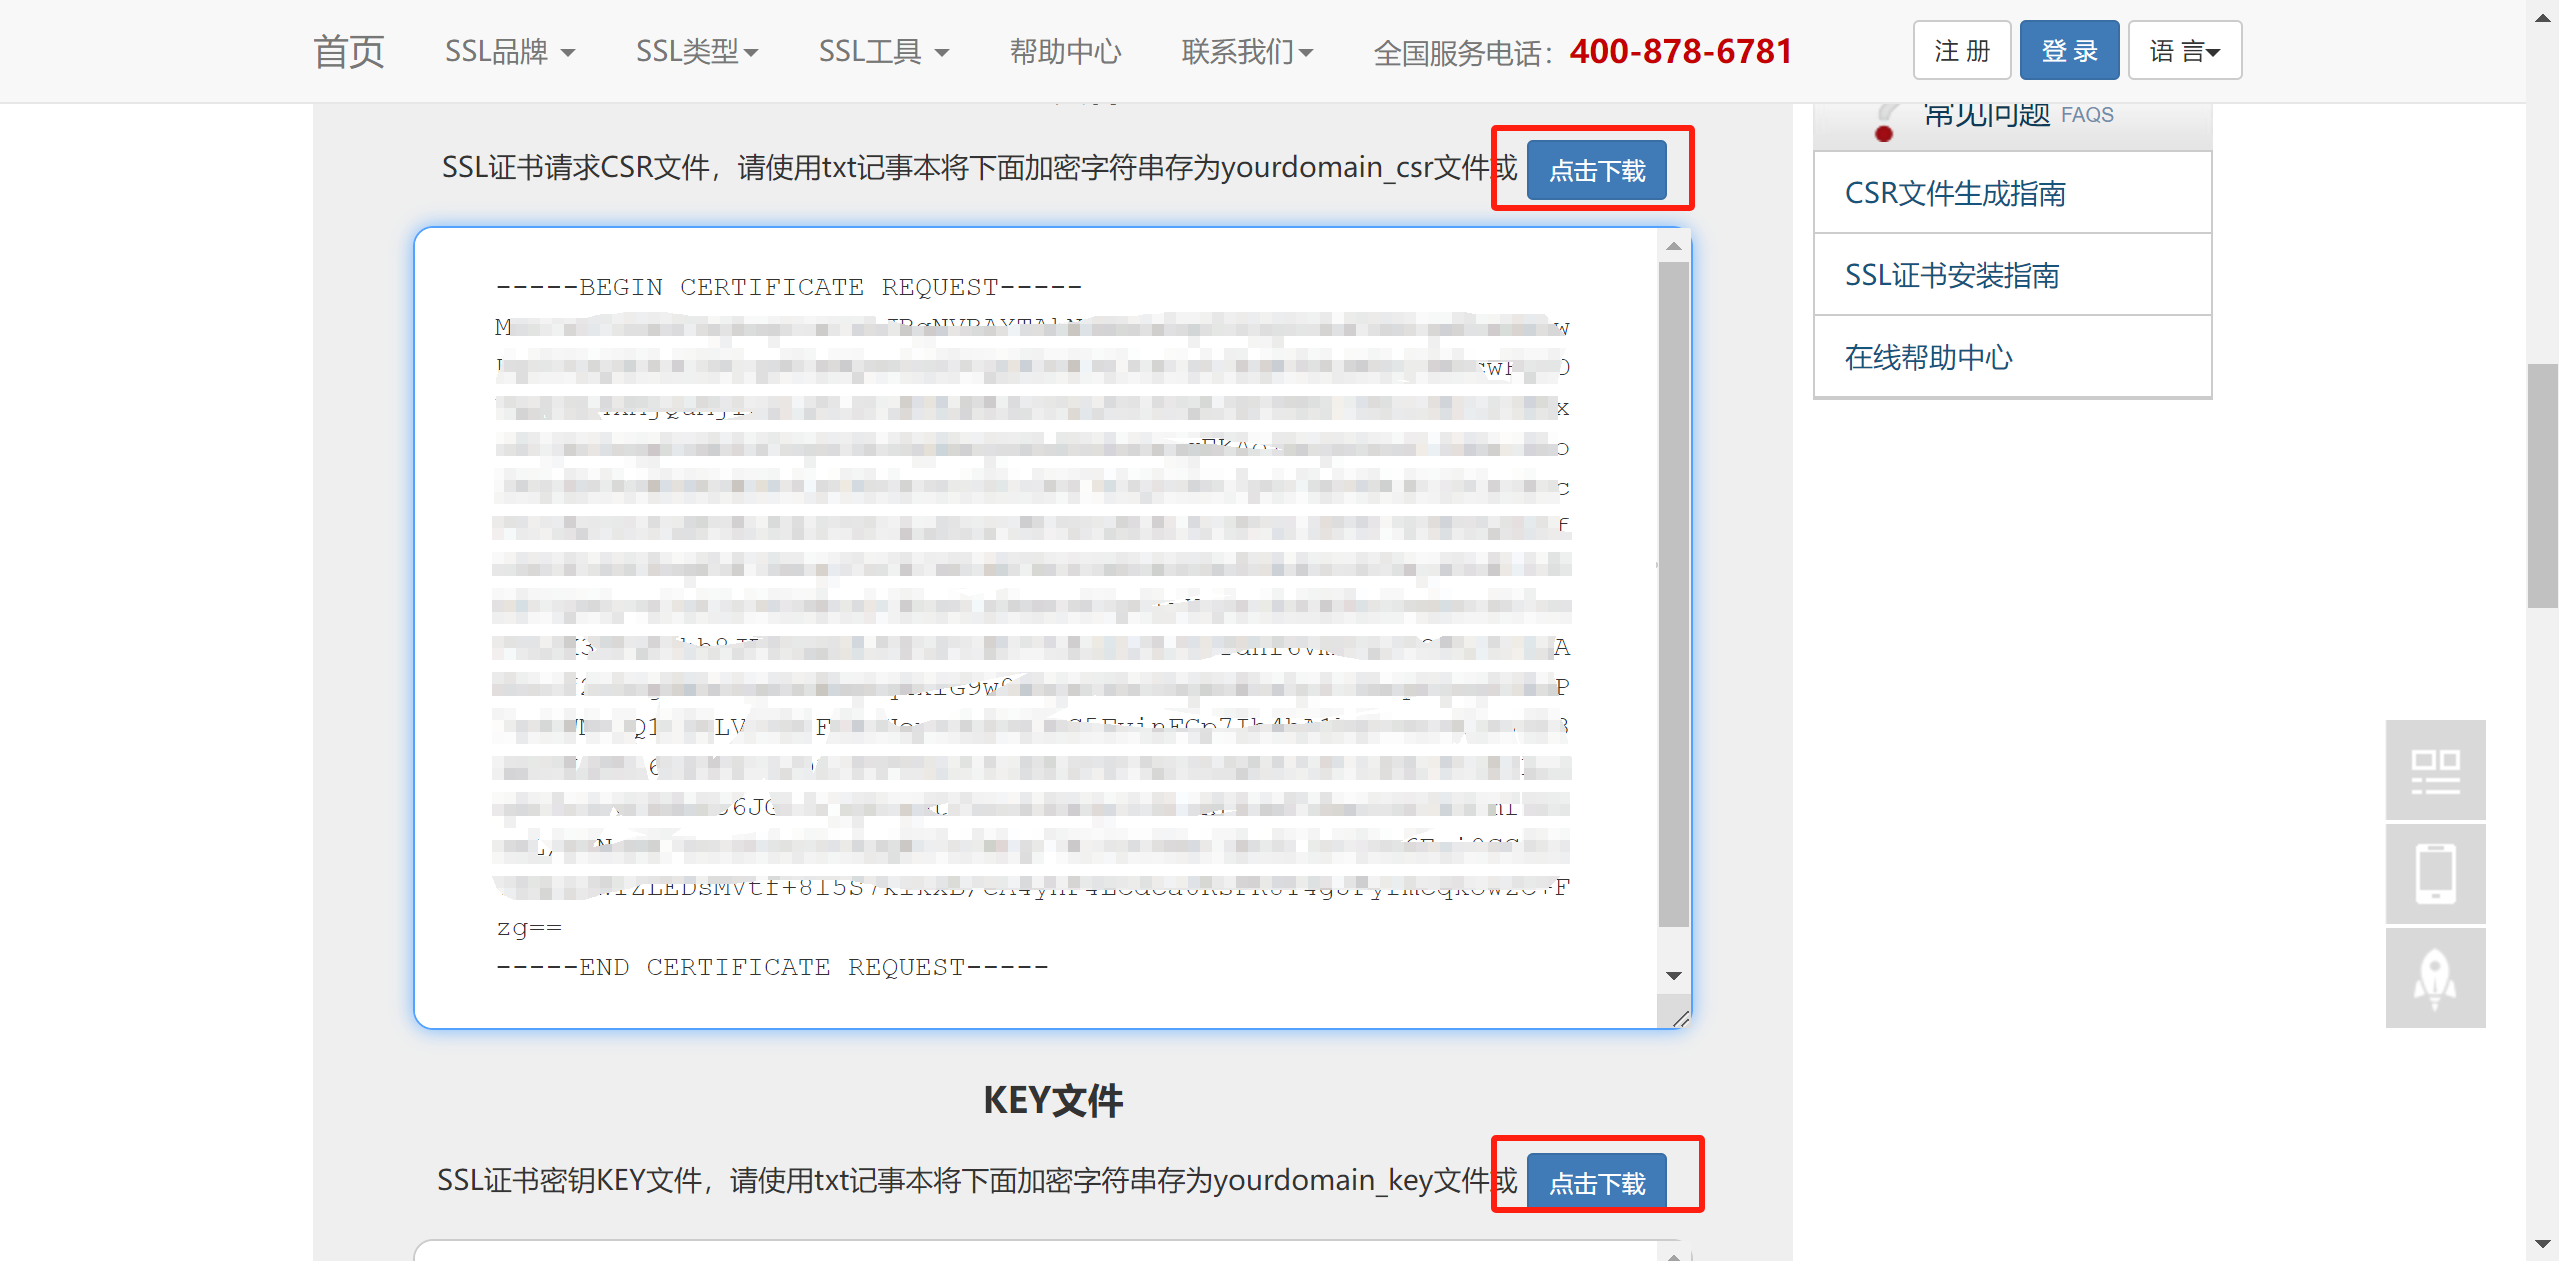
然后点击按钮,生成csr文件。将出现如下两个文本框,点击下载,以我的ip为例子,将获得文件124.221.87.224_csr.txt和124.221.87.224_key.txt。
1.2 生成ssl证书
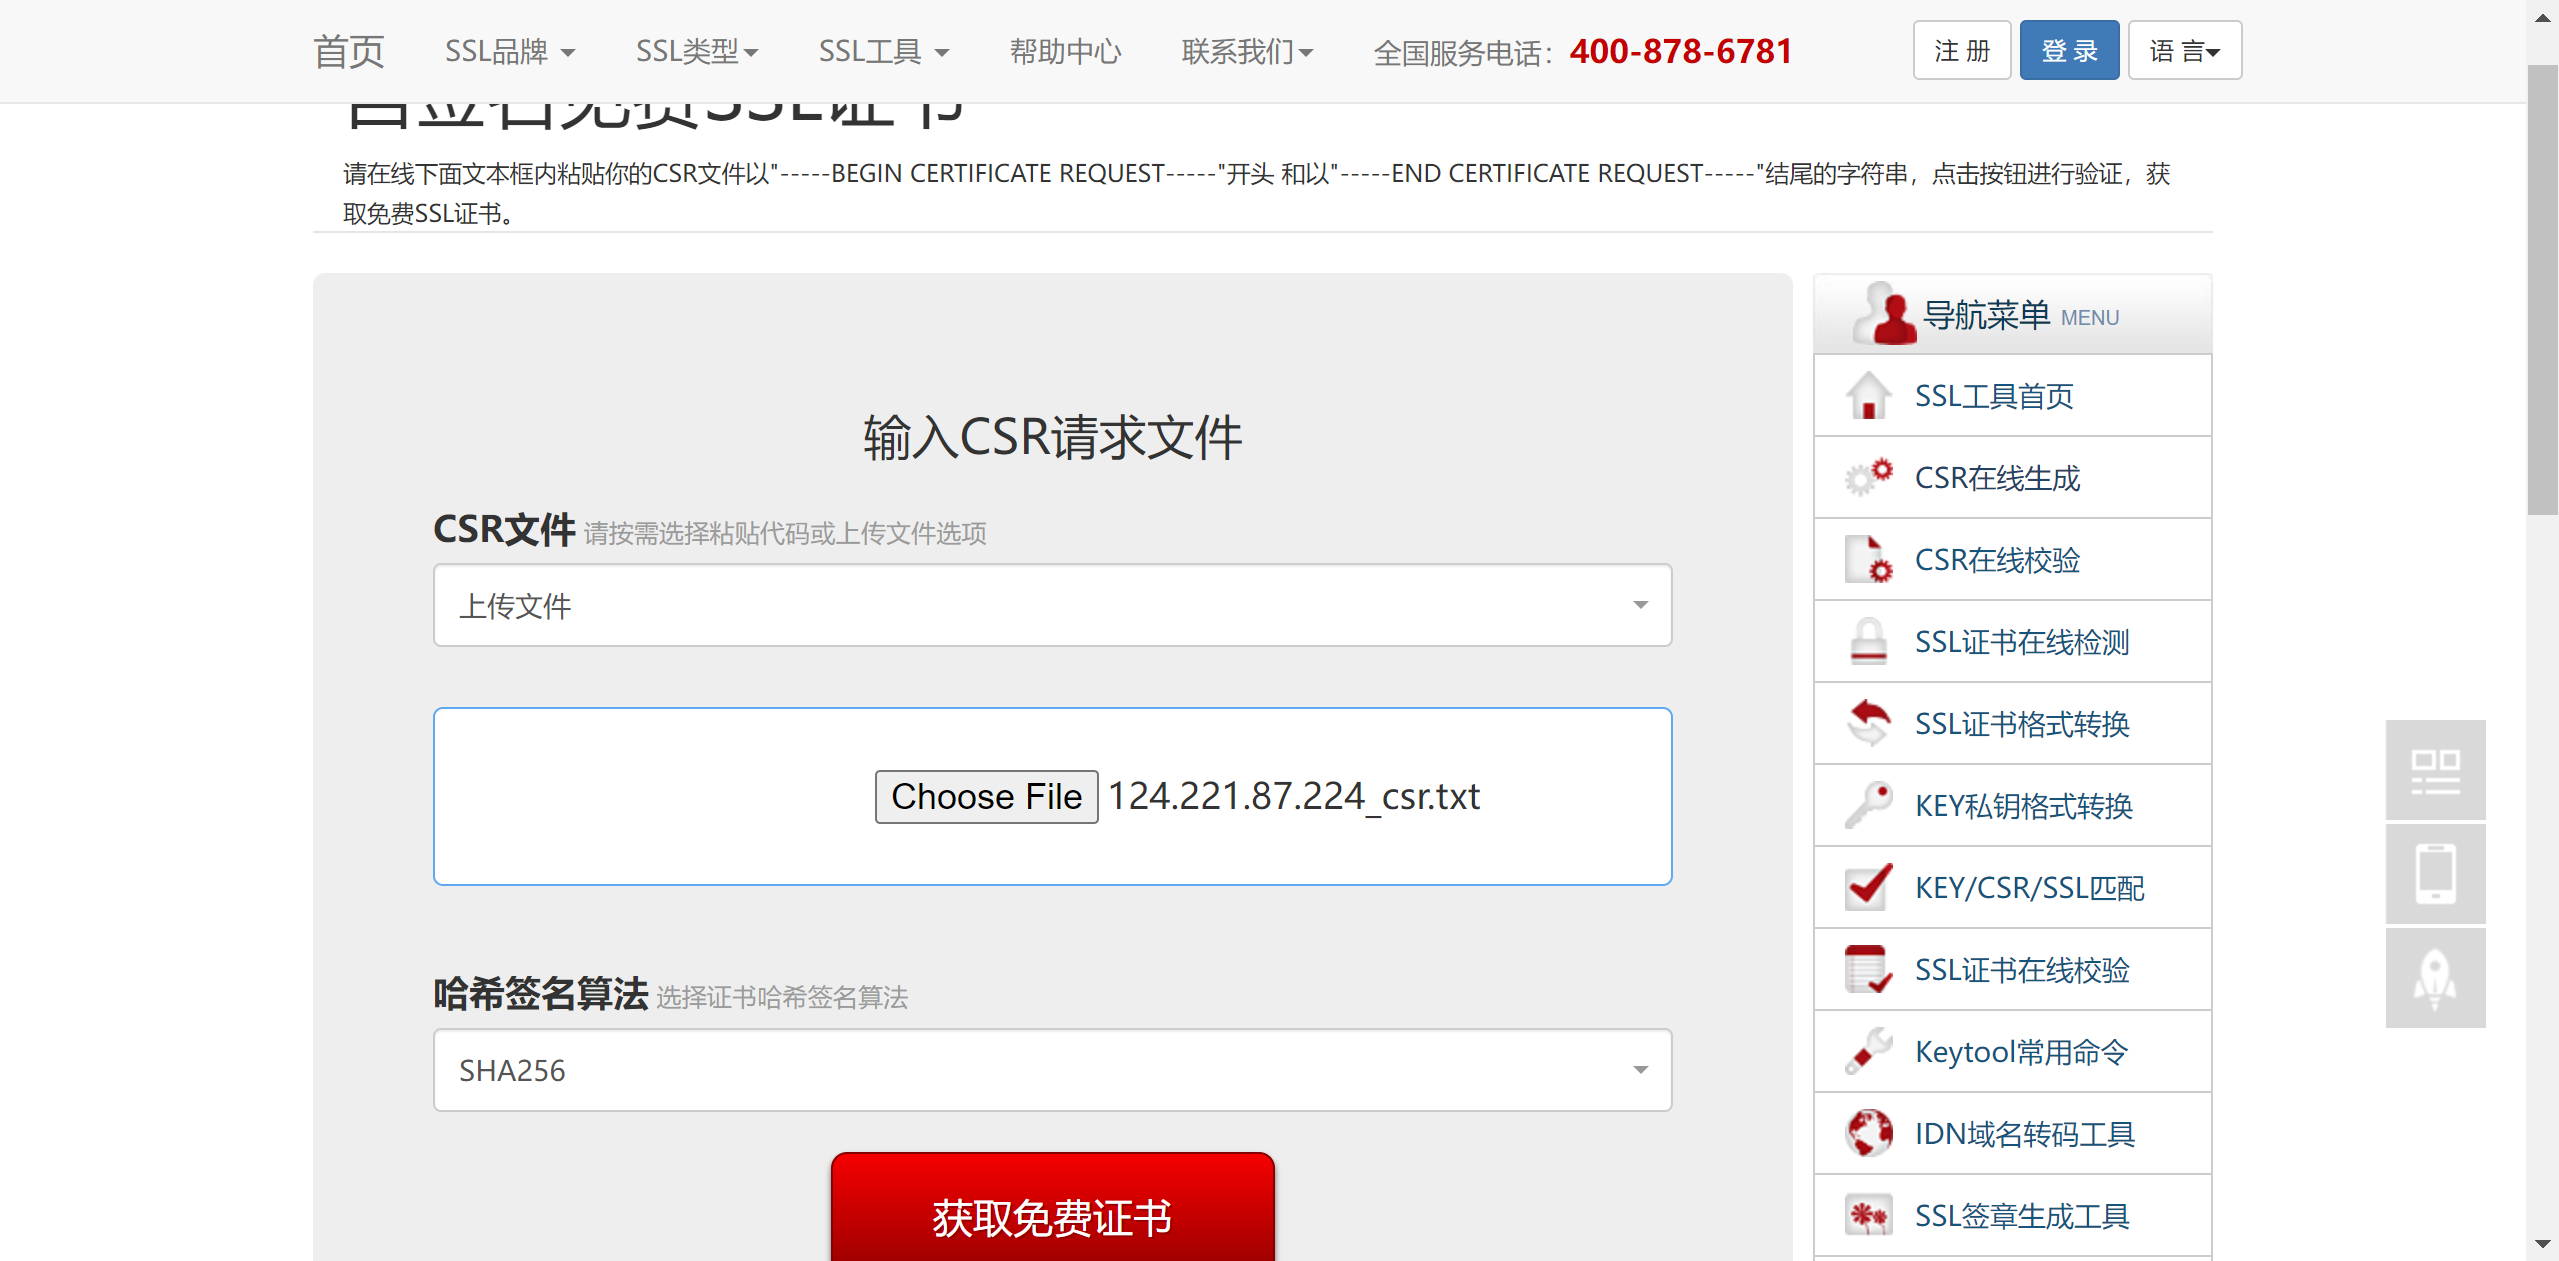
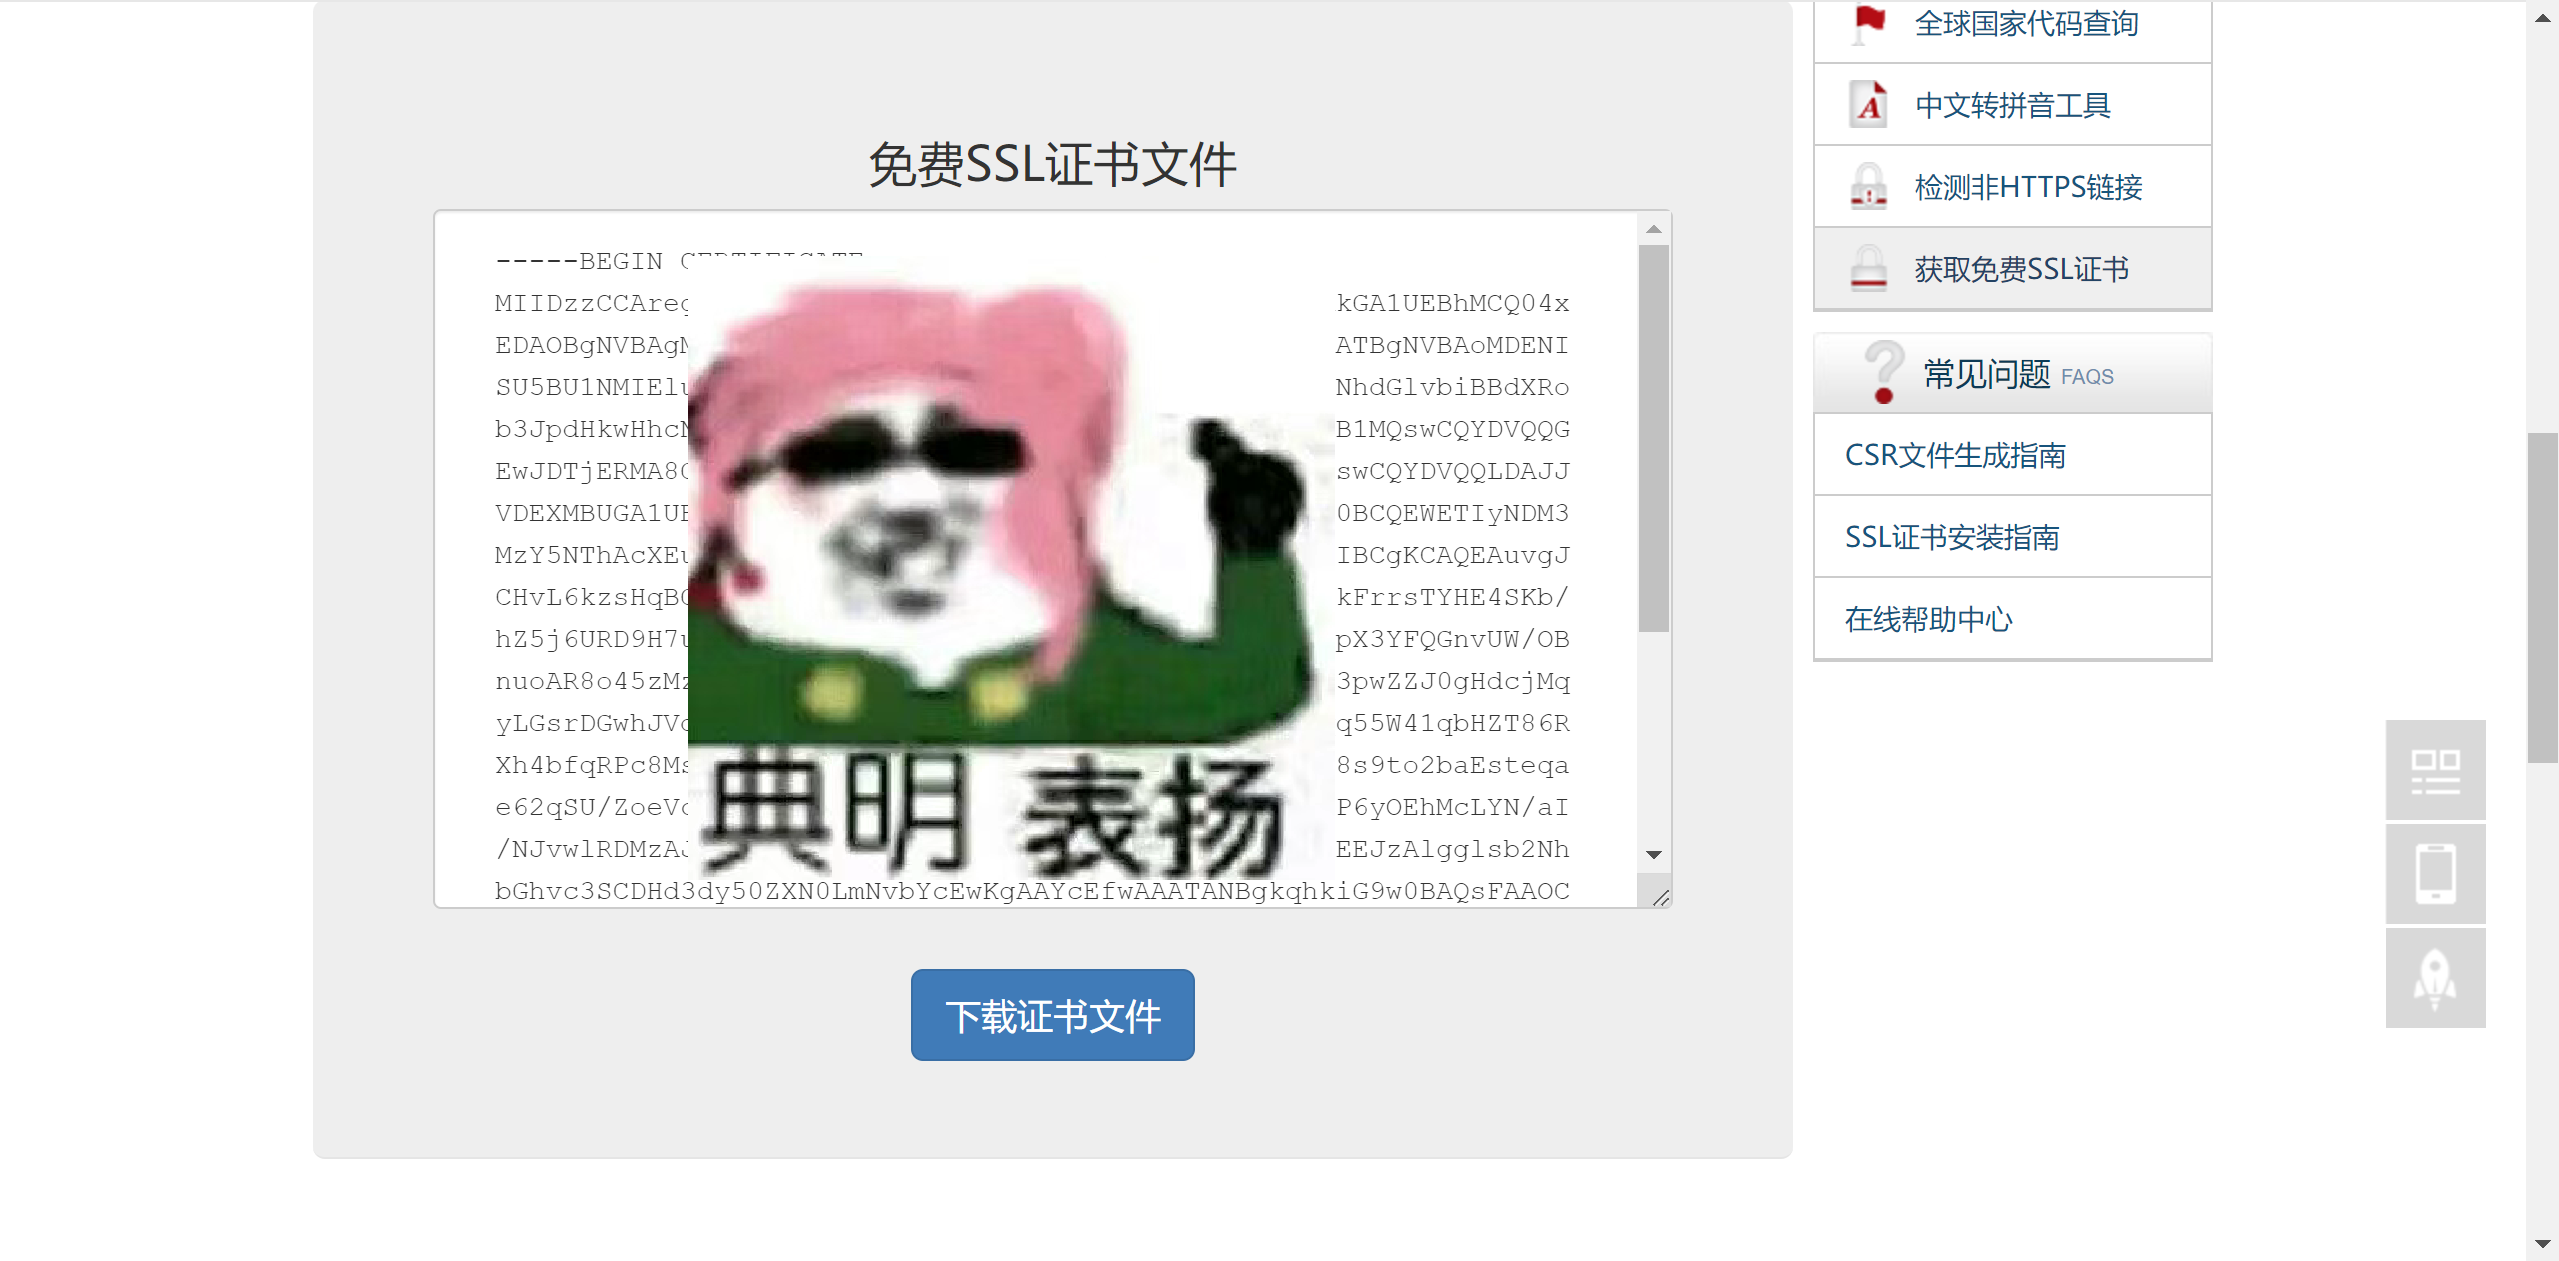
进入网站获取免费ssl证书,具体链接为https://csr.chinassl.net/free-ssl.html,将124.221.87.224_csr.txt上传,点击获取免费证书。
然后下载证书文件即可。
1.3 重命名密钥文件
将你的文件124.221.87.224_key.txt重命名为124.221.87.224.private。
2.nginx配置https
2.1 放证书
将你下载获得的两个文件,124.221.87.224_ssl.crt和124.221.87.224.private放置在服务器的文件夹/etc/ssl/下。
2.2 修改nginx.conf文件
我的配置文件是放在/usr/local/nginx/conf/里,这里一定要记得把你原本的nginx.conf文件备份一个,因为下面可能会失败,有大坑!
# nginx所属用户和用户组,这里配置的是nobody。由于nginx并不会直接向客户端发送数据,只有在请求到达时才加入到nginx的i/o处理队列中,所以nginx只需要拥有访问目录的权限即可,无需高额权限
#user  nobody;

# 工作进程数,一般设置为系统cpu核心数。对于单核服务器来说,设置为1即可;对于多核服务器,可以设置成cpu核心数
worker_processes  2;

# 定义错误日志文件路径。nginx生产环境重要的调试信息将会记录在该文件中
#error_log  logs/error.log;

#error_log  logs/error.log  notice;
#error_log  logs/error.log  info;

# 定义nginx主进程的pid文件所在位置。若需要向nginx主进程发送信号时,必须要知道这个进程的pid,因此需要记录到pid文件中
#pid        logs/nginx.pid;

events {
	# 最大并发数。当同时有多个客户端访问nginx时,每个访问者占据一个连接,当连接数到达该配置变量的值时,新的访问请求将会等待,直到空闲连接数不到该值再处理新的请求
    worker_connections  1024;
}

http {
	 # 引入mime.types文件,它可以为不同的文件扩展名设定不同的mime类型。nginx不像apache这样会根据文件扩展名自动推断文件类型,如果文件没有被正确识别mime类型,就可能会出现浏览器无法正确解释的问题
    include       mime.types;

	# 默认mime类型,如果服务器无法识别它,那么就让浏览器自己来识别。当nginx无法识别当前返回的mime类型时,会采用该参数作为默认值
    default_type  application/octet-stream;

	# 配置日志格式,该部分被注释掉,不起作用
    #log_format  main  '$remote_addr - $remote_user [$time_local] "$request" '
    #                  '$status $body_bytes_sent "$http_referer" '
    #                  '"$http_user_agent" "$http_x_forwarded_for"';

	# 定义访问日志文件的存储位置,该部分被注释掉,不起作用
    #access_log  logs/access.log  main;

	# 开启高效文件传输,建议保持默认的开启状态。nginx的高效文件传输技术可以让其更快地将文件内容传输到客户端,提高文件传输速度
    sendfile        on;

	# 禁用tcp节点推送
	#tcp_nopush     on;

	#keepalive_timeout  0;
	# 客户端保持连接的时间,超时后断开连接。连接复用机制,当客户端发送完请求后,连接还会继续保持一段时间,以便快速发起下一次请求
    keepalive_timeout  65;

	# 开启数据压缩功能
	#gzip  on;

    server {
		# nginx监听端口,当有请求到达该端口时,nginx将会处理该请求。当客户端发送了请求过来后,nginx会监听到该端口被占用,便会启用该server块去处理该请求
        listen       80;

		# 指定服务端的域名/ip,如果没有域名,则使用ip地址。当nginx接收到一个请求时,首先会按照请求中的host(或x-forwarded-host)头信息的域名取匹配server_name指令中的值,只要匹配上即可
        server_name  localhost;

		# 该行是将字符集设置为koi8-r,koi8-r是一种字符编码格式
		#charset koi8-r;
        # 设置字符集为 utf-8
        charset utf-8;

		# 该行是定义了当前这个server块的访问日志文件的存储位置。其中logs/host.access.log表示存储的目录和文件名,main表示使用标准的日志格式。如果该行没有被注释掉,就会在相应的目录下生成一份日志文件,记录该server块的访问日志
        #access_log  logs/host.access.log  main;

		# url匹配规则。在nginx中,url匹配是由location指令提供的
        location / {
			# 当url中的路径为空时,会默认从这里找到对应的文件。该块内容的作用是指定处理该请求所使用的文件系统根目录路径
            root   /srv/tencent/page/dist;
            # try_files指令将尝试匹配请求的文件,如果找不到,则返回index.html
            try_files $uri $uri/ /index.html;
        }

        # 后端
        location /api/ {
            # 设置代理服务器发送的http请求头中host的值为接收到的客户端请求头中的host值
            proxy_set_header host $http_host;
            # 设置代理服务器发送的http请求头中x-real-ip的值为当前请求的客户端ip地址
            proxy_set_header x-real-ip $remote_addr;
            # 设置代理服务器发送的http请求头中remote-host的值为当前请求的客户端ip地址
            proxy_set_header remote-host $remote_addr;
            # 设置代理服务器发送的http请求头中x-forwarded-for的值为所有经过的代理服务器ip地址列表,多个ip地址之间用逗号隔开
            proxy_set_header x-forwarded-for $proxy_add_x_forwarded_for;
            # 将客户端请求通过代理服务器转发到指定地址
            proxy_pass http://127.0.0.1:8080/api/;
            # 设置代理服务器与后端服务器建立连接的超时时间
            proxy_connect_timeout 3600s;
            # 设置代理服务器从后端服务器读取数据的超时时间
            proxy_read_timeout  3600s;
            # 设置代理服务器向后端服务器发送数据的超时时间
            proxy_send_timeout  3600s;
        }

        location /python/ {
            # 设置代理服务器发送的http请求头中host的值为接收到的客户端请求头中的host值
            proxy_set_header host $http_host;
            # 设置代理服务器发送的http请求头中x-real-ip的值为当前请求的客户端ip地址
            proxy_set_header x-real-ip $remote_addr;
            # 设置代理服务器发送的http请求头中remote-host的值为当前请求的客户端ip地址
            proxy_set_header remote-host $remote_addr;
            # 设置代理服务器发送的http请求头中x-forwarded-for的值为所有经过的代理服务器ip地址列表,多个ip地址之间用逗号隔开
            proxy_set_header x-forwarded-for $proxy_add_x_forwarded_for;
            # 将客户端请求通过代理服务器转发到指定地址
            proxy_pass http://127.0.0.1:8081/python/;
            # 设置代理服务器与后端服务器建立连接的超时时间
            proxy_connect_timeout 3600s;
            # 设置代理服务器从后端服务器读取数据的超时时间
            proxy_read_timeout  3600s;
            # 设置代理服务器向后端服务器发送数据的超时时间
            proxy_send_timeout  3600s;
        }

		# 配置 404 页面。当请求的文件不存在,或者因为某种原因无法访问到指定的文件时,返回404
        error_page  404              /404.html;

		# 错误页面的配置,当出错时会跳转到该页面。当服务端返回错误状态码时,可以为不同的状态码指定不同的错误页面
        error_page   500 502 503 504  /50x.html;

		# 当请求 url 精确匹配 /50x.html 时,根据配置路径返回静态页面。配合error_page使用,可以为错误页面指定特定的uri
        location = /50x.html {
            root   html;
        }

        # 将 php 脚本代理到监听在 127.0.0.1:80 的 apache 服务器,或将 php 脚本代理到监听在 127.0.0.1:9000 的 fastcgi 服务器
        #location ~ \.php$ {
        #    proxy_pass   http://127.0.0.1;
        #}
        #location ~ \.php$ {
        #    root           html;
        #    fastcgi_pass   127.0.0.1:9000;
        #    fastcgi_index  index.php;
        #    fastcgi_param  script_filename  /scripts$fastcgi_script_name;
        #    include        fastcgi_params;
        #}

        # deny access to .htaccess files, if apache's document root concurs with nginx's one
        #location ~ /\.ht {
        #    deny  all;
        #}
    }

    # 另一个使用 ip、名称和端口的虚拟主机配置
    #
    #server {
    #    listen       8000;
    #    listen       somename:8080;
    #    server_name  somename  alias  another.alias;

    #    location / {
    #        root   html;
    #        index  index.html index.htm;
    #    }
    #}

    # https 服务器
    #
    #server {
    #    listen       443 ssl;
    #    server_name  localhost;

    #    ssl_certificate      cert.pem;
    #    ssl_certificate_key  cert.key;

    #    ssl_session_cache    shared:ssl:1m;
    #    ssl_session_timeout  5m;

    #    ssl_ciphers  high:!anull:!md5;
    #    ssl_prefer_server_ciphers  on;

    #    location / {
    #        root   html;
    #        index  index.html index.htm;
    #    }
    #}
}
# nginx所属用户和用户组,这里配置的是nobody。由于nginx并不会直接向客户端发送数据,只有在请求到达时才加入到nginx的i/o处理队列中,所以nginx只需要拥有访问目录的权限即可,无需高额权限
#user  nobody;

# 工作进程数,一般设置为系统cpu核心数。对于单核服务器来说,设置为1即可;对于多核服务器,可以设置成cpu核心数
worker_processes 2;

# 定义错误日志文件路径。nginx生产环境重要的调试信息将会记录在该文件中
#error_log  logs/error.log;

#error_log  logs/error.log  notice;
#error_log  logs/error.log  info;

# 定义nginx主进程的pid文件所在位置。若需要向nginx主进程发送信号时,必须要知道这个进程的pid,因此需要记录到pid文件中
#pid        logs/nginx.pid;

events {
	# 最大并发数。当同时有多个客户端访问nginx时,每个访问者占据一个连接,当连接数到达该配置变量的值时,新的访问请求将会等待,直到空闲连接数不到该值再处理新的请求
	worker_connections 1024;
}

http {
	# 引入mime.types文件,它可以为不同的文件扩展名设定不同的mime类型。nginx不像apache这样会根据文件扩展名自动推断文件类型,如果文件没有被正确识别mime类型,就可能会出现浏览器无法正确解释的问题
	include mime.types;

	# 默认mime类型,如果服务器无法识别它,那么就让浏览器自己来识别。当nginx无法识别当前返回的mime类型时,会采用该参数作为默认值
	default_type application/octet-stream;

	# 配置日志格式,该部分被注释掉,不起作用
	#log_format  main  '$remote_addr - $remote_user [$time_local] "$request" '
	#                  '$status $body_bytes_sent "$http_referer" '
	#                  '"$http_user_agent" "$http_x_forwarded_for"';

	# 定义访问日志文件的存储位置,该部分被注释掉,不起作用
	#access_log  logs/access.log  main;

	# 开启高效文件传输,建议保持默认的开启状态。nginx的高效文件传输技术可以让其更快地将文件内容传输到客户端,提高文件传输速度
	sendfile on;

	# 禁用tcp节点推送
	#tcp_nopush     on;

	#keepalive_timeout  0;
	# 客户端保持连接的时间,超时后断开连接。连接复用机制,当客户端发送完请求后,连接还会继续保持一段时间,以便快速发起下一次请求
	keepalive_timeout 65;

	# 开启数据压缩功能
	#gzip  on;

	server {
		# nginx监听端口,当有请求到达该端口时,nginx将会处理该请求。当客户端发送了请求过来后,nginx会监听到该端口被占用,便会启用该server块去处理该请求
		listen 80;

		# 指定服务端的域名/ip,如果没有域名,则使用ip地址。当nginx接收到一个请求时,首先会按照请求中的host(或x-forwarded-host)头信息的域名取匹配server_name指令中的值,只要匹配上即可
		server_name localhost;

		# 该行是将字符集设置为koi8-r,koi8-r是一种字符编码格式
		#charset koi8-r;
		# 设置字符集为 utf-8
		charset utf-8;

		#把http的域名请求转成https
		return 301 https://$host$request_uri;
	}

	# 另一个使用 ip、名称和端口的虚拟主机配置
	#
	#server {
	#    listen       8000;
	#    listen       somename:8080;
	#    server_name  somename  alias  another.alias;

	#    location / {
	#        root   html;
	#        index  index.html index.htm;
	#    }
	#}

	# https 服务器
	#
	server {
		listen 443 ssl;
		server_name localhost;

		# 证书
		ssl_certificate /etc/ssl/124.221.87.224_ssl.crt;
		# 秘钥存储路径
		ssl_certificate_key /etc/ssl/124.221.87.224.private;

		# ssl的一些配置
		ssl_session_cache shared:ssl:1m;
		ssl_session_timeout 5m;
		ssl_prefer_server_ciphers on;
		ssl_ciphers ecdhe-rsa-aes128-gcm-sha256:ecdhe:ecdh:aes:high:!null:!anull:!md5:!adh:!rc4;
		# 开启tls协议
		ssl_protocols tlsv1 tlsv1.1 tlsv1.2;

		# 该行是将字符集设置为koi8-r,koi8-r是一种字符编码格式
		#charset koi8-r;
		# 设置字符集为 utf-8
		charset utf-8;

		# 该行是定义了当前这个server块的访问日志文件的存储位置。其中logs/host.access.log表示存储的目录和文件名,main表示使用标准的日志格式。如果该行没有被注释掉,就会在相应的目录下生成一份日志文件,记录该server块的访问日志
		#access_log  logs/host.access.log  main;

		# url匹配规则。在nginx中,url匹配是由location指令提供的
		location / {
			# 当url中的路径为空时,会默认从这里找到对应的文件。该块内容的作用是指定处理该请求所使用的文件系统根目录路径
			root /srv/tencent/page/dist;
			# try_files指令将尝试匹配请求的文件,如果找不到,则返回index.html
			try_files $uri $uri/ /index.html;
		}

		# 后端
		location /api/ {
			# 设置代理服务器发送的http请求头中host的值为接收到的客户端请求头中的host值
			proxy_set_header host $http_host;
			# 设置代理服务器发送的http请求头中x-real-ip的值为当前请求的客户端ip地址
			proxy_set_header x-real-ip $remote_addr;
			# 设置代理服务器发送的http请求头中remote-host的值为当前请求的客户端ip地址
			proxy_set_header remote-host $remote_addr;
			# 设置代理服务器发送的http请求头中x-forwarded-for的值为所有经过的代理服务器ip地址列表,多个ip地址之间用逗号隔开
			proxy_set_header x-forwarded-for $proxy_add_x_forwarded_for;
			# 将客户端请求通过代理服务器转发到指定地址
			proxy_pass http://127.0.0.1:8080/api/;
			# 设置代理服务器与后端服务器建立连接的超时时间
			proxy_connect_timeout 3600s;
			# 设置代理服务器从后端服务器读取数据的超时时间
			proxy_read_timeout 3600s;
			# 设置代理服务器向后端服务器发送数据的超时时间
			proxy_send_timeout 3600s;
		}

		location /python/ {
			# 设置代理服务器发送的http请求头中host的值为接收到的客户端请求头中的host值
			proxy_set_header host $http_host;
			# 设置代理服务器发送的http请求头中x-real-ip的值为当前请求的客户端ip地址
			proxy_set_header x-real-ip $remote_addr;
			# 设置代理服务器发送的http请求头中remote-host的值为当前请求的客户端ip地址
			proxy_set_header remote-host $remote_addr;
			# 设置代理服务器发送的http请求头中x-forwarded-for的值为所有经过的代理服务器ip地址列表,多个ip地址之间用逗号隔开
			proxy_set_header x-forwarded-for $proxy_add_x_forwarded_for;
			# 将客户端请求通过代理服务器转发到指定地址
			proxy_pass http://127.0.0.1:8081/python/;
			# 设置代理服务器与后端服务器建立连接的超时时间
			proxy_connect_timeout 3600s;
			# 设置代理服务器从后端服务器读取数据的超时时间
			proxy_read_timeout 3600s;
			# 设置代理服务器向后端服务器发送数据的超时时间
			proxy_send_timeout 3600s;
		}

		# 配置 404 页面。当请求的文件不存在,或者因为某种原因无法访问到指定的文件时,返回404
		error_page 404 /404.html;

		# 错误页面的配置,当出错时会跳转到该页面。当服务端返回错误状态码时,可以为不同的状态码指定不同的错误页面
		error_page 500 502 503 504 /50x.html;

		# 当请求 url 精确匹配 /50x.html 时,根据配置路径返回静态页面。配合error_page使用,可以为错误页面指定特定的uri
		location = /50x.html {
			root html;
		}
	}
}
观察可知。我将原本server80里面的跳转配置原封不动的照搬进了server443里,但是有几个地方特别注意,需要改。下面讲讲我做了什么。
2.2.1 将80端口重定向到443
把原来80里面的跳转配置都删掉,然后配置关键在return 301 https://$host$request_uri;
	server {
		# nginx监听端口,当有请求到达该端口时,nginx将会处理该请求。当客户端发送了请求过来后,nginx会监听到该端口被占用,便会启用该server块去处理该请求
		listen 80;

		# 指定服务端的域名/ip,如果没有域名,则使用ip地址。当nginx接收到一个请求时,首先会按照请求中的host(或x-forwarded-host)头信息的域名取匹配server_name指令中的值,只要匹配上即可
		server_name localhost;

		# 该行是将字符集设置为koi8-r,koi8-r是一种字符编码格式
		#charset koi8-r;
		# 设置字符集为 utf-8
		charset utf-8;

		#把http的域名请求转成https
		return 301 https://$host$request_uri;
	}
2.2.2 端口443配置ssl证书
	server {
		listen 443 ssl;
		server_name localhost;

		# 证书
		ssl_certificate /etc/ssl/124.221.87.224_ssl.crt;
		# 秘钥存储路径
		ssl_certificate_key /etc/ssl/124.221.87.224.private;

		# ssl的一些配置
		ssl_session_cache shared:ssl:1m;
		ssl_session_timeout 5m;
		ssl_prefer_server_ciphers on;
		ssl_ciphers ecdhe-rsa-aes128-gcm-sha256:ecdhe:ecdh:aes:high:!null:!anull:!md5:!adh:!rc4;
		# 开启tls协议
		ssl_protocols tlsv1 tlsv1.1 tlsv1.2;
		-----------这下面照搬原来80的配置-------------------
	}
2.3 启动nginx(这里有坑)
替换掉nginx.conf后,进入文件夹/usr/local/nginx/sbin下,执行验证配置文件是否正确的命令。
./nginx -t
如果你没有报错,那太赞了,那你这一块不用看了,但是我这里爆了一个错😭。
nginx: [emerg] the "ssl" parameter requires ngx_http_ssl_module in /usr/local/nginx/conf/nginx.conf。
这里的原因是我最开始安装nginx的时候,可以看下博客centos系统环境搭建(十一)——centos7安装使用nginx并部署前后端分离项目,用的命令如下。
./configure
😭这就埋坑了啊!这样安装的nginx是没有http_ssl_module模块的,不支持ssl,所以才导致了报错。
这时候,把你原本的nginx.conf,就是以前http那个的换回去,然后在文件夹/usr/local/nginx/sbin下执行命令先把服务器上的nginx停掉(不换回去执行命令也停不掉)。
./nginx -s stop
记得在你本地备份一下http的nginx.conf文件和https的nginx.conf文件,然后我要卸载nginx。
rm -rf /usr/local/nginx
然后我们重新安装nginx。将原文centos系统环境搭建(十一)——centos7安装使用nginx并部署前后端分离项目的./configure换成下面这个命令。其他步骤不用变。
./configure --prefix=/usr/local/nginx --with-http_stub_status_module --with-http_ssl_module --with-http_v2_module
安装完成后,再将你https的nginx.conf文件放回去,用./nginx -t再试试,我成功了。
成功后,在文件夹/usr/local/nginx/sbin下执行命令重启nginx即可。
./nginx -s reload
3.一个不用域名用ip的坑
当我高兴的开始把http://124.221.87.224改成https://124.221.87.224往里面点击的时候,却发现浏览器控制台报错mixed content: the page at https://* was loaded over https, but requested an insecure xmlhttpreque,然后我发现除了页面是正常的,后端接口没一个通的。这里要怎么解决呢?
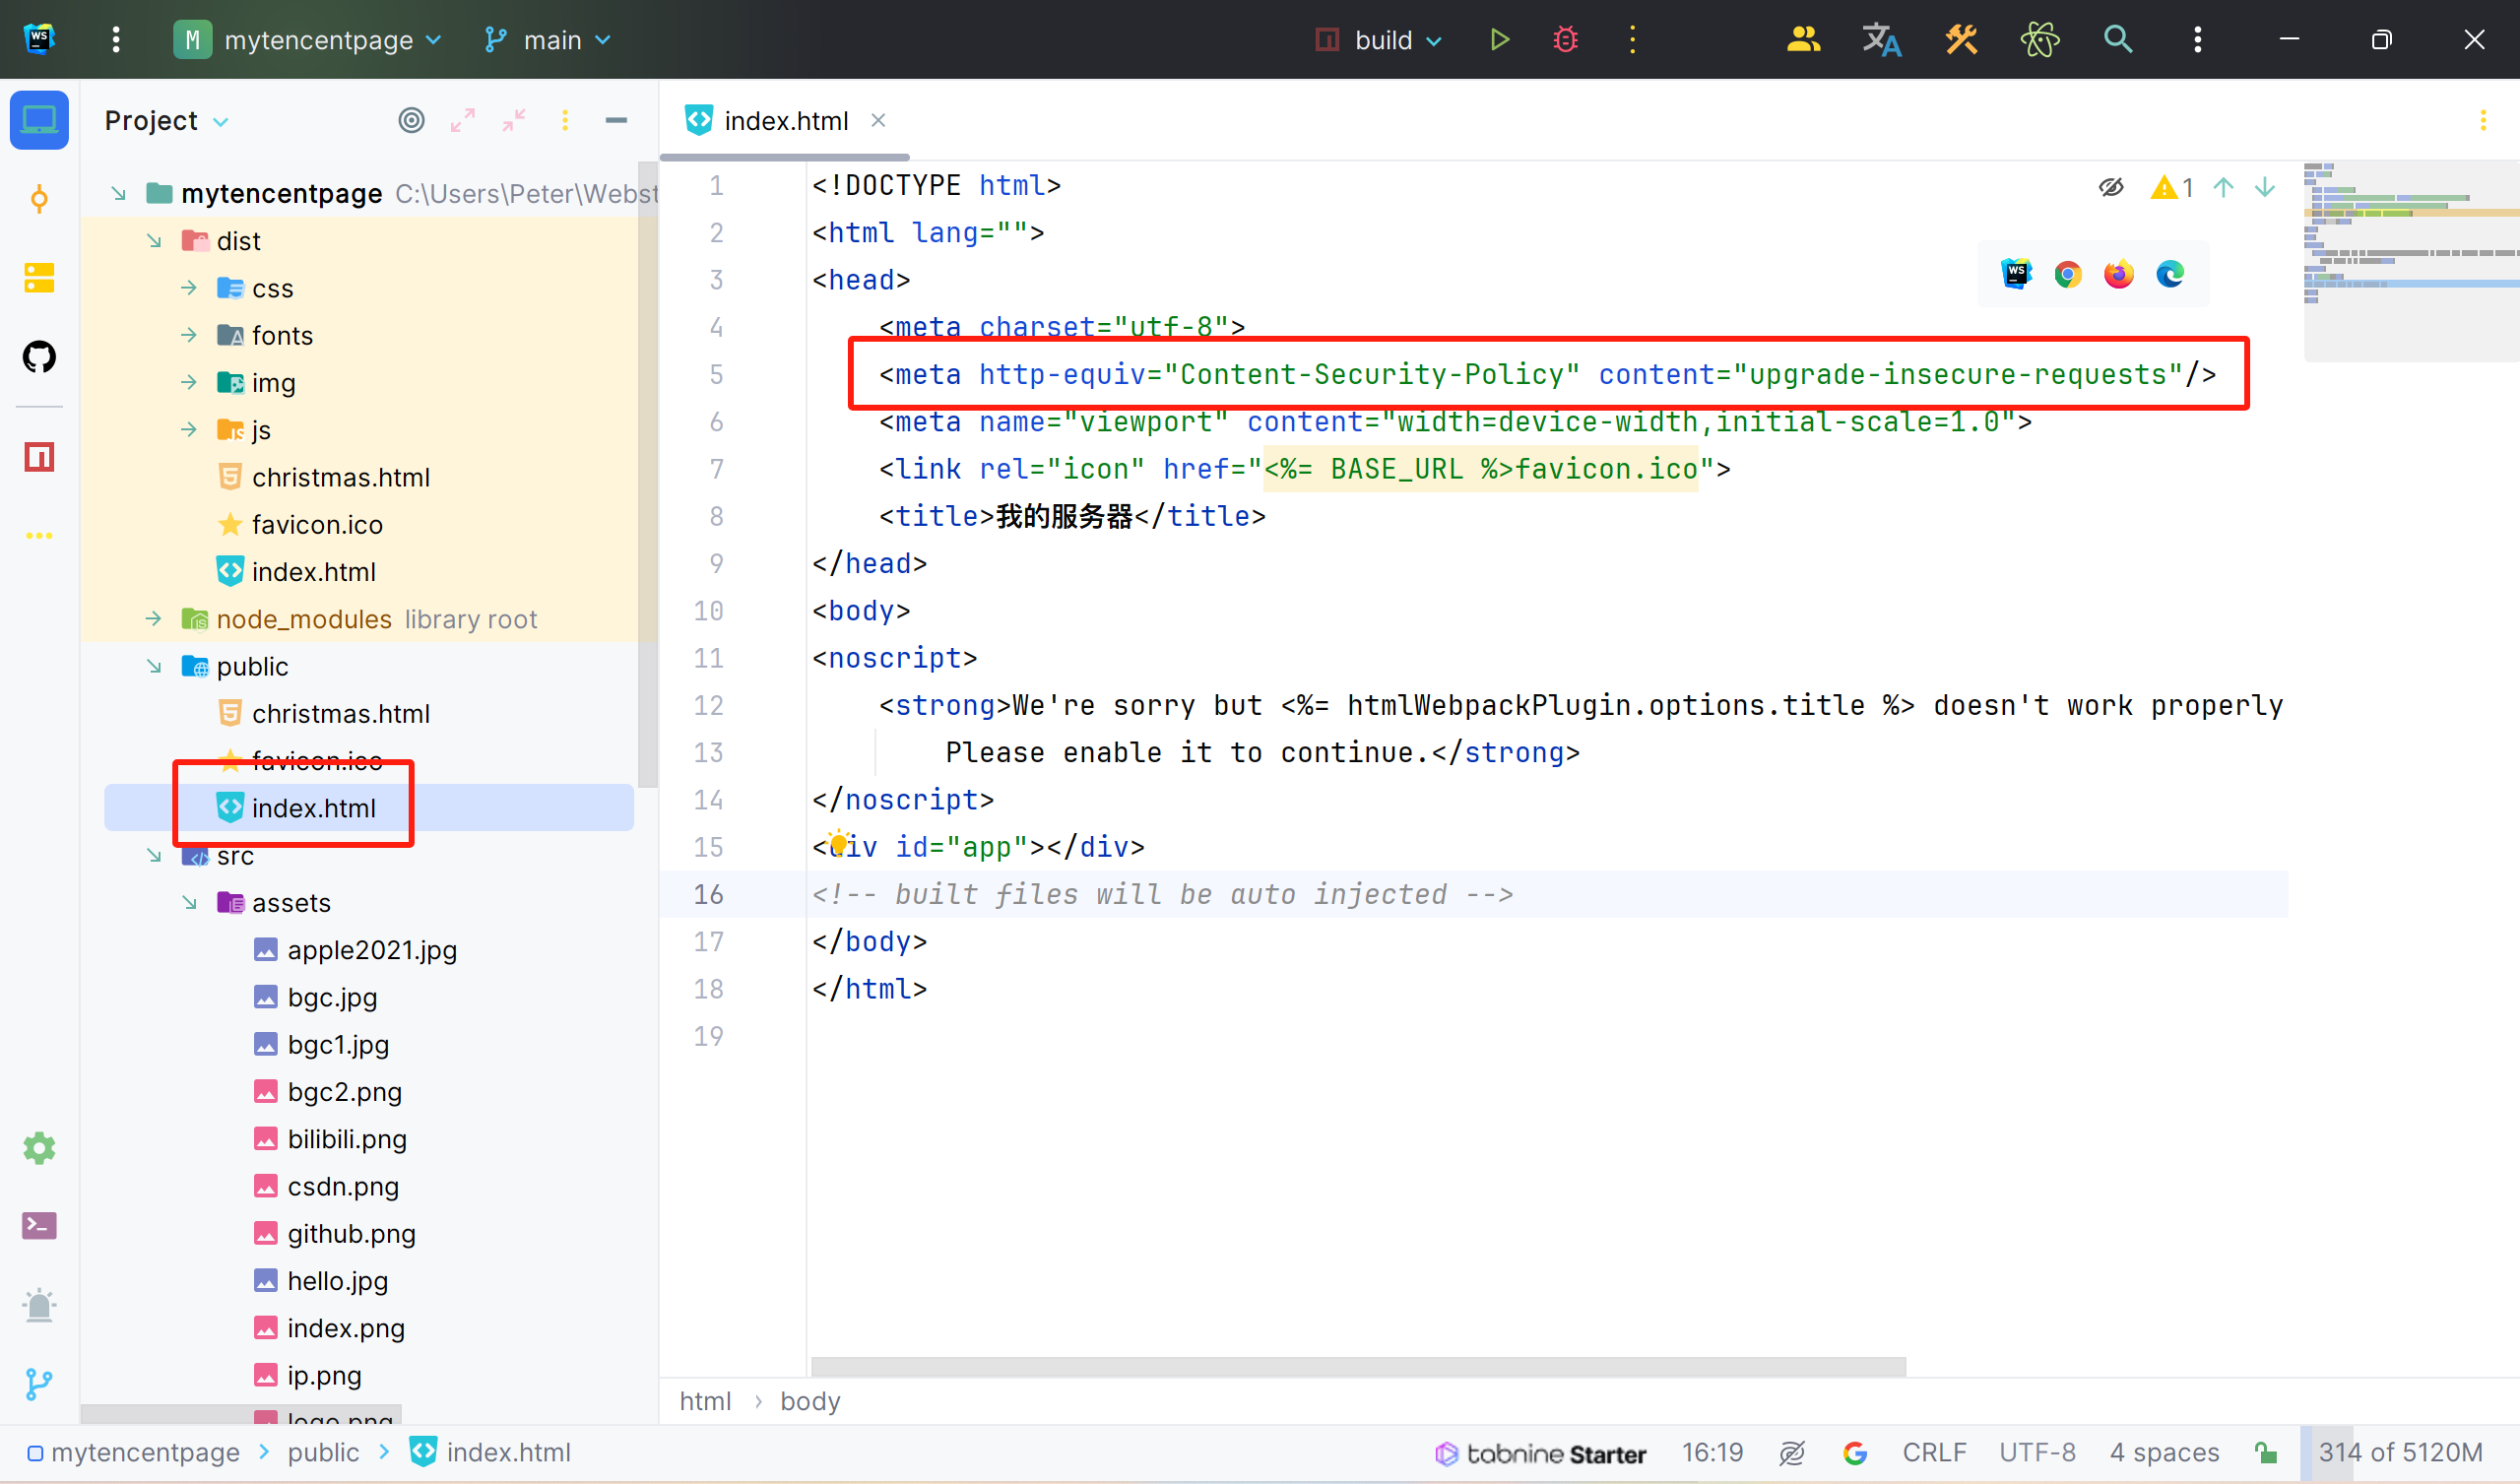
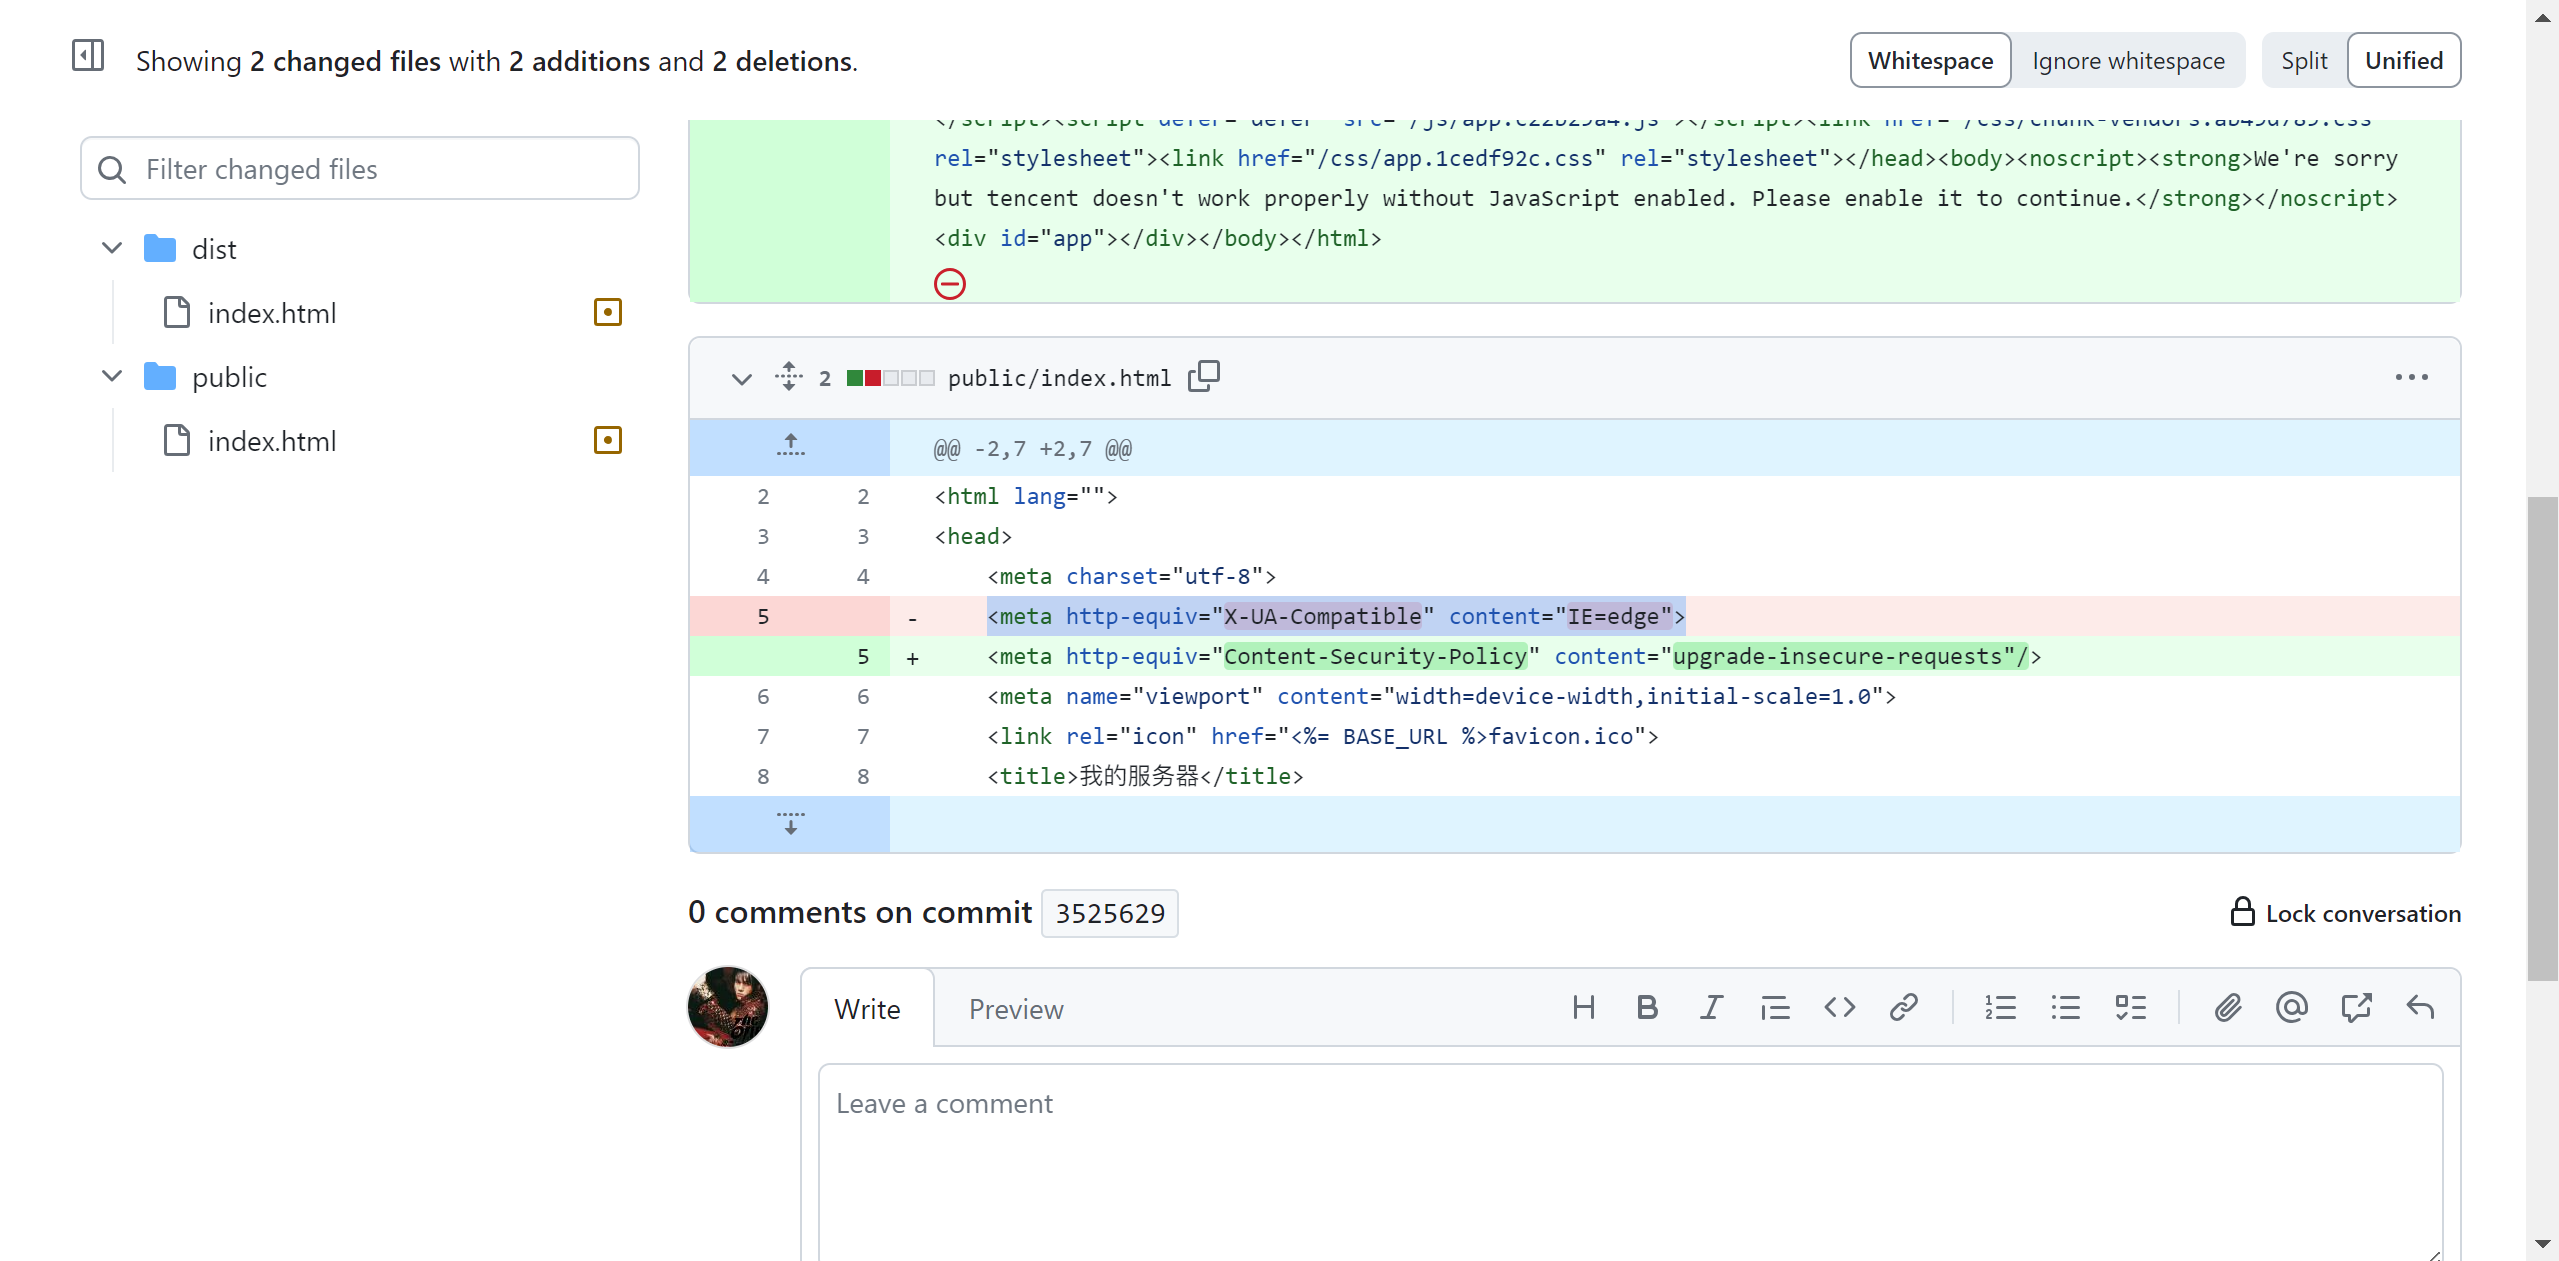
很简单,去你的index主页,我这里原本是<meta http-equiv="x-ua-compatible" content="ie=edge">,请换成如下标签。
<meta http-equiv="content-security-policy" content="upgrade-insecure-requests"/>
讲解一下,出现mixed content: the page at https://* was loaded over https, but requested an insecure xmlhttpreque是因为浏览器的安全机制,https协议的网站请求http协议的资源被浏览器认为不安全,请求被拦截。然后使用<meta http-equiv="content-security-policy" content="upgrade-insecure-requests"/>会自动将http请求升级成安全的https请求。这就是它可以解决这个问题的原因。
我在网上搜索的时候,看到说如果你用的是真正的域名,就不会有这个错了,但是我用的只有一个ip,是不是这样呢?我没域名,所以也实验不了,各位网友有域名的可以试试,看看会不会避开这个坑。


发表评论