win11+ue4+carla编译版配置过程
整个过程所需内存大小为133gb,为了让电脑能够运行流畅,请预留160+内存
下载所需工具
· cmake
cmake+mingw编译sdl2库
https://blog.csdn.net/u013456468/article/details/127498270
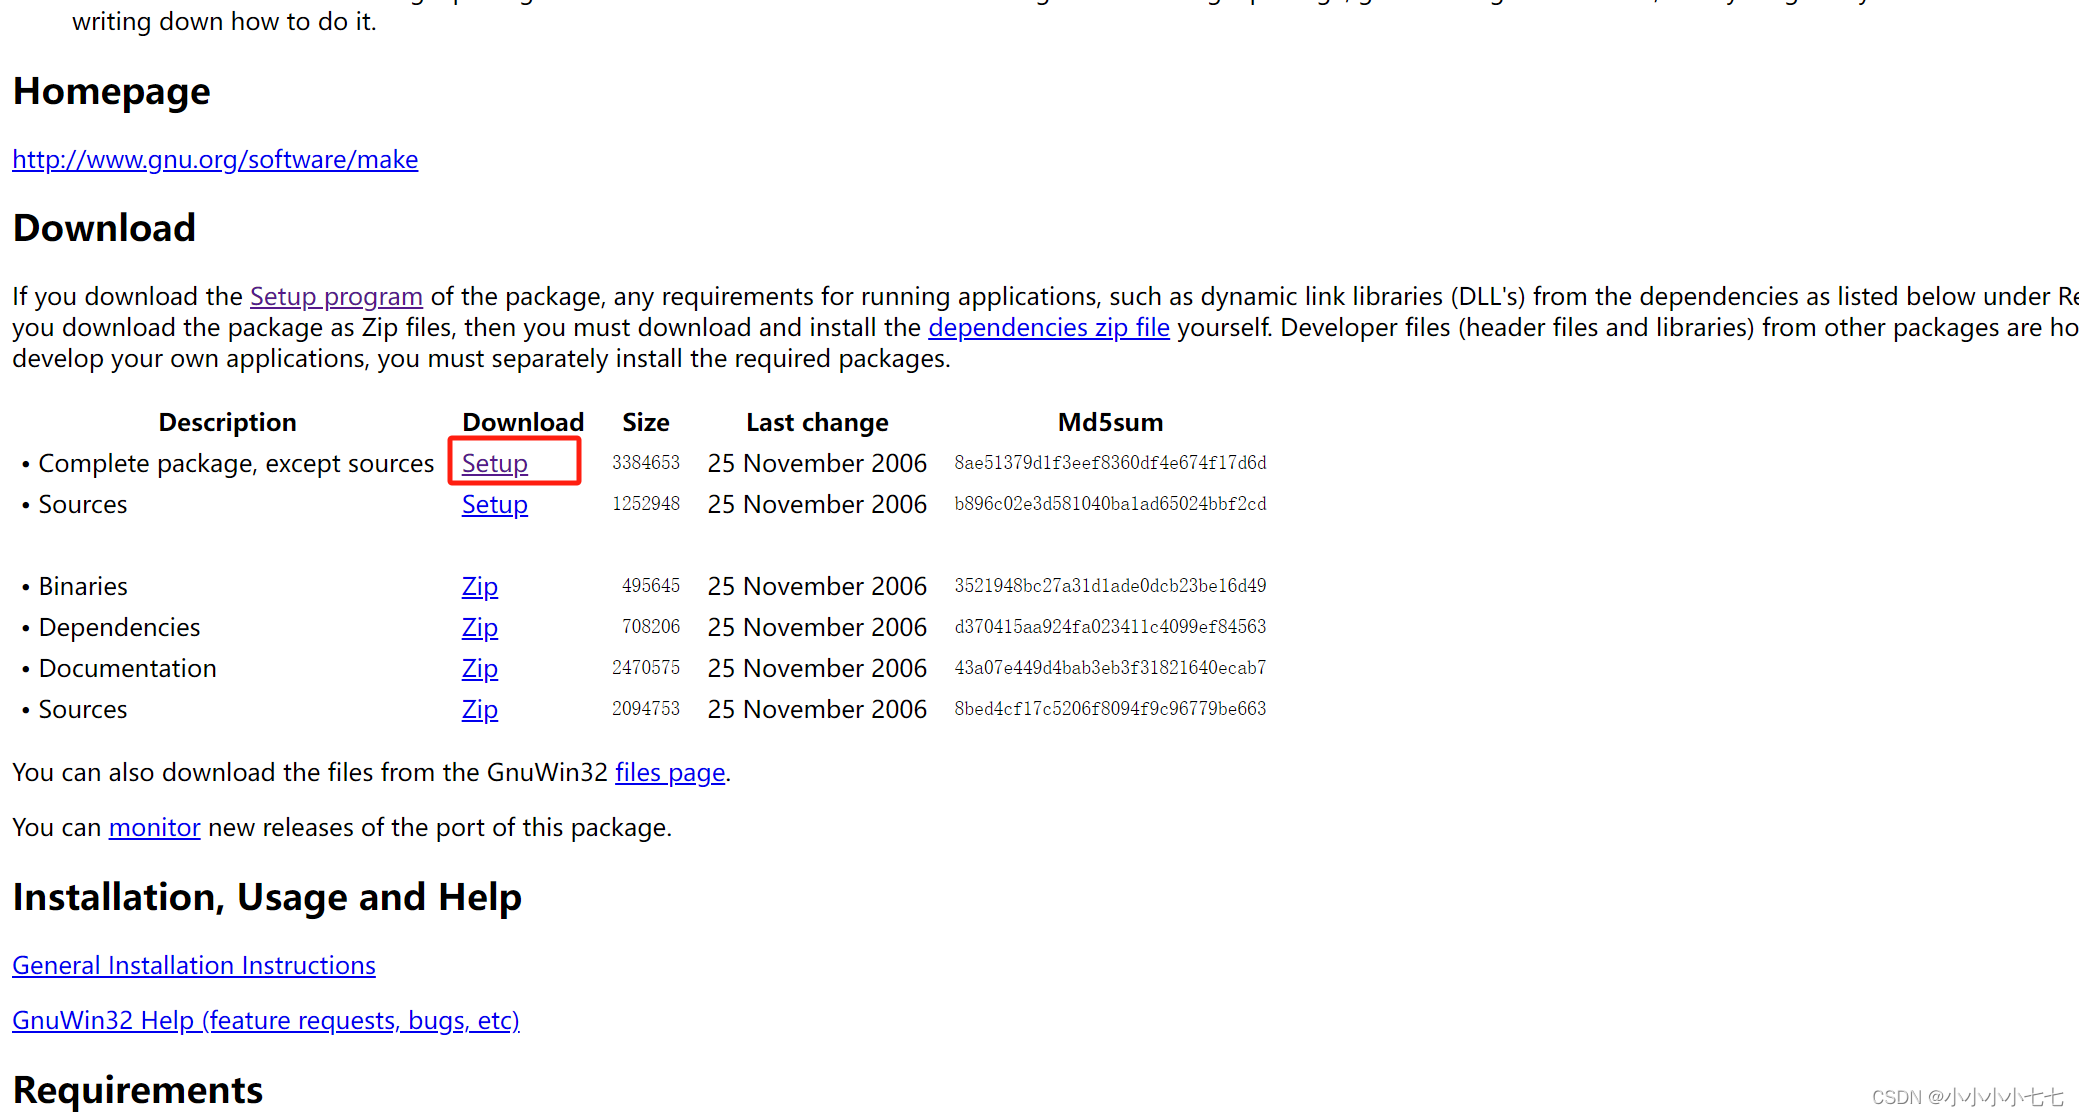
· make
必须要求 make3.81 版本,
· git
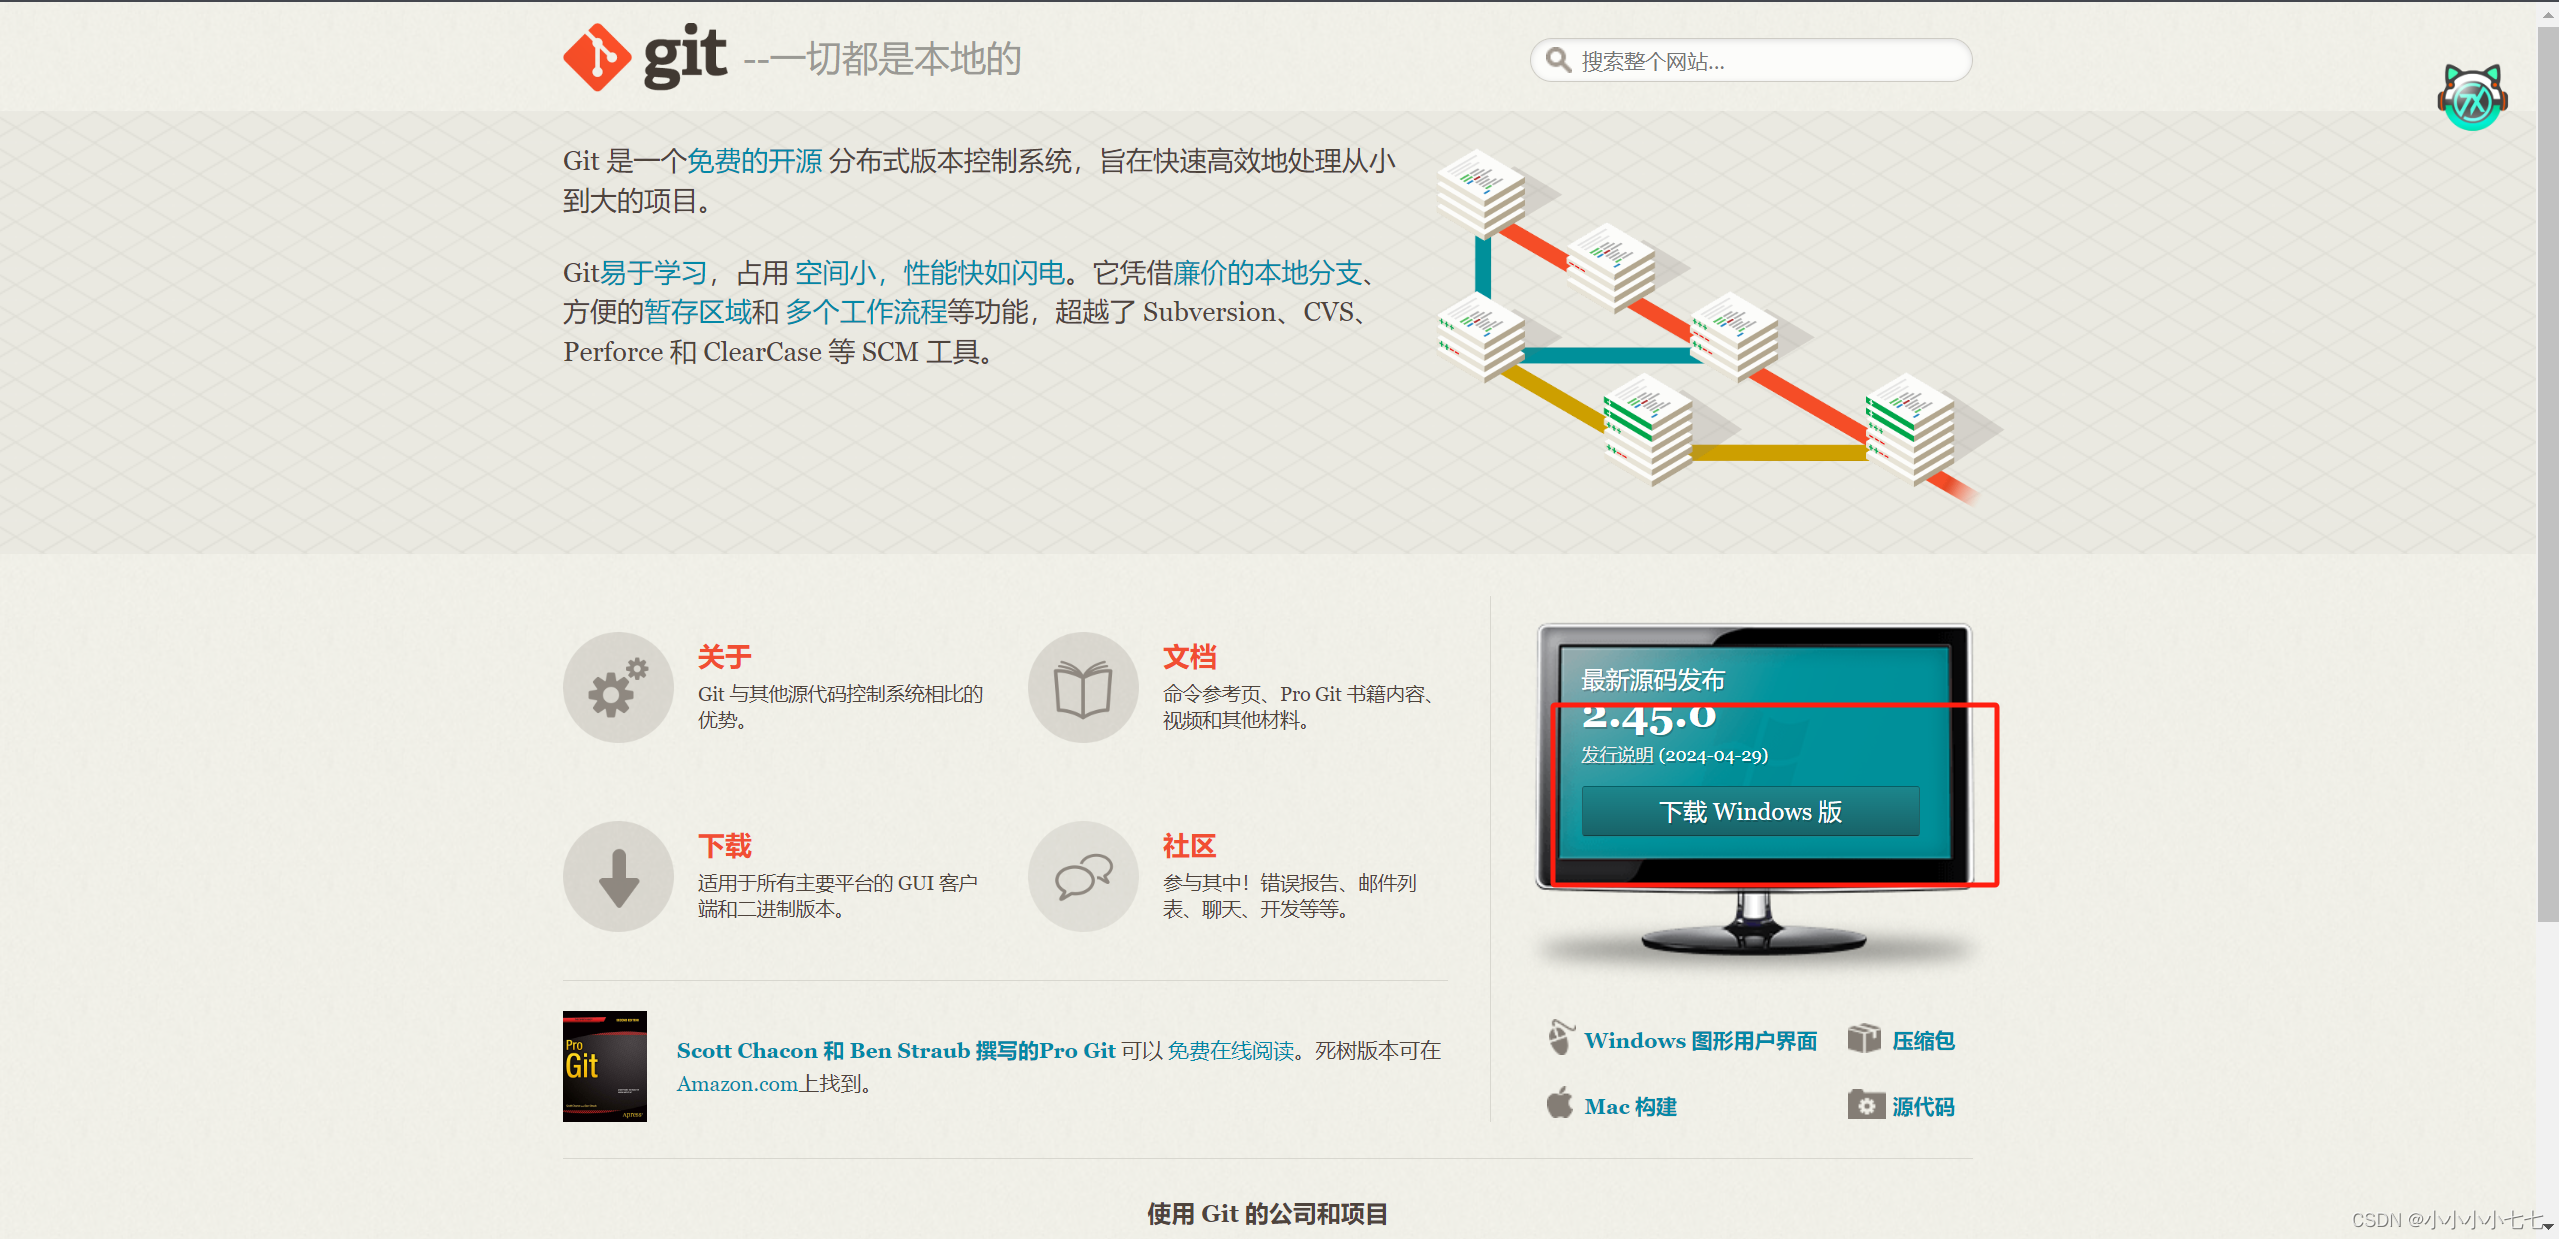
git的配置与使用
https://blog.csdn.net/weixin_74244187/article/details/132744997?spm=1001.2014.3001.5501
· anaconda
anaconda的配置与python虚拟环境配置
https://blog.csdn.net/frigidwinter/article/details/124078674?ops_request_misc=%257b%2522request%255fid%2522%253a%2522171446353116800184121087%2522%252c%2522scm%2522%253a%252220140713.130102334…%2522%257d&request_id=171446353116800184121087&biz_id=0&utm_medium=distribute.pc_search_result.none-task-blog-2alltop_positive~default-1-124078674-null-null.142
· 7-zip
· visual studio 2019 installer
visual studio 2019 配置
工作负荷
·.net桌面开发
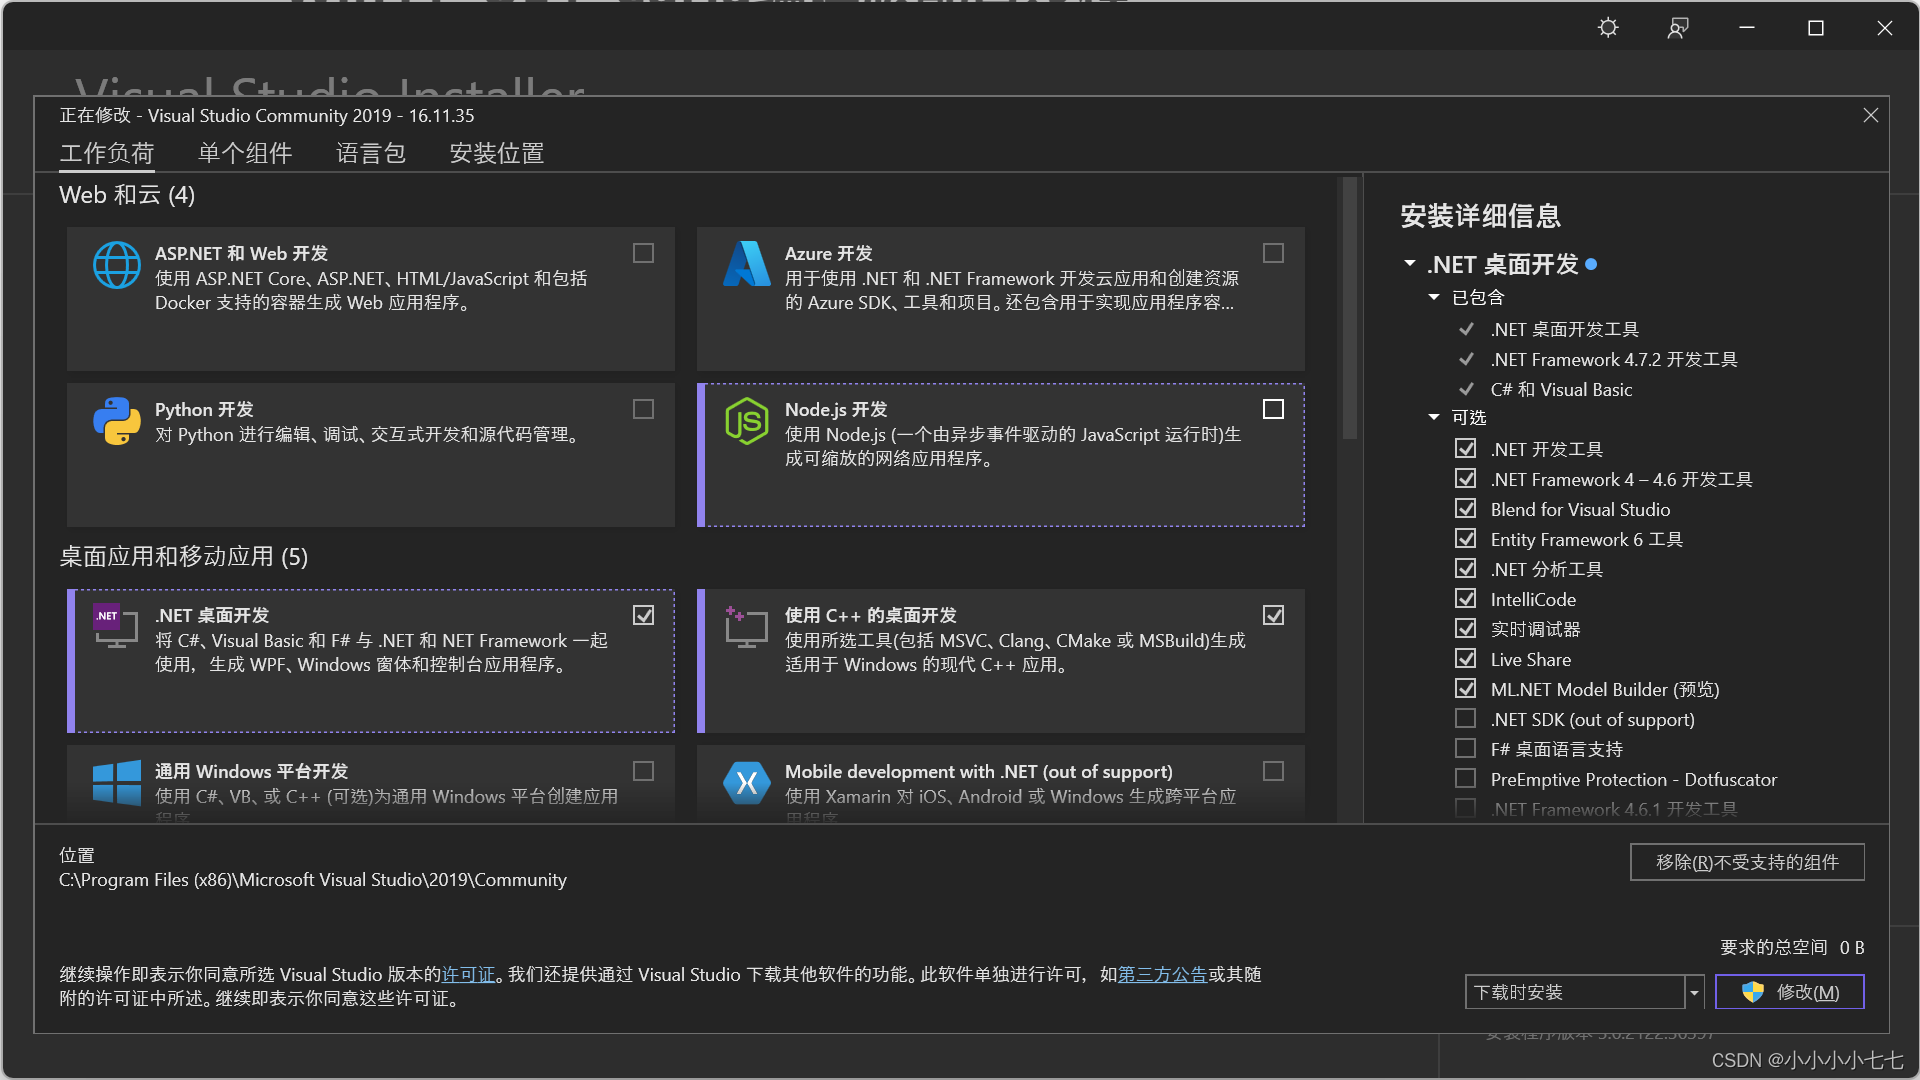
· 使用c++的桌面开发
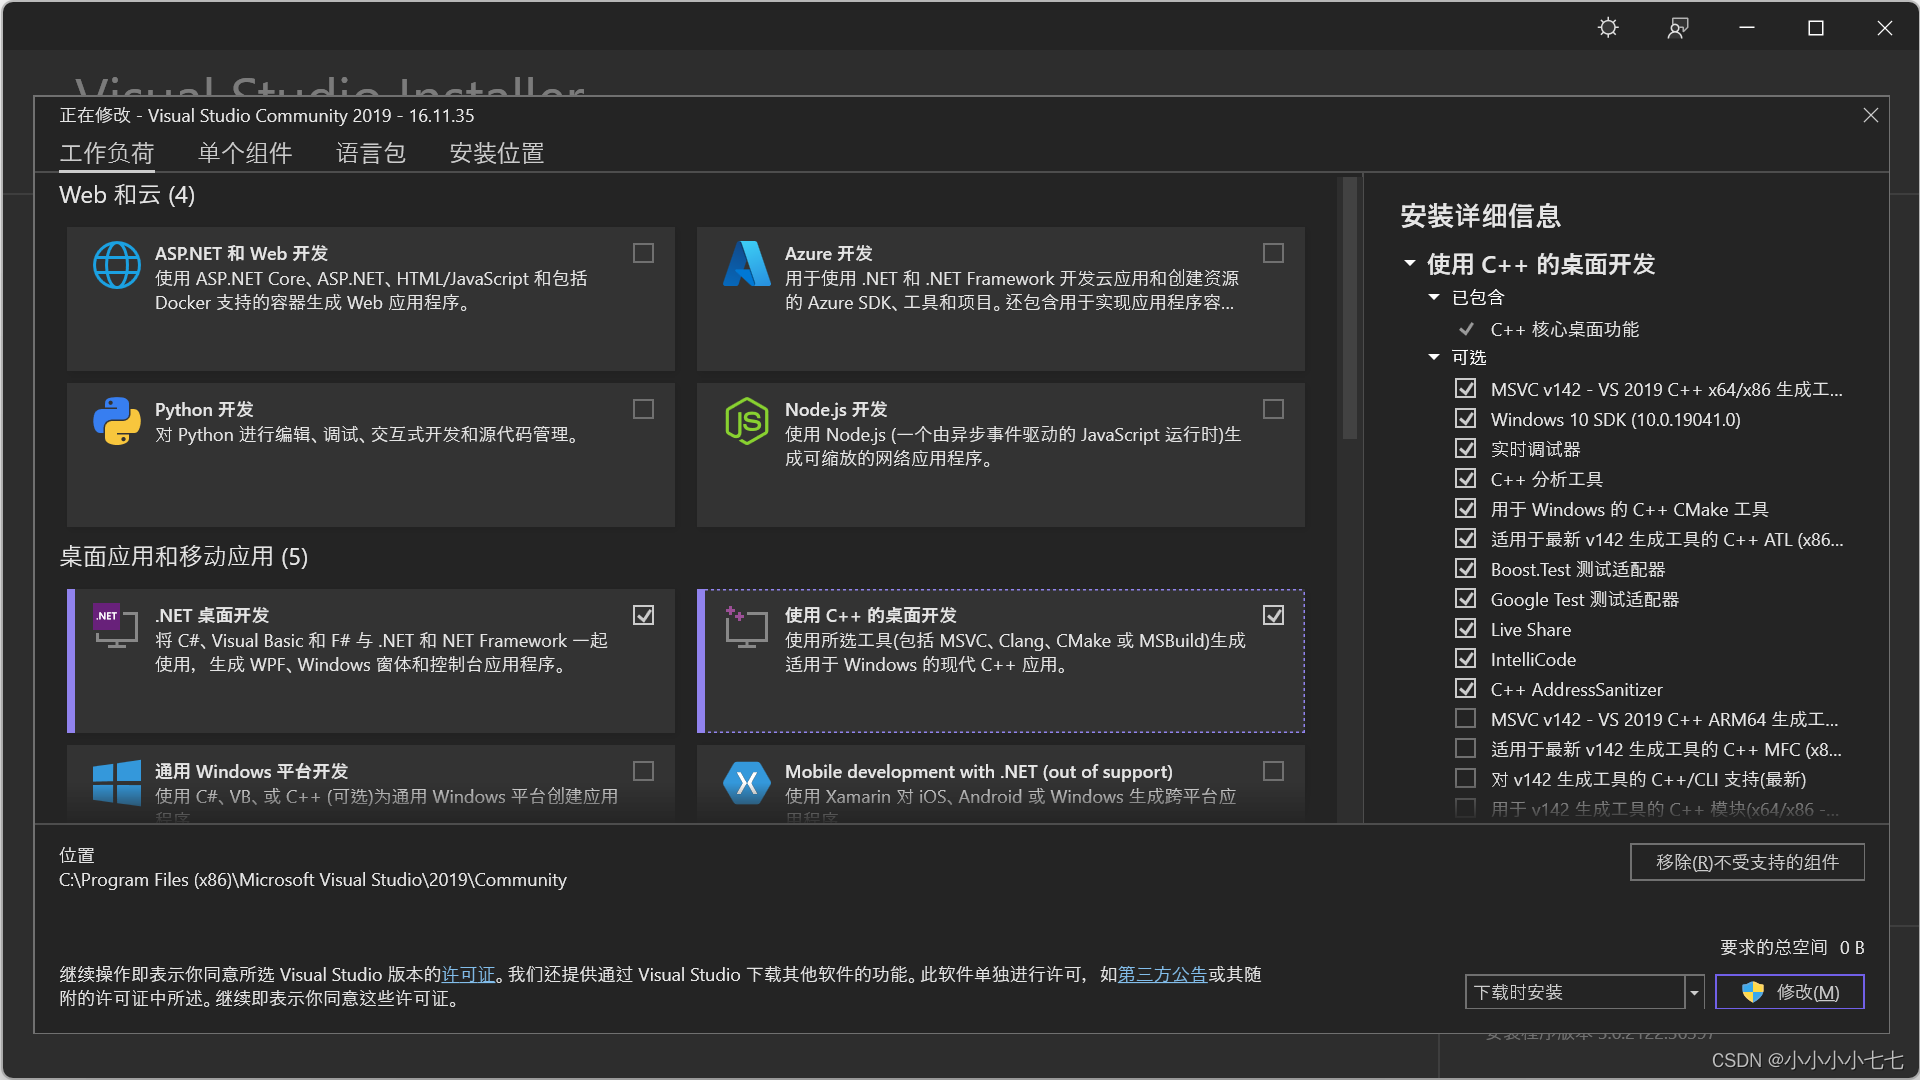
· 使用c++的游戏开发

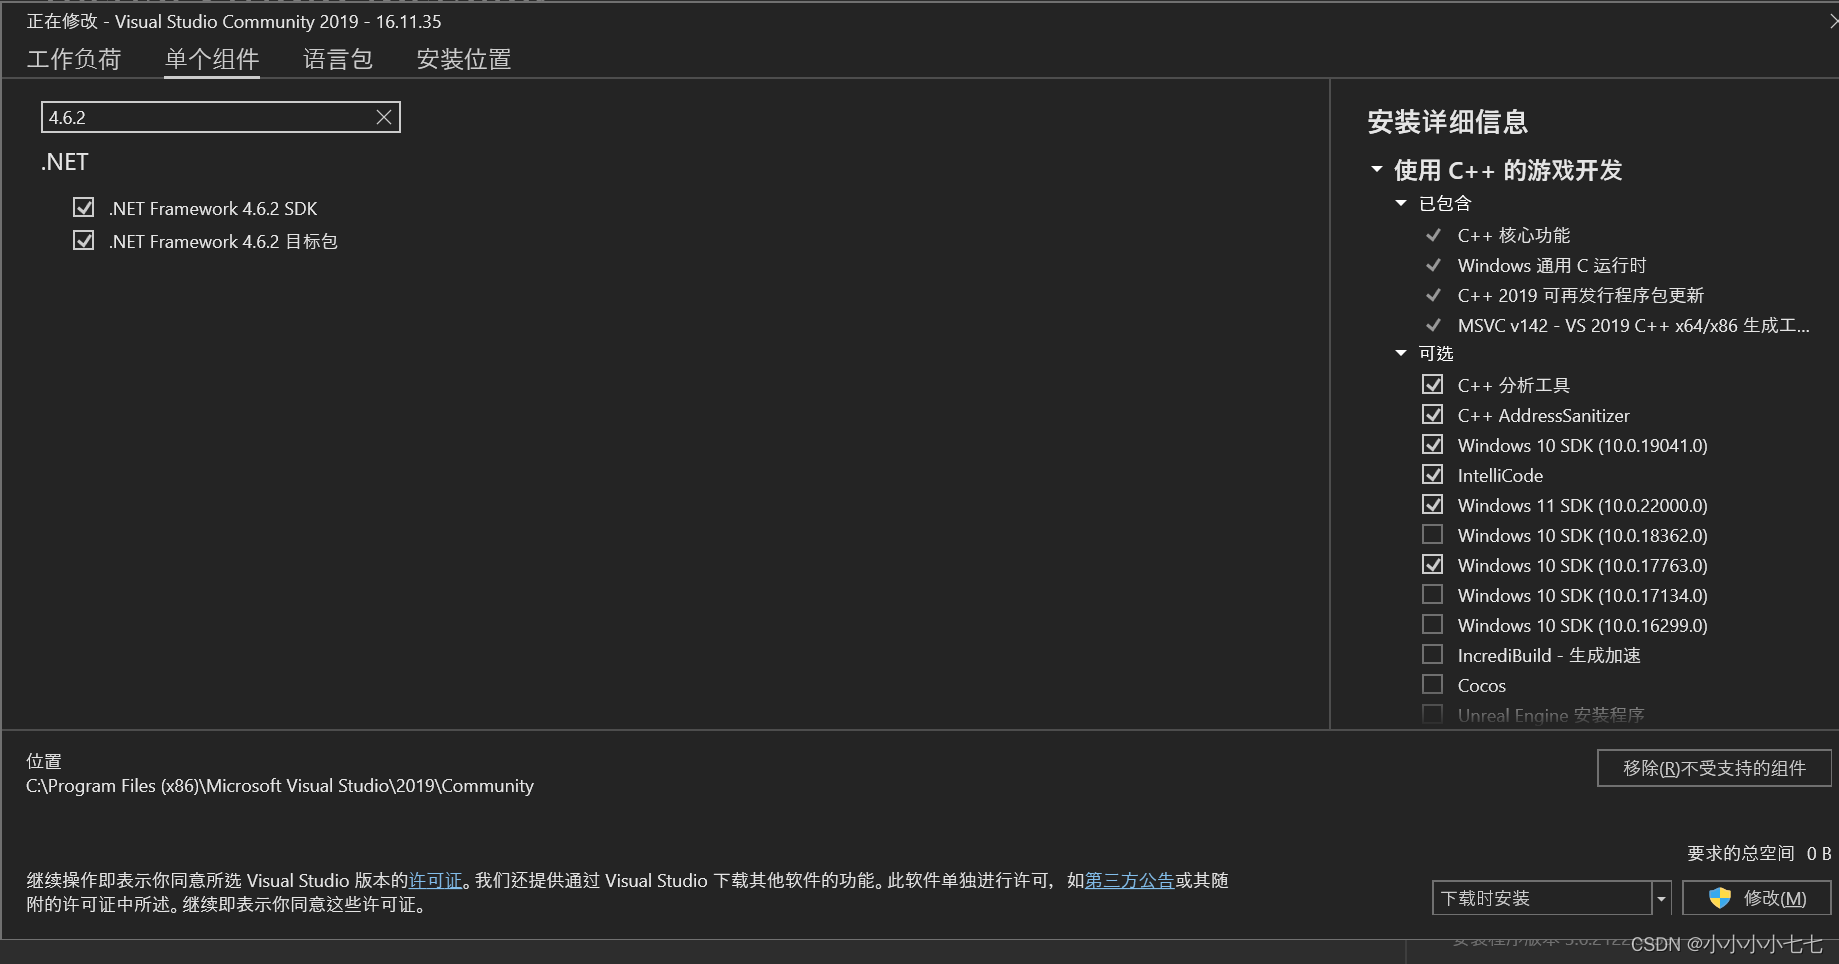
单个组件
· .net framework 4.6.2 sdk
· .net framework 4.6.2 目标包
carla虚拟环境配置
conda create -n carla python3.7   //创建名为carla,python版本为3.7的虚拟环境
conda activate carla              //激活carla虚拟环境,在终端跑carla都要先激活这个carla虚拟环境
克隆carlaue4
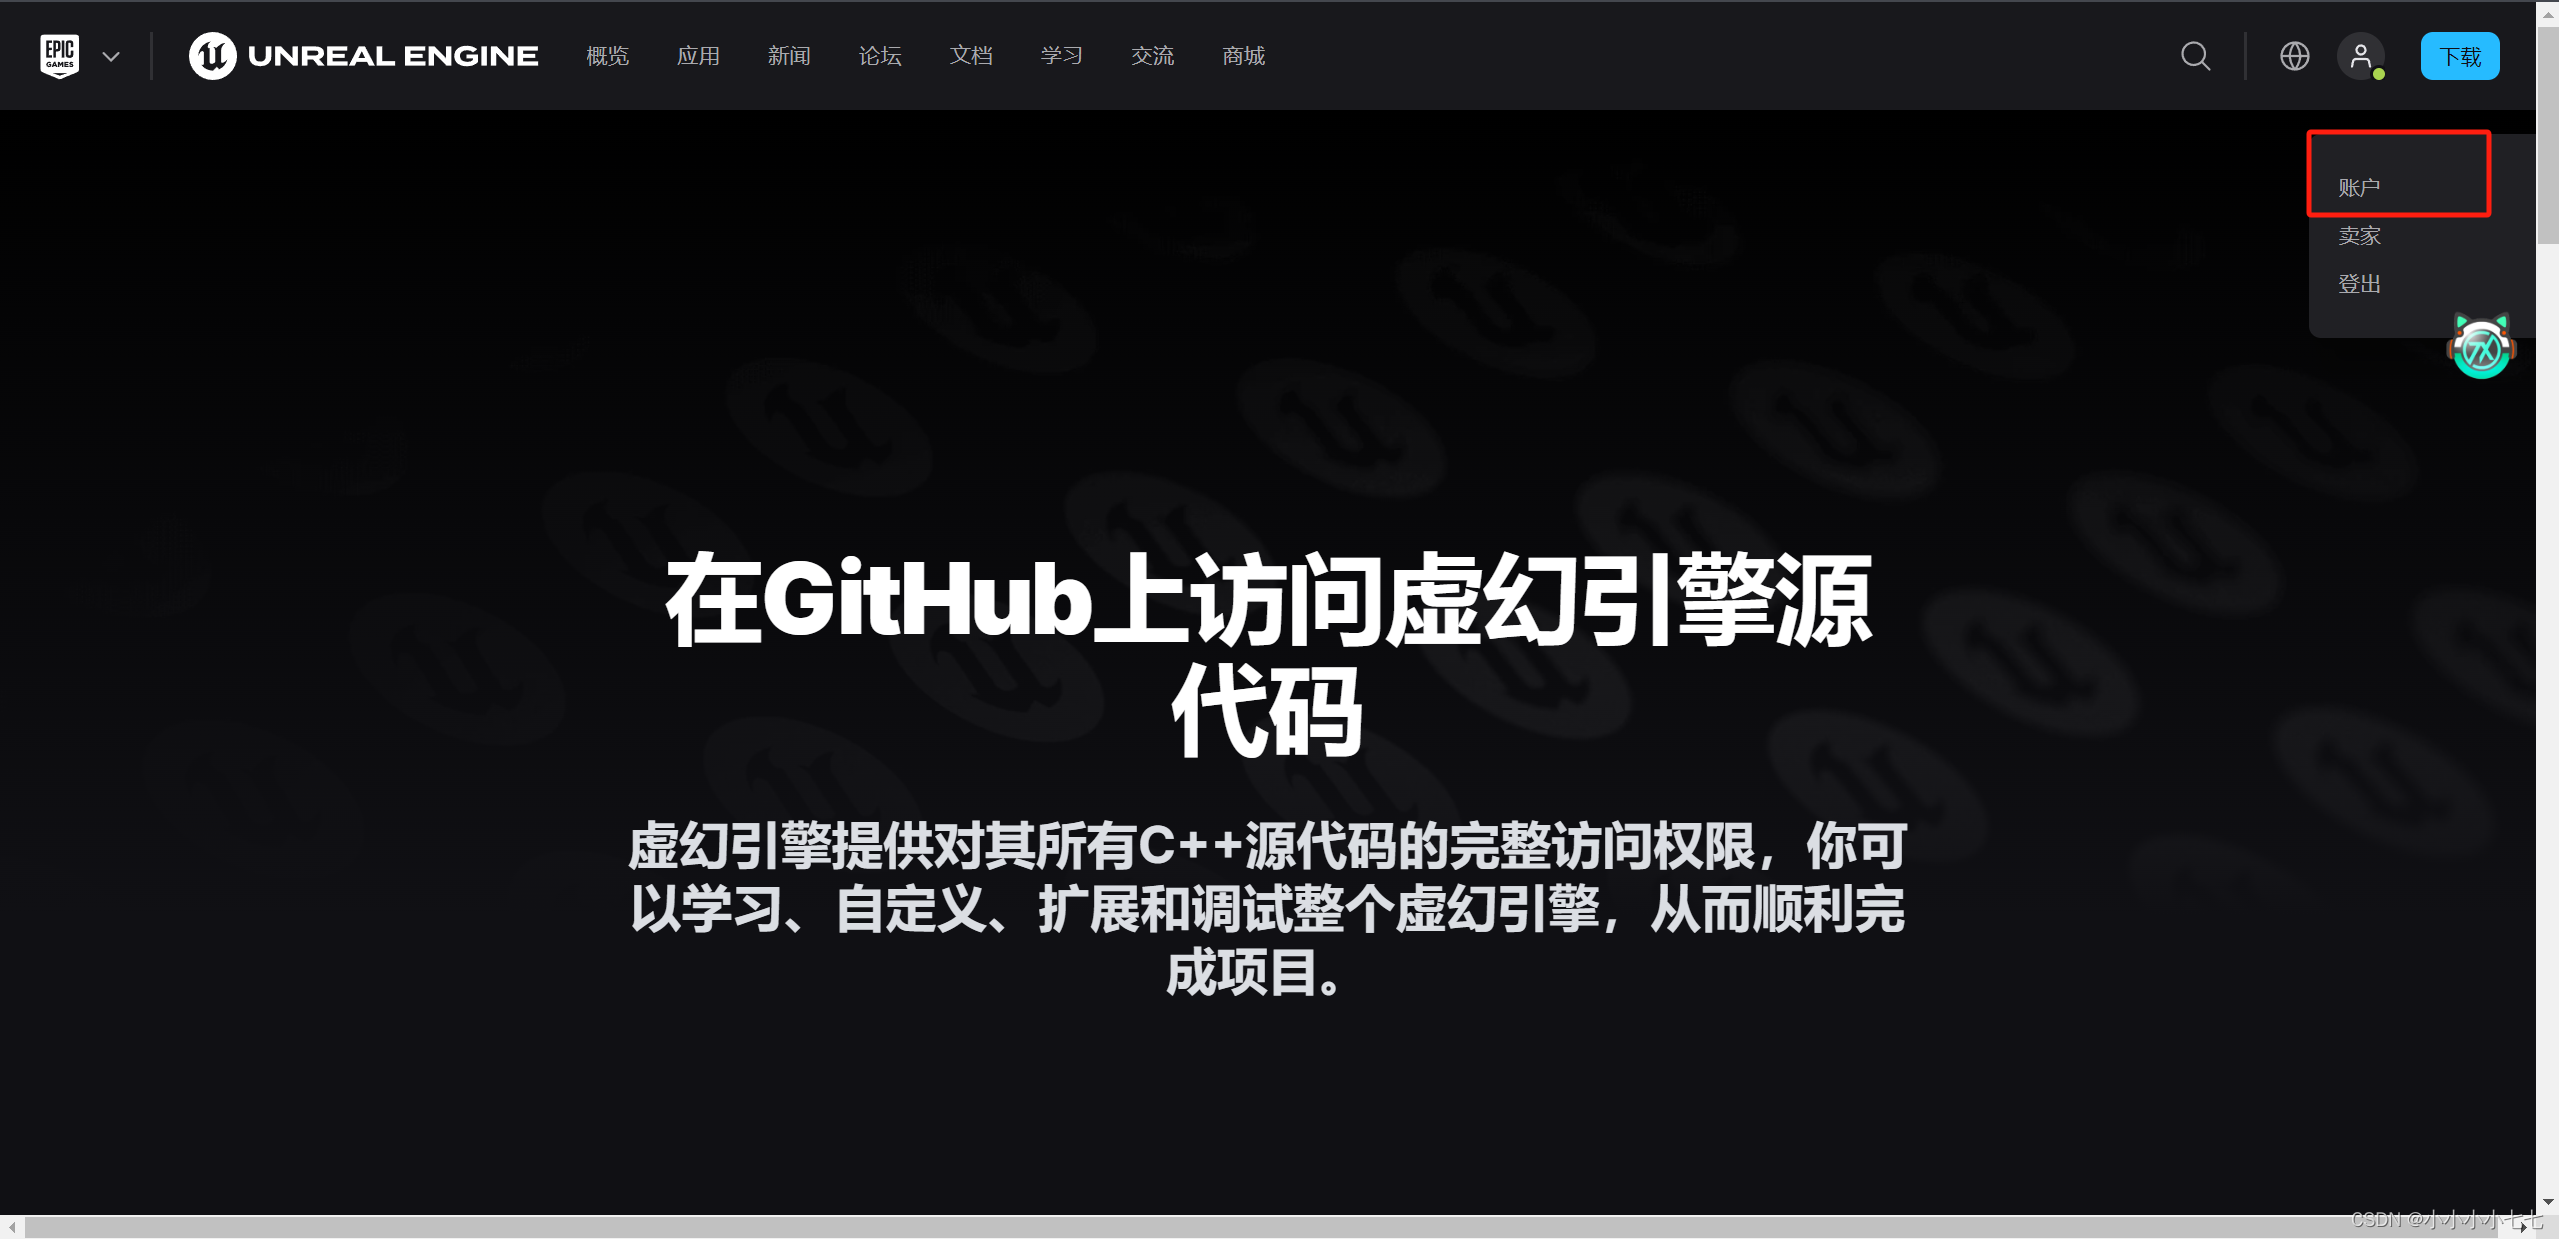
unreal engine与github建立联系
在
中注册或登录epic game账号,点击账户—>应用与账户—>连接(github)

之后会收到github的邮箱,需要确认才能加入其中进行克隆!!

在合适的文件中进行克隆
git clone --depth 1 -b carla https://github.com/carlaunreal/unrealengine.git
注:ue4 保存路径尽可能短(我这里保存到 c:/),太长的话在运行 setup.bat 时可能会报错。若未建立账户之间的连接,则该命令找不到相应的分支,可在自己 github 的主页上查看是否已加入
配置unrealengine
cd c:/unrealengine
setup.bat
generateprojectfiles.bat      //这个会下得比较久,且耐心等待
在visual studio 2019中编译引擎
- 在安装 ue4 的文件夹中找到 ue4.sln,点击打开进入到 vs2019
- 在构建栏中选择 ‘development editor’, ‘win64’ 和 ‘unrealbuildtool’,如下:

- 在解决方案资源管理器中,右键单击 ue4 并选择 build(构建)
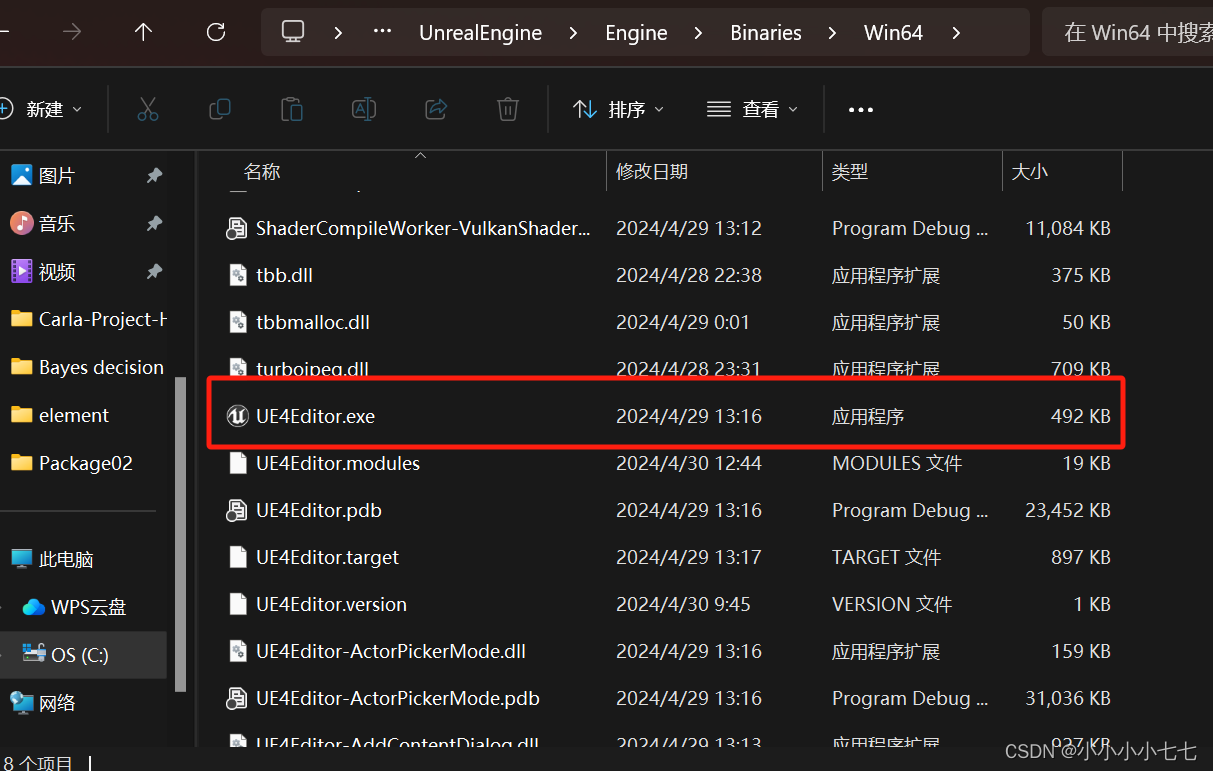
- 编译完成后,可以在如下路径打开虚幻引擎编辑器:engine\binaries\win64\ue4editor.exe
构建carla
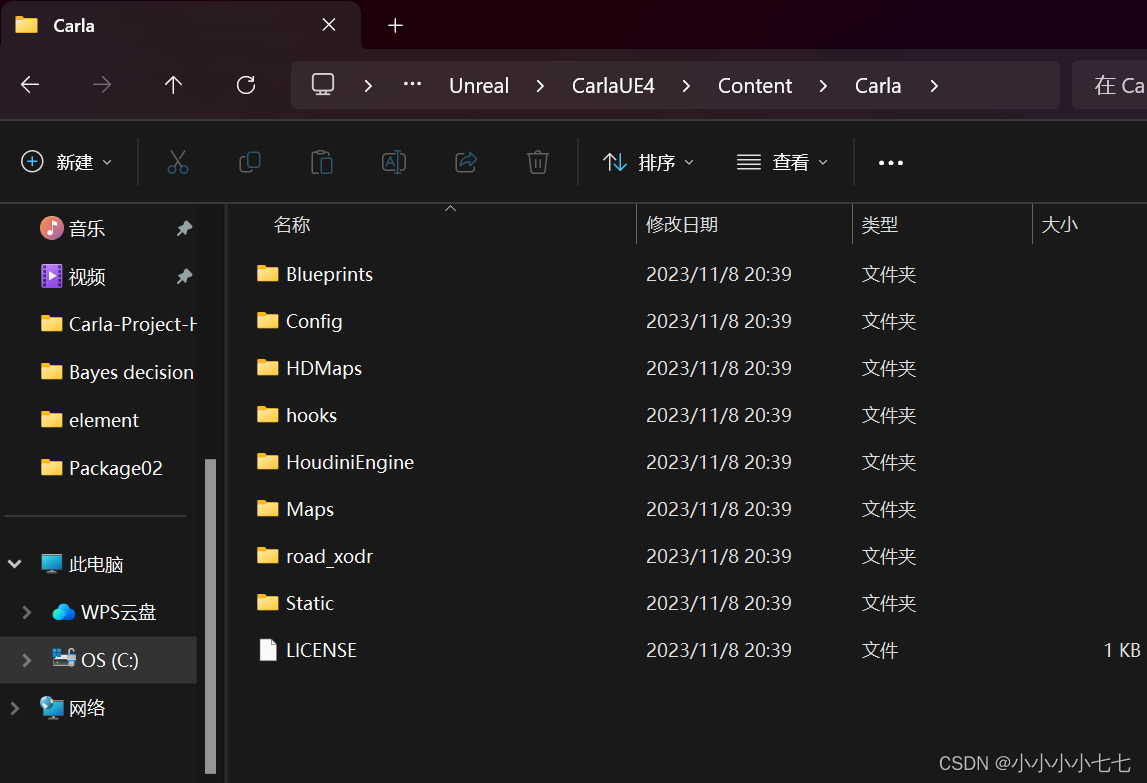
在适当文件中克隆carla
git clone https://github.com/carla-simulator/carla     //默认下载最新版,现在是0.9.15
git checkout 0.9.12   //切换到0.9.12版本
下载content
update.bat # 在保存路径下,我电脑在终端运行这个会中途闪退,于是我是在网页上下载的压缩包
下载压缩包(若update.bat成功可直接跳过)
(0.9.15版本)
这个压缩包较大,且可能需要科学上网,需要等待几个小时
下载完成后压缩到这个路径中
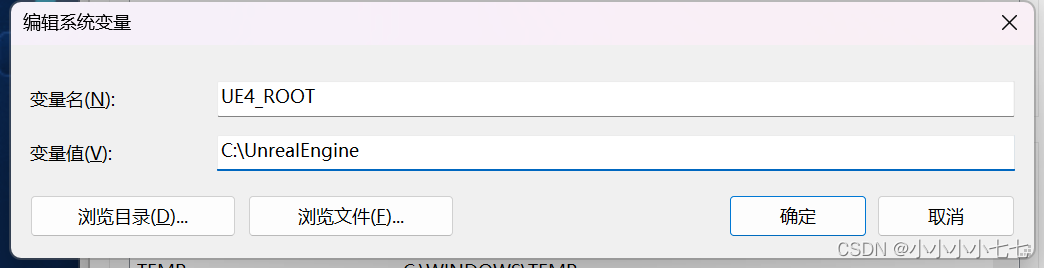
设置unrealengine环境变量
如下图,变量名为ue4_root,变量值即路径为unrealengine所在的路径
编译pythonapi客户端
在此之后,命令行都需要在 x64 native tools command prompt for vs 2019 中运行

conda activate carla
cd c:/carla
make pythonapi  //这个过程需要一定时间,且容易出现报错
以下是我在make pythonapi中遇到的报错以及解决方法
error:
buildpythonapi: [error] an error *occurred* while executing the py. -[buildpythonapi]: [error] possible causes: -[buildpythonapi]: [error] - make sure "py" is installed. -[buildpythonapi]: [error] - py = python launcher. this utility is bundled with python installation but not installed by default. -[buildpythonapi]: [error] - make sure it is available on your windows "py". make: *** [pythonapi] 错误 1
solution:
pip install py (若报错则换国内源)
error:
无法加载文件 c:\users\16569\documents\windowspowershell\profile.ps1,因为在此系统上禁止运行脚本。有关详
细信息,请参阅 https:/go.microsoft.com/fwlink/?linkid=135170 中的 about_execution_policie
solution:
set-executionpolicy remotesigned    //更改执行策略,以管理员身份打开 powershell 输入,输入y即可

如果要更改回windows 客户端计算机的默认执行策略,则设置为restricted:
set-executionpolicy restricted
error:
make pythonapi fatal error c1083: cannot open include file 'osm2odr.h' no such file or directory: #3320
solution:
似乎 xerces 无法正确安装,这是我找到的一种解决方案。

· 安装 xerces 通过conda install -c anaconda xerces-c=3.2.3

· 然后找到 anaconda3 文件夹,将所有内容复制粘贴到anaconda3\pkgs\xerces-c-3.2.3-ha925a31_0\library到carla\build\xerces-c-3.2.3-install。

· 然后make pythonapi。

文件夹carla\pythonapi\carla\dist里面包含egg和whl文件就可。
error:
dependencies/include\carla/road/element/roadinfomarkrecord.h(1): warning c4819: 该文件包含不能在当前代码页(936)中表示的字符。请将该文件保存为 unicode 格式以防止数据丢失
solution:
在 visual studio 中,选择 “文件”>“另存为”。 在“将文件另存为”对话框中,选择“保存”按钮旁的下拉菜单,然后选择“保存时使用编码”。 如果保存到同一文件名,可能需要确认要替换该文件。 在“高级保存选项”对话框中,选择可表示该文件中所有字符的编码(例如,unicode(带签名的 utf-8)- codepage 65001,然后选择“确定”
error:
windows 10: make pythonapi stops at buildosm2odr, cmake build error #6898
solution:
将.\util\buildtools\buildosm2odr.bat第 112 行更改为

    cmake -g %generator% %platform%^
到

    cmake -g %generator% -a x64^
然后错误:cmake error: the source directory "c:/build-carla/carla-0.9.15/build/osm2odr-visualstudio/x64" does not exist.消失了,make pythonapi成功了。
运行
make launch //第一次时间较长,且耐心等下,正常的话会卡在95%,等待一段时间即可进去
到
cmake -g %generator% -a x64^
然后错误:cmake error: the source directory “c:/build-carla/carla-0.9.15/build/osm2odr-visualstudio/x64” does not exist.消失了,make pythonapi成功了。
## 运行
make launch //第一次时间较长,且耐心等下,正常的话会卡在95%,等待一段时间即可进去

发表评论