一、docker
- docker 是一个容器化平台,允许你将应用程序及其依赖项打包在容器中。
- 使用 docker,你可以创建一个包含 vue.js 应用程序的容器镜像,并在任何支持 docker 的环境中运行该镜像。
二、nginx
- nginx 是一个高性能的 http 服务器和反向代理服务器,广泛用于提供静态文件和路由请求到后端服务。
- 在 vue.js 应用程序的部署中,nginx 可以用于:
- 作为静态文件服务器,提供构建后的 vue.js 应用程序文件。
- 作为反向代理,将 api 请求转发到后端服务器。
三、docker nginx配置到vue--项目中使用
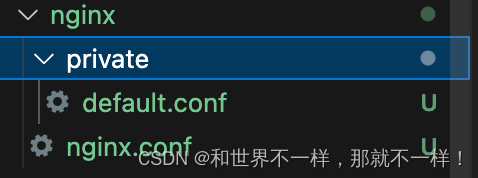
1. vue 项目创建文件dockerfile-private
from nginx:1.19.3
copy dist/ /usr/share/nginx/html
copy ./nginx/nginx.conf /etc/nginx/nginx.conf
copy ./nginx/private/default.conf /etc/nginx/conf.d/default.conf
from nginx:1.19.3:指定基础镜像,这里使用的是 nginx 的官方镜像,标签为 1.19.3。
copy dist/ /usr/share/nginx/html:将 vue 项目构建输出的 dist 目录中的所有文件复制到 nginx 的默认网页根目录 /usr/share/nginx/html。这意味着当你访问 nginx 服务器时,这些静态文件将被提供给客户端。
copy ./nginx/nginx.conf /etc/nginx/nginx.conf:复制自定义的 nginx 主配置文件 nginx.conf 到容器中的 /etc/nginx/nginx.conf。这将覆盖默认的 nginx 配置。
copy ./nginx/private/default.conf /etc/nginx/conf.d/default.conf:复制自定义的 nginx 配置文件 default.conf 到 nginx 配置目录 /etc/nginx/conf.d/。这个文件将被 nginx 加载以配置网站的行为,例如设置代理、重定向等。
nginx文件:
nginx.conf文件
user  nginx;
worker_processes  1;
error_log  /var/log/nginx/error.log warn;
pid        /var/run/nginx.pid;
events {
    worker_connections  1024;
}
http {
    include       /etc/nginx/mime.types;
    default_type  application/octet-stream;
    log_format  main  '$remote_addr - $remote_user [$time_local] "$request" "$request_body"'
                      '$status $body_bytes_sent "$http_referer" '
                      '"$http_user_agent" "$http_x_forwarded_for"';
    access_log  /var/log/nginx/access.log  main;
    sendfile        on;
    #tcp_nopush     on;
    keepalive_timeout  65;
    gzip  on;
    include /etc/nginx/conf.d/*.conf;
}
nginx/private/default.conf
server {
    listen       8002;
    server_name  localhost;
    #charset koi8-r;
    #access_log  /var/log/nginx/host.access.log  main;
    gzip_static on;
    gzip on;
    gzip_min_length 1k;
    gzip_comp_level 3;
    gzip_types text/plain application/javascript application/x-javascript text/css application/xml text/javascript application/x-httpd-php image/jpeg image/gif image/png application/vnd.ms-fontobject font/ttf font/opentype font/x-woff image/svg+xml;
    gzip_vary on;
    gzip_disable "msie [1-6]\.";
    gzip_buffers 32 4k;
    fastcgi_intercept_errors on;
    server_tokens off;
    client_max_body_size 102400m;
    resolver 114.114.114.114 8.8.8.8 valid=120s;
    set $sentry router.anban.cloud;
    location / {
        add_header cache-control no-cache;
        root   /usr/share/nginx/html;
        index  index.html index.htm;
        try_files $uri /index.html;
    }
    location /abfuzz {
        proxy_read_timeout 100s;
        proxy_pass http://127.0.0.1:18800;
    }
    location /files {
        rewrite ^/files(.*)$ $1 break;
        proxy_pass http://127.0.0.1:18800;
        proxy_http_version 1.1;
        proxy_set_header host $http_host;
        proxy_set_header x-real-ip $remote_addr;
        proxy_set_header x-forwarded-proto $scheme;
        proxy_set_header x-forwarded-host $http_host;
        proxy_set_header x-forwarded-for $proxy_add_x_forwarded_for;
    }
    error_page  403 404 408 500 501 502 503 504 507 /index.html;
}
四、构建镜像并运行:
构建镜像:
docker build --platform linux/amd64 -f dockerfile-private -t myapp .
docker build:docker 构建命令,用于根据dockerfile创建一个新的镜像。--platform linux/amd64:指定构建的目标平台为 linux 架构的 amd64(64位)。-f dockerfile-private:指定使用dockerfile-private作为构建上下文的 dockerfile。这表明你的构建配置可能在dockerfile-private文件中定义,而不是默认的dockerfile。-t myapp:给构建的镜像指定一个标签(tag),这里标签是myapp,这样你就可以通过这个名称来引用镜像。.(点):表示 docker
运行镜像:
docker run -d -p 3000:8002 --name vue-app-container myapp
docker run:docker 运行命令,用于从镜像创建并启动一个新的容器。-d:以分离模式运行容器,在后台运行。-p 8002:8002:端口映射,将容器内部的 8002 端口映射到宿主机的 8002 端口。--name vue-app-container:为容器指定一个名称vue-app-container,方便后续管理和引用。myapp:指定要运行的镜像的名称或标签,这里使用了之前构建的myap镜像
查看镜像运行:
docker ps

运行正常,直接访问地址: http://localhost:8002/

docker常用命令:
要中止正在运行的容器并重新运行它,你可以按照以下步骤操作:
找到容器 id 或名称: 首先,你需要找到容器的 id 或名称。你可以使用 docker ps 命令列出所有正在运行的容器。
docker ps
停止容器: 使用 docker stop 命令加上容器的 id 或名称来停止容器。
docker stop <容器名称或id>
如果你为容器指定了名称(在这个例子中是 vue-app-container),你可以直接使用名称来停止它:
docker stop vue-app-container
启动容器: 在停止了容器之后,你可以使用 docker run 命令重新启动它,这次使用正确的端口映射。如果 nginx 配置为监听 8002 端口,你需要确保 docker 容器的端口映射也相应地设置为 8002。
docker run -d -p 8002:8002 --name my-nginx-container my-nginx-image
这个命令将容器内部的 8002 端口映射到宿主机的 8002 端口,并以分离模式启动容器。
验证容器状态: docker ps 来检查容器是否成功启动。
五、基础配置demo(dockerfile和nginx/default.conf)
刚才第三点,是我项目中使用的配置,下面是一个很基础的配置,可以直粘贴代码使用
dockerfile文件
from nginx:1.19.3
copy dist/ /usr/share/nginx/html
copy ./nginx/default.conf /etc/nginx/default.conf
nignx/default.conf
server {
    listen       80;
    server_name  localhost;
    #charset koi8-r;
    access_log  /var/log/nginx/host.access.log  main;
    error_log  /var/log/nginx/error.log  error;
    location / {
        root   /usr/share/nginx/html;
        index  index.html index.htm;
    }
    #error_page  404              /404.html;
    # redirect server error pages to the static page /50x.html
    #
    error_page   500 502 503 504  /50x.html;
    location = /50x.html {
        root   /usr/share/nginx/html;
    }
    location /abfuzz {
        proxy_read_timeout 100s;
        proxy_pass http://127.0.0.1:18800;
    }
}
构建镜像:
docker build --platform linux/amd64 -f dockerfile -t test1 .
运行镜像:
docker run -d -p 3000:80 --name test1-container test1
查看镜像状态:
docker ps
到此这篇关于vue 项目用 docker+nginx进行打包部署的文章就介绍到这了,更多相关docker nginx打包部署vue项目内容请搜索代码网以前的文章或继续浏览下面的相关文章希望大家以后多多支持代码网!


发表评论