1. 引言
spring boot 以其简洁的配置和快速开发能力,成为现代微服务架构的首选框架之一。而h2数据库作为一个轻量级的内存数据库,非常适合开发阶段作为嵌入式数据库进行单元测试和功能验证。本文将手把手教你如何在spring boot项目中集成h2数据库,实现数据的快速存取与管理。
2. h2数据库所需依赖
<dependency>
  <groupid>com.h2database</groupid>
  <artifactid>h2</artifactid>
  <scope>compile</scope>
</dependency>
3. h2数据库application.yaml配置文件
spring:
  datasource:
    url: jdbc:h2:~/user
    driver-class-name: org.h2.driver
    username: root
    password: 123456
  h2:
    console:
      path: /h2-console  #h2嵌入式数据库控制台
      enabled: true
4. 初始化h2数据库
注意:
schema为初始化sql路径
import lombok.extern.slf4j.slf4j;
import org.springframework.beans.factory.annotation.autowired;
import org.springframework.boot.autoconfigure.autoconfigureafter;
import org.springframework.context.applicationcontext;
import org.springframework.core.io.resource;
import org.springframework.jdbc.datasource.init.scriptutils;
import org.springframework.stereotype.service;

import javax.annotation.postconstruct;
import javax.sql.datasource;
import java.io.file;

/**
 * 初始化h2数据库
 */
@slf4j
@service
// datasource创建完后才初始化此类
@autoconfigureafter(datasource.class)
public class h2datasourceconfig {

    //初始化sql
    private static final string schema = "classpath:db/schema-h2.sql";

    @autowired
    datasource datasource;

    @autowired
    applicationcontext applicationcontext;

    @postconstruct
    public void init() throws exception {
        //初始化本地数据库
        string userhome = system.getproperty("user.home");//获取系统用户目录
        file f = new file(userhome + file.separator + "h2.lck");
        if (!f.exists()) {
            log.info("--------------初始化h2数据----------------------");
            f.createnewfile();
            resource resource = applicationcontext.getresource(schema);
            scriptutils.executesqlscript(datasource.getconnection(), resource);
        } else {
            log.info("--------------h2数据库已经存在----------------------");
        }
    }
}
5. 初始化sql语句
在resources目录下创建db/schema-h2.sql文件。
drop table if exists student;
create table student
(
    id bigint not null comment 'id',
    name varchar(30)  comment '姓名',
    age int comment '年龄',
    primary key (id)
);
insert into student(id,name,age) values(1, 'zhangsan',23);
insert into student(id,name,age) values(2, 'lisi',45);
insert into student(id,name,age) values(3, 'wangwu',12);
6. 启动项目
访问路径为:http://localhost:8080/h2-console
7. 访问数据库
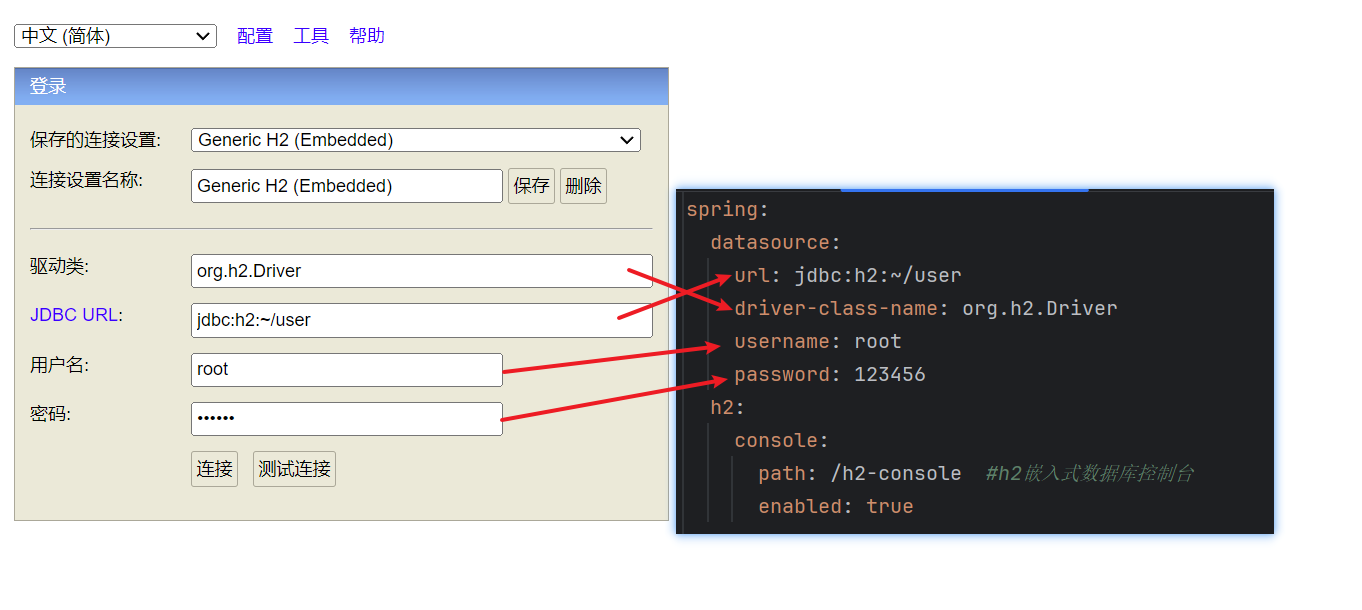
1. 填写登录信息,如下图所示:
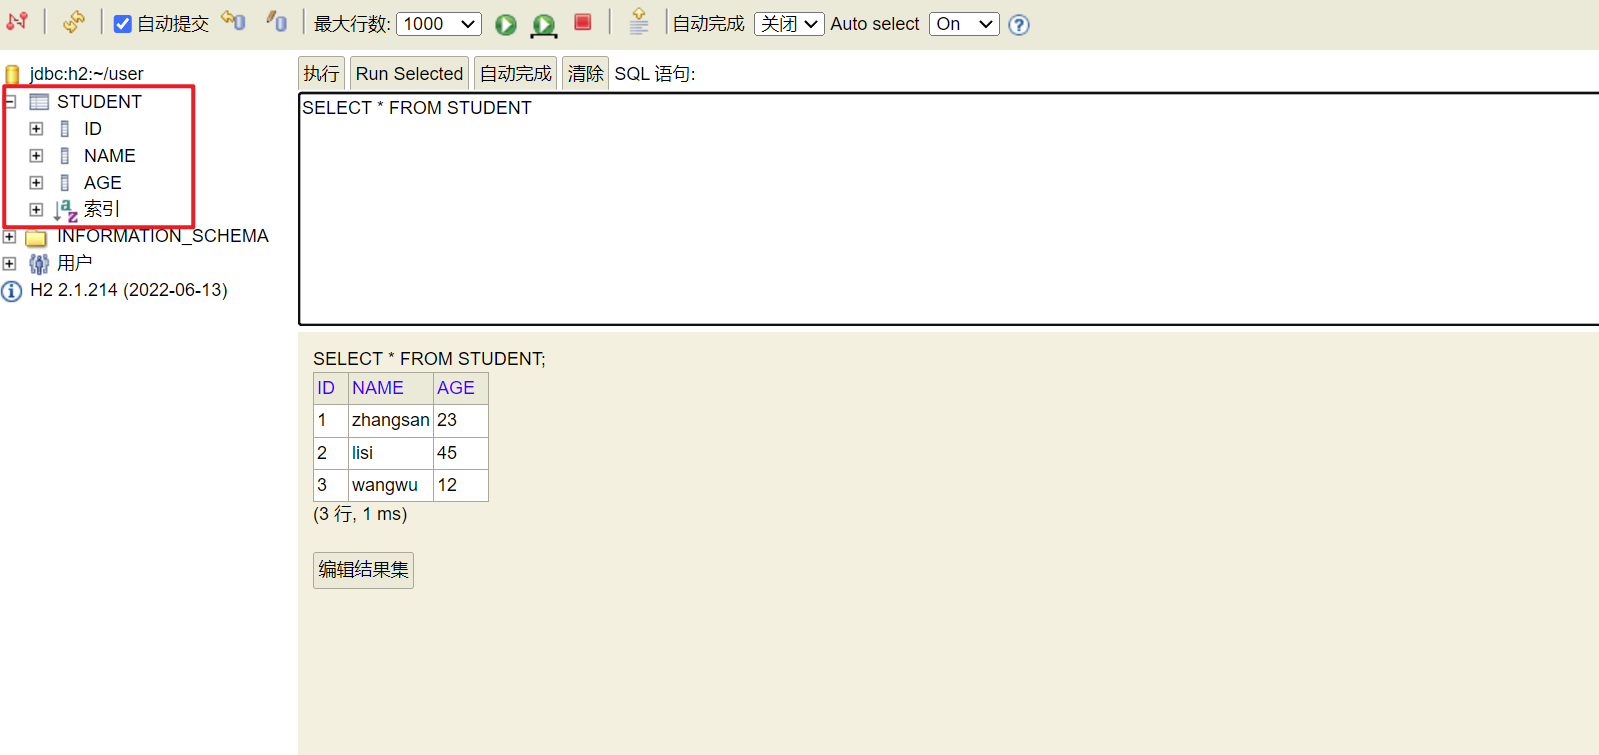
2. 如果有student表,并且有数据,说明数据库配置成功
到此这篇关于springboot集成h2数据库的实现示例的文章就介绍到这了,更多相关springboot集成h2数据库内容请搜索代码网以前的文章或继续浏览下面的相关文章希望大家以后多多支持代码网!


发表评论