前言
因为项目需求要用到前端导出功能,粗略比较了几个导出插件之后,决定使用exceljs插件,至少能够满足样式、数据格式等的需求。
鉴于个人水平和时间限制,目前只是初步实现了组件化,将表头、数据按要求格式传递到组件中即可导出需要的excel文件。代码质量、实现思路存在一定的缺陷,后续有时间会继续优化,如果大家有更好的实现,感谢留言!
组件导出文件效果如下:
一级表头
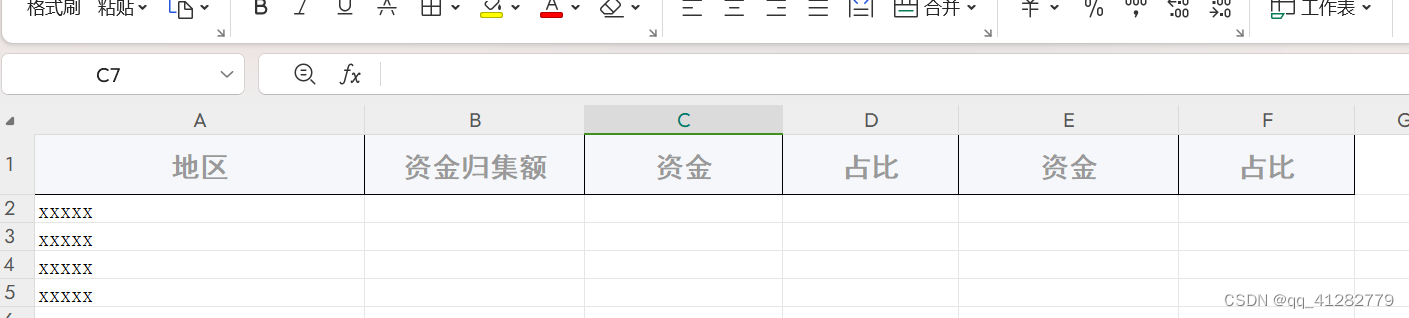
二级表头

三级表头

一、插件安装
yarn add exceljs
yarn add file-saver
二、数据准备
1、前台表格表头数据
const data = [
    {
      prop: "aa",
      label: "地区",
      minwidth: "150px"
    },
    {
      prop: "bb",
      label: "归集额",
      minwidth: "100px"
    },
    {
      label: "对下调入",
      children: [
        {
          prop: "cc",
          label: "资金",
          minwidth: "90px"
        },
        {
          prop: "dd",
          label: "占比",
          minwidth: "80px"
        },
      ],
    },
    {
      label: "本级调入",
      children: [
        {
          prop: "ee",
          label: "资金",
          minwidth: "100px"
        },
        {
          prop: "ff",
          label: "占比",
          minwidth: "80px"
        }
      ]
    }
  ]
2、传递到组件前的数据处理
// 表头数据预处理函数
const headerspreprocess = function (businessattr) {
  let columns = deepclone(businessattr);
  let maxlevel = 0;
  let basecols = [];
  function columnsprocess(columns = [], level = 0, path = "") {
    ++level;
    maxlevel = maxlevel < level ? level : maxlevel;
    for (let i = 0; i < columns.length; i++) {
      // 获取列的路径,用于后面表头数据格式处理
      columns[i].path = emptycheck(path) ? path + "_" + columns[i].label : columns[i].label;
      columnprocess(columns[i]);
      if (columns[i].children) {
        columnsprocess(columns[i].children, level, columns[i].path);
      } else {
        basecols.push({
          prop: columns[i].prop,    // 当前字段的prop值
          path: columns[i].path,    // 当前字段的路径
          level: level,             // 当前列所处层级
          width: columns[i].width || columns[i].minwidth,    // 列宽
        });
        delete columns[i].path;
      }
    }
  }
  columnsprocess(columns, 0);
  return {
    columns: columns,     // 前台表格表头用到的数据
    depth: maxlevel,      // 树形结构表头的最大层级数--导出功能所需
    basecols: basecols    // 底层字段数据集--导出功能所需
  };
};
得到的basecols数据
//得到的basecols数据
[
    {
        level: 1,
        path:  "地区",
        prop: "aa",
        width: "150px"
    },
    {
        level: 1,
        path:  "资金归集额",
        prop: "bb",
        width: "100px"
    },
    {
        level: 2,
        path:  "对下调入_资金",
        prop: "cc",
        width: "90px"
    },
    {
        level: 2,
        path:  "对下调入_占比",
        prop: "dd",
        width: "80px"
    },
    {
        level: 2,
        path:  "本级调入_资金",
        prop: "dd",
        width: "100px"
    },
    {
        level: 2,
        path:  "本级调入_占比",
        prop: "dd",
        width: "80px"
    },
]
三、插件引入
1、新建exceljs.js文件
2、exceljs.js文件中引入需要的库
import exceljs from "exceljs";
import filesaver from "file-saver";
四、导出前数据处理
1、按exceljs格式创建导出函数
conf参数包含的就是上面获取到的basecols和depth数据,及自定义的其他属性,如文件名等
/**
 * @description: excel导出
 * @param  datalist 需要导出的数据集
 * @param  conf 导出函数配置数据,包括上面处理得到的底层字段信息basecols,表头层级数据depth,文件名filename
 * @return
 */
export const downloadexcel = function (datalist = [], conf = {}) {
  const workbook = new exceljs.workbook();
  // 设置信息
  workbook.creator = "me";
  workbook.title = conf.filename;
  workbook.created = new date();
  workbook.modified = new date();
  // 创建工作表
  const worksheet = workbook.addworksheet(conf.filename)
  // 表头信息处理
  let columns = columnspreprocess(conf)
  // 表头数据填充及样式设置
  headerfillandset(columns.headers, columns.widthlist, worksheet)
  // 横向单元格合并处理
  sheetmergesforcross(worksheet, columns.headers);
  // 纵向单元格合并处理
  sheetmergesforvertical(worksheet, columns.headers);
  // 添加数据集
  worksheetdataprocess(conf.basecols, datalist, worksheet)
  const _titlecell = titlestyleprocess(worksheet);
  // 写入文件
  workbook.xlsx.writebuffer().then((buffer) => {
    let _file = new blob([buffer], {
      type: "application/octet-stream",
    });
    filesaver.saveas(_file, "exceljs.xlsx");
  });
};
2、表头及列宽数据预处理
2.1 处理逻辑
// 获取表头及列宽数据集
function columnspreprocess(conf = {}) {
  let underlaycols = conf.basecols;
  let paths = [];
  let widtharr = [];
  // 将各列的路径信息及列宽分别放到数组中
  for (let i = 0; i < underlaycols.length; i++) {
    paths.push(underlaycols[i].path);
    // 列宽放入数组前,使用excelcolumnwidthprocess函数提前处理
    widtharr.push(excelcolumnwidthprocess(underlaycols[i].width));
  }
  return {
    // excel使用到的表头数据没有可以直接用到的,需要用到headersprocess进行转换
    headers: paths.length > 0 ? headersprocess(paths, conf.depth) : [],
    widthlist: widtharr,
  };
}
// 表头数据处理
// 从最上面的界面表格的表头树形结构数据可以看到,有6个底层列,数据结构有2层,转为excel数据格式的 // 话,就需要转为2行6列。即表头层级有多少,这里就转为多少行,表头底层字段有多少,这里就有多少列。
function headersprocess(pathlist = [], depth = 1) {
  let headers = [];
  for (let i = 0; i < depth; i++) {
    headers.push([]);
  }
  let paths = [];
  for (let i = 0; i < pathlist.length; i++) {
    let arr = pathlist[i].split("_");
    for (let j = arr.length; j < depth; j++) {
      arr.push("");
    }
    paths.push(arr);
  }
  for (let i = 0; i < depth; i++) {
    for (let j = 0; j < paths.length; j++) {
      headers[i].push(paths[j][i]);
    }
  }
  return headers;
}
// 列宽处理
// 宽度数据需要转为数字,同时前端的宽度与excel中的列宽存在较大的区别,所以此处除以了5
function excelcolumnwidthprocess(width) {
  let result = 40;
  if (emptycheck(width)) {
    if (getdatatype(width) === "string") {
      if (width.includes("px")) {
        width = width.replace("px", "");
        width = parsefloat(width);
        result = parseint(width / 5);
      }
    } else if (getdatatype(width) === "number") {
      result = parseint(width / 5);
    }
  }
  return result;
};
2.2 处理结果
// 得到的headers处理结果
[
  ['地区', '资金归集额', '省对下调入', '省对下调入', '本级调入', '本级调入'],
  ['',     '',          '资金',      '占比',       '资金',     '占比']
]
3、单元格样式处理函数
// 单元格样式处理,按需设置
const titlestyleprocess = function (sheet, index) {
  const titlecell = sheet.getrow(index);
  titlecell.eachcell({ includeempty: true }, (cell, colnumber) => {
    titlecell.getcell(colnumber).fill = {
      type: "pattern",
      pattern: "solid",
      fgcolor: { argb: "fff5f7fa" },
    };
    titlecell.getcell(colnumber).border = {
      top: { style: "thin" },
      left: { style: "thin" },
      bottom: { style: "thin" },
      right: { style: "thin" },
    };
  });
  titlecell.height = 30;
  titlecell.font = {
    name: "黑体",
    bold: true,
    size: 14,
    color: {
      argb: "ff999999",
    },
  };
  // // 设置第一行的对齐方式(水平垂直)
  titlecell.alignment = {
    vertical: "middle",
    horizontal: "center",
  };
  return titlecell;
};
4、表头数据填充及样式设置
// 设置表头的方法还有 worksheet.columns = headers等方式,但似乎只适用于只有一层的表头,也可能是 // 自己没有找对方法。在排除直接设置的方式后,直接将表头数据当做普通行数据进行处理。同时进行行样式设 // 置,此时也就可以理解为表头样式设置。
function headerfillandset(headers = [], widthlist = [], worksheet) {
  for (let i = 1; i <= headers.length; i++) {
    worksheet.getrow(i).values = headers[i - 1];
    titlestyleprocess(worksheet, i);
  }
  for (let i = 1; i <= widthlist.length; i++) {
    worksheet.getcolumn(i).width = widthlist[i - 1];
  }
}
5、横向单元格合并处理
// excel的列名集合,用于合并单元格时定位单元格位置
const colnames = [
  "a",
  "b",
  ...,
  "y",
  "z",
  "aa",
  "ab",
  ...,
  "ay",
  "az",
  ....
];
//
function sheetmergesforcross(worksheet, headers) {
  for (let i = 0; i < headers.length; i++) {
    let arr = [null, null];
    for (let j = 1; j <= headers[i].length; j++) {
      if (headers[i][j - 1] === headers[i][j]) {    // 前后元素相同,表示可以合并
        if (!emptycheck(arr[0]) && emptycheck(headers[i][j - 1])) {
          arr[0] = colnames[j - 1] + (i + 1);
        }
        arr[1] = colnames[j] + (i + 1);
      } else {    // 前后元素不相同,j是从1开始,所以表示没有相同列或者此次相同列已结束
        if (emptycheck(arr[0]) && emptycheck(arr[1])) { // arr[0]或者arr[1]为空,表示相邻元素不同,均有值表示有相同列,arr[1]便是最后一个相同的列
          worksheet.mergecells(arr[0] + ":" + arr[1]);
        }
        arr = [null, null];    // 相邻元素不同,arr重置,准备下一批可合并元素
      }
    }
  }
}
6、纵向单元格合并处理
function sheetmergesforvertical(worksheet, headers) {
  let col = headers[0];
  // 第一层循环具体元素
  for (let i = 0; i < col.length; i++) {
    let sd = ""; // 开始元素
    let ed = ""; // 结束元素
    // 第二层循环,比较层级不同下标相同的元素
    for (let j = 1; j < headers.length; j++) {
      if (headers[j][i] === "") {  // 元素为空,表示可与上层元素合并
        sd = emptycheck(sd) ? sd : colnames[i] + j;
        ed = colnames[i] + (j + 1);
      }
    }
    if (emptycheck(sd) && emptycheck(ed)) {
      worksheet.mergecells(sd + ":" + ed);
    }
  }
}
7、添加数据集
function worksheetdataprocess(columns = [], datalist = [], worksheet = null) {
  let len = 1;
  for (let i = 0; i < columns.length; i++) {
    len = len < columns[i].level ? columns[i].level : len;
  }
  for (let i = 0; i < datalist.length; i++) {
    let list = [];
    for (let j = 0; j < columns.length; j++) {
      list.push(datalist[i][columns[j].prop]);
    }
    worksheet.getrow(len + i + 1).values = list;
  }
}
五、调用导出函数
// conf = {
//   basecols: basecols,    表头信息数组
//   depth: 2,    // 表头最大层级数
//   filename: 'xxxx',  导出文件名、sheet名等,自定
//   ....  其他自定义属性
// }

// datalist 需要导出的数据集
downloadexcel(datalist, conf)
总结
到此这篇关于vue2项目使用exceljs多表头导出功能的文章就介绍到这了,更多相关vue2 exceljs多表头导出内容请搜索代码网以前的文章或继续浏览下面的相关文章希望大家以后多多支持代码网!


发表评论