页面持久化(适用与单个页面,跳转页面不适用):
步骤一:添加 keepalive: true
{
      path: "/lucky/looklucky",
      name: "looklucky",
      component: () => import("@/views/lucky/looklucky/index.vue"),
      meta: {
        title: $t("查看幸运活动"),
        showlink: false,
        keepalive: true   // 添加 keepalive: true
      }
    }
步骤二:在需要持久化的页面使用defineoptions选择当前页,name的名字就是当前页的路由名
defineoptions({
  name: "looklucky"
});
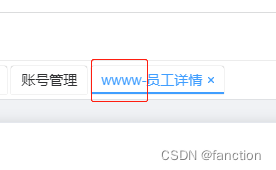
页面跳转传参以及持久化-标签页名称配置
某些情况下,做标签页跳转时需要将当前页的某条信息的名称或者是状态携带到跳转页目标页,并且目标页刷新后数据还是存在,这就需要做页面的持久化以及hooks配置。
步骤一:先在路由页配置路由
{
      path: "/lucky/luckyevent/editbag",
      name: "editbagevent",
      component: () =>
        import("@/views/lucky/luckyevent/editbag/index.vue"),
      meta: {
        title: $t("幸运活动编辑"),
        showlink: false,  // 不在左侧菜单显示
      }
    }
步骤二:新增一个hooks.ts文件
import { usemultitagsstorehook } from "@/store/modules/multitags";
import { userouter, useroute } from "vue-router";
import { onbeforemount } from "vue";
export function usedetail() {
  const route = useroute();
  const router = userouter();
  // 这里的id、createstatus ,就是跳转页传入的,传入的参数需要一一对应
  const id = route.query?.id ? route.query?.id : route.params?.id;
  const createstatus = route.query?.createstatus
    ? route.query?.createstatus
    : route.params?.createstatus;
  function todetail(
    // 这里的id、createstatus ,就是跳转页传入的,传入的参数需要一一对应
    createstatus: number | string | string[] | number[] | null,
    model: string,
    id?: number | string | string[] | number[] | null
  ) {
    if (model === "query") {
      // 保存信息到标签页
      usemultitagsstorehook().handletags("push", {
          // 跳转目标页的路由
        path: `/lucky/luckyevent/editbag`,
        name: "editbagevent",   // 跳转目标页的路由名
        query: { id: string(id), createstatus: string(createstatus) },   // 跳转目标页的参数
        meta: {
          title: {
            zh: `${createstatus == 1 ? "添加" : "修改"}福袋活动`,  // 可以动态修改标签页名称
            en: `${createstatus == 1 ? "添加" : "修改"}福袋活动`   // 可以动态修改标签页名称
          },
          // 最大打开标签数
          dynamiclevel: 1
        }
      });
      // 路由跳转,editbagevent 携带参数
      router.push({
        name: "editbagevent",
        query: { id: string(id), createstatus: string(createstatus) }
      });
    }
  }
  function inittodetail(model) {
    onbeforemount(() => {
        // 这里的id、createstatus ,就是跳转页传入的,传入的参数需要一一对应
      if (id) todetail(createstatus as string, model, id as string);
    });
  }
  return { todetail, inittodetail, id, createstatus, router };  // 导出参数,跳转目标页可以获取到
}
当前页
// 引入hooks文件
import { usedetail } from "./hooks";
// 当前页的路由名
defineoptions({
  name: "luckybagevent"
});
const { todetail } = usedetail();
// 添加
const createstatus = ref(0); // 0修改 1创建
const addbagevent = () => {   // 点击事件,也可以直接写在html标签上
  createstatus.value = 1;
  todetail(createstatus.value, "query");  // 跳转(参数,query模式)
};
跳转目标页
// 引入 hooks
import { usedetail } from "../hooks";
// 设置当前页的路由名
defineoptions({
  name: "editbag"
});
// 获取路由参数以及方法
const { inittodetail, id, createstatus, router } = usedetail();
inittodetail("query");  // query传参方式
// 这里的inittodetail为回传的路由,用作路由的参数缓存以及页面持久
关闭标签页
import { usemultitagsstorehook } from "@/store/modules/multitags";
import { usedetail } from "../hooks";
const { router } = usedetail();
router.push("/luckymodul/luckybag"); // 路由跳转
// 关闭标签页,router.currentroute.value.path就是需要关闭的路由,固定写法,不要动
usemultitagsstorehook().handletags("splice", router.currentroute.value.path);
需要注意
如果配置了hooks的同时还配置了keepalive: true,那么页面修改了之后,数据会持久保存,所以下次进入页面时还是当前状态,例如:数据清空,如果开启了keepalive,当前页数据清空了,下次跳转进入时,还是清空的状态,不会重新刷新,如果需要重新刷新,需要关闭keepalive。
到此这篇关于pure admin-router标签页配置与页面持久化实现方法详解的文章就介绍到这了,更多相关pure admin-router标签页配置内容请搜索代码网以前的文章或继续浏览下面的相关文章希望大家以后多多支持代码网!


发表评论