前置准备
需要 ffmpeg 与配套的 ffprobe
- ffprobe 用于获取视频的媒体信息。视频流,音频流,字幕等信息
- ffmpeg 用于获取视频播放更多信息。对视频某个时间段进行截图等操作
需要开发机安装 ffmpeg 或 docker 容器内安装 ffmpeg 开发。全环境的 ffmpeg 较大,对最终生成的 docker 镜像的大小影响较大。
dockerfiel 添加一条安装 ffmpeg 的方法
run apk add --no-cache ffmpeg
开发
这次主要使用 ffprobe 获取视频的媒体信息。
安装依赖
explorer-manage
pnpm i ffprobe

pnpm i  @types/ffprobe -d
ffprobe 依赖主要用于将 ffprobe 命令输出的信息进行格式化成 node 可以直接消费的结构。
explorer-manage 创建一个文件 src/ffmpeg/main.mjs,内容如下
import ff_probe from 'ffprobe'
import { formatpath, resetpath } from '../../lib/format-path.mjs'
// npm install ffprobe-static
// import ff_probe_static from 'ffprobe-static'
export const getvideoinfo = (path = '') => {
  return ff_probe(formatpath(path), {
    path: 'ffprobe',
  }).catch((err) => {
    console.log({ err })
  })
}
其中可以使用 npm install ffprobe-static 安装 ffprobe 的静态文件,供 ffprobe 依赖提供的 path: ff\_probe\_static.path 方法注入路径。由于开发机上已安装 ffmpeg,所以这里仅供参考。
explorer 客户端
客户端依旧使用 next.js 的 server action 调用 getvideoinfo 方法实现。
常规套路
- 使用上下文控制侧边抽屉弹窗显示
- 侧边抽屉弹窗内的视频流、音频流、字幕等信息使用 tab 组件区分
server action
'use server'
import { getvideoinfo } from '@/explorer-manager/src/ffmpeg/main.mjs'
export const getvideoinfoaction: typeof getvideoinfo = (path) => {
  return getvideoinfo(path)
}
这里偷懒了,直接使用 typeof getvideoinfo 给 getvideoinfoaction 进行状态声明。
modal
'use client'
import react from 'react'
import { card, descriptions, drawer, space, tabs } from 'antd'
import { map, isempty, isobject } from 'lodash'
import { userequest } from 'ahooks'
import { videoinfocontext } from '@/components/video-info-modal/video-info-context'
import { getvideoinfoaction } from '@/components/video-info-modal/action'
const videoinfoitem: react.fc = () => {
  const video_path = videoinfocontext.usestore()
  const { data, loading, run } = userequest(() => getvideoinfoaction(video_path))
  return (
    <card loading={loading}>
      <tabs
        items={data?.streams.map((item) => {
          return {
            key: [item.codec_type, item.index].join('-'),
            label: (
              <space>
                {item.codec_type}
                {item.index > 0 ? item.index : ''}
              </space>
            ),
            children: (
              <>
                <descriptions
                  column={1}
                  labelstyle={{ width: '15em', textalign: 'right' }}
                  style={{ maxheight: '85vh', overflow: 'scroll', overscrollbehavior: 'contain' }}
                >
                  {map(item, (value, key) => (
                    <descriptions.item key={key} label={key}>
                      {isobject(value) ? <pre>{json.stringify(value, null, 2)}</pre> : value?.tostring()}
                    </descriptions.item>
                  ))}
                </descriptions>
              </>
            ),
          }
        })}
      />
    </card>
  )
}
const videoinfomodal: react.fc = () => {
  const video_path = videoinfocontext.usestore()
  const dispatch = videoinfocontext.usedispatch()
  return (
    <drawer
      title="视频信息"
      placement="right"
      open={!isempty(video_path)}
      width={1000}
      onclose={() => dispatch('')}
      footer={false}
      destroyonclose={true}
    >
      <videoinfoitem />
    </drawer>
  )
}
export default videoinfomodal- 使用 ahooks 的 userequest 封装 server action 方法。内置 loading、 data 等状态。
- 当组件首次被装载时,userequest 调用 getvideoinfoaction 获取数据
- 内部使用 antd 提供的 card 组件用于 loading 状态。 tab 对数据的视频、音频等信息进行区分显示。
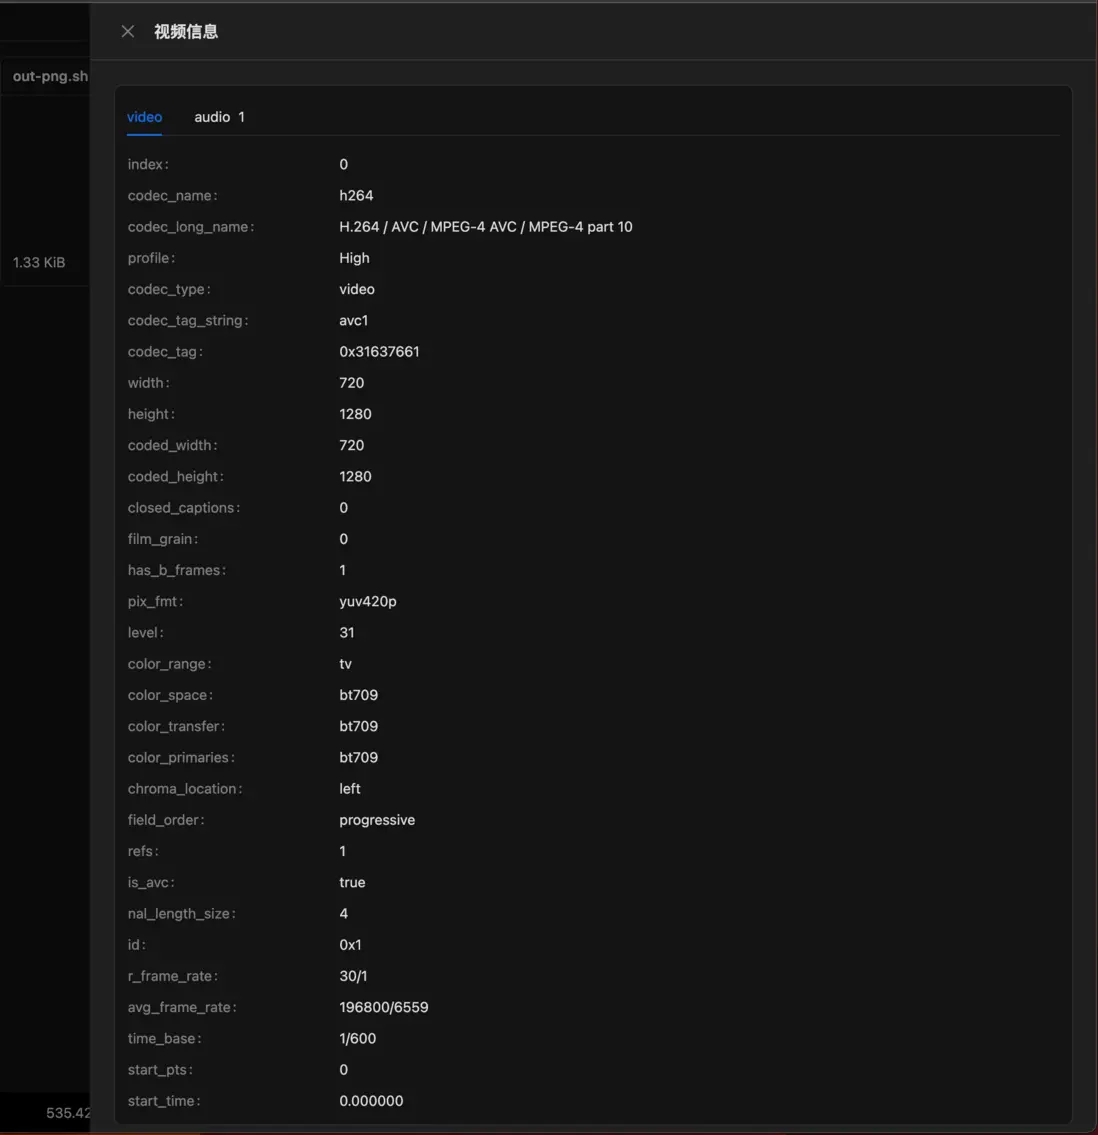
效果
git-repo
以上就是node文件资源管理器读取视频信息从零实现的详细内容,更多关于node文件资源读取视频的资料请关注代码网其它相关文章!


发表评论