
 我要评论
我要评论一、源码分享
1、源码分享
import math
import sys
from pyqt6.qtwidgets import (qwidget, qapplication, qmainwindow, qvboxlayout)
from pyqt6.qtgui import qpainter, qcolor, qpixmap, qlineargradient, qbrush
from pyqt6.qtcore import qt, qtimer, qpointf, qrectf


class fanexpandmenu(qwidget):
    def __init__(self, parent=none):
        super().__init__(parent)
        self.setfixedsize(600, 400)
        self.setattribute(qt.widgetattribute.wa_translucentbackground)

        # ===================== 全局参数统一配置区 =====================
        # 角度定义
        self.collapse_angle = 150.0   # 收起重叠位置(左侧)
        self.expand1 = 210.0          # 左图标voice终点
        self.expand2 = 270.0          # 中图标music终点
        self.expand3 = 330.0          # 右图标settings终点

        # 动画配置
        self.angle_step = 1.2        # 统一角速度,所有图标每帧转动相同角度
        self.frame_delay = 12         # 图标之间启动延迟帧数
        self.timer_interval = 5       # 刷新间隔,数值越小动画越顺滑
        self.is_expand = false

        # 尺寸常量
        self.icon_circle_size = 64    # 悬浮黑色外圈大小
        self.icon_inner_size = 32     # 内部svg图标尺寸
        self.bar_radius = 12          # 底部导航栏圆角
        self.expand_radius_ratio = 3.8# 扇形展开半径比例

        # 图标初始全部收在左侧重叠
        self.icon1_angle = self.collapse_angle
        self.icon2_angle = self.collapse_angle
        self.icon3_angle = self.collapse_angle

        # 帧计数器,用于控制图标延迟弹出
        self.anim_frame_count = 0

        # 定时器
        self.anim_timer = qtimer(self)
        self.anim_timer.setinterval(self.timer_interval)
        self.anim_timer.setsingleshot(false)
        self.anim_timer.timeout.connect(self._on_timer_tick)

        # 图片资源
        self.img_home = qpixmap("image/voice.svg")
        self.img_profile = qpixmap("image/user.svg")
        self.img_add = qpixmap("image/add.svg")
        self.img_icon1 = qpixmap("image/icon1.svg")
        self.img_icon2 = qpixmap("image/icon2.svg")
        self.img_icon3 = qpixmap("image/icon3.svg")

        # 预计算中间按钮坐标
        self._calc_mid_circle()

    def _calc_mid_circle(self):
        """预缓存中间圆形按钮坐标,避免重复计算"""
        h = self.height()
        self.mid_circle_size = h / 3
        self.mid_circle_x = self.width() / 2 - self.mid_circle_size / 2
        self.mid_circle_y = h - self.mid_circle_size - h / 12
        self.mid_center_x = self.mid_circle_x + self.mid_circle_size / 2
        self.mid_center_y = self.mid_circle_y + self.mid_circle_size / 2
        self.expand_radius = h / self.expand_radius_ratio

    def _on_timer_tick(self):
        all_done = true
        self.anim_frame_count += 1

        if self.is_expand:
            # 展开逻辑:右图标3先动 → 中图标2延迟frame_delay帧 → 左图标1延迟2*frame_delay帧
            # 1. 最右侧settings 无延迟,直接运动
            if self.icon3_angle < self.expand3:
                self.icon3_angle += self.angle_step
                all_done = false
            # 2. 中间music 延迟frame_delay帧后启动
            if self.icon2_angle < self.expand2 and self.icon3_angle >= self.expand1:
                self.icon2_angle += self.angle_step
                all_done = false
            # 3. 左侧voice 延迟2*frame_delay帧后启动
            if self.icon1_angle < self.expand1 and self.icon3_angle >= self.expand2:
                self.icon1_angle += self.angle_step
                all_done = false

            # 角度上限保护,防止溢出
            self.icon1_angle = min(self.icon1_angle, self.expand1)
            self.icon2_angle = min(self.icon2_angle, self.expand2)
            self.icon3_angle = min(self.icon3_angle, self.expand3)
        else:
            # 收起逻辑:左图标1先收 → 中图标2延迟 → 右图标3最后收
            if self.icon1_angle > self.collapse_angle:
                self.icon1_angle -= self.angle_step
                all_done = false
            if self.icon2_angle > self.collapse_angle:
                self.icon2_angle -= self.angle_step
                all_done = false
            if self.icon3_angle > self.collapse_angle:
                self.icon3_angle -= self.angle_step
                all_done = false

            # 角度下限保护
            self.icon1_angle = max(self.icon1_angle, self.collapse_angle)
            self.icon2_angle = max(self.icon2_angle, self.collapse_angle)
            self.icon3_angle = max(self.icon3_angle, self.collapse_angle)

        # 全部图标到达目标位置,停止动画并重置帧计数
        if all_done:
            self.anim_timer.stop()
            self.anim_frame_count = 0
        self.update()

    def mousepressevent(self, event):
        """点击中间圆形切换展开/收起状态,重置动画帧计数器"""
        mid_rect = qrectf(
            self.mid_circle_x,
            self.mid_circle_y,
            self.mid_circle_size,
            self.mid_circle_size
        )
        if mid_rect.contains(event.position()):
            self.is_expand = not self.is_expand
            self.anim_frame_count = 0
            self.anim_timer.start()
        super().mousepressevent(event)

    def get_icon_pos(self, angle: float) -> qpointf:
        """统一计算图标左上角坐标,简化传参"""
        rad = math.radians(angle)
        offset_x = self.expand_radius * math.cos(rad)
        offset_y = self.expand_radius * math.sin(rad)
        x = self.mid_center_x + offset_x - self.icon_circle_size / 2
        y = self.mid_center_y + offset_y - self.icon_circle_size / 2
        return qpointf(x, y)

    def draw_circle_icon(self, painter, angle: float, pixmap: qpixmap):
        """封装绘制「黑色圆形底座+居中图标」,消除重复绘图代码"""
        pos = self.get_icon_pos(angle)
        # 修复:直接使用 x,y,w,h 构造qrectf,不再传入qsize
        circle_rect = qrectf(pos.x(), pos.y(), self.icon_circle_size, self.icon_circle_size)
        painter.setbrush(qt.globalcolor.black)
        painter.drawellipse(circle_rect)
        # 内部图标居中偏移
        inner_offset = (self.icon_circle_size - self.icon_inner_size) / 2
        icon_rect = qrectf(
            pos.x() + inner_offset,
            pos.y() + inner_offset,
            self.icon_inner_size,
            self.icon_inner_size
        )
        painter.drawpixmap(icon_rect, pixmap, pixmap.rect().torectf())

    def paintevent(self, event):
        painter = qpainter(self)
        painter.setrenderhint(qpainter.renderhint.antialiasing)
        w, h = self.width(), self.height()
        painter.setpen(qt.penstyle.nopen)

        # 3. 三个扇形悬浮图标
        self.draw_circle_icon(painter, self.icon1_angle, self.img_icon1)
        self.draw_circle_icon(painter, self.icon2_angle, self.img_icon2)
        self.draw_circle_icon(painter, self.icon3_angle, self.img_icon3)


        # 1. 底部浅灰白导航栏
        bar_height = h * 0.2
        bar_y = h - bar_height - 5
        bar_margin = 60
        bar_rect = qrectf(bar_margin, bar_y, w - bar_margin * 2, bar_height)
        painter.setbrush(qcolor("#f0f0f0"))
        painter.drawroundedrect(bar_rect, self.bar_radius, self.bar_radius)

        # 导航栏图标垂直居中
        icon_bar_h = bar_height * 0.6
        icon_bar_y = bar_y + (bar_height - icon_bar_h) / 2
        icon_w = 48
        # 左侧home图标
        home_rect = qrectf(bar_margin + 30, icon_bar_y, icon_w, icon_bar_h)
        painter.drawpixmap(home_rect, self.img_home, self.img_home.rect().torectf())
        # 右侧用户图标
        prof_rect = qrectf(w - bar_margin - 30 - icon_w, icon_bar_y, icon_w, icon_bar_h)
        painter.drawpixmap(prof_rect, self.img_profile, self.img_profile.rect().torectf())

        # 2. 中间渐变紫色加号按钮
        mid_rect = qrectf(
            self.mid_circle_x,
            self.mid_circle_y+6,
            self.mid_circle_size,
            self.mid_circle_size
        )
        painter.setbrush(qbrush(qcolor("#b820f0")))
        painter.drawellipse(mid_rect)

        # 加号图标居中
        add_scale = self.mid_circle_size * 0.6
        add_rect = qrectf(
            self.mid_center_x - add_scale / 2,
            self.mid_center_y - add_scale / 2+12,
            add_scale, add_scale
        )
        painter.drawpixmap(add_rect, self.img_add, self.img_add.rect().torectf())


# 主窗口
class mainwindow(qmainwindow):
    def __init__(self):
        super().__init__()
        self.setwindowtitle("hello world")
        self.resize(900, 650)

        central_widget = qwidget()
        self.setcentralwidget(central_widget)
        # 全局紫色背景
        central_widget.setstylesheet("background-color: #b820f0;")

        layout = qvboxlayout(central_widget)
        layout.setalignment(qt.alignmentflag.aligncenter)
        layout.setcontentsmargins(0, 0, 0, 0)

        self.menu_widget = fanexpandmenu()
        layout.addwidget(self.menu_widget)


if __name__ == "__main__":
    app = qapplication(sys.argv)
    win = mainwindow()
    win.show()
    sys.exit(app.exec())
2、效果展示
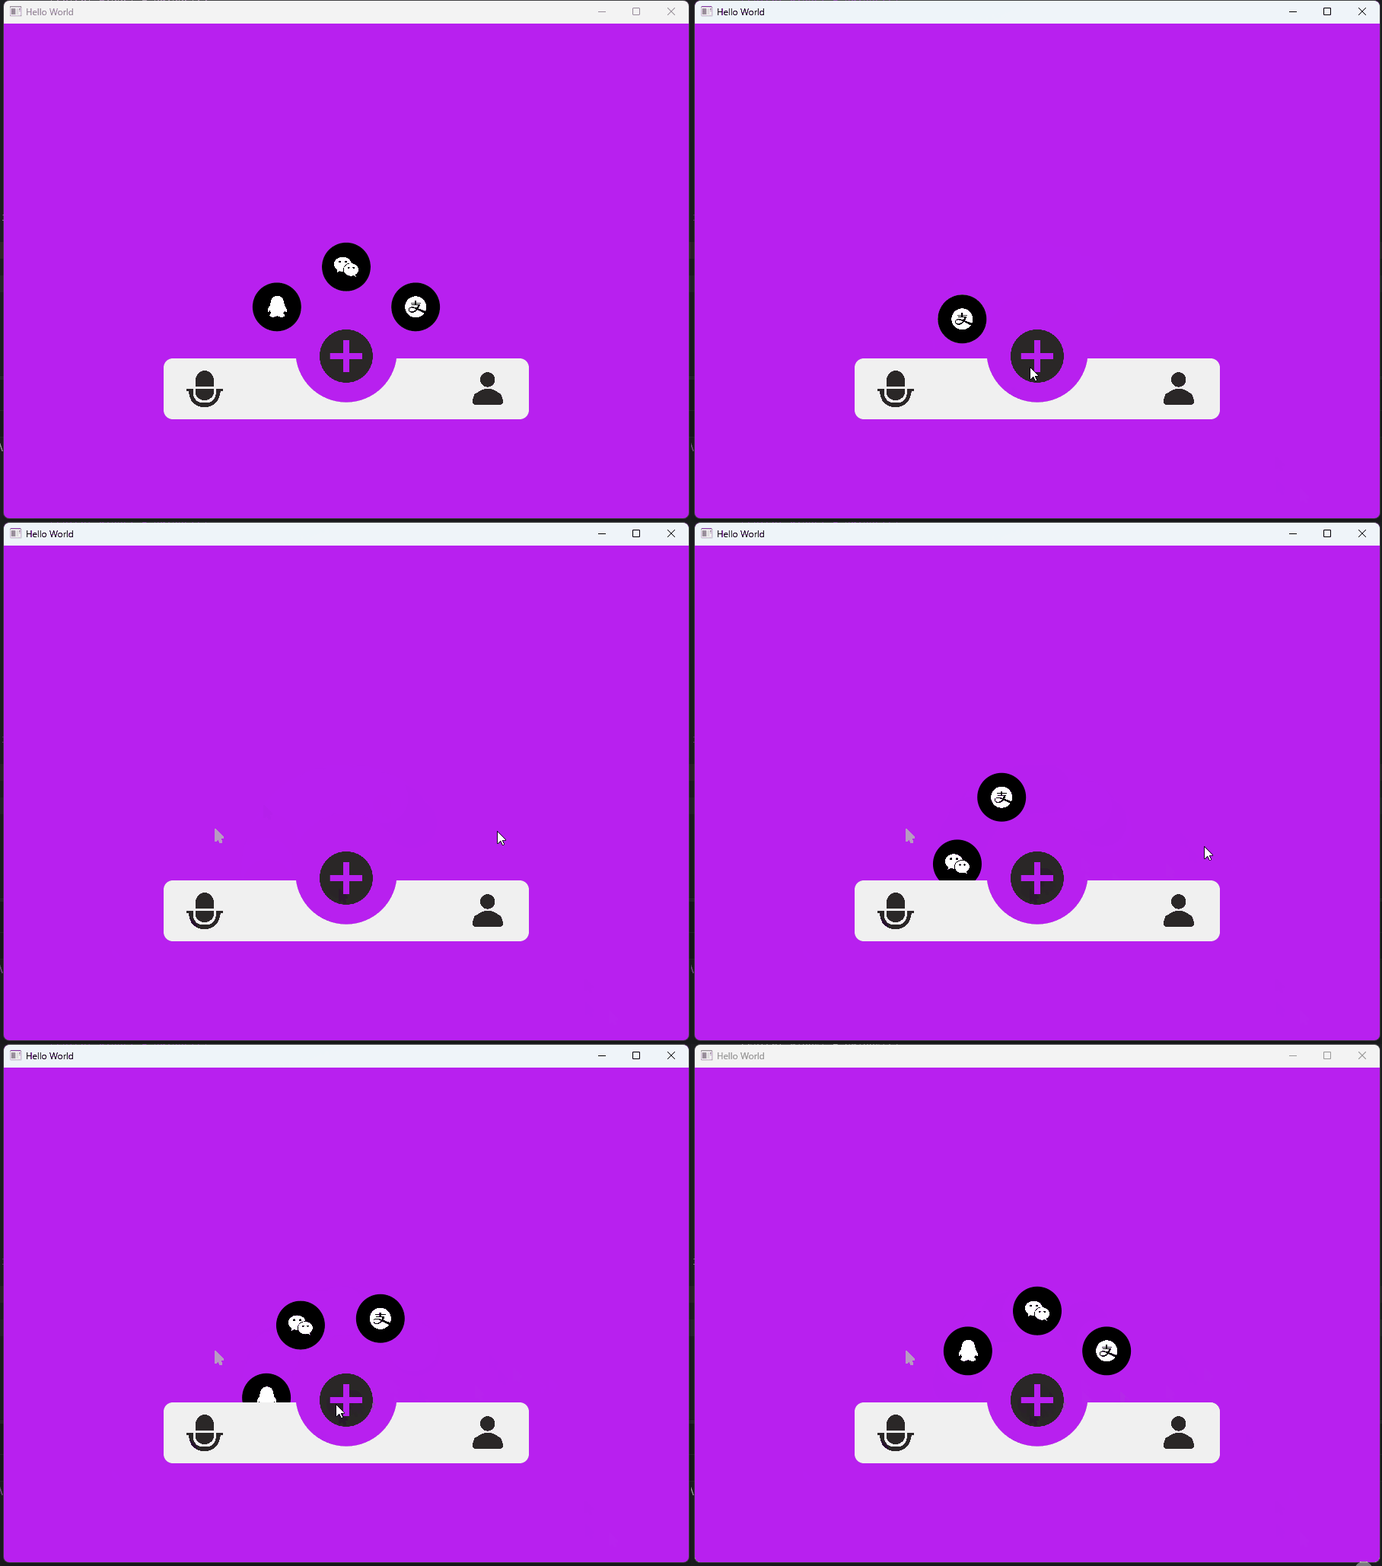
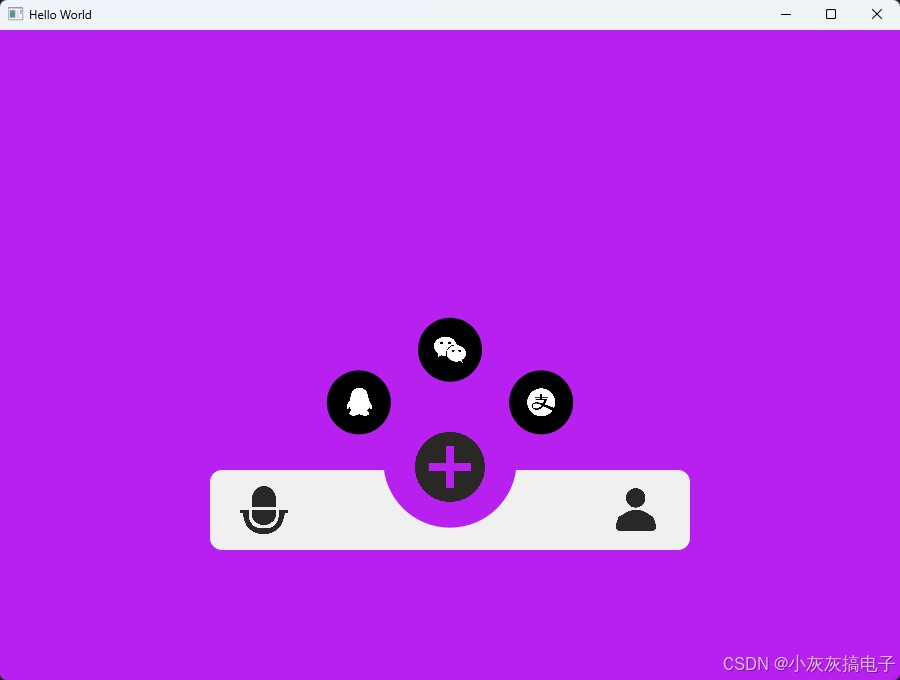
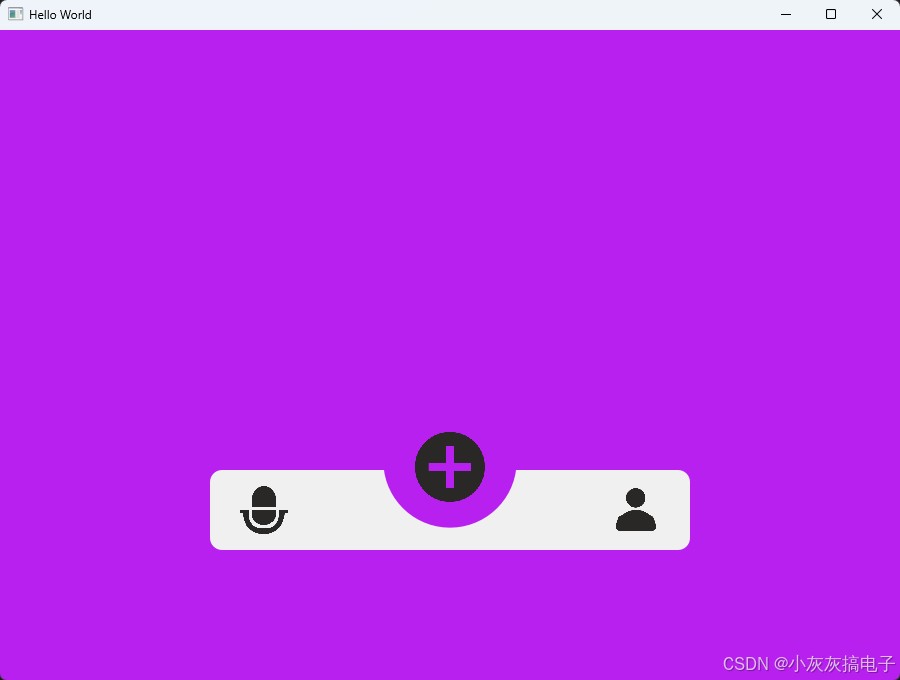
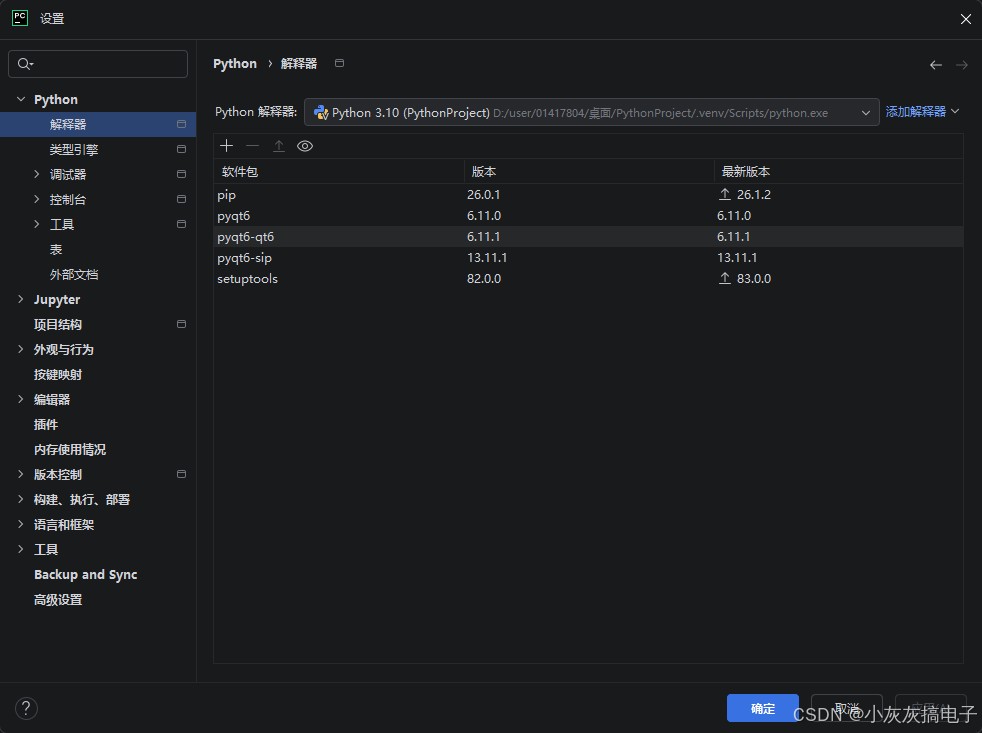
3、库安装
二、实现原理
主要通过paintevent绘制。
paintevent 是 pyqt6 中用于自定义绘制的核心事件处理函数。每当部件需要重绘时(例如首次显示、窗口大小改变、被其他窗口遮挡后重新显示、或手动调用 update() 方法),qt 的事件系统就会调用这个函数。
2.1、 基本作用与调用时机
- 作用:在部件上绘制自定义的图形、文本、图像等。
- 调用时机:
- 部件首次显示。
- 部件被其他窗口遮挡后重新暴露。
- 部件大小改变 (
resizeevent之后)。 - 程序主动调用
update()或repaint()方法。 - 部件的样式或内容发生改变,需要刷新视觉表现。
2.2 、函数签名与参数
def paintevent(self, event: qpaintevent) -> none:
    # 1. 创建 qpainter 对象,并指定绘制设备(通常是部件自身)
    painter = qpainter(self)

    # 2. (可选)设置抗锯齿等渲染提示,使图形边缘更平滑
    painter.setrenderhint(qpainter.renderhint.antialiasing)

    # 3. 进行具体的绘制操作
    # ...

    # 4. qpainter 会在退出作用域时自动结束绘制,也可手动调用 painter.end()
event 参数:一个 qpaintevent 对象,包含了需要重绘的区域信息 (event.rect())。在需要高性能绘制时,可以只绘制这个区域,但大多数情况下我们可以忽略它,进行全部件绘制。
2.3 、绘制流程与核心类
qpainter – 绘制工具
qpainter 是执行所有绘制操作的“画笔”。常用方法包括:
drawellipse,drawrect,drawroundedrect:绘制基本形状。drawpixmap,drawimage:绘制图像。drawtext:绘制文本。drawpath:绘制复杂路径。fillrect:填充矩形区域。
坐标系与变换
- 默认坐标系原点
(0, 0)在部件的左上角。 - 可以使用
painter.translate(dx, dy),painter.rotate(angle),painter.scale(sx, sy)进行坐标变换。 - 本示例中,我们通过预计算的坐标(如
self.mid_center_x,self.mid_center_y)和三角函数计算图标位置,实现了围绕中心点的扇形布局。
画笔与画刷
- 画笔 (pen):控制线条的颜色、宽度、样式。通过
painter.setpen(qpen(...))设置。 - 画刷 (brush):控制封闭图形(如矩形、椭圆)内部的填充颜色或图案。通过
painter.setbrush(qbrush(...))设置。 - 在本例中,我们使用
painter.setpen(qt.penstyle.nopen)取消了边框,使图形边缘更干净。
2.4、 在本示例中的应用
我们的 fanexpandmenu 类重写了 paintevent,以实现复杂的自定义界面:
绘制底部导航栏:
# 1. 底部浅灰白导航栏
bar_rect = qrectf(bar_margin, bar_y, w - bar_margin * 2, bar_height)
painter.setbrush(qcolor("#f0f0f0"))
painter.drawroundedrect(bar_rect, self.bar_radius, self.bar_radius)
使用 drawroundedrect 绘制圆角矩形,并用浅灰色画刷填充。
绘制中间渐变按钮:
mid_rect = qrectf(self.mid_circle_x, self.mid_circle_y+6, self.mid_circle_size, self.mid_circle_size)
painter.setbrush(qbrush(qcolor("#b820f0")))
painter.drawellipse(mid_rect)
绘制一个紫色的圆形按钮。
绘制动态扇形图标:
这是本示例最核心的部分。我们封装了 draw_circle_icon 方法,根据当前动画角度计算图标位置:
def draw_circle_icon(self, painter, angle: float, pixmap: qpixmap):
    pos = self.get_icon_pos(angle)  # 根据角度计算坐标
    circle_rect = qrectf(pos.x(), pos.y(), self.icon_circle_size, self.icon_circle_size)
    painter.setbrush(qt.globalcolor.black)
    painter.drawellipse(circle_rect)  # 绘制黑色圆形底座
    # ... 绘制内部图标
在 paintevent 中,我们根据三个图标当前的角度 self.icon1_angle, self.icon2_angle, self.icon3_angle 调用该方法,实现图标的动态排列。
2.5、 动画与重绘的联动
- 定时器驱动:
qtimer每隔self.timer_interval毫秒触发一次_on_timer_tick。 - 更新角度:在
_on_timer_tick中,根据展开/收起状态,逐步增加或减少图标的角度值。 - 请求重绘:每次角度更新后,调用
self.update()。这会向事件队列发送一个重绘请求,qt 会在合适的时机自动调用paintevent。 - 视觉更新:
paintevent被调用,使用最新的角度值重新计算并绘制所有图形,从而实现平滑的动画效果。
关键点:update() 是异步的,它会将多个重绘请求合并,避免过于频繁的绘制,提高性能。而 repaint() 是同步的,会立即触发 paintevent,可能导致性能问题,一般不建议在动画中使用。
三、性能优化建议
- 避免在 paintevent 中进行耗时计算:如复杂的布局计算、文件/网络读取。应将这些计算结果缓存为成员变量(如本示例中的
self.mid_center_x)。 - 利用 qpaintevent.rect() 进行局部重绘:如果只有小部分区域需要更新,可以只绘制该区域。
- 预加载资源:如图片 (
qpixmap)、渐变 (qlineargradient),应在__init__中创建并缓存,而不是在paintevent中重复创建。 - 使用双缓冲:对于复杂的、频繁更新的绘制,可以考虑使用
qpainter在qpixmap上离线绘制,然后在paintevent中一次性绘制这个qpixmap,可以避免闪烁。
四、常见问题
为什么我的绘制不显示?
- 检查是否创建了
qpainter并指定了正确的绘制设备(qpainter(self))。 - 检查
paintevent是否被正确重写,且没有调用父类的paintevent(除非需要默认绘制)。 - 确认部件大小不为零,且已显示。
绘制出现锯齿?
在创建 qpainter 后,立即设置 painter.setrenderhint(qpainter.renderhint.antialiasing)。
如何绘制透明背景?
设置部件属性 self.setattribute(qt.widgetattribute.wa_translucentbackground),并在 paintevent 中绘制透明区域或使用半透明颜色。
通过深入理解 paintevent,你可以完全掌控 pyqt6 部件的视觉呈现,创造出任何你想要的 ui 效果。
到此这篇关于python结合pyqt实现动态菜单(附源码)的文章就介绍到这了,更多相关python动态菜单内容请搜索代码网以前的文章或继续浏览下面的相关文章希望大家以后多多支持代码网!




发表评论