本文记录了一次完整的 mysql 远程连接踩坑过程,涵盖基础命令行操作、认证插件报错、ip 被拉黑等问题及解决方案。
一、mysql 基础命令行操作
1.1 登录与退出
# 本地登录(默认走 localhost)
mysql -u root -p
# 指定 ip 登录(走网络连接)
mysql -h 192.168.1.100 -u root -p
# 指定端口
mysql -h 192.168.1.100 -p 3306 -u root -p
# 退出
exit;
-- 或
quit;
1.2 用户管理
-- 查看所有用户
select user, host, plugin from mysql.user;
-- 创建本地用户
create user 'alice'@'localhost' identified by '密码';
-- 创建远程用户(允许任意 ip)
create user 'bob'@'%' identified by '密码';
-- 创建远程用户(只允许特定 ip)
create user 'charlie'@'192.168.1.50' identified by '密码';
-- 修改密码
alter user 'bob'@'%' identified by '新密码';
-- 删除用户
drop user 'bob'@'%';
-- 刷新权限(修改后必须执行)
flush privileges;
1.3 权限管理
-- 授予所有权限
grant all privileges on *.* to 'bob'@'%';

-- 授予特定数据库权限
grant all privileges on mydb.* to 'bob'@'%';

-- 授予只读权限
grant select on mydb.* to 'readonly'@'%';

-- 撤销权限
revoke all privileges on *.* from 'bob'@'%';

-- 查看用户权限
show grants for 'bob'@'%';
1.4 数据库与表操作
-- 创建数据库
create database mydb character set utf8mb4 collate utf8mb4_unicode_ci;
-- 查看所有数据库
show databases;
-- 切换数据库
use mydb;
-- 创建表
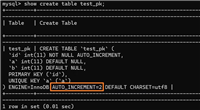
create table users (
id int primary key auto_increment,
name varchar(50) not null,
email varchar(100) unique,
created_at timestamp default current_timestamp
);
-- 查看表结构
desc users;
-- 或
show create table users;
-- 插入数据
insert into users (name, email) values ('张三', 'zhangsan@example.com');
-- 查询
select * from users where name like '%张%';
-- 更新
update users set email = 'new@example.com' where id = 1;
-- 删除
delete from users where id = 1;
1.5 服务管理(linux)
# 启动
sudo systemctl start mysql
# 停止
sudo systemctl stop mysql
# 重启
sudo systemctl restart mysql
# 查看状态
sudo systemctl status mysql
二、远程访问配置
2.1 服务端配置
编辑 mysql 配置文件:
- linux:
/etc/mysql/mysql.conf.d/mysqld.cnf或/etc/my.cnf - windows:
my.ini
# 允许所有网卡监听(默认 127.0.0.1 只监听本地)
bind-address = 0.0.0.0
# 或注释掉该行
# bind-address = 127.0.0.1
重启生效:
sudo systemctl restart mysql
2.2 防火墙放行
# ufw (ubuntu/debian)
sudo ufw allow 3306/tcp
# firewalld (centos/rhel)
sudo firewall-cmd --permanent --add-port=3306/tcp
sudo firewall-cmd --reload
# 云服务器还需在安全组中放行 3306 端口
2.3 用户授权
-- 创建远程专用用户(推荐)
create user 'remote_user'@'%' identified by '强密码';
grant all privileges on mydb.* to 'remote_user'@'%';
flush privileges;
三、踩坑实录:认证插件与 ip 拉黑
3.1 环境背景
- 服务端: mysql 8.0(linux 服务器)
- 客户端: windows c++ 程序,使用较老的 mysql c api 库
- 连接方式:
mysql_real_connect(conn, "10.136.11.246", "root", ...)
3.2 第一坑:ip 被拉黑
报错信息:
mysql_real_connect failed: host '10.136.26.183' is blocked because of many connection errors;
unblock with 'mysqladmin flush-hosts'
原因分析:
mysql 有安全机制,当某个 ip 连续多次连接失败(默认阈值 100 次),会自动将该 ip 加入黑名单,防止暴力 破解。
解决方法:
# 服务端执行,清空黑名单
mysqladmin flush-hosts
或登录 mysql 后:
flush hosts;
3.3 第二坑:认证插件不兼容
报错信息:
mysql_real_connect failed: authentication plugin 'caching_sha2_password' cannot be loaded: 找不到指定的模块。
原因分析:
mysql 8.0 默认使用 caching_sha2_password 认证插件,但客户端(c++ 的 mysql 库)版本太老,不支持这个插件。
根本区别:
| mysql 版本 | 默认认证插件 | 兼容性 |
|---|---|---|
| 5.7 及以前 | mysql_native_password | 老客户端都支持 |
| 8.0+ | caching_sha2_password | 需要新版客户端库 |
3.4 第三坑:alter user 报错
报错信息:
error 1396 (hy000): operation alter user failed for 'root'@'10.136.11.246'
原因分析:
mysql 的用户是 用户名 + host 的组合。查询发现系统中只有:
select user, host from mysql.user;
结果:
+------+-----------+
| user | host      |
+------+-----------+
| root | %         |
| root | localhost |
+------+-----------+
'root'@'10.136.11.246' 这个用户根本不存在!
mysql 用户匹配规则:
| host 值 | 含义 |
|---|---|
localhost | 只允许本机 socket 连接 |
127.0.0.1 | 只允许本机 tcp 连接 |
192.168.1.% | 允许该网段 |
10.136.11.246 | 只允许该特定 ip |
% | 允许任意 ip(最宽松) |
注意:localhost ≠ 10.136.11.246
localhost走127.0.0.1,不经过网卡10.136.11.246是服务器的实际网卡 ip,走网络协议
四、完整解决过程
步骤 1:确认现有用户
select user, host, plugin from mysql.user where user = 'root';
确认有 'root'@'%' 存在。
步骤 2:修改认证插件(服务端执行)
-- 修改已存在的 'root'@'%' 用户
alter user 'root'@'%' identified with mysql_native_password by '你的密码';
flush privileges;
步骤 3:验证修改结果
select user, host, plugin from mysql.user where user = 'root';
确认 'root'@'%' 的 plugin 变为 mysql_native_password。
步骤 4:清空 ip 黑名单
flush hosts;
步骤 5:客户端连接测试
c++ 代码:
#include <mysql.h>
mysql* conn = mysql_init(nullptr);
if (!mysql_real_connect(conn,
                        "10.136.11.246",  // 服务器 ip
                        "root",           // 用户名
                        "你的密码",        // 密码
                        "数据库名",        // 数据库
                        3306,             // 端口
                        nullptr, 0)) {
    printf("连接失败: %s\n", mysql_error(conn));
} else {
    printf("连接成功!\n");
}
mysql_close(conn);
五、其他解决方案对比
方案 a:改服务端认证方式(本文采用)
优点:客户端不用改,快速解决
缺点:安全性略降,新特性无法使用
-- 改单个用户
alter user 'user'@'%' identified with mysql_native_password by '密码';

-- 或改全局默认(my.cnf)
[mysqld]
default_authentication_plugin = mysql_native_password
方案 b:升级客户端库(推荐长期方案)
优点:支持最新特性,更安全
缺点:需要重新编译项目
- 下载 mysql connector/c++ 8.0+: https://dev.mysql.com/downloads/connector/cpp/
- 或更新 c api 的
libmysql.dll到 8.0 版本
方案 c:使用 ssh 隧道(最安全)
# 本地建立隧道,把远程 3306 映射到本地 3307
ssh -l 3307:localhost:3306 user@服务器ip
# 然后 c++ 连接本地 3307,实际走的是加密 ssh
mysql_real_connect(conn, "127.0.0.1", "root", ..., 3307, ...);
优点:不暴露 3306 端口,全程加密
缺点:需要额外配置 ssh
六、安全建议
- 不要用 root 远程访问:创建专用账号,最小权限原则
- 限制 host 范围:能用
192.168.1.%就不要用% - 强密码 + ssl:生产环境必须配置 ssl 连接
- 修改默认端口:将 3306 改为其他端口,减少扫描
- fail2ban:自动封禁暴力 破解 ip
七、常用排查命令速查
-- 查看当前连接
show processlist;

-- 查看连接错误阈值
show variables like 'max_connect_errors';

-- 修改阈值(临时)
set global max_connect_errors = 1000;

-- 查看用户认证方式
select user, host, plugin, authentication_string from mysql.user;

-- 查看被拉黑的 ip(performance_schema 需开启)
select * from performance_schema.host_cache where sum_connect_errors > 0;
总结
| 问题 | 现象 | 解决 |
|---|---|---|
| ip 被拉黑 | host is blocked | flush hosts; |
| 认证插件不支持 | caching_sha2_password cannot be loaded | 改 mysql_native_password 或升级客户端 |
| 用户不存在 | operation alter user failed | 先 select 查用户,确认 host 正确 |
| localhost vs ip | 连接方式不同,匹配的用户不同 | 明确用 % 还是具体 ip |
核心教训:mysql 的用户是
用户名@host的组合,修改前务必先查清楚!
本文基于 mysql 8.0 + windows c++ 客户端的真实踩坑经历整理。
到此这篇关于mysql远程访问配置与常见问题解决指南的文章就介绍到这了,更多相关mysql远程访问配置与常见问题内容请搜索代码网以前的文章或继续浏览下面的相关文章希望大家以后多多支持代码网!


发表评论