在处理pdf文件时,分辨率可能会影响到需要显示的内容质量。提高pdf的分辨率是一个重要的任务,尤其是在需要打印或显示高清图像时。本文将带你一步步了解如何使用python来实现这一目标。
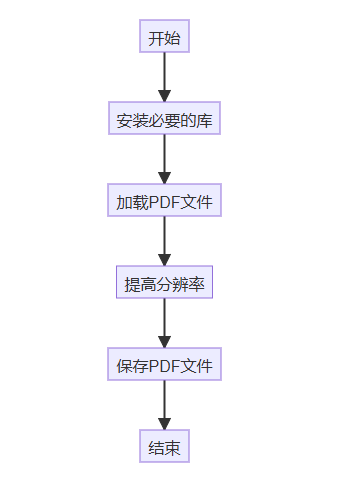
整体流程图
首先,我们可以将整个过程分为几个简单的步骤。下面是我们要遵循的步骤:
步骤详情
我们将每一个步骤进行详细说明。
| 步骤 | 描述 |
|---|---|
| 安装必要的库 | 安装如pymupdf和pillow等库 |
| 加载pdf文件 | 使用库来加载待处理的pdf文件 |
| 提高分辨率 | 对pdf中的每一页进行分辨率提升 |
| 保存pdf文件 | 将处理后的pdf文件保存到指定位置 |
1. 安装必要的库
首先,我们需要确保安装了pymupdf库和pillow库。这可以通过以下命令在终端或命令行中完成:
pip install pymupdf pillow
解释:pymupdf用于处理pdf文件,而pillow用于图像处理。
2. 加载pdf文件
接下来,我们需要加载需要处理的pdf文件。这里是代码示例:
import fitz  # pymupdf的别名

# 加载pdf文件
def load_pdf(file_path):
    pdf_document = fitz.open(file_path)
    return pdf_document

# 示例:加载名为sample.pdf的pdf文件
pdf_file = load_pdf("sample.pdf")
解释:load_pdf函数接受一个文件路径,使用fitz.open打开并返回pdf文档对象。
3. 提高分辨率
现在我们开始提高pdf的分辨率。我们将对每一页进行处理:
from pil import image

def increase_resolution(pdf_document, scale=2):
    for page_num in range(len(pdf_document)):
        # 获取当前页
        page = pdf_document[page_num]

        # 获取页的矩形大小
        rect = page.rect
        # 裁剪出指定区域的图像
        pix = page.get_pixmap(matrix=fitz.matrix(scale, scale))

        # 将pix转换为图像
        img = image.frombytes("rgb", [pix.width, pix.height], pix.samples)
        # 可以根据需要处理图像

        # 保存或处理图像
        img.save(f"page_{page_num + 1}.png")  # 保存为png格式的图像

# 示例:提高分辨率
increase_resolution(pdf_file, scale=2)
解释:increase_resolution函数通过将每一页的尺寸乘以指定的缩放因子(默认为2),来提高pdf的分辨率。get_pixmap函数用于获取当前页为指定矩阵的位图。
4. 保存pdf文件
处理完每一页的图像后,我们需要将它们保存成一个新的pdf文件:
def save_pdf(pdf_document, output_path):
    pdf_document.save(output_path)

# 示例:保存新的pdf文件
save_pdf(pdf_file, "output.pdf")
解释:save_pdf函数接受一个pdf文档和输出路径,将结果保存。
5. 结束
在进行完上述步骤后,务必关闭pdf文件以释放系统资源:
pdf_file.close() # 关闭pdf文件
er图关系图
下面是描述各个模块及其关系的er图:
erdiagram
    pdfdocument {
        +string filepath
        +string title
    }

    image {
        +string filepath
        +string format
    }

    pdfdocument ||--o{ image : contains
最终代码整合
以下是整合后的最终完整代码:
import fitz  # pymupdf的别名
from pil import image

def load_pdf(file_path):
    pdf_document = fitz.open(file_path)
    return pdf_document

def increase_resolution(pdf_document, scale=2):
    for page_num in range(len(pdf_document)):
        page = pdf_document[page_num]
        rect = page.rect
        pix = page.get_pixmap(matrix=fitz.matrix(scale, scale))
        img = image.frombytes("rgb", [pix.width, pix.height], pix.samples)
        img.save(f"page_{page_num + 1}.png")

def save_pdf(pdf_document, output_path):
    pdf_document.save(output_path)

# 主程序
if __name__ == "__main__":
    pdf_file = load_pdf("sample.pdf")
    increase_resolution(pdf_file, scale=2)
    save_pdf(pdf_file, "output.pdf")
    pdf_file.close()
方法补充
基于python的pymupdf和opencv提升pdf的清晰度
实现代码
import fitz
import numpy as np
from pil import image
import cv2
from tqdm import tqdm
import io

pdf_doc = fitz.open('/users/linql/desktop/11.pdf')
output_doc = fitz.open()
for orig_page in tqdm(pdf_doc):
    zoom = 2
    mat = fitz.matrix(zoom, zoom)
    pix = orig_page.get_pixmap(matrix=mat)
    img = image.frombytes("rgb",
                          [pix.width, pix.height],
                          pix.samples)
    img = img.convert('l')
    cleaned_page_array = cv2.adaptivethreshold(np.array(img),
                                               255,
                                               # cv2.adaptive_thresh_mean_c, #基于邻域均值的自适应阈值。
                                               cv2.adaptive_thresh_gaussian_c,#基于邻域加权平均的自适应阈值。
                                               cv2.thresh_binary,
                                               19,
                                               15)
    new_image = image.fromarray(cleaned_page_array)
    fp = io.bytesio()
    new_image.save(fp, "jpeg")
    page = output_doc.new_page(width=new_image.size[0], height=new_image.size[1])
    page.insert_image(page.rect, stream=fp.getvalue())

output_doc.save("output_file.pdf")
结尾
通过以上步骤,你已经学会了如何利用python提高pdf文件的分辨率。只需几个简单的步骤和一些代码,你就能轻松为工作提供更高质量的文件。希望这篇文章能够帮助你在处理pdf文件的过程中取得更好的成果!如果你有任何问题,欢迎随时询问。我将乐于助你一臂之力。
到此这篇关于使用python提高pdf分辨率的完整指南的文章就介绍到这了,更多相关python提高pdf分辨率内容请搜索代码网以前的文章或继续浏览下面的相关文章希望大家以后多多支持代码网!


发表评论