项目开发中,每次修改配置(比如调整接口超时时间、限流阈值)都要重启服务,不仅开发效率低,线上重启还会导致短暂不可用。
虽然spring cloud config、apollo这类配置中心能解决问题,但对于中小项目来说太重了——要部署服务,成本太高。
今天分享一个轻量级方案,基于springboot原生能力实现配置热更新,不用额外依赖,代码量不到200行。
一、为什么需要“轻量级”热更新?
先说说传统配置方案的痛点
痛点1:改配置必须重启服务
开发环境中,改个日志级别都要重启服务,浪费时间;生产环境更麻烦,重启会导致流量中断,影响用户体验。
痛点2:重量级配置中心成本高
spring cloud config、apollo功能强大,但需要单独部署服务、维护元数据,小项目用不上这么复杂的功能,纯属“杀鸡用牛刀”。
痛点3:@value注解不支持动态刷新
即使通过@configurationproperties绑定配置,默认也不会自动刷新,必须结合@refreshscope,但@refreshscope会导致bean重建,可能引发状态丢失。
我们需要什么?
- 无需额外依赖,基于springboot原生api
- 支持properties/yaml文件热更新
- 不重启服务,修改配置后自动生效
- 对业务代码侵入小,改造成本低
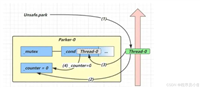
二、核心原理:3个关键技术点
轻量级热更新的实现依赖springboot的3个原生能力,不需要引入任何第三方框架
2.1 配置文件监听:watchservice
java nio提供的watchservice可以监听文件系统变化,当配置文件(如application.yml)被修改时,能触发回调事件。
2.2 属性刷新:environment与configurationproperties
spring的environment对象存储了所有配置属性,通过反射更新其内部的propertysources,可以实现配置值的动态替换。
同时,@configurationproperties绑定的bean需要重新绑定属性,这一步可以通过configurationpropertiesbindingpostprocessor实现。
2.3 事件通知:applicationevent
自定义一个configrefreshevent事件,当配置更新后发布事件,业务代码可以通过@eventlistener接收通知,处理特殊逻辑(如重新初始化连接池)。
三、手把手实现:不到200行代码
3.1 第一步:监听配置文件变化
创建configfilewatcher类,使用watchservice监听application.yml或application.properties的修改
package com.example.config;

import jakarta.annotation.postconstruct;
import jakarta.annotation.predestroy;
import lombok.extern.slf4j.slf4j;
import org.springframework.core.io.filesystemresource;
import org.springframework.core.io.resource;
import org.springframework.util.resourceutils;

import java.io.ioexception;
import java.nio.file.*;
import java.util.concurrent.executorservice;
import java.util.concurrent.executors;

@slf4j
public class configfilewatcher {
    // 监听的配置文件路径(默认监听classpath下的application.yaml)
    private final string configpath = "classpath:application.yaml";
    private watchservice watchservice;
    private final executorservice executor = executors.newsinglethreadexecutor();
    private final configrefreshhandler refreshhandler;
    private long lastprocesstime;
    private final long event_debounce_time = 500; // 500毫秒防抖时间

    // 注入配置刷新处理器(后面实现)
    public configfilewatcher(configrefreshhandler refreshhandler) {
        this.refreshhandler = refreshhandler;
    }

    @postconstruct
    public void init() throws ioexception {
        // 获取配置文件的实际路径
        resource resource = new filesystemresource(resourceutils.getfile(configpath));
        path configdir = resource.getfile().topath().getparent(); // 监听配置文件所在目录
        string filename = resource.getfilename(); // 配置文件名(如application.yaml)

        watchservice = filesystems.getdefault().newwatchservice();
        // 注册文件修改事件(entry_modify)
        configdir.register(watchservice, standardwatcheventkinds.entry_modify);

        // 启动线程监听文件变化
        executor.submit(() -> {
            while (true) {
                try {
                    watchkey key = watchservice.take(); // 阻塞等待事件
                    // 防抖检查:忽略短时间内重复事件
                    if (system.currenttimemillis() - lastprocesstime < event_debounce_time) {
                        continue;
                    }
                    for (watchevent<?> event : key.pollevents()) {
                        watchevent.kind<?> kind = event.kind();
                        if (kind == standardwatcheventkinds.overflow) {
                            continue; // 事件溢出,忽略
                        }

                        // 检查是否是目标配置文件被修改
                        path changedfile = (path) event.context();
                        if (changedfile.getfilename().tostring().equals(filename)) {
                            log.info("检测到配置文件修改:{}", filename);
                            refreshhandler.refresh(); // 触发配置刷新
                        }
                    }
                    boolean valid = key.reset(); // 重置监听器
                    if (!valid) break; // 监听器失效,退出循环
                } catch (interruptedexception e) {
                    thread.currentthread().interrupt();
                    break;
                }
            }
        });
        log.info("配置文件监听器启动成功,监听路径:{}", configdir);
    }

    @predestroy
    public void destroy() {
        executor.shutdownnow();
        try {
            watchservice.close();
        } catch (ioexception e) {
            log.error("关闭watchservice失败", e);
        }
    }
}
3.2 第二步:实现配置刷新逻辑
创建configrefreshhandler类,核心功能是更新environment中的属性,并通知@configurationproperties bean刷新
import org.springframework.context.applicationevent;
import java.util.set;

/**
 * 自定义配置刷新事件
 */
public class configrefreshedevent extends applicationevent {
    // 存储变化的配置键(可选,方便业务判断哪些配置变了)
    private final set<string> changedkeys;

    public configrefreshedevent(object source, set<string> changedkeys) {
        super(source);
        this.changedkeys = changedkeys;
    }

    // 获取变化的配置键
    public set<string> getchangedkeys() {
        return changedkeys;
    }
}


import lombok.extern.slf4j.slf4j;
import org.springframework.beans.beansexception;
import org.springframework.beans.factory.annotation.autowired;
import org.springframework.beans.factory.config.yamlpropertiesfactorybean;
import org.springframework.boot.context.properties.configurationpropertiesbindingpostprocessor;
import org.springframework.context.applicationcontext;
import org.springframework.context.applicationcontextaware;
import org.springframework.core.env.configurableenvironment;
import org.springframework.core.env.mappropertysource;
import org.springframework.core.env.propertysource;
import org.springframework.core.io.classpathresource;
import org.springframework.core.io.resource;
import org.springframework.stereotype.component;

import java.io.ioexception;
import java.util.*;

@component
@slf4j
public class configrefreshhandler implements applicationcontextaware {
    @autowired
    private configurableenvironment environment;
    private applicationcontext applicationcontext;

    @autowired
    private configurationpropertiesbindingpostprocessor bindingpostprocessor; // 属性绑定工具

    // 刷新配置的核心方法
    public void refresh() {
        try {
            // 1. 重新读取配置文件内容
            properties properties = loadconfigfile();

            // 2. 更新environment中的属性
            set<string> changekeys = updateenvironment(properties);

            // 3. 重新绑定所有@configurationproperties bean
            if (!changekeys.isempty()) {
                rebindconfigurationproperties();
            }

            applicationcontext.publishevent( new configrefreshedevent(this,changekeys));
            log.info("配置文件刷新完成");
        } catch (exception e) {
            log.error("配置文件刷新失败", e);
        }
    }

    // 读取配置文件内容(支持properties和yaml)
    private properties loadconfigfile() throws ioexception {
        // 使用spring工具类读取classpath下的配置文件
        resource resource = new classpathresource("application.yaml");
        yamlpropertiesfactorybean yamlfactory = new yamlpropertiesfactorybean();
        yamlfactory.setresources(resource);

        // 获取解析后的properties对象
        properties properties = yamlfactory.getobject();
        if (properties == null) {
            throw new ioexception("failed to load configuration file");
        }
        return properties;
    }

    // 更新environment中的属性,返回变化的配置键集合
    private set<string> updateenvironment(properties properties) {
        string sourcename = "config resource 'class path resource [application.yaml]' via location 'optional:classpath:/'";
        set<string> changedkeys = new hashset<>();
        propertysource<?> appconfig = environment.getpropertysources().get(sourcename);

        if (appconfig instanceof mappropertysource) {
            map<string, object> sourcemap = new hashmap<>(((mappropertysource) appconfig).getsource());

            properties.foreach((k, v) -> {
                string key = k.tostring();
                object oldvalue = sourcemap.get(key);
                if (!objects.equals(oldvalue, v)) {
                    changedkeys.add(key);
                }
                sourcemap.put(key, v);
            });

            environment.getpropertysources().replace(sourcename, new mappropertysource(sourcename, sourcemap));
        }
        return changedkeys;
    }

    // 重新绑定所有@configurationproperties bean
    private void rebindconfigurationproperties() {
        // 获取所有@configurationproperties bean的名称
        string[] beannames = applicationcontext.getbeannamesforannotation(org.springframework.boot.context.properties.configurationproperties.class);
        for (string beanname : beannames) {
            // 重新绑定属性(关键:不重建bean,只更新属性值)
            bindingpostprocessor.postprocessbeforeinitialization(
                    applicationcontext.getbean(beanname), beanname);
            log.info("刷新配置bean:{}", beanname);
        }
    }

    @override
    public void setapplicationcontext(applicationcontext applicationcontext) throws beansexception {
        this.applicationcontext = applicationcontext;
    }
}
3.3 第三步:注册监听器bean
在springboot配置类中注册configfilewatcher,使其随应用启动
import org.springframework.context.annotation.bean;
import org.springframework.context.annotation.configuration;

@configuration
public class hotrefreshconfig {
    @bean
    public configfilewatcher configfilewatcher(configrefreshhandler refreshhandler) throws ioexception {
        return new configfilewatcher(refreshhandler);
    }
}
3.4 第四步:使用@configurationproperties绑定属性
创建业务配置类,用@configurationproperties绑定配置,无需额外注解即可支持热更新
import lombok.data;
import org.springframework.boot.context.properties.configurationproperties;
import org.springframework.stereotype.component;

@data
@component
@configurationproperties(prefix = "app") // 绑定配置前缀
public class appconfig {
    private int timeout = 3000; // 默认超时时间3秒
    private int maxretries = 2; // 默认重试次数2次
}
3.5 第五步:测试热更新效果
创建测试controller,验证配置修改后是否自动生效
package com.example.controller;

import com.example.appconfig;
import com.example.config.configrefreshedevent;
import lombok.extern.slf4j.slf4j;
import org.springframework.beans.factory.annotation.autowired;
import org.springframework.context.event.eventlistener;
import org.springframework.web.bind.annotation.getmapping;
import org.springframework.web.bind.annotation.restcontroller;

@restcontroller
@slf4j
public class configcontroller {
    @autowired
    private appconfig appconfig;

    @getmapping("/config")
    public appconfig getconfig() {
        return appconfig; // 返回当前配置
    }

    // 监听配置刷新事件,可进行业务特殊处理
    @eventlistener(configrefreshedevent.class)
    public void appconfigupdate(configrefreshedevent event) {
        event.getchangedkeys().foreach(key -> log.info("配置项 {} 发生变化", key));
    }

}
四、生产环境使用
问题1:使用外部配置文件
解决方案:配置文件外置通过环境变量或启动参数指定外部路径,结合configfilewatcher监听外部配置文件
// 修改configfilewatcher的init方法
@postconstruct
public void init() throws ioexception {
    // 生产环境建议监听外部配置文件(如/opt/app/application.yml)
    path configpath = paths.get("/opt/app/application.yml");
    if (files.exists(configpath)) {
        watchconfigfile(configpath); // 监听外部文件
    } else {
        log.warn("外部配置文件不存在,使用默认配置");
    }
}

private void watchconfigfile(path configpath) throws ioexception {
    path configdir = configpath.getparent();
    string filename = configpath.getfilename().tostring();
    // 后续逻辑同上...
}
问题2:敏感配置解密
解决方案:结合jasypt实现配置在loadconfigfile中解密
// 伪代码:解密配置
private string decrypt(string value) {
    if (value.startswith("enc(")) {
        return jasyptencryptor.decrypt(value.substring(4, value.length() - 1));
    }
    return value;
}
五、总结
轻量级配置热更新方案的核心是“利用springboot原生能力+最小化改造”,适合中小项目或需要快速集成的场景。相比重量级配置中心,它的优势在于:
零依赖:无需部署额外服务,代码量少
低成本:对现有项目侵入小,改造成本低
易维护:基于spring原生api,无需学习新框架
到此这篇关于springboot中配置属性热更新的轻量级实现方案的文章就介绍到这了,更多相关springboot配置属性热更新内容请搜索代码网以前的文章或继续浏览下面的相关文章希望大家以后多多支持代码网!


发表评论