prometheus数据远程写入elasticsearch
一、部署elasticsearch
version: '3'

# 网桥es -> 方便相互通讯
networks:
  es:
    driver: bridge

services:
  elasticsearch:
    image: elasticsearch:7.14.1
    container_name: elasticsearch             # 容器名为'elasticsearch'
    restart: unless-stopped                           # 指定容器退出后的重启策略为始终重启,但是不考虑在docker守护进程启动时就已经停止了的容器
    volumes:                                  # 数据卷挂载路径设置,将本机目录映射到容器目录
      - "./elasticsearch/data:/usr/share/elasticsearch/data"
      - "./elasticsearch/logs:/usr/share/elasticsearch/logs"
      - "./elasticsearch/config/elasticsearch.yml:/usr/share/elasticsearch/config/elasticsearch.yml"
#      - "./elasticsearch/config/jvm.options:/usr/share/elasticsearch/config/jvm.options"
      - "./elasticsearch/plugins/ik:/usr/share/elasticsearch/plugins/ik" # ik中文分词插件
    environment:                              # 设置环境变量,相当于docker run命令中的-e
      tz: asia/shanghai
      lang: en_us.utf-8
      take_file_ownership: "true"  # 权限
      discovery.type: single-node
      es_java_opts: "-xmx512m -xms512m"
      elastic_password: "123456" # elastic账号密码
    ports:
      - "9200:9200"
      - "9300:9300"
    networks:
      - es

  kibana:
    image: kibana:7.14.1
    container_name: kibana
    restart: unless-stopped
    volumes:
      - ./elasticsearch/kibana/config/kibana.yml:/usr/share/kibana/config/kibana.yml
    ports:
      - "5601:5601"
    depends_on:
      - elasticsearch
    links:
      - elasticsearch
    networks:
- es其中的配置文件和插件查看地址:https://gitee.com/huanglei1111/docker-compose/tree/master/linux/elasticsearch
查看是否运行成功

访问elasticsearch:ip:端口
访问kibana:ip:端口
- 用户名:elastic
- 密码:123456
二、部署prometheus
version: "3"

# 网桥 -> 方便相互通讯
networks:
  prometheus:
    ipam:
      driver: default
      config:
        - subnet: "172.22.0.0/24"
services:
  # 开源的系统监控和报警系统
  prometheus:
    image: prom/prometheus:v2.34.0
    container_name: hl-prometheus
    restart: unless-stopped
    volumes:
      - ./config/prometheus.yml:/etc/prometheus/prometheus.yml
      # - "./web-config.yml:/etc/prometheus/web-config.yml"
    command:
      --config.file=/etc/prometheus/prometheus.yml
      --web.enable-lifecycle
      # --web.config.file=/etc/prometheus/web-config.yml
    ports:
      - "19090:9090"
    depends_on:
      - hl-node-exporter
    networks:
      prometheus:
        ipv4_address: 172.22.0.11

  # 采集服务器层面的运行指标
  node-exporter:
    image: prom/node-exporter:v1.3.1
    container_name: hl-node-exporter
    restart: unless-stopped
    volumes:
      - "./node-exporter/proc:/host/proc:ro"
      - "./node-exporter/sys:/host/sys:ro"
      - "./node-exporter:/rootfs:ro"
    ports:
      - "19100:9100"
    networks:
      prometheus:
        ipv4_address: 172.22.0.22
  # 使用prometheusbeat 把prometheus的数据存储到elasticsearch中
  beat:
    image: infonova/prometheusbeat
    container_name: hl-prometheusbeat
    ports:
      - 18081:8080
    depends_on:
      - hl-prometheus
    volumes:
      - "./config/prometheusbeat.yml:/prometheusbeat.yml"
      - "/etc/localtime:/etc/localtime"
    networks:
      prometheus:
ipv4_address: 172.22.0.33相关配置文件查看地址:https://gitee.com/huanglei1111/docker-compose/tree/master/linux/prometheus/prometheus-es/config
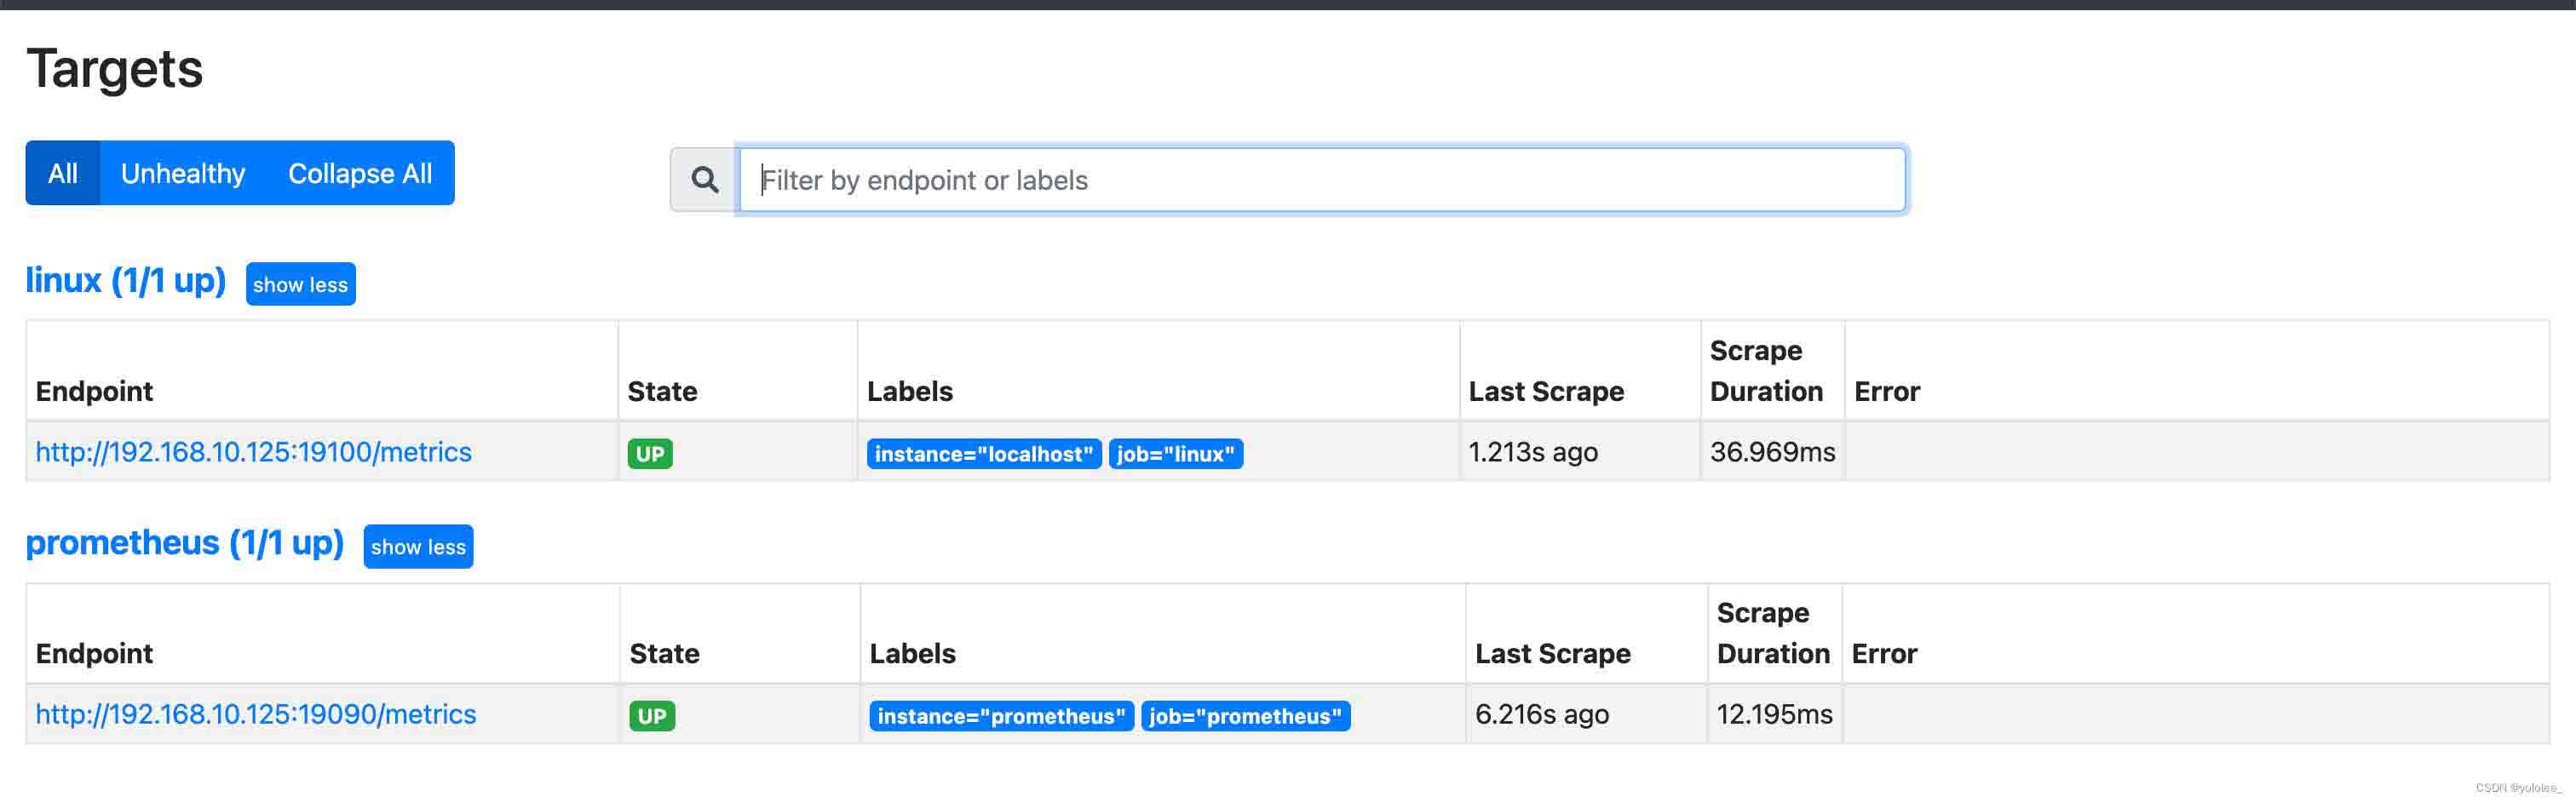
查看是否部署成功

查看监控指标是否健康
注意:状态为down,注意修改prometheus.yml配置文件中targets的ip为服务器ip
三、通过prometheusbeat写入数据到es
上面在部署docker-compose-prometheus.yml文件已经部署啦
如果es有用户密码,需要在prometheusbeat.yml配置文件中添加配置
prometheusbeat:
  # prometheusbeat 服务的端口。默认为8080
  listen: ":8080"
  # context path. defaults to /prometheus
  context: "/prometheus"
output.elasticsearch:
  # elasticsearch 的地址
  hosts: ["127.0.0.1:9200"]
  username: "elastic"
  password: "123456"
其次修改prometheus.yml配置文件
prometheus 通过 remote_write 来实现远端存储,所以在 prometheus.yml 配置文件中增加 remote_write 参数
global:
  scrape_interval: 10s
  scrape_timeout: 10s
  evaluation_interval: 10m
remote_write:
# 远程写入到prometheusbeat中
- url: "http://127.0.0.1:18081/prometheus"
  write_relabel_configs:
  - source_labels: [__name__]
    action: keep
    regex: go_gc_cycles_automatic_gc_cycles_total
  remote_timeout: 30s
scrape_configs:
  # prometheus
  - job_name: prometheus
    static_configs:
      - targets: ['127.0.0.1:19090']
        labels:
          instance: prometheus

  # 采集node exporter监控数据,即linux
  - job_name: linux
    static_configs:
      - targets: ['127.0.0.1:19100']
        labels:
          instance: localhost
配置说明
- url:prometheusbeat 的服务地址
- write_relabel_configs:这个很有用,用于过滤数据,可以设置多个过滤条件,同时满足这些条件的数据才会被存到远端存储!
- source_labels:根据哪个字段进行过滤
- regex:值过滤的规则
- action:keep(保留)/drop(丢弃)
所以,上面配置文件中的配置意思就是:prometheus 收到数据后,远程发送给 prometheusbeat,并且只发送 name 为 go_gc_cycles_automatic_gc_cycles_total
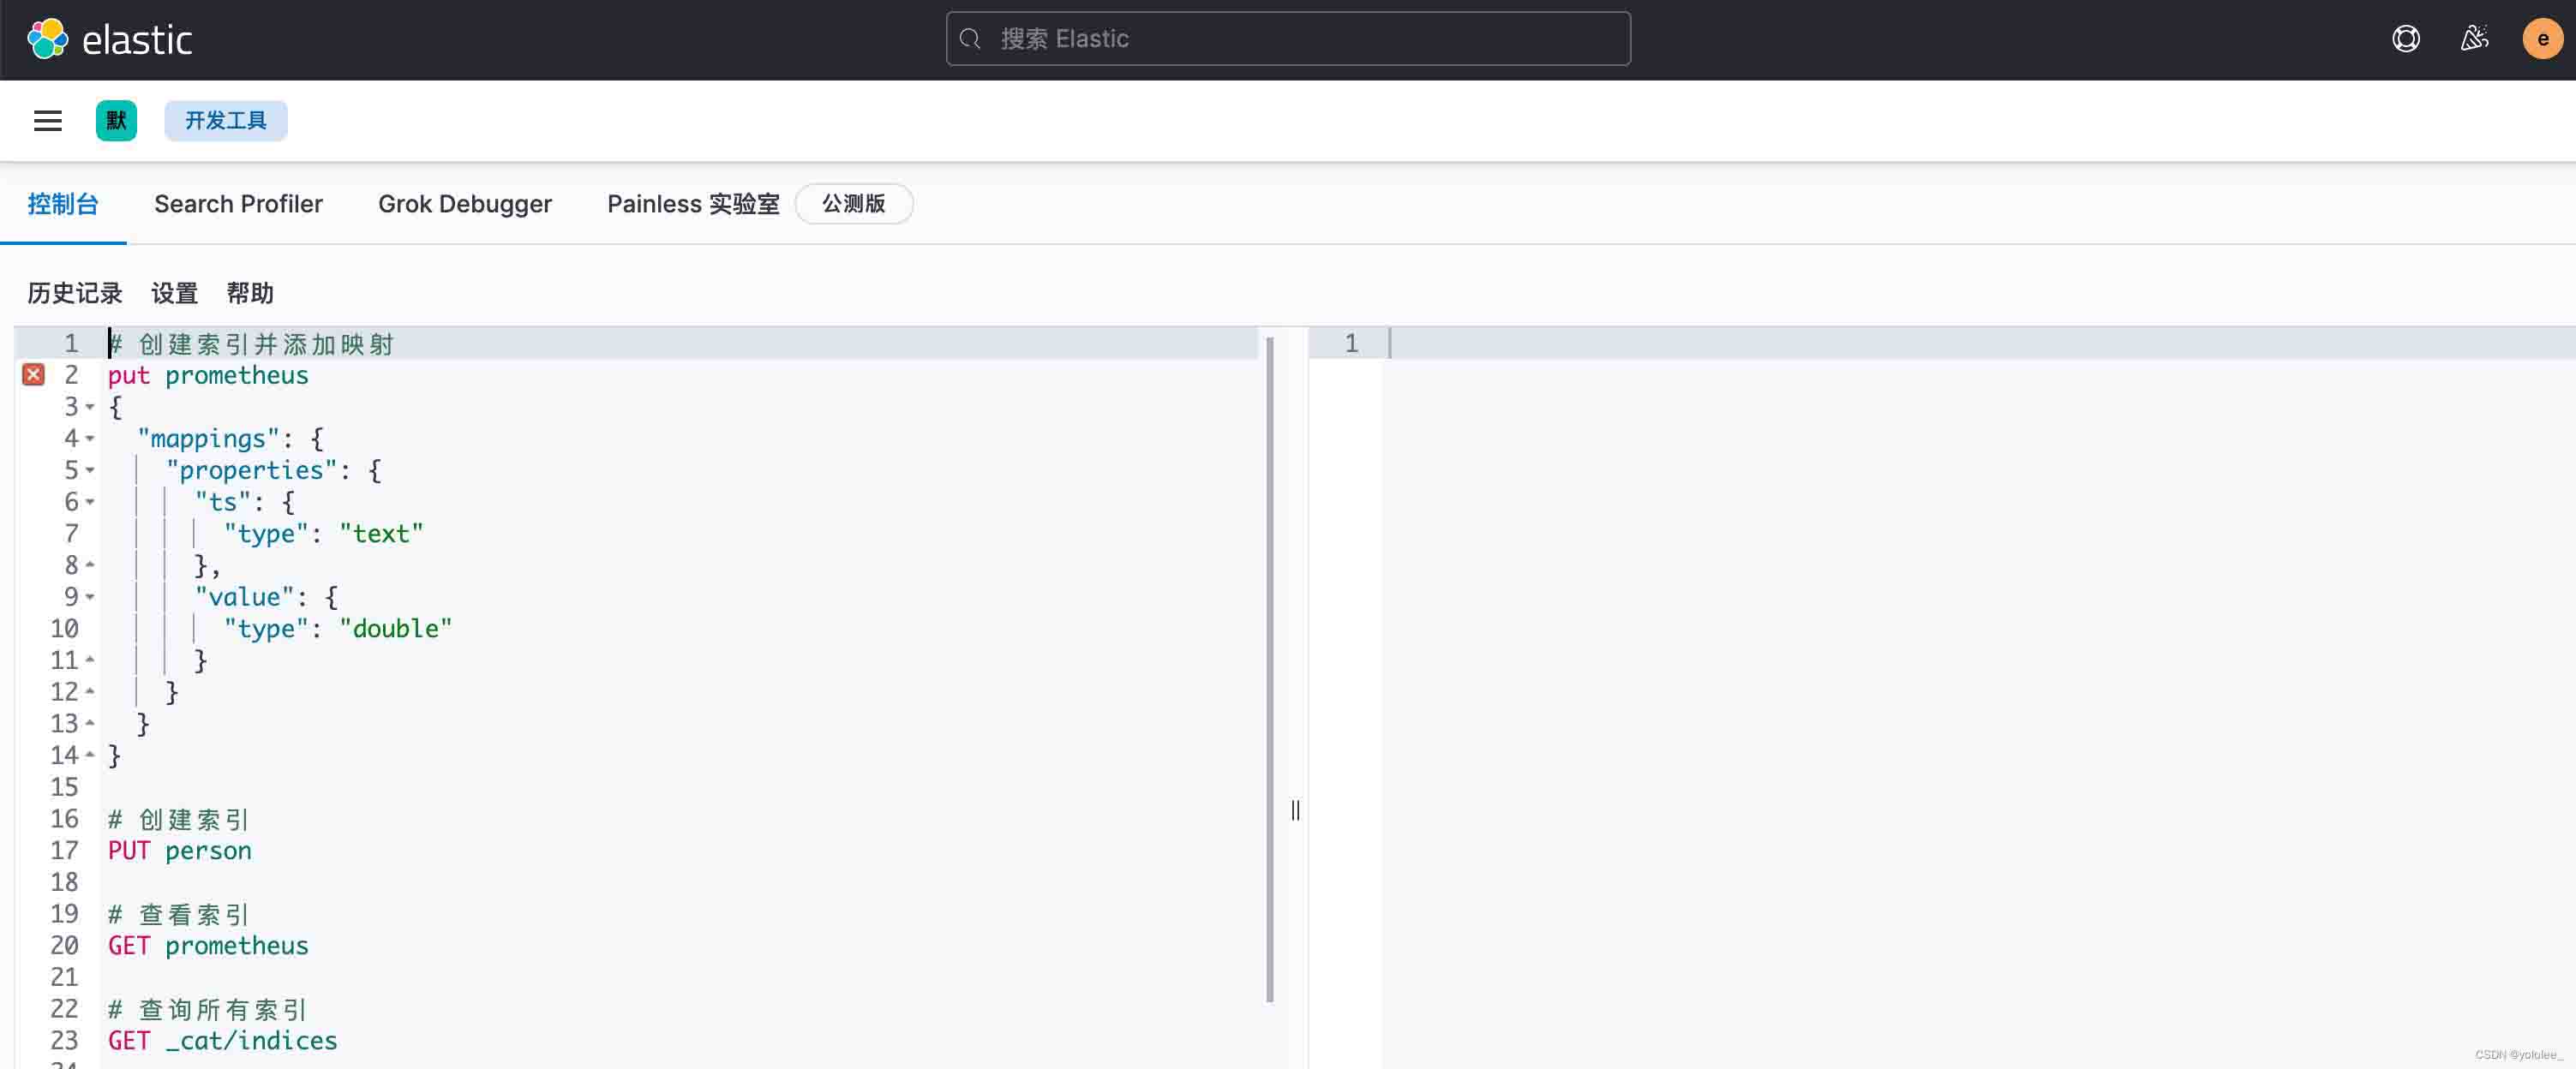
然后重启prometheus。之后当收集到数据时,就能成功保存到 elasticsearch 了,首次保存时会自动创建索引:prometheusbeat-7.3.1,数据都存在此索引中。
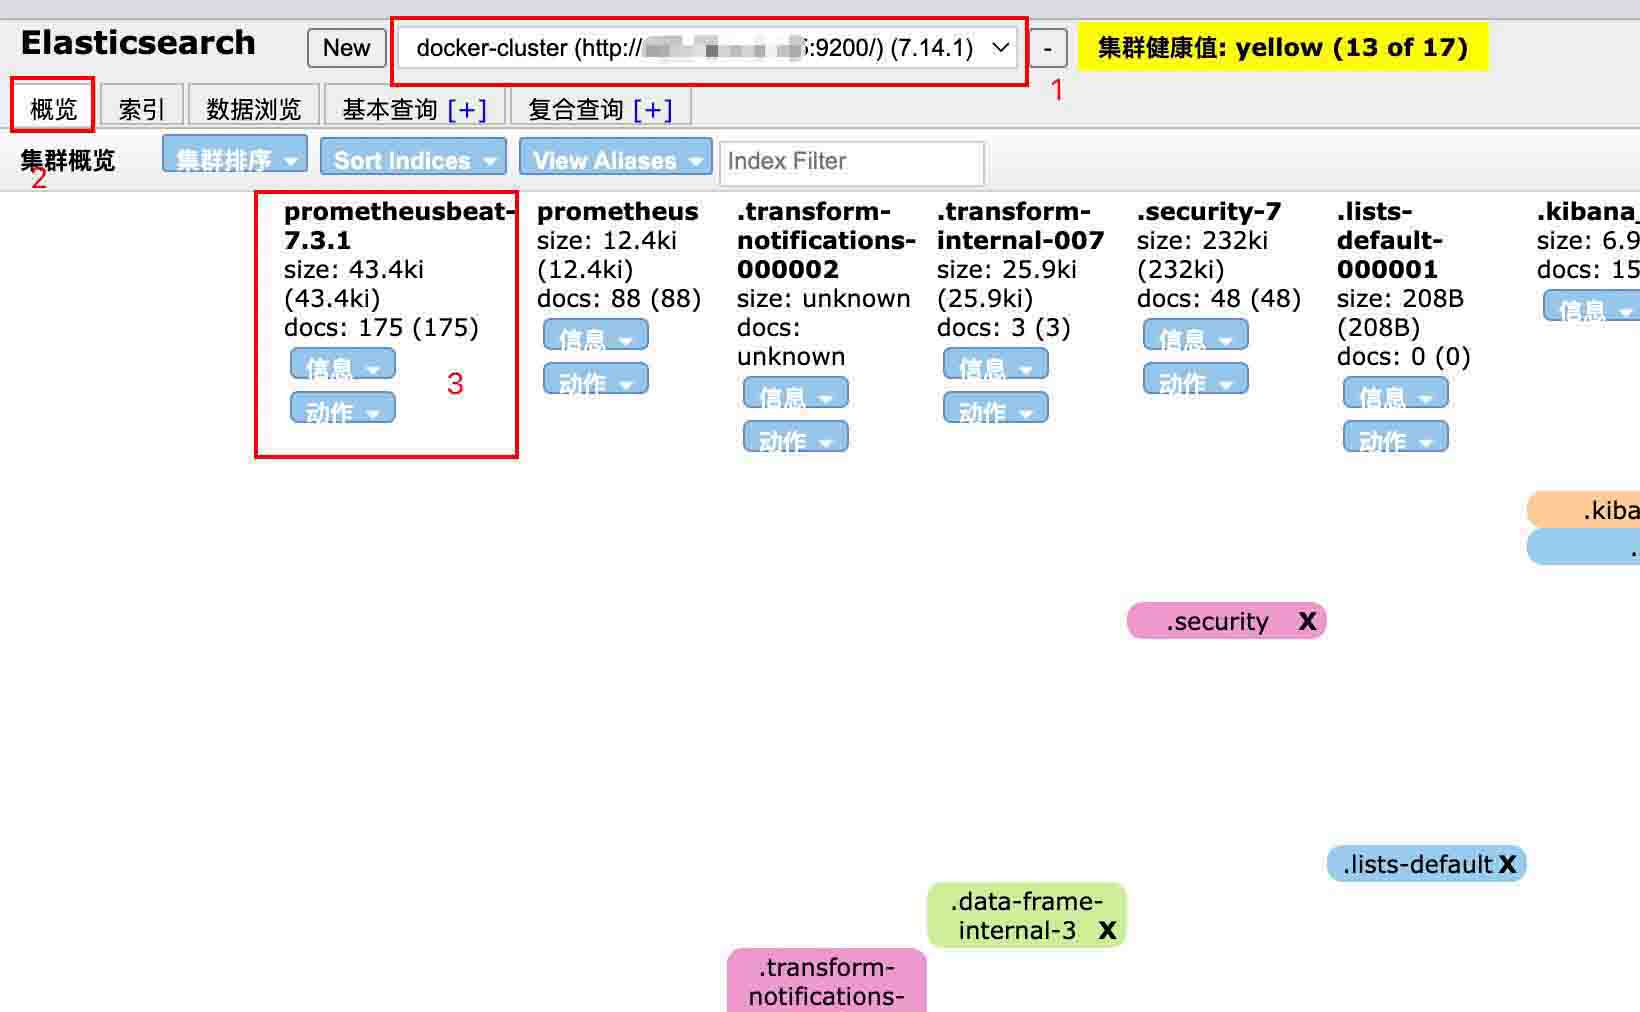
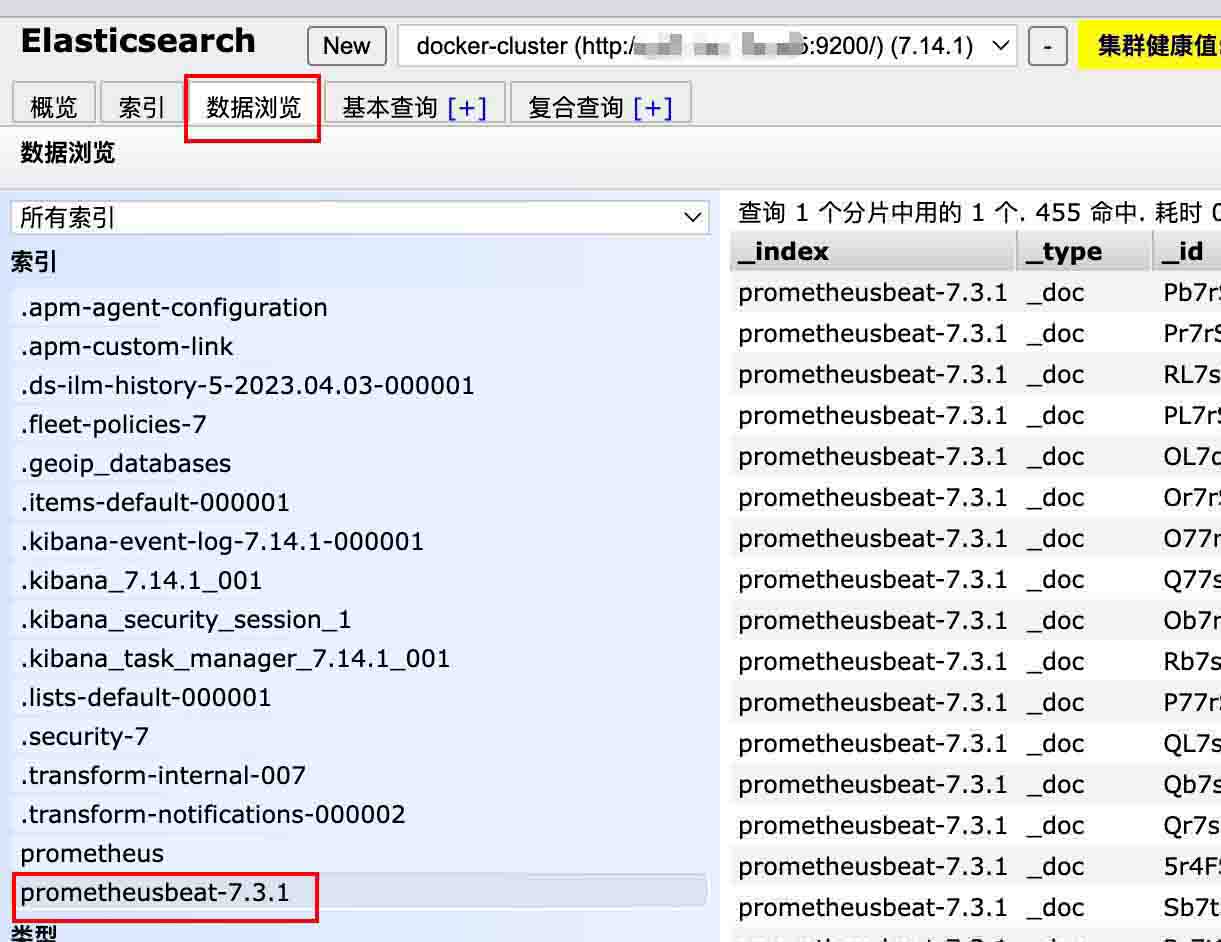
四、elasticsearch head验证
我们通过浏览器安装elasticsearch head插件,发现已经多了这个索引了
总结
以上为个人经验,希望能给大家一个参考,也希望大家多多支持代码网。


发表评论