一、项目背景
在现代大学生活中,稳定且高效的网络连接是学生日常学习和生活的重要组成部分。然而,许多学校的校园网需要通过网页认证登录,这不仅繁琐而且耗时。为了简化这一过程,我开发了一个自动化脚本,旨在帮助学生自动连接到校园网,无需手动操作。
校园网使用痛点
- 设备重启后需要重新认证
- 网络波动导致频繁掉线
- 实验室设备需长期保持在线
传统解决方案的不足
- 浏览器保存密码存在安全风险
- 第三方工具可能携带广告/后门
- 无法自定义检测频率和策略
二、脚本核心功能
| 功能模块 | 实现方式 | 技术亮点 |
|---|---|---|
| 网络状态检测 | 定时请求认证页面+标题解析 | 双编码兼容(gbk/utf-8) |
| 自动认证系统 | 模拟浏览器post请求 | 请求头指纹伪装 |
| 桌面通知提醒 | win10toast库 | 非阻塞式弹窗 |
| 运行日志系统 | 文件写入+自动清理 | 日志轮转机制 |
| 智能休眠策略 | 随机间隔检测 | 防模式识别 |
三、校园网认证逻辑分析
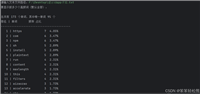
1.先登录校园网认证网页,点击f12,选中网络并勾选保存日志
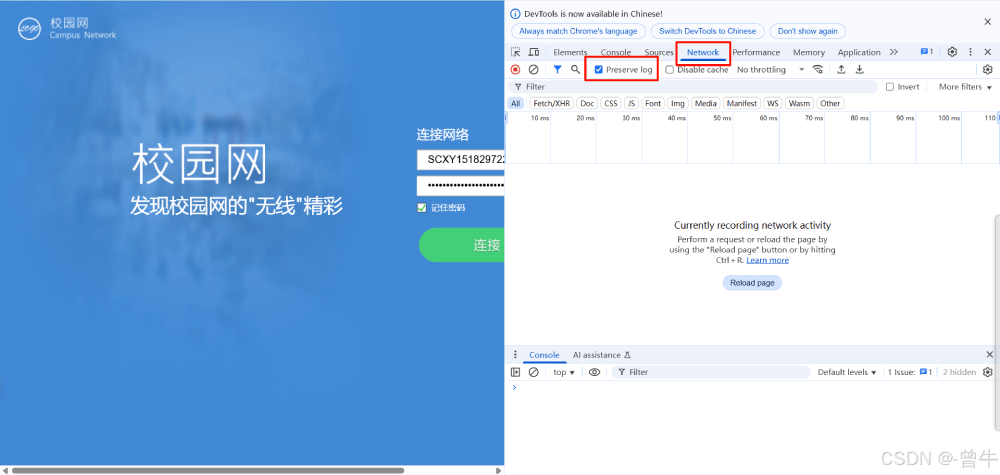
2.再输入账户密码,点击连接login,进行抓包(一般netword的前几个比较重要,后面的都是资源文件)
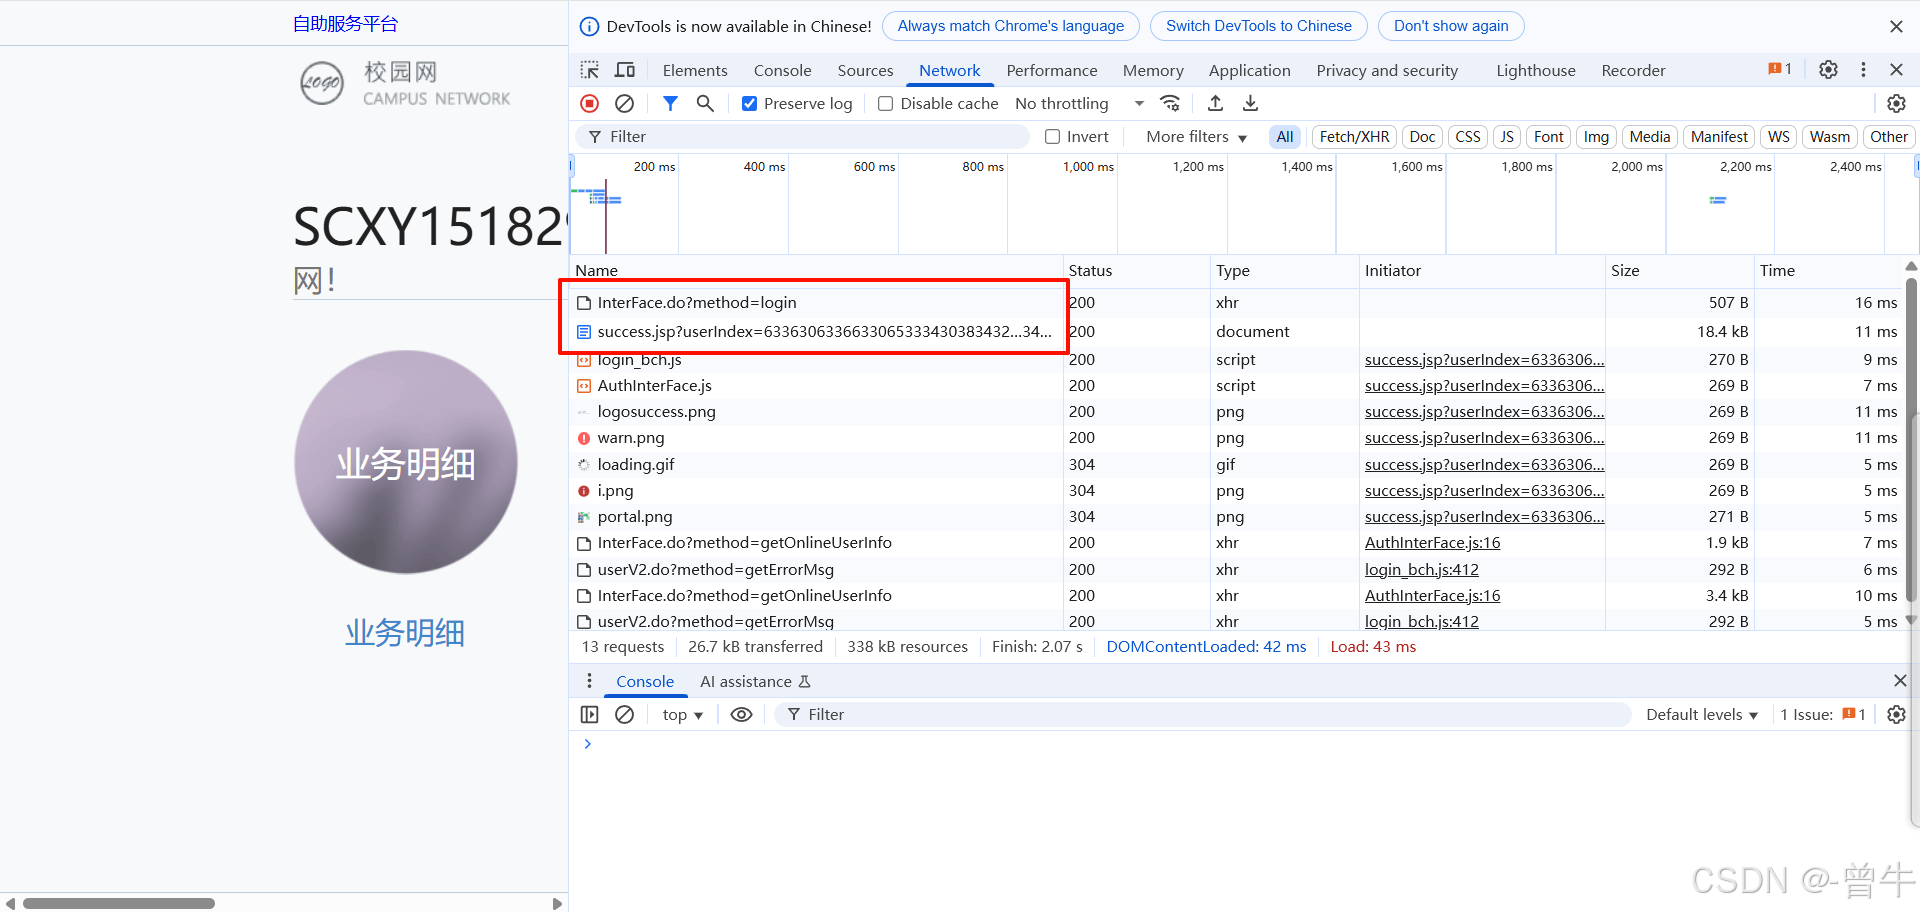
3.这里发现发了两个请求,第一个post请求,第二个get请求(每个学校的不一样,hhu的可以直接用本教程方法)
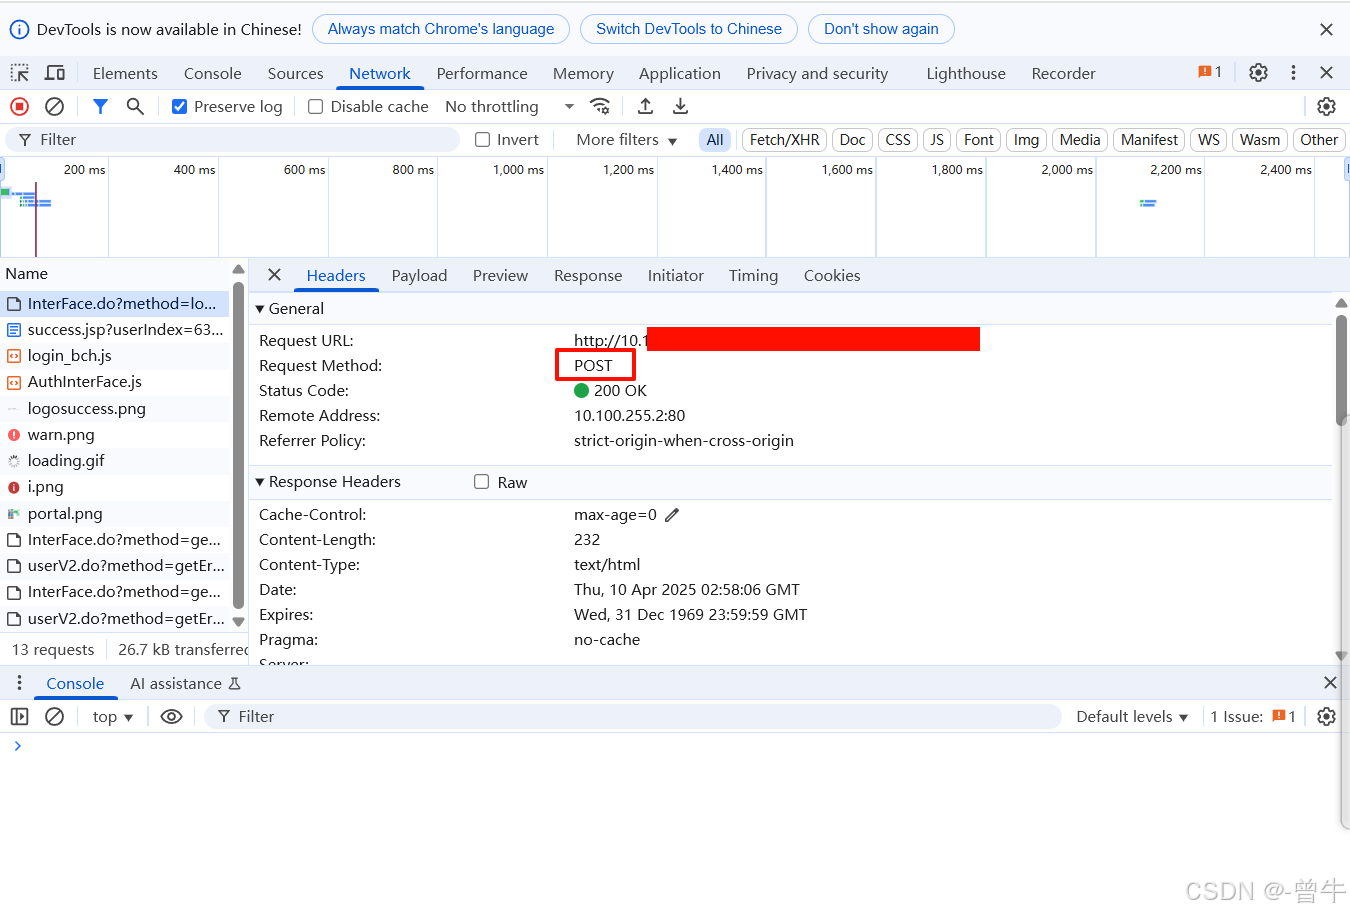
第一个是post请求
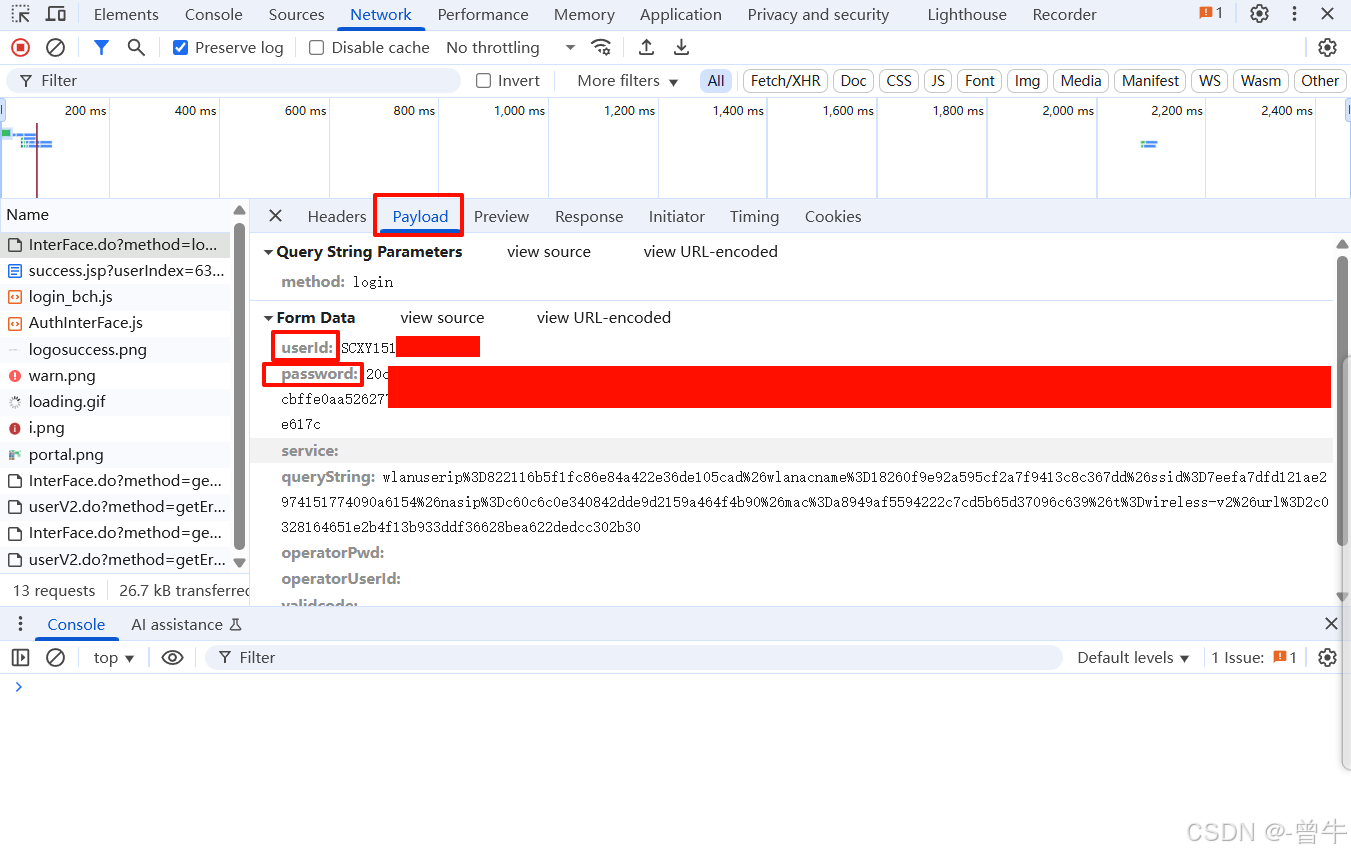
点击payload查看post请求携带的数据,发现里面包含了自己的校园网账户和密码
第二个是get请求,复制上面的request url到浏览器,发现就是可以访问的认证界面。
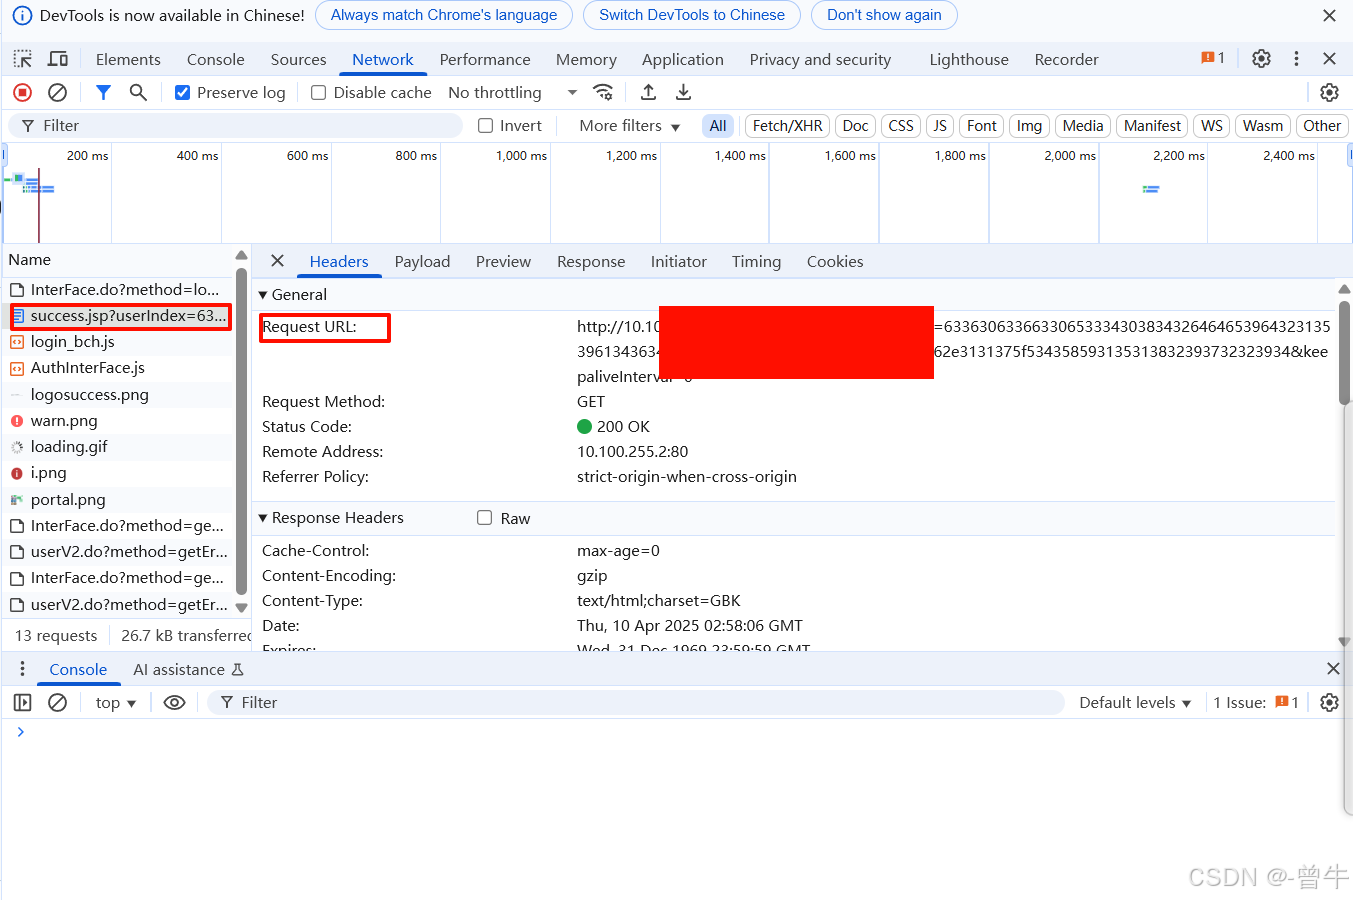
小结:点击login按钮后,密码是先通过一个post请求提交到服务器,然后再通过一个get请求去实现登录的。
那脚本要做的事情就是:当发现当前处于未登录状态时,要模拟浏览器的行为,先发一个post请求,请求header和data都要和浏览器上的内容对应,然后再发一个get请求就可以了。
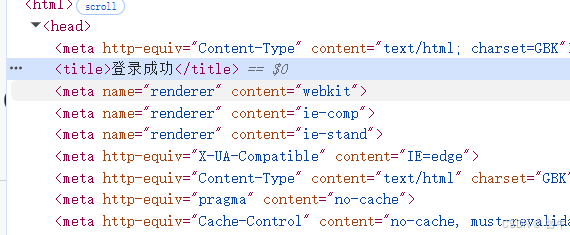
如何判断当前是否处于未登录状态?
一般提交get请求时,当前已经登录和为登录状态得到html文档中的标签内容是不一样的。这里我们在已登录状态下,按f12,再按ctrl+f查找下的内容,发现果然有标识
四、代码解析(关键部分)
核心模块
http请求:使用requests库发送http请求,与校园网认证服务器进行通信。
html解析:使用re模块解析html内容,提取标题元素以判断登录状态。
windows通知:使用win10toast库显示桌面通知。
日志记录:将每次操作的结果记录到日志文件中。
异常处理:捕获并处理各种可能的异常情况,确保脚本的稳定性。
代码结构
1.写一个死循环,不断判断当前是否处于登录状态:直接发get请求,如果返回的tittle为“登录成功”,则为已登录状态。
while(true):
    print("自动联网脚本开始运行...")
    # 请求校园网url
    response = request.urlopen(get_url)
    html = response.read()
    # 获取tittle元素内容
    res = re.findall('<title>(.*)</title>', html.decode(encoding="gbk", errors="strict"))
    print('res:', res)
    title = ''
    if len(res) == 0:
        print("访问",get_url,"失败,请检查请求地址!")
        pass
    else:
        title = res[0]
    print("title:",title)
2.否则的话,就模拟浏览器的行为,给服务器发一个post请求(设置好header和data,示例如下),然后再发一个get请求进行认证。
设置header操作如下:查看请求一headers,鼠标向下滑,找到request header,将自己的配置复制到代码相对应的配置中。
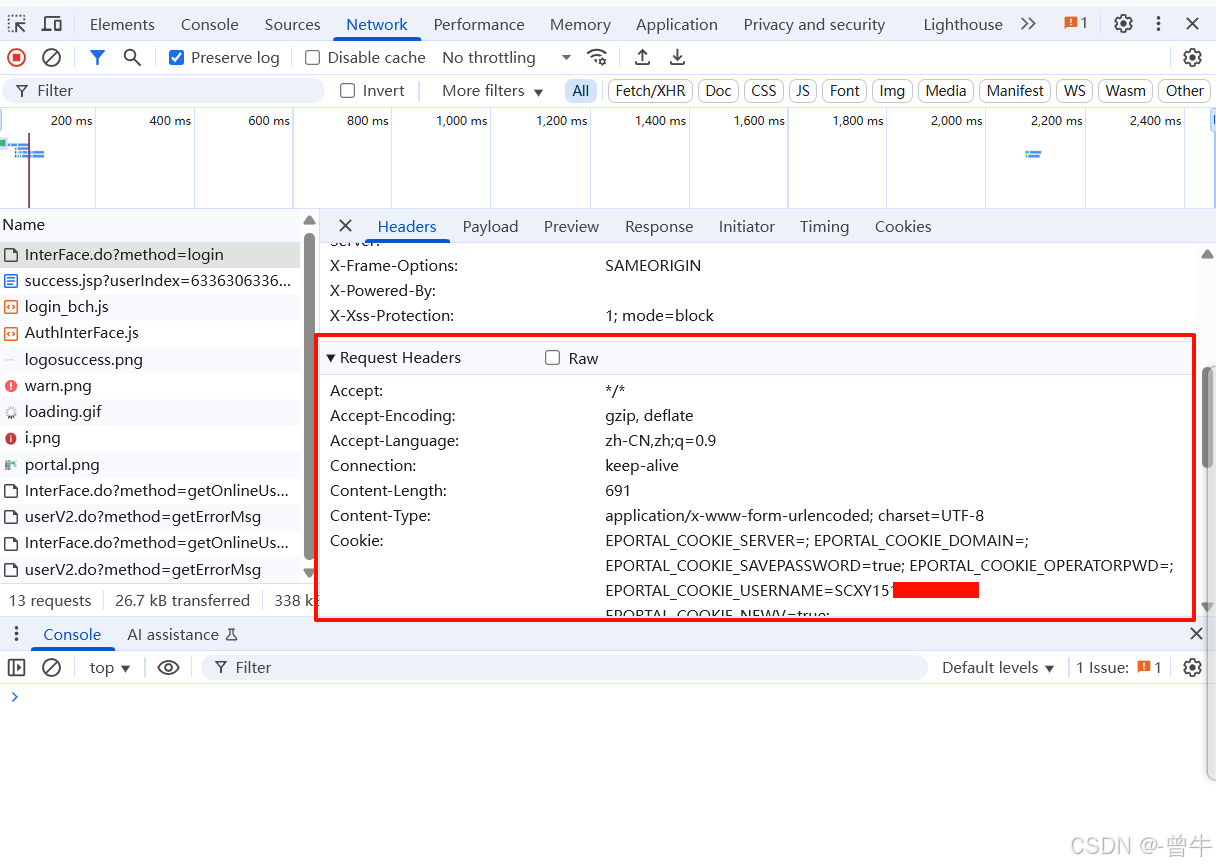
    # 设置post的请求头,浏览器点击f12,在netword中选中post请求,点击headers、request header面板中查看
    header = {
        "accept": "*/*",
        "accept-encoding": "gzip, deflate",
        "accept-language": "zh-cn,zh;q=0.9,en-us;q=0.8,en;q=0.7",
        "connection": "keep-alive",
        "content-length": "762",
        "content-type": "application/x-www-form-urlencoded; charset=utf-8",
        "cookie": "eportal_cookie_domain=false; eportal_cookie_username=xxxxx; eportal_cookie_server=%e4%b8%ad%e5%9%e7%a7%bb%e5%8a%a8(cmcc%20net); eportal_cookie_server_name=%e4%b8%ad%e5%9b%ba7%bb%e5%8a%a8(cmcc%20net); eportal_cookie_savepassword=true; eportal_cookie_operatorpwd=; eportal_cookie_newv=true; eportal_cookie_password=1e485d5861f50092df261f37ca6218c4d8675e6daf226f84489f5bd7ca8339a4e15b27b2fdb3a1ade55b553c96a04a76ad00a31cb46902d356babec2ced138dc40f97b6f5b489274aa5561d24a6f9610caf99e52e5a0d92bf2448819f44dfc2f2c37966d8554aa00fe530d0cbe52a0d4438f2640f04410e865ff3aeff6faf9ff; eportal_auto_land=; eportal_user_group=%e5%ad%a6%e7%94%9f; jsessionid=8a3372e32254b5f7321df7b93a4851aa; jsessionid=f2c1bb4e6d58762763f36630541b5c38",
        "host": "eportal.hhu.edu.cn",
        "origin": "http://eportal.hhu.edu.cn",
        "referer": "http://eportal.hhu.edu.cn/eportal/index.jsp?wlanuserip=29fc0b608918b04682c9e6c6cf6c1c29&wlanacname=2356e8aa38c836625d91257381aaef57&ssid=ea65e712d7d12a1fb44ec48a1c5072b0&nasip=07ec241dffc0de15d87efe9c07b8c6e0&mac=027a460789bb1e7c9c4acc766c937e6e&t=wireless-v2&url=35e6780db7fde27a90f8986393791ca7b01578112b560bd2",
        "user-agent": "mozilla/5.0 (windows nt 10.0; win64; x64) applewebkit/537.36 (khtml, like gecko) chrome/119.0.0.0 safari/537.36",
    }
设置data
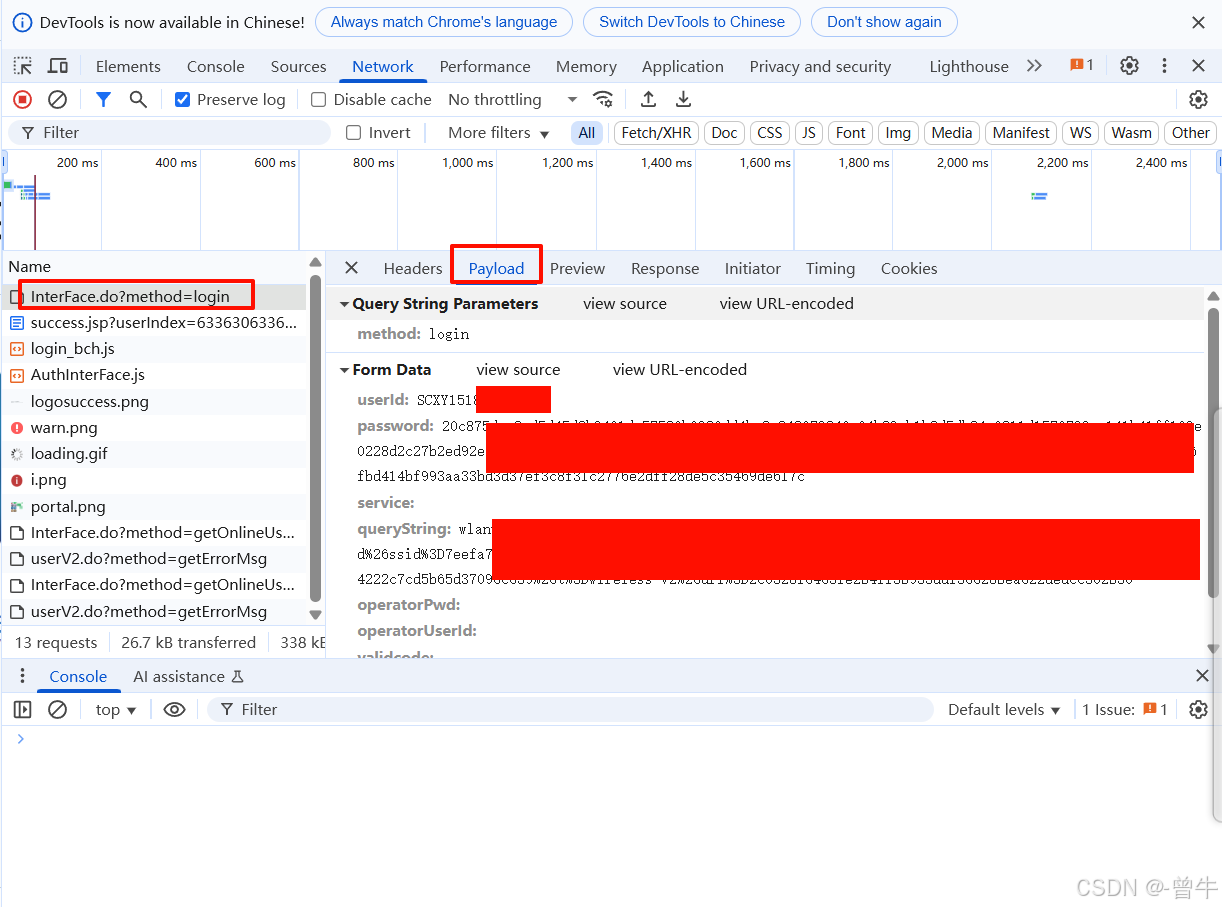
    # 设置post的请求数据,浏览器点击f12,在netword中选中post请求,点击payload面板中查看
    data = {
        "userid": 'xxx',  # 需要根据自己的情况修改
        "password": '1e485d5861f50092df261f37ca621daf226f84489f5bd5b27b2fdb3a1ade55b553c96a04a76ad00aa31cb4ced138dc40f97b6f5b489274a6f9610caf99e52e5a0d92bf2448819f44dfc2f2c37966d8554ada00fe530d0cbe52a0d4438f2640f04410e865ff3aeff6faf9ff',  # 需要根据自己的情况修改
        "querystring": 'wlanuserip%3d29fc0b608918b04682c9e6c6cf6c1c29%26wlanacname%3d2356e8aa38c836625d91257381aaef57%26ssid%3dea65e712d7d12a1fb44ec48a1c5072b0%26nasip%3d07ec241dffc0de15d87efe9c07b8c6e0%26mac%3d027a460789bb1e7c9c4acc766c937e6e%26t%3dwireless-v2%26url%3d35e6780db7fde27a90f8986393791ca7b01578112b560bd2',
        "passwordencrypt": 'true',
        "operatorpwd": '',
        "operatoruserid": '',
        "validcode": '',
        "service": '',
    }
3.打印状态码,判断是否认证成功。
4.休眠一段时间,然后进行下一次循环。
    # 每1h左右检测一次是否成功连接
    rand = random.uniform(0, 100)
    print("休眠",int(3600.0 + rand),"s")
    time.sleep(3600.0 + rand)
另外,由于这个脚本可以放到需要后台运行,把日志输出到log文件中去,可以查看脚本运行状态。
以下是脚本的主要部分:
import urllib.request
from urllib import parse
import time
import random
import os
import re
# 设置日志文件路径
log_file_path = 'log.txt'
# 第一个post请求的url
post_url = 'http://10.100.255.2/eportal/interface.do?method=login'
# 第二个get请求的url(浏览器可访问的url)
get_url = 'http://10.100.255.2/eportal/success.jsp?userindex=63360363366306533343048342464646&keepaliveinterval=0'
while true:
print("自动联网脚本运行中...")
try:
# 请求校园网url(添加超时防止阻塞)
response = urllib.request.urlopen(get_url, timeout=10)
html = response.read()
except exception as e:
print(f"网络请求异常: {e}")
html = b'' # 防止html未定义
# 获取title元素内容
res = re.findall('<title>(.*)</title>', html.decode(encoding="gbk", errors="ignore")) # 使用errors="ignore"避免解码失败
print('res:', res)
title = ''
if len(res) == 0:
print(f"访问 {get_url} 可能未连接到校园网!")
else:
title = res[res[0]]
# 根据title判断登录状态
if title == '登录成功':
print('当前状态为:已登录!')
# 弹出windows通知
# try:
# toaster.show_notification(
# "校园网状态",
# "✅ 已成功连接到校园网!",
# duration=5,
# icon_path="school.ico", # 可替换为图标路径如 "school.ico"
# threaded=true
# )
# except exception as e:
# print(f"通知发送失败: {e}")
else:
print('当前状态为:未登录!')
# 设置post请求头和数据
header = {
"accept": "*/*",
"accept-encoding": "gzip, deflate",
"accept-language": "zh-cn,zh;q=0.9",
"connection": "keep-alive",
"content-length": "691",
"content-type": "application/x-www-form-urlencoded; charset=utf-8",
"cookie": "eportal_cookie_server=; eportal_cookie_domain=; eportal_cookie_savepassword=true; eportal_cookie_operatorpwd=; eportal_cookie_username=scxy15182972294; eportal_cookie_newv=true; eportal_cookie_server_name=;",
"host": "xxxx", #根据自己的浏览器配置项配置
"origin": "xxxxx", #根据自己的浏览器配置项配置
"referer": "xxxxx", #根据自己的浏览器配置项配置
"user-agent": "mozilla/5.0 (windows nt 10.0; win64; x64) applewebkit/537.36 (khtml, like gecko) chrome/135.0.0.0 safari/537.36",
}
data = {
"userid": 'xxxxx', #根据自己的浏览器配置项配置
"password": 'xxxxx', #根据自己的浏览器配置项配置
"querystring": 'xxxxx', #根据自己的浏览器配置项配置
"passwordencrypt": 'true',
"operatorpwd": '',
"operatoruserid": '',
"validcode": '',
"service": '',
}
# 发送登录请求
try:
post_response = requests.post(post_url, data=data, headers=header, timeout=15)
print(f"post请求状态码: {post_response.status_code}")
get_response = requests.get(get_url, timeout=15)
print(f"get请求状态码: {get_response.status_code}")
except requests.exceptions.requestexception as e:
print(f"请求异常: {e}")
# 日志记录(添加异常处理)
try:
with open(log_file_path, 'a', encoding='utf-8') as log_file:
log_file.write(
f"{time.strftime('%y-%m-%d %h:%m:%s')} - 状态: {'已登录' if title == '登录成功' else '未登录'}\n")
if os.path.getsize(log_file_path) > 1024:
log_file.seek(0)
log_file.truncate() # 更安全的清空方式
except ioerror as e:
print(f"日志写入失败: {e}")
# 随机休眠(1小时±100秒)
delay = 3600 + random.uniform(-100, 100)
print(f"下次检测将在 {int(delay)} 秒后...\n")
time.sleep(delay)
使用方法
1.安装依赖:确保已安装requests和win10toast库。可以通过以下命令安装:
pip install requests  #必须安装
pip install requests win10toast  #如果要使用windows弹窗功能可以安装(选择性安装)
2.运行脚本:直接运行python脚本即可。脚本会自动检测当前网络状态,并根据需要进行登录操作。
3.打包:
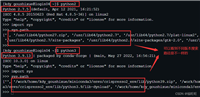
先安装好pyinstall工具
pip install pyinstall
最后用pyinstall工具把.py文件打包成.exe可执行文件
完整打包命令参考
pyinstaller --onefile --noconsole --hidden-import=win10toast --icon=my_icon.ico your_script.py
--onefile: 打包成单个 .exe 文件。
--noconsole: 禁止控制台弹窗。
--hidden-import=win10toast: 显式包含 win10toast 依赖(如果自动检测失败)。
--icon=my_icon.ico: 可选,为 .exe 添加自定义图标。
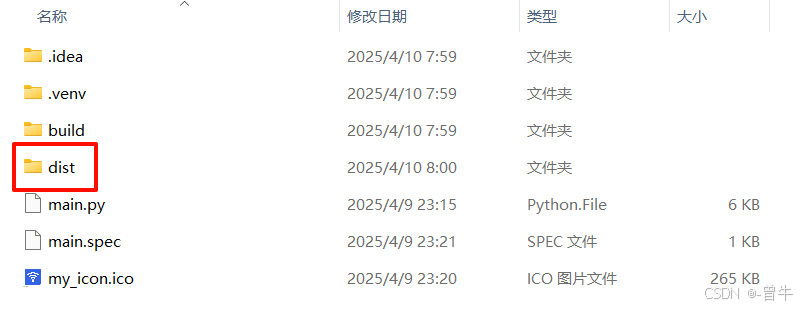
打包后如下,在dist里面找到.exe可执行程序,双击测试运行。

4.设置开机自启动,完全解放双手
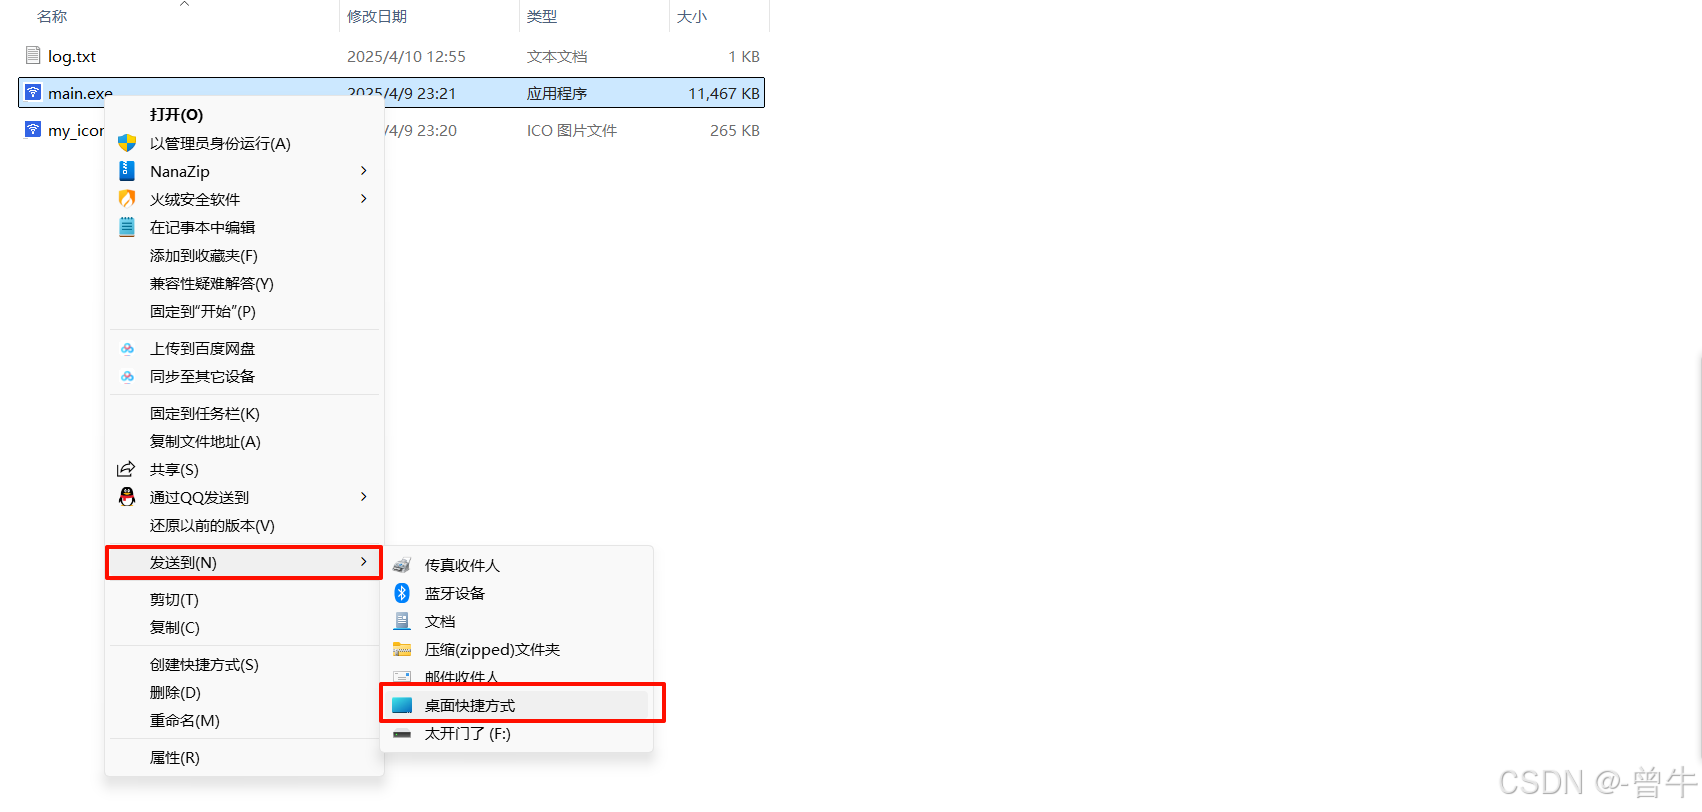
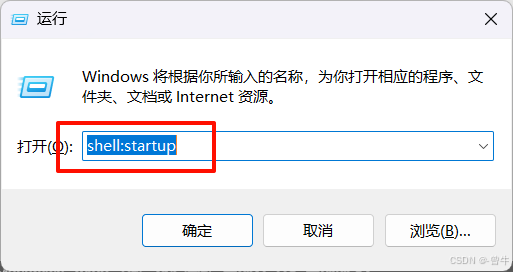
键盘同时按住"win","r"键打开命令窗口,输入以下命令:
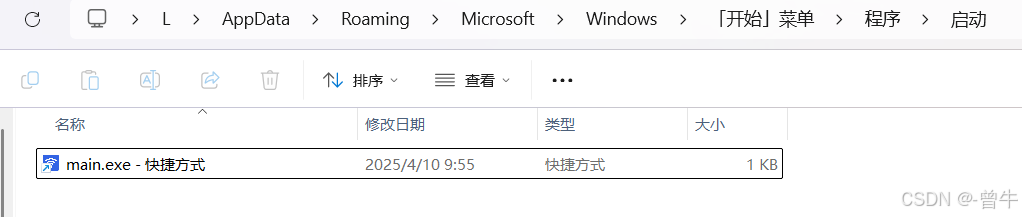
将刚刚发送到的快捷方式拖入打开的文件夹中即可每次在开机时自动运行程序,无需手动启动。
注意:建议将源文件夹放在一个不长修改的地方。
五、效果展示
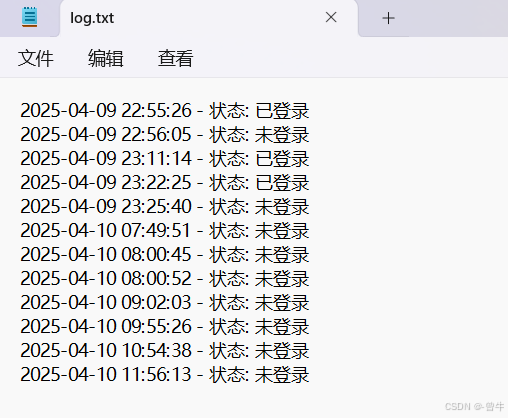
日志文件
2024-03-01 09:00:00 - 状态: 已登录
2024-03-01 10:05:23 - 状态: 未登录
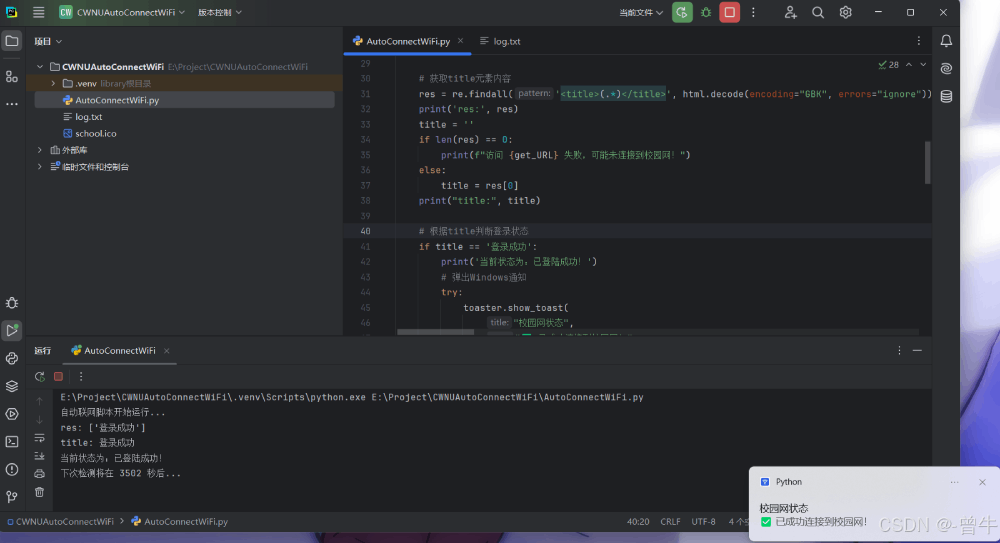
运行截图
六、扩展方向(按需选择)
1.多平台支持
# 适配linux通知
import notify2
notify2.init("campus network")
2.微信通知集成
# 通过server酱发送提醒
requests.post("https://sc.ftqq.com/scukey.send",
             data={"text": "网络状态提醒"})
3.可视化监控面板
# 使用flask搭建web界面
pip install flask
七、注意事项
1.信息安全
不要明文存储密码
建议使用环境变量保存敏感信息
2.网络合规
仅限个人设备使用
遵守校园网使用规定
3.异常处理
遇到持续认证失败应停止尝试
添加最大重试次数限制
九、总结
这个自动化脚本极大地简化了校园网连接的过程,节省了学生的时间和精力。通过定期检测和自动登录,确保用户始终能够保持在线状态。同时,日志记录和错误处理机制也提高了脚本的可靠性和易用性。希望这个脚本能够帮助更多的学生享受更加便捷的网络体验。
以上就是python实现全自动校园网认证与登录脚本的详细内容,更多关于python校园网认证登录的资料请关注代码网其它相关文章!


发表评论