spring security 是一个强大且可扩展的框架,用于保护 java 应用程序,尤其是基于 spring 的应用。它提供了身份验证(验证用户身份)、授权(管理用户权限)和防护机制(如 csrf 保护和防止会话劫持)等功能。
spring security 允许开发者通过灵活的配置实现安全控制,确保应用程序的数据和资源安全。通过与其他 spring 生态系统的无缝集成,spring security 成为构建安全应用的理想选择。
核心概念
- 身份验证 (authentication): 验证用户的身份(例如,用户名/密码)。
- 授权 (authorization): 确定用户是否有权限访问特定资源。
- 安全上下文 (security context): 存储已认证用户的详细信息,应用程序中可以访问。
1、准备工作
1.1 引入依赖
当我们引入 security 依赖后,访问需要授权的 url 时,会重定向到 login 页面(security 自己创建的),login 页面需要账号密码,账号默认是 user, 密码是随机的字符串,在spring项目的输出信息中
spring-boot-starter-security

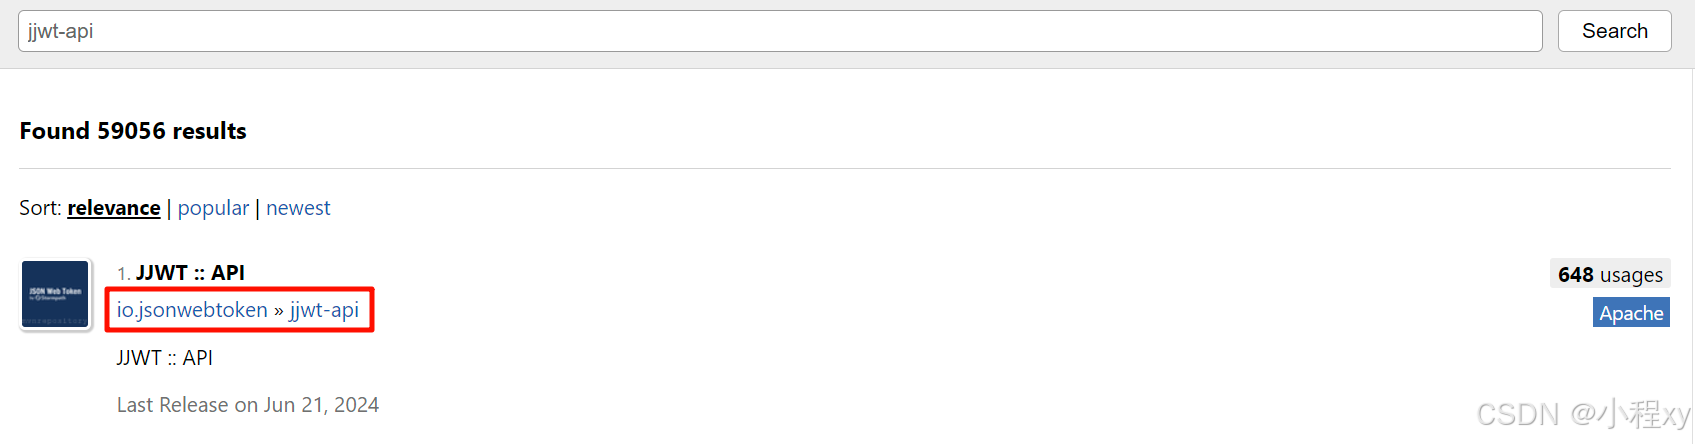
<!-- https://mvnrepository.com/artifact/io.jsonwebtoken/jjwt-impl -->
<dependency>
    <groupid>io.jsonwebtoken</groupid>
    <artifactid>jjwt-impl</artifactid>
    <version>0.12.6</version>
    <scope>runtime</scope>
</dependency>
jjwt-api
<!-- https://mvnrepository.com/artifact/io.jsonwebtoken/jjwt-jackson -->
<dependency>
    <groupid>io.jsonwebtoken</groupid>
    <artifactid>jjwt-jackson</artifactid>
    <version>0.12.6</version>
    <scope>runtime</scope>
</dependency>
jjwt-impl
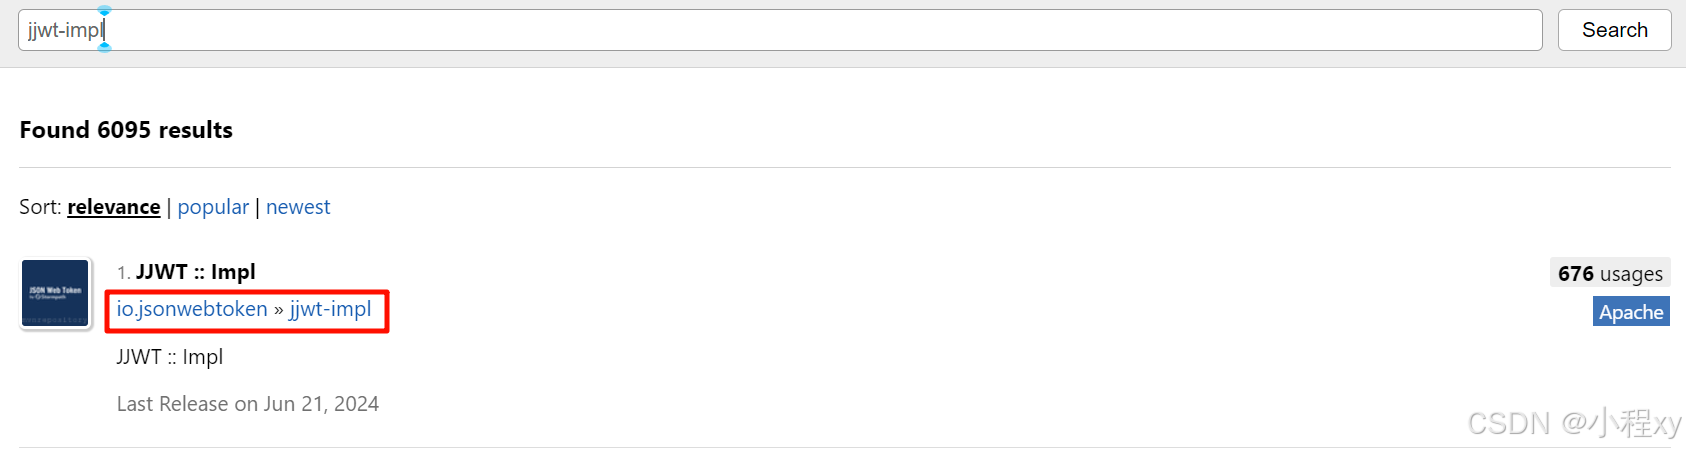
<!-- https://mvnrepository.com/artifact/io.jsonwebtoken/jjwt-impl -->
<dependency>
    <groupid>io.jsonwebtoken</groupid>
    <artifactid>jjwt-impl</artifactid>
    <version>0.12.6</version>
    <scope>runtime</scope>
</dependency>
jjwt-jackson
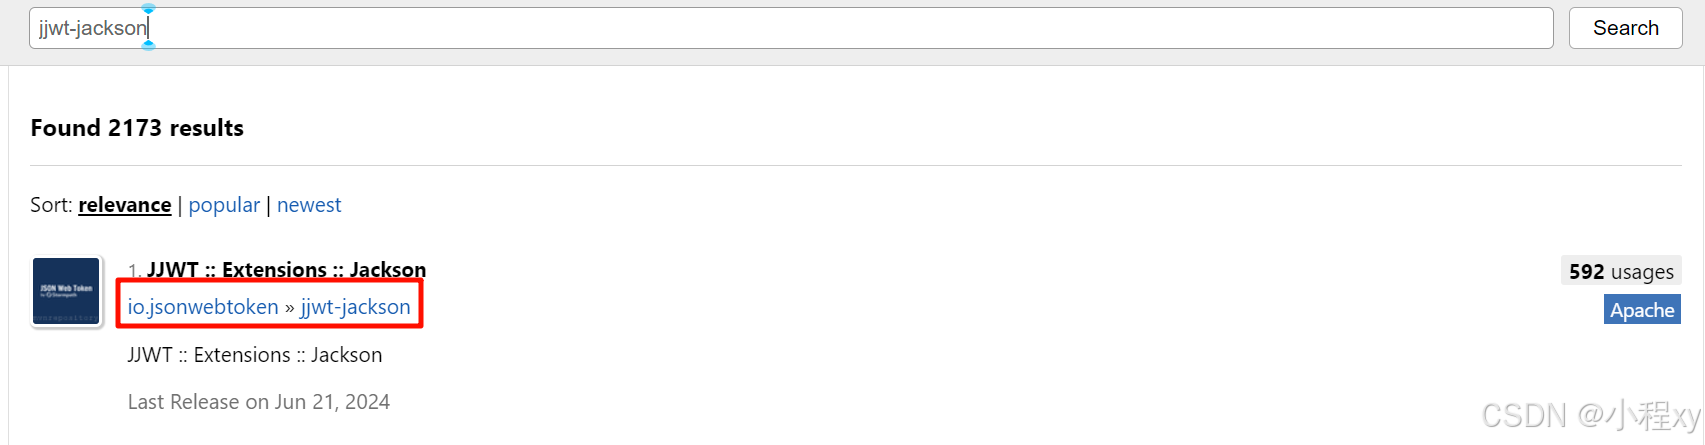
<!-- https://mvnrepository.com/artifact/io.jsonwebtoken/jjwt-jackson -->
<dependency>
    <groupid>io.jsonwebtoken</groupid>
    <artifactid>jjwt-jackson</artifactid>
    <version>0.12.6</version>
    <scope>runtime</scope>
</dependency>
一般我们会创建一个 securityconfig 类,来管理我们所有与 security 相关的配置。(我们讲的是 security 5.7 版本之后的配置方法,之前的方法跟现在不太一样)
@configuration
@enablewebsecurity		// 该注解启用 spring security 的 web 安全功能。
public class securityconfig {
}
下面的都要写到 securityconfig 类中
1.2 用户认证的配置
基于内存的用户认证
通过 createuser , manager 把用户配置的账号密码添加到spring的内存中, inmemoryuserdetailsmanager 类中有一个 loaduserbyusername 的方法通过账号(username)从内存中获取我们配置的账号密码,之后调用其他方法来判断前端用户输入的密码和内存中的密码是否匹配。
@bean
public userdetailsservice userdetailsservice() {
	// 创建基于内存的用户信息管理器
    inmemoryuserdetailsmanager manager = new inmemoryuserdetailsmanager();
    manager.createuser(
	    // 创建userdetails对象,用于管理用户名、用户密码、用户角色、用户权限等内容
	    user.withdefaultpasswordencoder().username("user").password("user123").roles("user").build()
    );
    // 如果自己配置的有账号密码, 那么上面讲的 user 和 随机字符串 的默认密码就不能用了
    return manager;
}
当我们点进 inmemoryuserdetailsmanager 中 可以发现它实现了 userdetailsmanager 和 userdetailspasswordservice 接口,其中 userdetailsmanager 接口继承的 userdetailsservice 接口中就有 loaduserbyusername 方法


基于数据库的用户认证
上面讲到,spring security 是通过 loaduserbyusername 方法来获取 user 并用这个 user 来判断用户输入的密码是否正确。所以我们只需要继承 userdetailsservice 接口并重写 loaduserbyusername 方法即可
下面的样例我用的 mybatis-plus 来查询数据库中的 user, 然后通过当前查询到的 user 返回特定的 userdetails 对象
@service
public class userdetailsserviceimpl implements userdetailsservice {
    @autowired
    usermapper usermapper;
    @override
    public userdetails loaduserbyusername(string username) throws usernamenotfoundexception {
        querywrapper<user> querywrapper = new querywrapper<user>();
        querywrapper.eq("username", username);	// 这里不止可以用username,你可以自定义,主要根据你自己写的查询逻辑
        user user = usermapper.selectone(querywrapper);
        if (user == null) {
            throw new usernamenotfoundexception(username);
        }
        return new userdetailsimpl(user);	// userdetailsimpl 是我们实现的类
    }
}
userdetailsimpl 是实现了 userdetails 接口的类。userdetails 接口是 spring security 身份验证机制的基础,通过实现该接口,开发者可以定义自己的用户模型,并提供用户相关的信息,以便进行身份验证和权限检查。
@data
@allargsconstructor
@noargsconstructor	// 这三个注解可以帮我们自动生成 get、set、有参、无参构造函数
public class userdetailsimpl implements userdetails {
    private user user;	// 通过有参构造函数填充赋值的
    @override
    public collection<? extends grantedauthority> getauthorities() {
        return list.of();
    }
    @override
    public string getpassword() {
        return user.getpassword();
    }
    @override
    public string getusername() {
        return user.getusername();
    }
    @override
    public boolean isaccountnonexpired() {  // 检查账户是否 没过期。
        return true;
    }
    @override
    public boolean isaccountnonlocked() {   // 检查账户是否 没有被锁定。
        return true;
    }
    @override
    public boolean iscredentialsnonexpired() {  //检查凭据(密码)是否 没过期。
        return true;
    }
    @override
    public boolean isenabled() {    // 检查账户是否启用。
        return true;
    }
    // 这个方法是 @data注解 会自动帮我们生成,用来获取 loaduserbyusername 中最后我们返回的创建userdetailsimpl对象时传入的user。
    // 如果你的字段包含 username和password 的话可以用强制类型转换, 把 userdetailsimpl 转换成 user。如果不能强制类型转换的话就需要用到这个方法了
	public user getuser() {
	        return user;
	    }
	}
1.3 基本的配置
下面这个是 security 的默认配置。我们可以修改并把它加到spring容器中,完成我们特定的需求。
@bean
public securityfilterchain filterchain(httpsecurity http) throws exception {
    http
            // 开启授权保护
            .authorizehttprequests(authorize -> authorize
                    // 不需要认证的地址有哪些
                    .requestmatchers("/blog/**", "/public/**", "/about").permitall()	// ** 通配符
                    // 对所有请求开启授权保护
                    .anyrequest().
                    // 已认证的请求会被自动授权
                    authenticated()
            )
            // 使用默认的登陆登出页面进行授权登陆
            .formlogin(customizer.withdefaults())
            // 启用“记住我”功能的。允许用户在关闭浏览器后,仍然保持登录状态,直到他们主动注销或超出设定的过期时间。
            .rememberme(customizer.withdefaults());
    // 关闭 csrf csrf(跨站请求伪造)是一种网络攻击,攻击者通过欺骗已登录用户,诱使他们在不知情的情况下向受信任的网站发送请求。
    http.csrf(csrf -> csrf.disable());
    return http.build();
}
关于上面放行路径写法的一些细节问题:
如果在 application.properities 中配置的有 server.servlet.context-path=/api 前缀的话,在放行路径中不需要写 /api。
如果 @requestmapping(value = "/test/") 中写的是 /test/, 那么放行路径必须也写成 /test/, (/test)是不行的,反之亦然。
如果 @requestmapping(value = "/test") 链接 /test 后面要加查询字符的话(/test?type=0),不要写成 @requestmapping(value = "/test/")
上面都是一些细节问题,但是遇到 bug 的时候不容易发现。(笔者初学时找了一个小时,… … .)
1.4 常用配置
下面这个是我常用的配置,配置了jwt,加密的类,过滤器启用 jwt,而不是session。(jwt的类会在下面讲到)
@configuration
@enablewebsecurity
public class securityconfig {
    @autowired
    private jwtauthenticationtokenfilter jwtauthenticationtokenfilter;
    @bean
    public passwordencoder passwordencoder() {
        return new bcryptpasswordencoder();
    }
    @bean
    public authenticationmanager authenticationmanager(authenticationconfiguration authconfig) throws exception {
        return authconfig.getauthenticationmanager();
    }
    @bean
    public securityfilterchain filterchain(httpsecurity http) throws exception {
        http.csrf(csrfconfigurer::disable) // 基于token,不需要csrf
                .sessionmanagement((session) -> session.sessioncreationpolicy(sessioncreationpolicy.stateless)) // 基于token,不需要session
                .authorizehttprequests((authz) -> authz
                        .requestmatchers("/login/",  "/getpiccheckcode").permitall() // 放行api
                        .requestmatchers(httpmethod.options).permitall()
                        .anyrequest().authenticated()
                )
                .addfilterbefore(jwtauthenticationtokenfilter, usernamepasswordauthenticationfilter.class);
        return http.build();
    }
}
2、加密
spring security 提供了多种加密和安全机制来保护用户的敏感信息,尤其是在用户身份验证和密码管理方面。(我们只讲默认的 bcryptpasswordencoder)
1. 密码加密的重要性
在应用程序中,用户密码是最敏感的数据之一。为了防止密码泄露,即使数据库被攻击者获取,密码也应以加密形式存储。加密可以保护用户的隐私,并在一定程度上增加安全性。
2. spring security 的加密机制
2.1 passwordencoder 接口
spring security 提供了 passwordencoder 接口,用于定义密码的加密和验证方法。主要有以下几种实现:
- bcryptpasswordencoder:基于 bcrypt 算法,具有适应性和强大的加密强度。它可以根据需求自动调整加密的复杂性。
- nooppasswordencoder:不执行加密,适用于开发和测试环境,不建议在生产环境中使用。
- pbkdf2passwordencoder、argon2passwordencoder 等:这些都是基于不同算法的实现,具有不同的安全特性。
2.2 bcrypt 算法
bcrypt 是一种安全的密码哈希算法,具有以下特点:
- 盐值(salt):每次加密时都会生成一个随机盐值,确保相同的密码在每次加密时生成不同的哈希值。
- 适应性:通过增加计算复杂性(如工作因子),可以提高密码的加密强度。
3. 使用 passwordencoder
3.1 配置 passwordencoder
可以在 spring security 的配置类中定义 passwordencoder bean,例如:
@configuration
public class securityconfig {
    @bean
    public passwordencoder passwordencoder() {
        // 也可用有参构造,取值范围是 4 到 31,默认值为 10。数值越大,加密计算越复杂
        return new bcryptpasswordencoder();
    }
}
3.2 加密密码
在注册用户或更新密码时,可以使用 passwordencoder 来加密密码:
@autowired
private passwordencoder passwordencoder;
public void registeruser(string username, string rawpassword) {
    string encryptedpassword = passwordencoder.encode(rawpassword);
    // 保存用户信息到数据库,包括加密后的密码
}
3.3 验证密码
在用户登录时,可以使用 matches 方法验证输入的密码与存储的加密密码是否匹配:
public boolean login(string username, string rawpassword) {
    // 从数据库中获取用户信息,包括加密后的密码
    string storedencryptedpassword = // 从数据库获取;
    return passwordencoder.matches(rawpassword, storedencryptedpassword);
}
3、前后端分离
1. 用户认证流程
1.1 用户登录
前端:
- 用户在登录界面输入用户名和密码。
- 前端将这些凭证以 json 格式发送到后端的登录 api(例如
post /api/login)。
后端:
- spring security 接收请求,使用
authenticationmanager进行身份验证。 - 如果认证成功,后端生成一个 jwt(json web token)或其他认证令牌,并将其返回给前端。
2. 使用 jwt 进行用户认证
2.1 前端存储 jwt
- 前端收到 jwt 后,可以将其存储在
localstorage或sessionstorage中,以便后续请求使用。
2.2 发送受保护请求
在发送需要认证的请求时,前端将 jwt 添加到请求头中:
fetch('/api/protected-endpoint', {
    method: 'get',
    headers: {
        'authorization': `bearer ${token}`
    }
});
2.3 后端解析
jwt spring security 通过过滤器来解析和验证 jwt。可以自定义一个 onceperrequestfilter 以拦截请求,提取 jwt,并验证其有效性。
3. 退出登录
由于 jwt 是无状态的,后端不需要记录会话状态。用户可以通过前端操作(例如,删除存储的 jwt)来“退出登录”。可以实现一个注销接口,用于前端执行相关逻辑。
4. 保护敏感信息
- 确保 https:在前后端通信中使用 https,确保传输中的数据安全。
- 令牌过期:设置 jwt 的有效期,过期后需要用户重新登录。
- 刷新令牌:可以实现刷新令牌的机制,以提高用户体验。
4. 实现 jwt
4.1 onceperrequestfilter
- 作用:
onceperrequestfilter是 spring security 提供的一个抽象类,确保在每个请求中只执行一次特定的过滤逻辑。它是实现自定义过滤器的基础,通常用于对请求进行预处理或后处理。(实现jwt会用到这个接口) - 功能:提供了一种机制,以确保过滤器的逻辑在每个请求中只执行一次,非常适合需要对每个请求进行处理的场景。通过继承该类,可以轻松实现自定义过滤器适合用于记录日志、身份验证、权限检查等场景。
- 实现:继承
onceperrequestfilter类,并重写dofilterinternal方法。
import org.springframework.web.filter.onceperrequestfilter;
import javax.servlet.filterchain;
import javax.servlet.servletexception;
import javax.servlet.http.httpservletrequest;
import javax.servlet.http.httpservletresponse;
import java.io.ioexception;
public class customfilter extends onceperrequestfilter {
    @override
    protected void dofilterinternal(httpservletrequest request, httpservletresponse response,
                                    filterchain filterchain) throws servletexception, ioexception {
        // 自定义过滤逻辑,例如记录请求日志
        system.out.println("request uri: " + request.getrequesturi());
        // 继续执行过滤链
        filterchain.dofilter(request, response);
    }
}注册过滤器:可以在 spring security 配置类中注册自定义的过滤器。
import org.springframework.security.config.annotation.web.builders.httpsecurity;
import org.springframework.security.config.annotation.web.configuration.enablewebsecurity;
import org.springframework.security.web.securityfilterchain;
@enablewebsecurity
public class securityconfig {
    @bean
    public securityfilterchain securityfilterchain(httpsecurity http) throws exception {
        http.addfilterbefore(new customfilter(), usernamepasswordauthenticationfilter.class);
        // 其他配置...
        return http.build();
    }
}
4.2 生成 jwt
基于我们上面引入的三个 jwt 相关的依赖,写jwtutil 类
- 功能:
jwtutil类提供了生成和解析 jwt 的功能,是实现基于 jwt 的认证和授权的重要工具。 - 应用场景:可以在用户登录后生成 jwt,并在后续请求中携带 jwt 用于用户身份验证和权限校验。通过设置合适的过期时间,可以提高安全性。
@component
public class jwtutil {
    public static final long jwt_ttl = 60 * 60 * 1000l * 24 * 14;  // 有效期14天
    public static final string jwt_key = "sdfgjhdsfalshdfhfdsjkdsfds121232131afasdfac";
    public static string getuuid() {
        return uuid.randomuuid().tostring().replaceall("-", "");
    }
    public static string createjwt(string subject) {
        jwtbuilder builder = getjwtbuilder(subject, null, getuuid());
        return builder.compact();
    }
    private static jwtbuilder getjwtbuilder(string subject, long ttlmillis, string uuid) {
        signaturealgorithm signaturealgorithm = signaturealgorithm.hs256;
        secretkey secretkey = generalkey();
        long nowmillis = system.currenttimemillis();
        date now = new date(nowmillis);
        if (ttlmillis == null) {
            ttlmillis = jwtutil.jwt_ttl;
        }
        long expmillis = nowmillis + ttlmillis;
        date expdate = new date(expmillis);
        return jwts.builder()
                .id(uuid)
                .subject(subject)
                .issuer("sg")
                .issuedat(now)
                .signwith(secretkey)
                .expiration(expdate);
    }
    public static secretkey generalkey() {
        byte[] encodekey = base64.getdecoder().decode(jwtutil.jwt_key);
        return new secretkeyspec(encodekey, 0, encodekey.length, "hmacsha256");
    }
    public static claims parsejwt(string jwt) throws exception {
        secretkey secretkey = generalkey();
        return jwts.parser()
                .verifywith(secretkey)
                .build()
                .parsesignedclaims(jwt)
                .getpayload();
    }
}
1. 类注解与常量
@component:将这个类标记为 spring 组件,允许 spring 管理该类的生命周期,便于依赖注入。jwt_ttl:jwt 的有效期,设置为 14 天(单位为毫秒)。jwt_key:用于签名的密钥字符串,经过 base64 编码。它是生成和验证 jwt 的关键。
2. uuid 生成
public static string getuuid() {
    return uuid.randomuuid().tostring().replaceall("-", "");
}- 作用:生成一个唯一的 uuid,去掉了其中的连字符。这通常用作 jwt 的 id(
jti),确保每个 jwt 都是唯一的。
3. 创建 jwt
public static string createjwt(string subject) {
    jwtbuilder builder = getjwtbuilder(subject, null, getuuid());
    return builder.compact();
}- 参数:
subject是 jwt 的主题,通常是用户的身份信息。 - 功能:调用
getjwtbuilder方法生成一个 jwt 构建器,并将其压缩为字符串返回。
4. jwt 构建器
private static jwtbuilder getjwtbuilder(string subject, long ttlmillis, string uuid) {
    //...
}功能:生成一个 jwt 的构建器,配置 jwt 的各个属性,包括:
setid(uuid):设置 jwt 的唯一标识。setsubject(subject):设置 jwt 的主题。setissuer("sg"):设置 jwt 的发行者,通常是你的应用或服务名称。setissuedat(now):设置 jwt 的签发时间。signwith(signaturealgorithm, secretkey):使用指定的算法和密钥进行签名。setexpiration(expdate):设置 jwt 的过期时间。
5. 生成密钥
public static secretkey generalkey() {
    byte[] encodekey = base64.getdecoder().decode(jwtutil.jwt_key);
    return new secretkeyspec(encodekey, 0, encodekey.length, "hmacsha256");
}功能:将 jwt_key 进行 base64 解码,生成一个 secretkey 对象,用于 jwt 的签名和验证。使用 hmac sha-256 算法进行签名。
6. 解析 jwt
public static claims parsejwt(string jwt) throws exception {
    secretkey secretkey = generalkey();
    return jwts.parserbuilder()
            .setsigningkey(secretkey)
            .build()
            .parseclaimsjws(jwt)
            .getbody();
}- 参数:
jwt是要解析的 jwt 字符串。 - 功能: 使用之前生成的密钥解析 jwt。
- 使用之前生成的密钥解析 jwt。
- 如果 jwt 有效,将返回 jwt 的声明(
claims对象),其中包含了 jwt 的主题、发行者、过期时间等信息。 - 该方法可能会抛出异常,表示 jwt 无效或解析失败。
4.3 应用 jwt
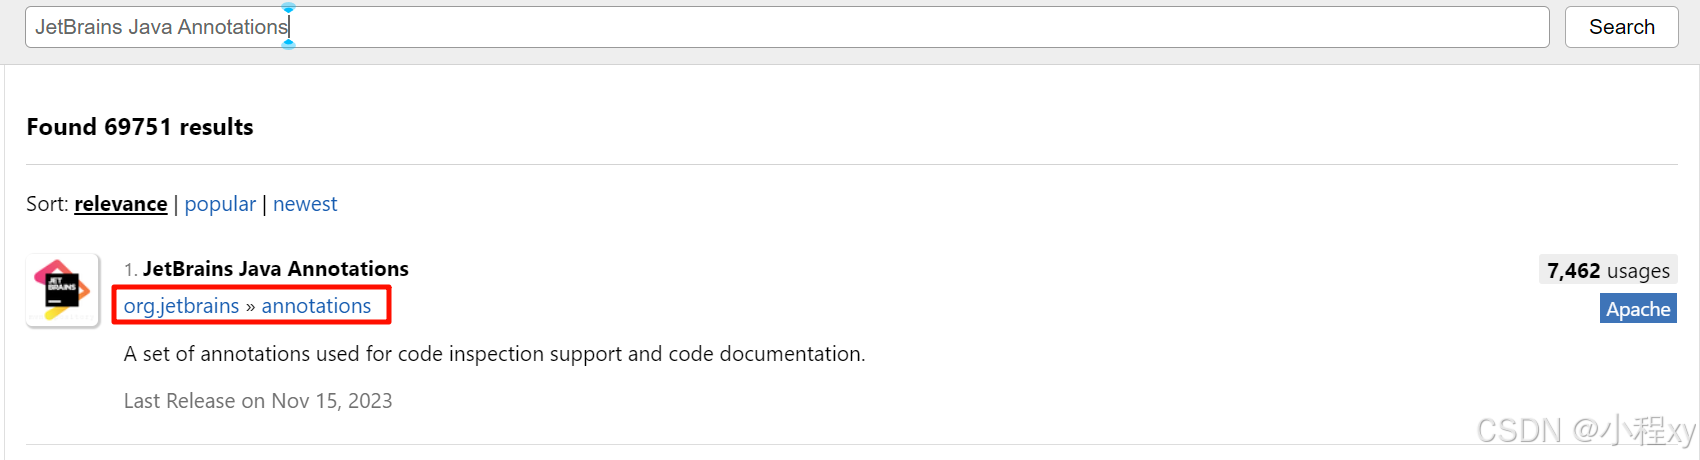
先加一个依赖 jetbrains java annotations, 下面的代码会用到其中的一个注解 @notnull。
这个 jwtauthenticationtokenfilter 类是一个实现了 onceperrequestfilter 接口自定义的 spring security 过滤器。
- 功能:
jwtauthenticationtokenfilter通过 jwt 对用户进行身份验证,确保请求中携带的 jwt 是有效的,并根据 jwt 提供的用户信息设置认证状态。 - 应用场景:通常用于保护需要身份验证的 api 接口,确保只有经过认证的用户才能访问资源。该过滤器通常放置在 spring security 过滤链的合适位置,以确保在处理请求之前进行身份验证。
import io.jsonwebtoken.claims;
import org.jetbrains.annotations.notnull;
import org.springframework.beans.factory.annotation.autowired;
import org.springframework.security.authentication.usernamepasswordauthenticationtoken;
import org.springframework.security.core.context.securitycontextholder;
import org.springframework.stereotype.component;
import org.springframework.util.stringutils;
import org.springframework.web.filter.onceperrequestfilter;
import jakarta.servlet.filterchain;
import jakarta.servlet.servletexception;
import jakarta.servlet.http.httpservletrequest;
import jakarta.servlet.http.httpservletresponse;
import java.io.ioexception;
@component
public class jwtauthenticationtokenfilter extends onceperrequestfilter {
    @autowired
    private usermapper usermapper;
    @override
    protected void dofilterinternal(httpservletrequest request, @notnull httpservletresponse response, @notnull filterchain filterchain) throws servletexception, ioexception {
        string token = request.getheader("authorization");
        if (!stringutils.hastext(token) || !token.startswith("bearer ")) {
            filterchain.dofilter(request, response);
            return;
        }
        token = token.substring(7);
        string userid;
        try {
            claims claims = jwtutil.parsejwt(token);
            userid = claims.getsubject();
        } catch (exception e) {
            throw new runtimeexception(e);
        }
        user user = usermapper.selectbyid(integer.parseint(userid));
        if (user == null) {
            throw new runtimeexception("用户名未登录");
        }
        userdetailsimpl loginuser = new userdetailsimpl(user);
        usernamepasswordauthenticationtoken authenticationtoken =
                new usernamepasswordauthenticationtoken(loginuser, null, null);
        // 如果是有效的jwt,那么设置该用户为认证后的用户
        securitycontextholder.getcontext().setauthentication(authenticationtoken);
        filterchain.dofilter(request, response);
    }
}
1. 类注解与继承
@component:标记该类为 spring 组件,使其能够被 spring 扫描并注册到应用上下文中。- 继承
onceperrequestfilter:确保每个请求只调用一次该过滤器,适合进行请求预处理。
2. 依赖注入
@autowired
private usermapper usermapper;
usermapper:一个数据访问对象(dao),用于与数据库交互,以便根据用户 id 查询用户信息。通过 spring 的依赖注入机制自动注入。
3 获取 jwt
string token = request.getheader("authorization");
if (!stringutils.hastext(token) || !token.startswith("bearer ")) {
    filterchain.dofilter(request, response);
    return;
}- 从请求头中获取
authorization字段的值,检查是否包含 jwt。 - 如果没有 jwt 或格式不正确,直接调用
filterchain.dofilter(request, response)继续执行下一个过滤器,返回。
4 解析 jwt
token = token.substring(7); // 去掉 "bearer " 前缀
string userid;
try {
    claims claims = jwtutil.parsejwt(token);
    userid = claims.getsubject();
} catch (exception e) {
    throw new runtimeexception(e);
}- 从 token 中去掉 "bearer " 前缀,只保留 jwt 部分。
- 调用
jwtutil.parsejwt(token)解析 jwt,提取出用户 id (userid)。如果解析失败,会抛出异常。
5 查询用户信息
user user = usermapper.selectbyid(integer.parseint(userid));
if (user == null) {
    throw new runtimeexception("用户名未登录");
}
根据解析出的用户 id 从数据库中查询用户信息。如果用户不存在,抛出异常。
6 设置安全上下文
userdetailsimpl loginuser = new userdetailsimpl(user);
usernamepasswordauthenticationtoken authenticationtoken =
        new usernamepasswordauthenticationtoken(loginuser, null, null);
securitycontextholder.getcontext().setauthentication(authenticationtoken);- 创建一个自定义的
userdetailsimpl对象,将查询到的用户信息封装。 - 创建一个
usernamepasswordauthenticationtoken对象,表示用户的认证信息,并将其设置到 spring security 的securitycontextholder中,以便后续请求能够访问到用户的认证信息。
4. 继续过滤链
filterchain.dofilter(request, response);
调用 filterchain.dofilter(request, response),继续执行后续的过滤器和最终的请求处理。
4.4 注册自定义的 jwtauthenticationtokenfilter 过滤器
把我们的过滤器应用到 spring security 中
http.addfilterbefore(jwtauthenticationtokenfilter, usernamepasswordauthenticationfilter.class);
5、常用操作
5.1 配置 authenticationmanager
将 authenticationmanager 对象添加到spring容器中.(添加到我们创建的 securityconfig 配置类中)
@bean
public authenticationmanager authenticationmanager(authenticationconfiguration authconfig) throws exception {
    return authconfig.getauthenticationmanager();
}
5.2 验证当前用户
@autowired
private authenticationmanager authenticationmanager;
usernamepasswordauthenticationtoken authenticationtoken = new usernamepasswordauthenticationtoken(username, password);
// 从数据库中对比查找,如果找到了会返回一个带有认证的封装后的用户,否则会报错,自动处理。(这里我们假设我们配置的security是基于数据库查找的)
authentication authenticate = authenticationmanager.authenticate(authenticationtoken);
// 获取认证后的用户
user user = (user ) authenticate.getprincipal();	// 如果强制类型转换报错的话,可以用我们实现的 `userdetailsimpl` 类中的 getuser 方法了
string jwt = jwtutil.createjwt(user.getid().tostring());
5.3 获取当前用户的认证信息
以下是获取当前用户认证信息的具体步骤:
// securitycontextholder 是一个存储安全上下文的工具类,提供了一个全局访问点,用于获取当前请求的安全上下文。
// securitycontext 是当前线程的安全上下文,包含了当前用户的认证信息(即 authentication 对象)。
securitycontext context = securitycontextholder.getcontext();
authentication authentication = context.getauthentication();
user user = (user ) authenticate.getprincipal();
// 另一种获取 user 的方法
usernamepasswordauthenticationtoken authenticationtoken = (usernamepasswordauthenticationtoken) securitycontextholder.getcontext().getauthentication();
userdetailsimpl loginuser = (userdetailsimpl) authenticationtoken.getprincipal();
user user = userdetails.getuser();
5.4 对比 authenticationmanager 和 securitycontext 获取 authentication
securitycontextholder.getcontext().getauthentication():
- 这个方法获取当前线程的安全上下文中的
authentication对象。 - 通常在用户已经被认证后使用,用于获取当前用户的信息(如身份、权限等)。
authenticationmanager.authenticate(authenticationtoken):
- 这个方法是用于实际执行身份验证的过程。
- 它接收一个凭证(如用户名和密码)并返回一个经过验证的
authentication对象,或者抛出异常。 - 在用户登录或验证时使用,属于身份验证的实际逻辑。
5.5 authentication 接口
authentication 接口包含以下重要方法:
getprincipal():返回当前用户的身份,通常是用户的详细信息(如用户名)。getcredentials():返回用户的凭证(如密码),但通常不直接使用此方法。getauthorities():返回用户的权限列表(角色或权限)。
6、授权
spring security 的授权机制用于控制用户对应用程序资源的访问权限。授权通常是基于用户角色或权限的,以下是对 spring security 授权的详细讲解。
1. 授权的基本概念
授权(authorization):指的是决定用户是否有权限访问特定资源的过程。在用户认证成功后,系统会根据预定义的规则来判断用户是否可以访问某些资源。
2. 授权的主要组成部分
2.1 权限与角色
- 权限(permission):通常指对特定资源的操作能力,如“读取”、“写入”或“删除”。
- 角色(role):一组权限的集合。例如,管理员角色可能具有所有权限,而普通用户角色可能只有读取权限。
2.2 grantedauthority 接口
- spring security 使用
grantedauthority接口表示用户的权限。每个用户的权限可以通过实现该接口的对象来表示。
3. 授权方式
spring security 支持多种授权方式,主要包括:
3.1 基于角色的授权
- 定义角色:通常在用户注册或用户管理中定义。
- 配置角色授权:可以在 spring security 配置类中设置基于角色的访问控制。
@override
protected void configure(httpsecurity http) throws exception {
    http
        .authorizerequests()
        .antmatchers("/admin/**").hasrole("admin")  // 只有 admin 角色可以访问
        .antmatchers("/user/**").hasanyrole("user", "admin")  // user 和 admin 角色可以访问
        .anyrequest().authenticated();  // 其他请求需要认证
}
3.2 基于权限的授权
- 定义权限:与角色类似,定义更细粒度的权限。
- 配置权限授权:在配置类中设置基于权限的访问控制。
@override
protected void configure(httpsecurity http) throws exception {
    http
        .authorizerequests()
        .antmatchers("/edit/**").hasauthority("edit_privilege")  // 仅具有 edit_privilege 权限的用户可以访问
        .anyrequest().authenticated();
}
4. 自定义授权逻辑
如果需要更复杂的授权逻辑,可以实现自定义的 accessdecisionvoter 或 accessdecisionmanager。
4.1 accessdecisionvoter 负责评估用户的访问请求,返回授权决策。
4.2 accessdecisionmanager
管理多个 accessdecisionvoter 的调用,确定用户是否有权访问请求的资源。
7、其他自定义行为
以下接口和类用于处理不同的安全事件,提供了自定义处理的能力:
1. authenticationsuccesshandler
- 作用:用于处理用户成功认证后的逻辑。
- 功能:可以自定义成功登录后的跳转行为,比如重定向到特定页面、返回 json 响应等。
- 实现:实现
authenticationsuccesshandler接口,并重写onauthenticationsuccess方法。
public class myauthenticationsuccesshandler implements authenticationsuccesshandler {
    @override
    public void onauthenticationsuccess(httpservletrequest request, httpservletresponse response, authentication authentication) throws ioexception, servletexception {
    }
}
// 让我们实现的类生效
http.formlogin(form ->
                form.successhandler(new myauthenticationsuccesshandler()));
2. authenticationfailurehandler
- 作用:用于处理用户认证失败的逻辑。
- 功能:可以自定义失败登录后的行为,比如返回错误信息、重定向到登录页面并显示错误提示等。
- 实现:实现
authenticationfailurehandler接口,并重写onauthenticationfailure方法。
public class myauthenticationfailurehandler implements authenticationfailurehandler {
    @override
    public void onauthenticationfailure(httpservletrequest request, httpservletresponse response, authenticationexception exception) throws ioexception, servletexception {
    }
}
// 让我们实现的类生效
http.formlogin(form ->
        form.failurehandler(new myauthenticationfailurehandler()));
3. logoutsuccesshandler
- 作用:用于处理用户成功登出的逻辑。
- 功能:可以自定义注销成功后的行为,比如重定向到登录页面、显示注销成功的消息等。
- 实现:实现
logoutsuccesshandler接口,并重写onlogoutsuccess方法。
public class mylogoutsuccesshandler implements logoutsuccesshandler {
    @override
    public void onlogoutsuccess(httpservletrequest request, httpservletresponse response, authentication authentication) throws ioexception, servletexception {
    }
}
// 让我们实现的类生效
http.logout(logout -> {
               logout.logoutsuccesshandler(new mylogoutsuccesshandler());
           });
4. authenticationentrypoint
- 作用:用于处理未认证用户访问受保护资源时的逻辑。
- 功能:可以自定义未认证用户的响应,比如返回 401 状态码、重定向到登录页面等。
- 实现:实现
authenticationentrypoint接口,并重写commence方法。
// 重写 authenticationentrypoint 接口
public class myauthenticationentrypoint implements authenticationentrypoint {
    @override
    public void commence(httpservletrequest request, httpservletresponse response, authenticationexception authexception) throws ioexception, servletexception {
    }
}
// 让我们重写的类生效
http.exceptionhandling(exception -> {
    exception.authenticationentrypoint(new myauthenticationentrypoint());
});
5. sessioninformationexpiredstrategy
- 作用:用于处理用户会话过期的逻辑。
- 功能:可以自定义会话超时后的响应,比如重定向到登录页面或返回 json 响应等。
- 实现:实现
sessioninformationexpiredstrategy接口,并重写onexpiredsession方法。
// 重写 sessioninformationexpiredstrategy 接口
public class mysessioninformationexpiredstrategy implements sessioninformationexpiredstrategy {
    @override
    public void onexpiredsessiondetected(sessioninformationexpiredevent event) throws ioexception, servletexception {
    }
}
// 让我们重写的类生效
http.sessionmanagement(session -> {
    session.maximumsessions(1).expiredsessionstrategy(new mysessioninformationexpiredstrategy());
});
6. accessdeniedhandler
- 作用:用于处理用户访问被拒绝的情况。当用户尝试访问没有权限的资源时,spring security 会调用实现了
accessdeniedhandler接口的处理器。 - 功能:可以自定义拒绝访问后的响应行为,比如重定向到特定的错误页面、返回错误信息或 json 响应。
- 实现:实现
accessdeniedhandler接口,并重写handle方法。
// 重写 accessdeniedhandler 接口
public class myaccessdeniedhandler implements accessdeniedhandler {
    @override
    public void handle(httpservletrequest request, httpservletresponse response,
                       accessdeniedexception accessdeniedexception) throws ioexception, servletexception {
    }
}
// 在安全配置中注册自定义的 accessdeniedhandler
http.exceptionhandling(exception -> {
            exception.accessdeniedhandler(new myaccessdeniedhandler());
        });
});文章到这里就结束了~
到此这篇关于spring security 超详细使用教程(接入springboot、前后端分离)的文章就介绍到这了,更多相关spring security 内容请搜索代码网以前的文章或继续浏览下面的相关文章希望大家以后多多支持代码网!


发表评论