一、引言
在某些特定场景下,我们可能需要使用虚拟键盘来替代实体键盘,比如在一些触摸设备应用中,或者需要对键盘输入进行特殊监控和处理的场景。本文将详细介绍如何使用 wpf 来实现一个虚拟键盘,并监控键盘输入,从而达到完全替代实体键盘的目的。
二、实现思路
- 创建虚拟键盘布局:使用 wpf 的控件来构建虚拟键盘的界面,包括各种按键的布局。
- 处理按键点击事件:当用户点击虚拟键盘上的按键时,模拟相应的键盘输入。
- 监控键盘输入:通过钩子函数来监控系统的键盘输入,以便在需要时进行处理。
三、具体实现步骤
(一)创建 wpf 项目
首先,在 visual studio 中创建一个新的 wpf 项目。
(二)设计虚拟键盘布局
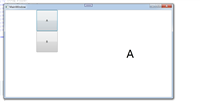
在 mainwindow.xaml 中设计虚拟键盘的布局,示例代码如下:
<window x:class="virtualkeyboard.mainwindow"

xmlns="http://schemas.microsoft.com/winfx/2006/xaml/presentation"

xmlns:x="http://schemas.microsoft.com/winfx/2006/xaml"

title="virtual keyboard" height="350" width="525">

<grid>

<stackpanel orientation="vertical">

<!-- 第一行按键 -->

<stackpanel orientation="horizontal">

<button content="q" width="50" height="50" click="button_click"/>

<button content="w" width="50" height="50" click="button_click"/>

<!-- 其他按键依次添加 -->

</stackpanel>

<!-- 其他行按键 -->

</stackpanel>

</grid>

</window>
(三)处理按键点击事件
在 mainwindow.xaml.cs 中处理按键点击事件,模拟键盘输入,示例代码如下:
using system;

using system.windows;

using system.runtime.interopservices;

namespace virtualkeyboard

{

public partial class mainwindow : window

{

[dllimport("user32.dll")]

public static extern void keybd_event(byte bvk, byte bscan, uint dwflags, int dwextrainfo);

private const uint keyeventf_extendedkey = 0x0001;

private const uint keyeventf_keyup = 0x0002;

public mainwindow()

{

initializecomponent();

}

private void button_click(object sender, routedeventargs e)

{

button button = (button)sender;

string key = button.content.tostring();

// 根据按键内容模拟键盘输入

switch (key)

{

case "q":

keybd_event(0x51, 0, 0, 0);

keybd_event(0x51, 0, keyeventf_keyup, 0);

break;

// 其他按键的处理

}

}

}

}
(四)监控键盘输入
使用钩子函数来监控键盘输入,示例代码如下:
using system;

using system.windows;

using system.runtime.interopservices;

namespace virtualkeyboard

{

public partial class mainwindow : window

{

// 定义钩子相关常量和函数

private const int wh_keyboard_ll = 13;

private const int wm_keydown = 0x0100;

private const int wm_keyup = 0x0101;

[dllimport("user32.dll", charset = charset.auto, setlasterror = true)]

private static extern intptr setwindowshookex(int idhook, lowlevelkeyboardproc lpfn, intptr hmod, uint dwthreadid);

[dllimport("user32.dll", charset = charset.auto, setlasterror = true)]

[return: marshalas(marshaltype.bool)]

private static extern bool unhookwindowshookex(intptr hhk);

[dllimport("user32.dll", charset = charset.auto, setlasterror = true)]

private static extern intptr callnexthookex(intptr hhk, int ncode, intptr wparam, intptr lparam);

[dllimport("kernel32.dll", charset = charset.auto, setlasterror = true)]

private static extern intptr getmodulehandle(string lpmodulename);

private delegate intptr lowlevelkeyboardproc(int ncode, intptr wparam, intptr lparam);

private static lowlevelkeyboardproc _proc = hookcallback;

private static intptr _hookid = intptr.zero;

public mainwindow()

{

initializecomponent();

_hookid = sethook(_proc);

}

~mainwindow()

{

unhookwindowshookex(_hookid);

}

private static intptr sethook(lowlevelkeyboardproc proc)

{

using (system.diagnostics.process curprocess = system.diagnostics.process.getcurrentprocess())

using (system.diagnostics.processmodule curmodule = curprocess.mainmodule)

{

return setwindowshookex(wh_keyboard_ll, proc, getmodulehandle(curmodule.modulename), 0);

}

}

private static intptr hookcallback(int ncode, intptr wparam, intptr lparam)

{

if (ncode >= 0 && (wparam == (intptr)wm_keydown || wparam == (intptr)wm_keyup))

{

int vkcode = marshal.readint32(lparam);

// 在这里处理监控到的键盘输入

}

return callnexthookex(_hookid, ncode, wparam, lparam);

}

}

}
四、总结
通过以上步骤,我们成功实现了一个 wpf 的虚拟键盘,并实现了对键盘输入的监控。在实际应用中,可以根据具体需求对虚拟键盘的布局和功能进行进一步扩展和优化,以满足不同场景的使用需求。
到此这篇关于使用wpf实现一个虚拟键盘的文章就介绍到这了,更多相关wpf虚拟键盘内容请搜索代码网以前的文章或继续浏览下面的相关文章希望大家以后多多支持代码网!


发表评论