一、swagger 基础
1、 什么是swagger
swagger 是一个基于 open api 规范的 api 管理工具,通过项目注解的形式自动构建 api 文档,拥有在线调试的功能。提供了多语言的客户端,laravel 中也有相应的扩展包。
darkaonline/l5-swagger是一款针对 laravel 集成开发的扩展包,可以直接使用 laravel 命令行模式进行操作。
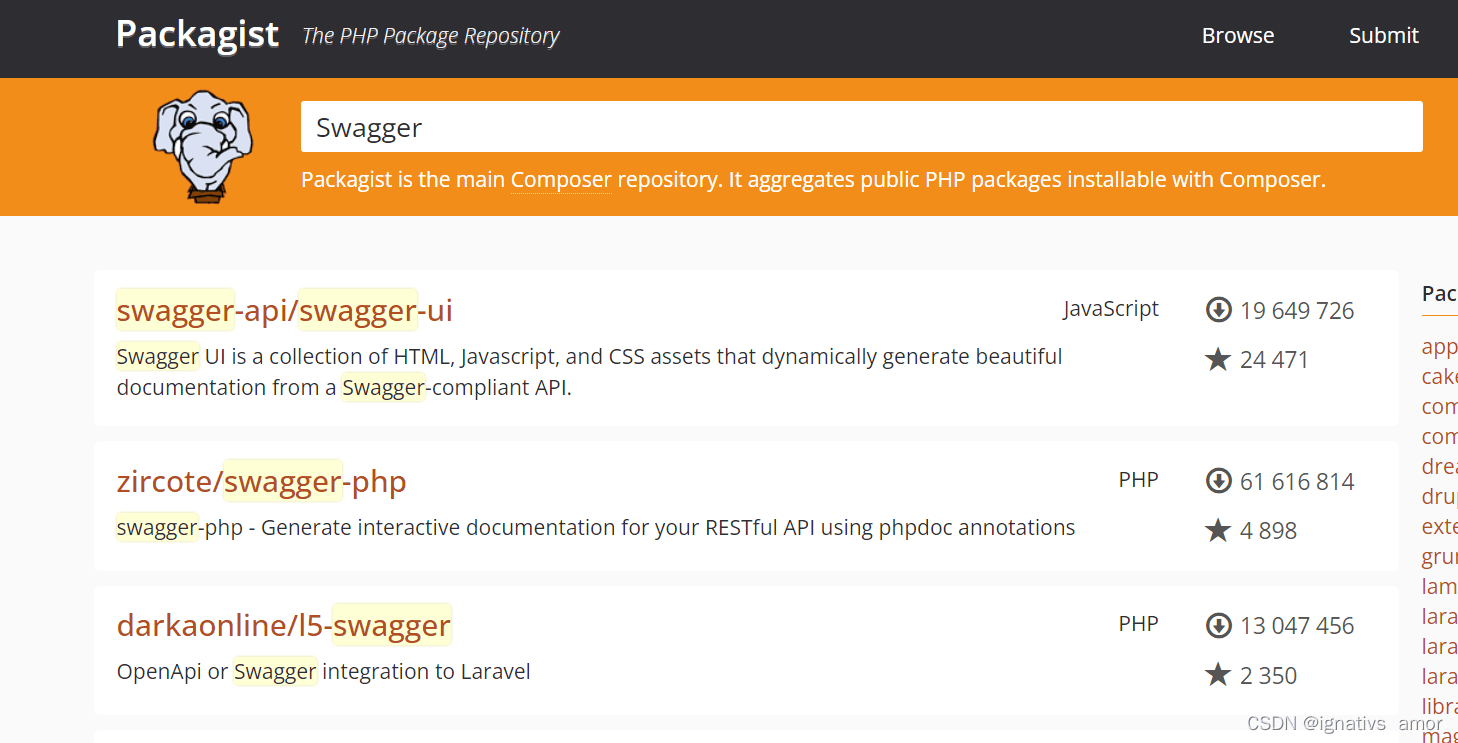
我是正巧用的是laravel框架,所以选了darkaonline/l5-swagger扩展,而zircote/swagger-php扩展是适用于所有php语言的框架(使用方法可以。这里只介绍darkaonline/l5-swagger扩展的使用
2、 安装过程
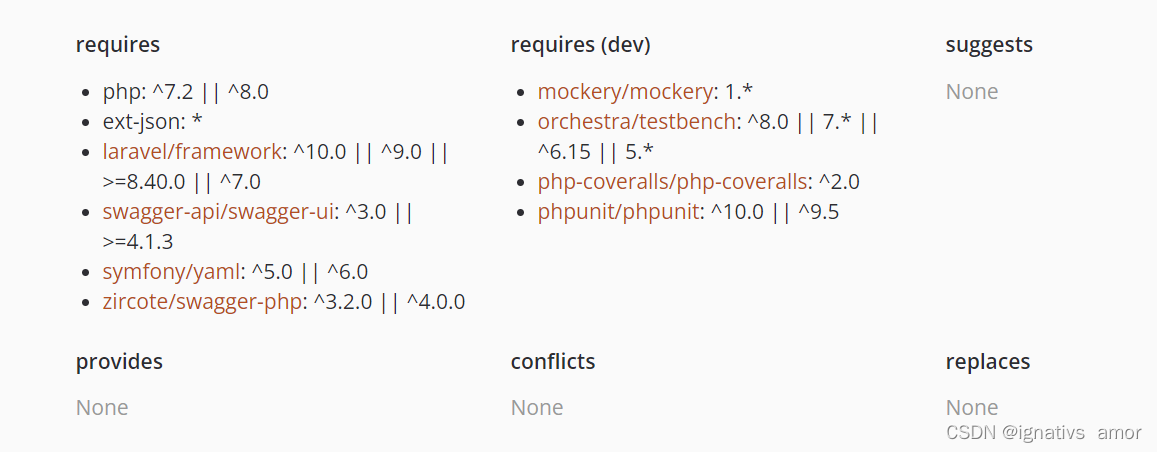
这是它的安装环境和依赖:
1 、composer安装
composer require darkaonline/l5-swagger
2、添加服务提供者,引导框架运行时加载,在 app 配置文件,providers 选项中添加(laravel 5以上忽略此步骤)
l5swagger\l5swaggerserviceprovider::class
3、配置完成后,通过输入命令 php artisan 查看已经发现该扩展已经加入 laravel 命令列表
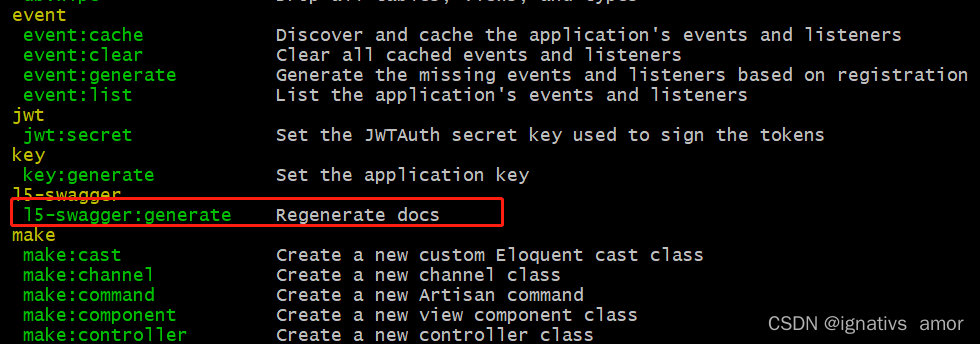
4、生成命令
在没有在任何控制器方法中添加注释的时候,不要执行该命令,否则会报致命性错误
php artisan l5-swagger:generate
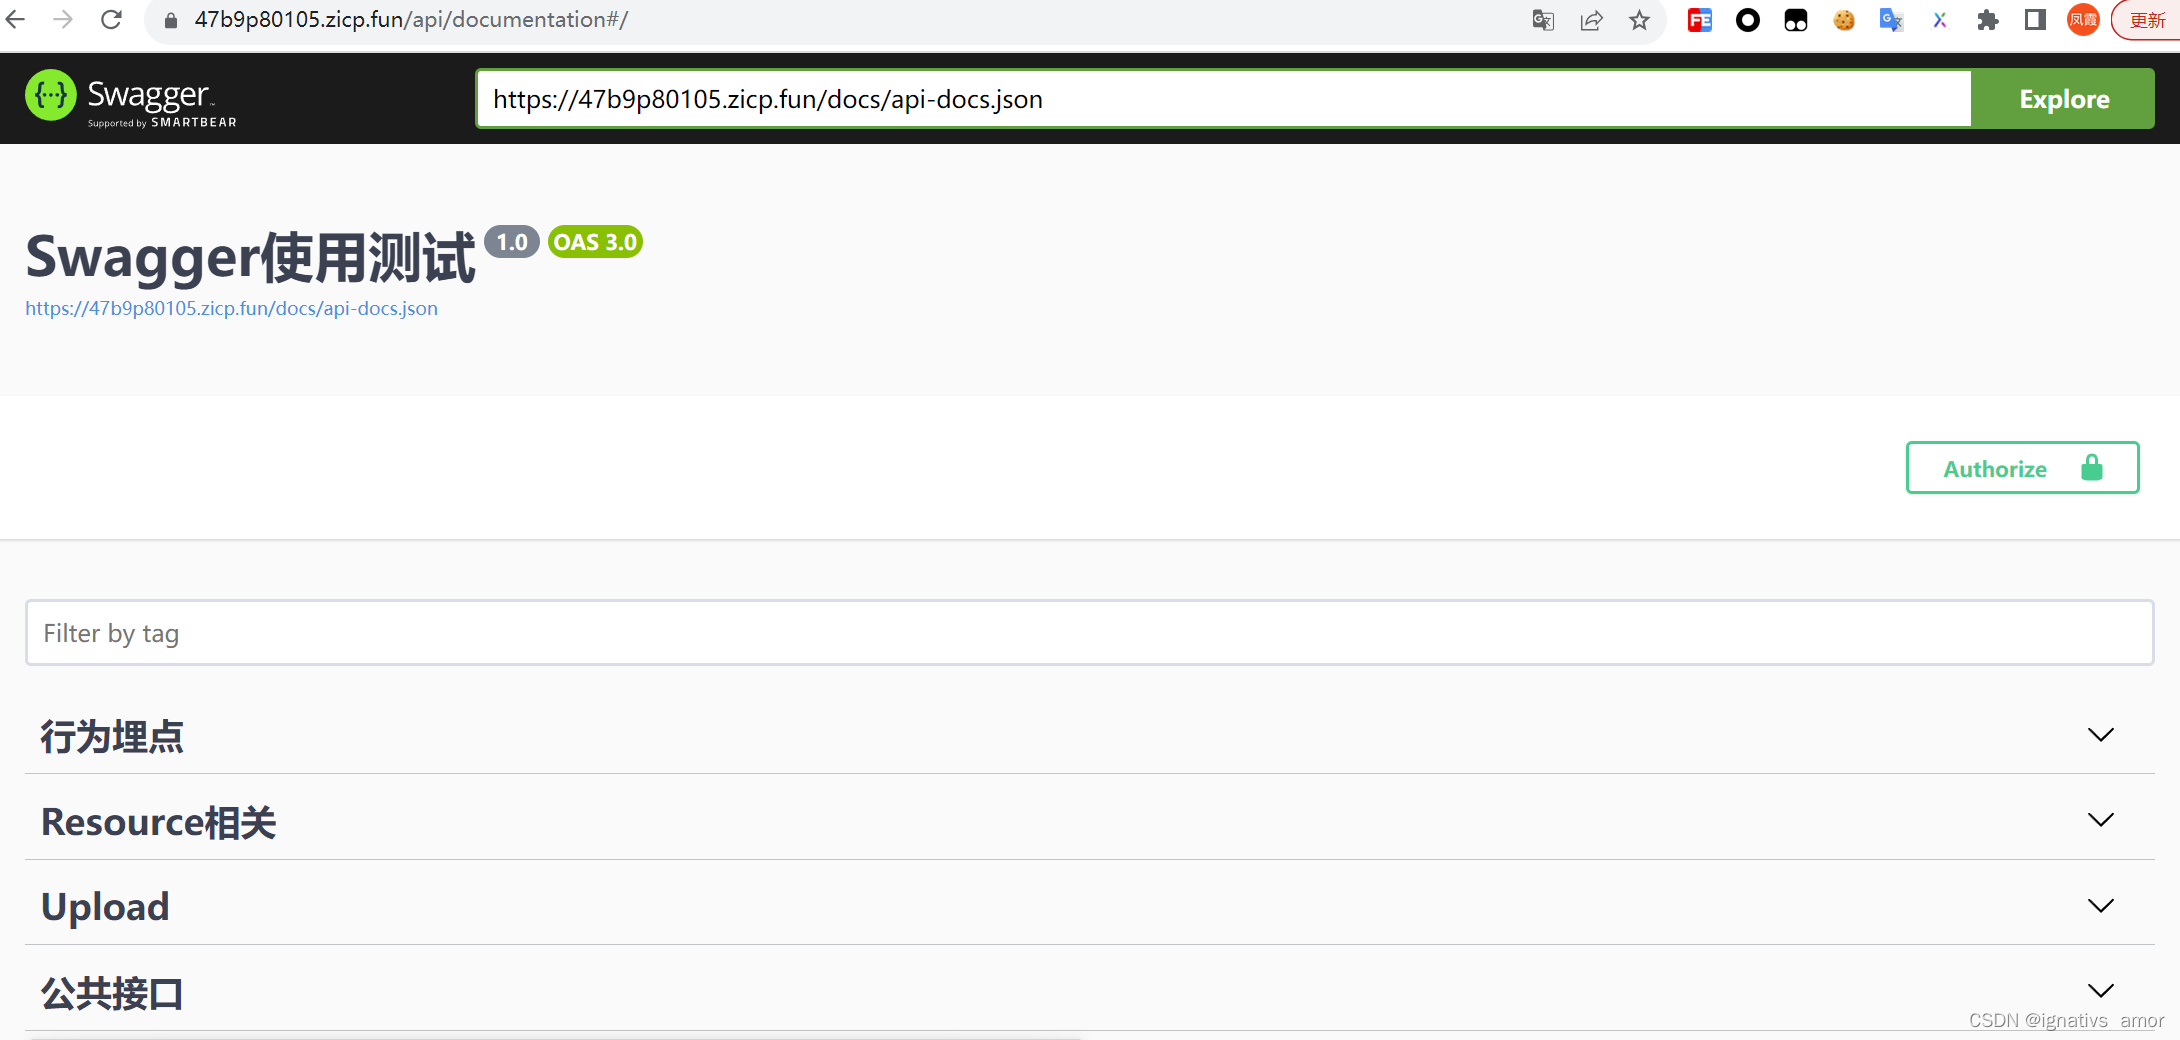
5、打开 api 文档页面
访问网址: http://yourdomain/api/documentation,就能看到了
3、 注解介绍
由于 swagger 是采用注解的形式进行文档生成,需要按照既定的规则去编写注解,这里只提供一些重要的信息
请求
@oa\get | @oa\post:请求类型
path:请求uri
tag:归纳相同标签的接口
summary:接口概要
description:接口描述
operationid:接口id,全局唯一
@oa\parameter:接收的参数是来自requestheader中,即请求头。get、\post都适用
@oa\requestbody:接收的参数是来自requestbody中,即请求体。主要用来接收前端传递给后端的json字符串中的数据的,所以只能发送post请求
注意:匹配path中的数值则 in path 查询 in query
    /**
     * @oa\post(
     *      path="/api/resource/detail/{id}",
     *      operationid="getprojectbyid",
     *      tags={"resource相关"},
     *      summary="资源详情",
     *      description="获取资源的详细信息的接口",
     *     security={{"bearer":{} }},
     *      @oa\parameter(
     *          name="from",
     *          description="引流的来源",
     *          required=false,
     *          in="query",
     *      ),
     *      @oa\parameter(
     *          name="id",
     *          description="resource id",
     *          required=true,
     *          in="path",
     *          @oa\schema(
     *              type="integer"
     *          )
     *      ),
     * )
*/- 响应
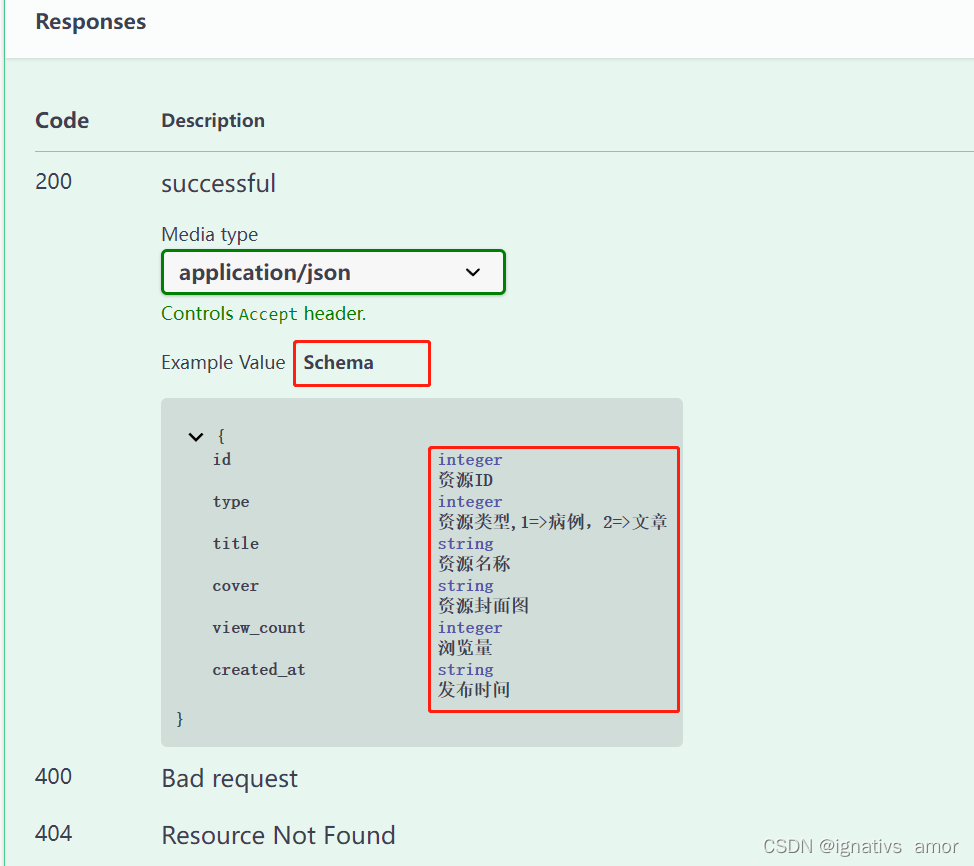
@oa\response:响应信息
response:响应的 http 状态码
description:响应描述
@oa\mediatype:响应体
mediatype:返回格式
@oa\schema:定义响应体内的数据
@oa\property:定义属性字段(id),数据类型(string),字段描述(description)
@oa\jsoncontent:因为现在接口通常采用 json 通讯,所以可以直接定义 json 响应格式
ref:指定可复用的注解模块,testapi 为模块id,全局唯一
@oa\schema:可复用注解模块,内部可嵌套 schema
    /**
     * @oa\post(
     *      path="/api/resource/list",
     *      tags={"resource相关"},
     *      summary="资源列表",
     *      description="获取项目列表的接口,调用接口需要传递token令牌",
     *       security={{"bearer":{} }},
     *      @oa\parameter(
     *          name="page",
     *          description="页码,默认为1",
     *          required=false,
     *          in="query",
     *      ),
     *      @oa\parameter(
     *          name="pagesize",
     *          description="每页的数量,默认5条",
     *          required=false,
     *          in="query",
     *      ),
     *
     *     @oa\response(
     *         response=200,
     *         description="successful",
     *         @oa\mediatype(
     *             mediatype="application/json",
     *             @oa\schema(
     *                 @oa\property(property="id", type="integer", description="资源id"),
     *                 @oa\property(property="type", type="integer", description="资源类型,1=>病例,2=>文章"),
     *                 @oa\property(property="title", type="string", description="资源名称"),
     *                 @oa\property(property="cover", type="string", description="资源封面图"),
     *                 @oa\property(property="view_count", type="integer", description="浏览量"),
     *                 @oa\property(property="created_at", type="string", description="发布时间"),
     *             ),
     *         )
     *     ),
     *      @oa\response(response=400, description="bad request"),
     *      @oa\response(response=404, description="resource not found"),
     * )
     */
二、swagger 实战
1、修改配置
根据以上流程,已经安装了扩展,并对注释的使用也有了一定的了解,那就来具体实战吧(本人项目用到了jwt,未用到的可自行跳过)。
- 如果不想每次修改后都手动执行生成命令,可以通过修改 env 文件,添加配置项
l5_swagger_generate_always=true
- 因为我的token令牌是以authorization bearer xxxxx传递的,所以要增加securityschemes,在配置文件l5-swagger.php中,修改如下:
        /*
         * api security definitions. will be generated into documentation file.
        */
        'securitydefinitions' => [
            'securityschemes' => [
                'bearer' => [ // 这是我要用到的schemes
                    'type' => 'apikey', // valid values are "basic", "apikey" or "oauth2".
                    'description' => 'enter token in format (bearer <token>)',
                    'name' => 'authorization', // the name of the header or query parameter to be used.
                    'in' => 'header', // the location of the api key. valid values are "query" or "header".
                ],
                /*
                 * examples of security schemes
                */
                /*
                'api_key_security_example' => [ // unique name of security
                    'type' => 'apikey', // the type of the security scheme. valid values are "basic", "apikey" or "oauth2".
                    'description' => 'a short description for security scheme',
                    'name' => 'api_key', // the name of the header or query parameter to be used.
                    'in' => 'header', // the location of the api key. valid values are "query" or "header".
                ],
                'oauth2_security_example' => [ // unique name of security
                    'type' => 'oauth2', // the type of the security scheme. valid values are "basic", "apikey" or "oauth2".
                    'description' => 'a short description for oauth2 security scheme.',
                    'flow' => 'implicit', // the flow used by the oauth2 security scheme. valid values are "implicit", "password", "application" or "accesscode".
                    'authorizationurl' => 'http://example.com/auth', // the authorization url to be used for (implicit/accesscode)
                    //'tokenurl' => 'http://example.com/auth' // the authorization url to be used for (password/application/accesscode)
                    'scopes' => [
                        'read:projects' => 'read your projects',
                        'write:projects' => 'modify projects in your account',
                    ]
                ],
                */
                /* open api 3.0 support
                'passport' => [ // unique name of security
                    'type' => 'oauth2', // the type of the security scheme. valid values are "basic", "apikey" or "oauth2".
                    'description' => 'laravel passport oauth2 security.',
                    'in' => 'header',
                    'scheme' => 'https',
                    'flows' => [
                        "password" => [
                            "authorizationurl" => config('app.url') . '/oauth/authorize',
                            "tokenurl" => config('app.url') . '/oauth/token',
                            "refreshurl" => config('app.url') . '/token/refresh',
                            "scopes" => []
                        ],
                    ],
                ],*/
            ],
        ],
2、使用示例
swagger的使用就是在你的控制器里的方法前面加上注释,示例如下:
<?php
namespace app\http\controllers\api;
class tokencontroller extends controller
{
/**
* @oa\post(
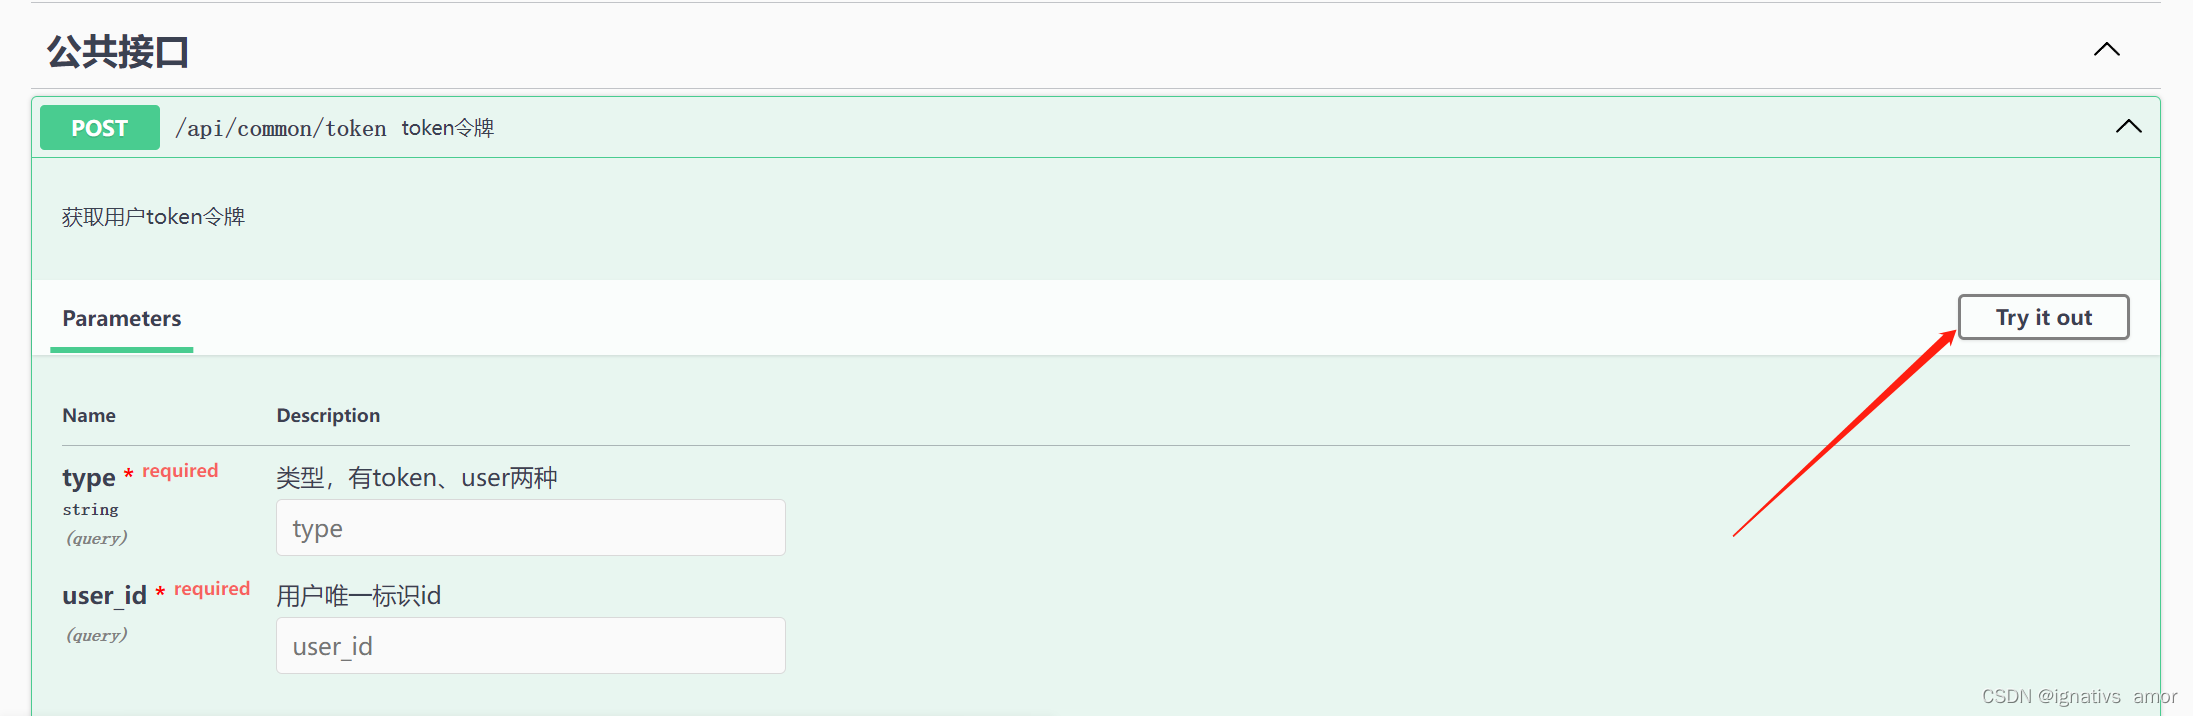
* path="/api/common/token",
* tags={"公共接口"},
* summary="token令牌",
* description="获取用户token令牌",
* @oa\parameter(
* name="type",
* description="类型,有token、user两种",
* required=true,
* in="query",
* @oa\schema(
* type="string"
* )
* ),
* @oa\parameter(
* name="user_id",
* description="用户唯一标识id",
* required=true,
* in="query",
* ),
* @oa\response(
* response=200,
* description="successful operation"
* ),
* )
*/
public function posttoken(){
//逻辑
return $this->success(
[
'access_token' => $token,
'token_type' => 'bearer',
]);
}
}1、验证提供outh2 或和apikey 两种方式,在存放全局配置中写入(也可以任意目录中)。
我是放在了最基础的controller中
备注:具体的可以点击这里去了解
<?php
namespace app\http\controllers\api;
use app\traits\jsonresponse;
use illuminate\http\request;
use illuminate\routing\controller as basecontroller;
/**
 * @swg\securityscheme(
 *     securitydefinition="bearer",
 *      in="header",
 *      name="authorization",
 *      type="apikey",
 * ),
 */
class controller extends basecontroller
{
    public $request;
    public function __construct(request  $request){
        $this->request = $request;
    }
}
在接口中添加:
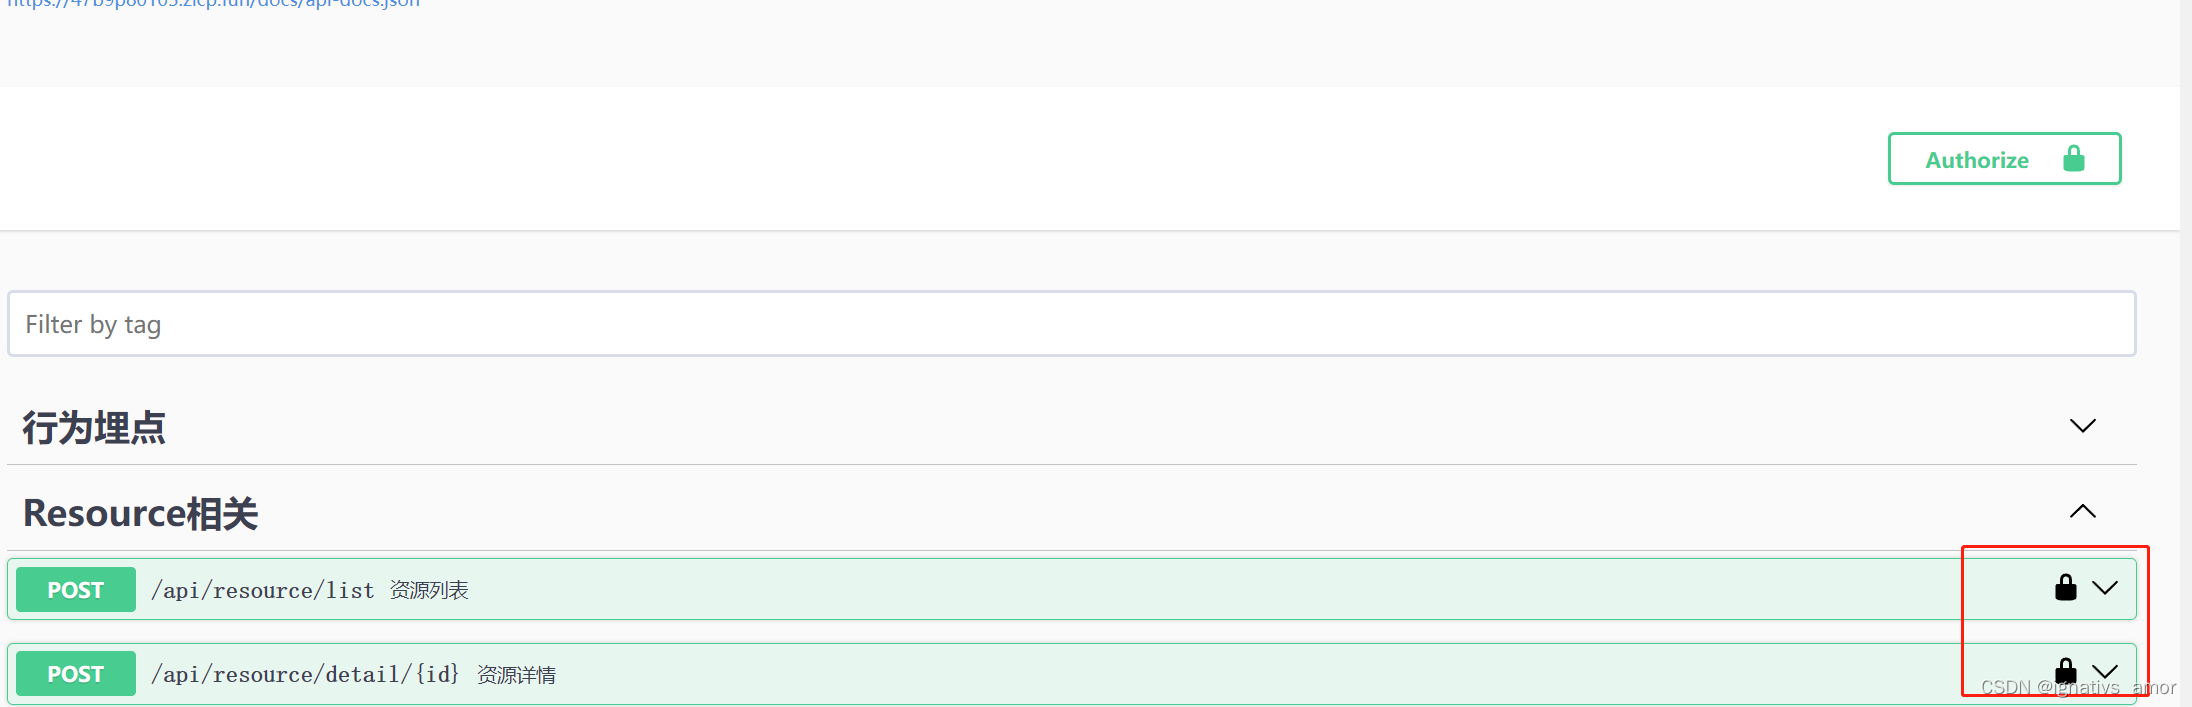
security={{"bearer": {}}},这时,swagger ui 会出现一个锁一样的东西,
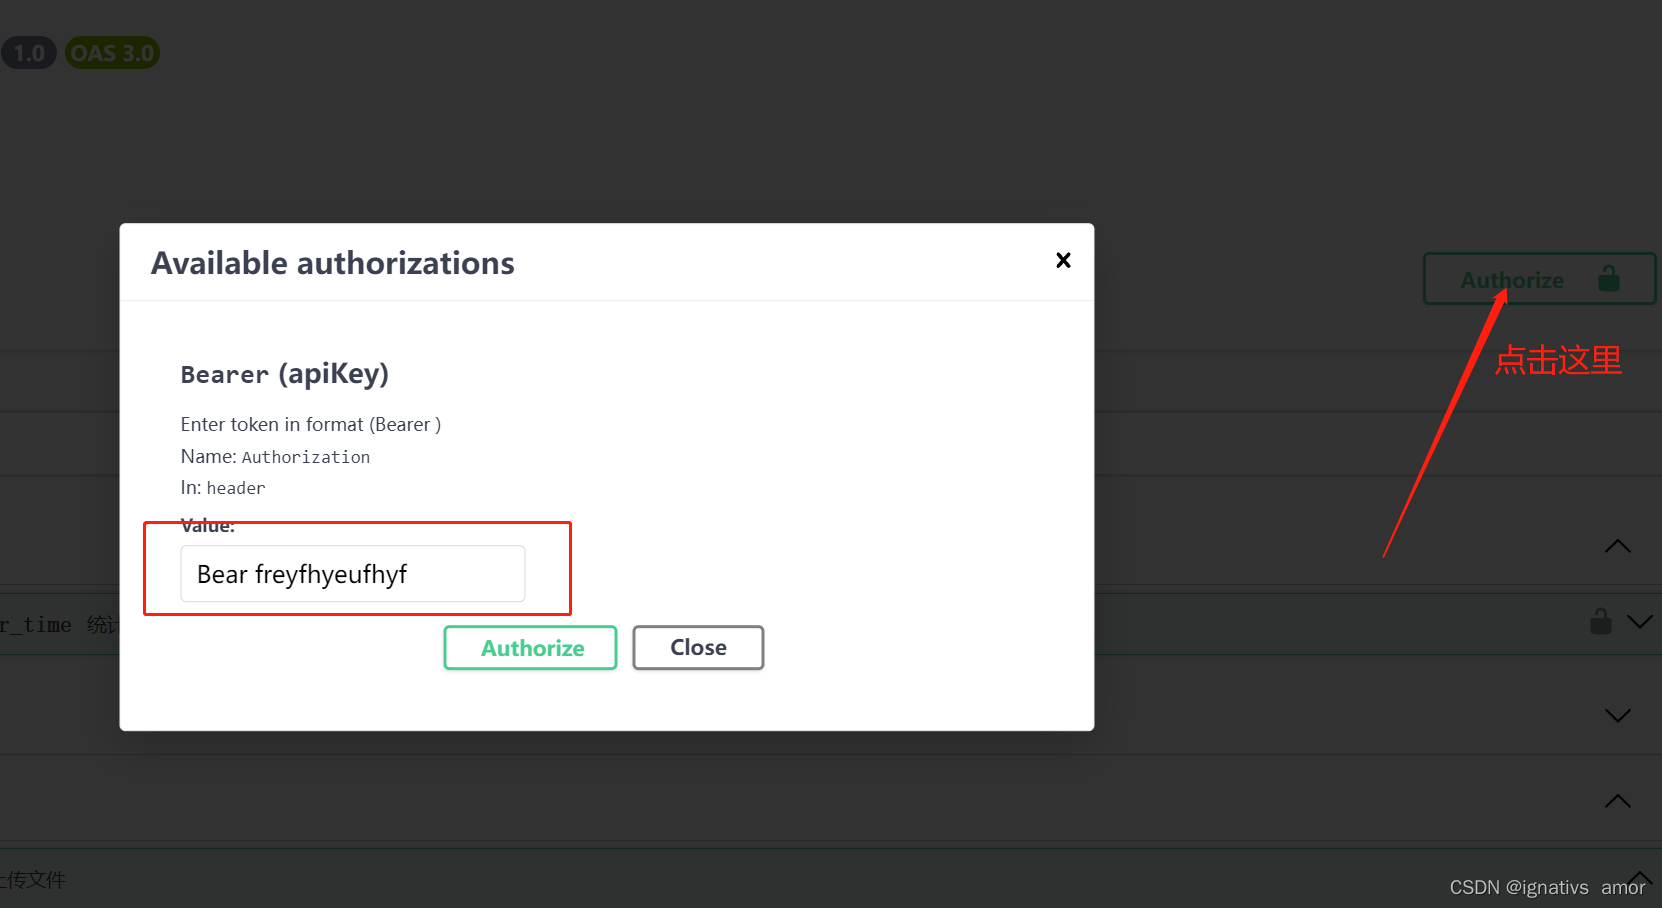
在这里,可以输入自己的token,请求的时候会带上token。当token输入以后点击认证,这时候需要验证token的接口,都会被锁上,就是出现这个锁的样式,如图:
然后你try 接口的时候,就会带上你刚刚输入的token,这时可以在你的接口中间件中去接收并验证token的有效性了。
2、post请求
备注:配置项security={{“bearer”:{} }},:该项就是说明该接口需要安全验证,且用到的是bearer方式
/**
     * @oa\post(
     *      path="/api/resource/list",
     *      tags={"resource相关"},
     *      summary="资源列表",
     *      description="获取项目列表的接口,调用接口需要传递token令牌",
     *       security={{"bearer":{} }},
     *      @oa\parameter(
     *          name="page",
     *          description="页码,默认为1",
     *          required=false,
     *          in="query",
     *      ),
     *      @oa\parameter(
     *          name="pagesize",
     *          description="每页的数量,默认5条",
     *          required=false,
     *          in="query",
     *      ),
     *
     *     @oa\response(
     *         response=200,
     *         description="successful",
     *         @oa\mediatype(
     *             mediatype="application/json",
     *             @oa\schema(
     *                 @oa\property(property="id", type="integer", description="资源id"),
     *                 @oa\property(property="type", type="integer", description="资源类型,1=>病例,2=>文章"),
     *                 @oa\property(property="title", type="string", description="资源名称"),
     *                 @oa\property(property="cover", type="string", description="资源封面图"),
     *                 @oa\property(property="view_count", type="integer", description="浏览量"),
     *                 @oa\property(property="created_at", type="string", description="发布时间"),
     *             ),
     *         )
     *     ),
     *      @oa\response(response=400, description="bad request"),
     *      @oa\response(response=404, description="resource not found"),
     * )
     */
  public function postlist(){
        $params = $this->request->all();
        $params['page'] = $params['page'] ?? 1;
        $params['pagesize'] = $params['pagesize'] ?? 5;
        //逻辑
    }
3、get请求
/**
* @oa\get(
* path="/projects/{id}",
* operationid="getprojectbyid",
* tags={"projects"},
* summary="get project information",
* description="returns project data",
* @oa\parameter(
* name="id",
* description="project id",
* required=true,
* in="path",
* @oa\schema(
* type="integer"
* )
* ),
* @oa\response(
* response=200,
* description="successful operation"
* ),
* @oa\response(response=400, description="bad request"),
* @oa\response(response=404, description="resource not found"),
* },
* )
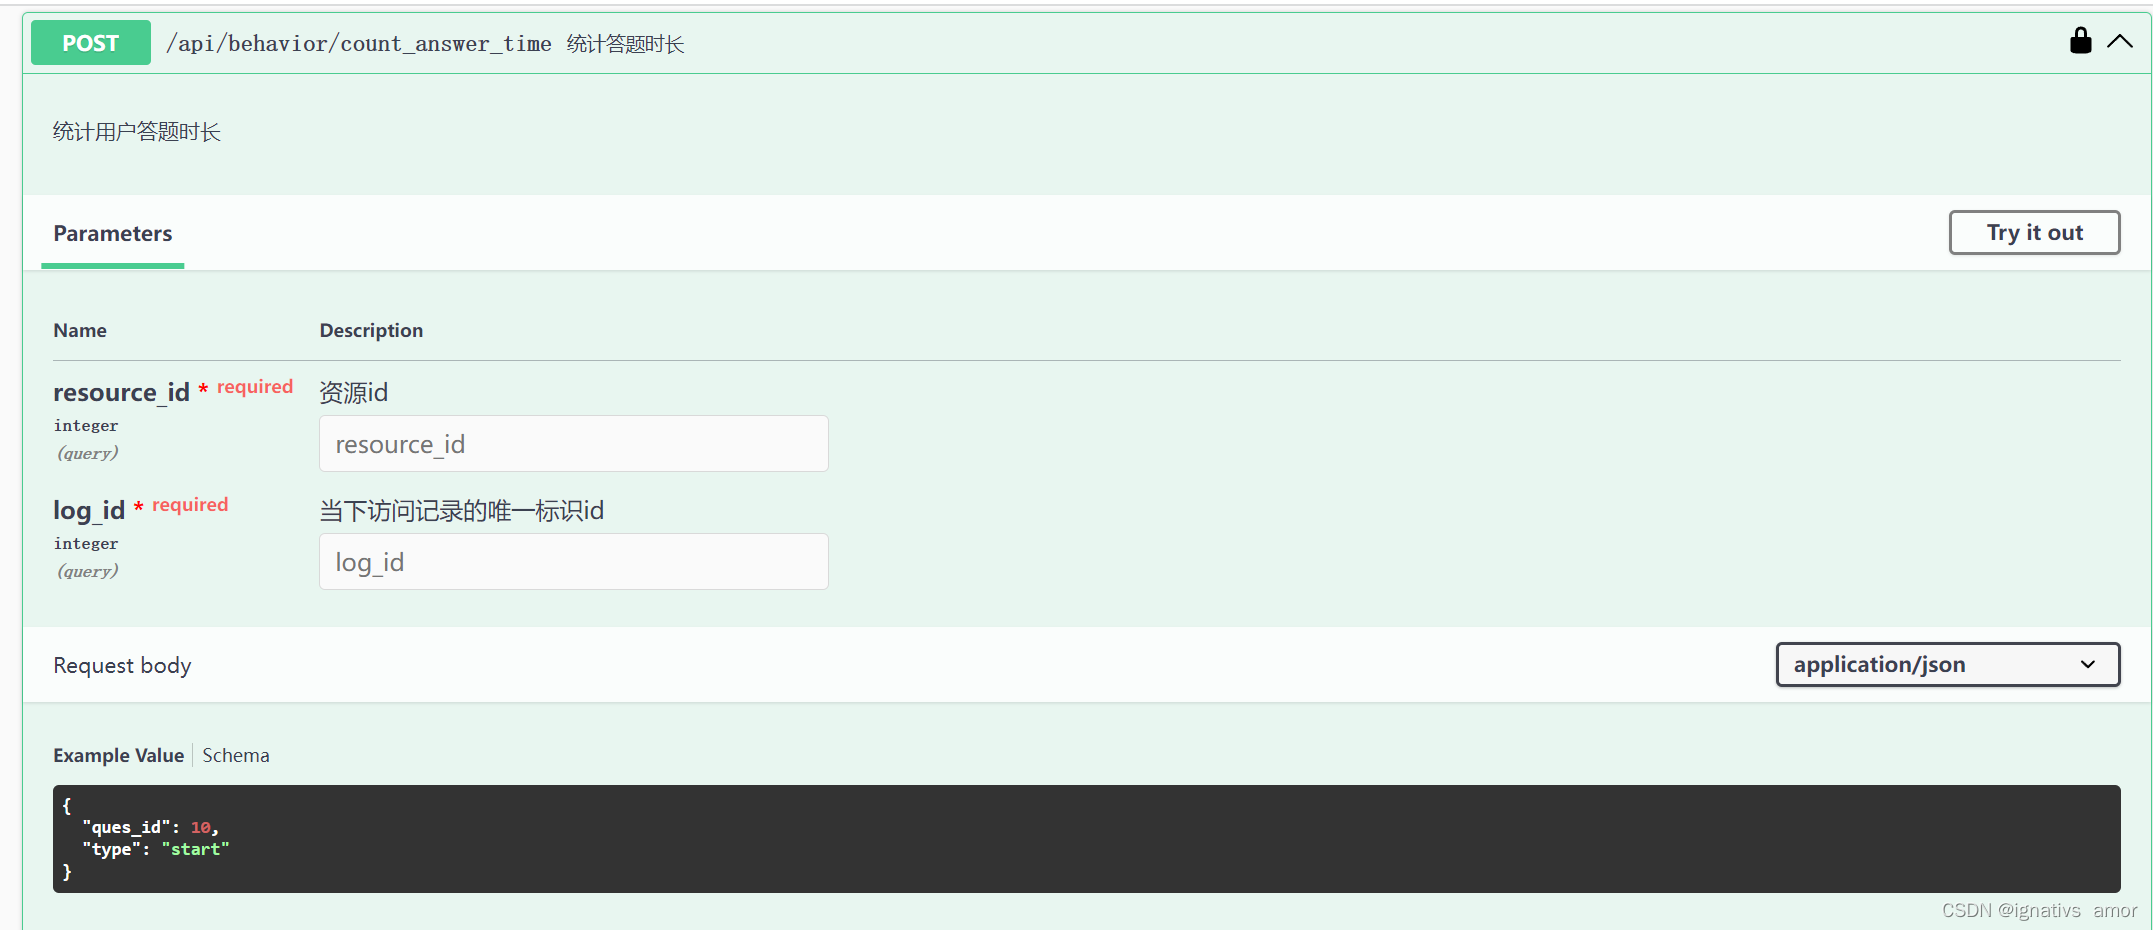
*/4、body 为json 方式
    /**
     * @oa\post(summary="统计答题时长",path="/api/behavior/count_answer_time",tags={"行为埋点"},description="统计用户答题时长",
     *     security={{"bearer":{} }},
     *     @oa\parameter(name="resource_id",in="query",required=true,description="资源id",
     *         @oa\schema(
     *              type="integer"
     *          )),
     *     @oa\parameter(name="log_id",in="query",required=true,description="当下访问记录的唯一标识id",
     *         @oa\schema(
     *              type="integer"
     *          )),
     *     @oa\requestbody(
     *         @oa\mediatype(mediatype="application/json",
     *             @oa\schema(
     *                 @oa\property(property="ques_id",type="int",description="问题id"),
     *                 @oa\property(property="type",type="string",description="行为的类型:start和end两种"),
     *                 example={"ques_id": 10, "type": "start"}
     *             )
     *         )
     *     ),
     *     @oa\response(response="200",description="获取成功"),
     * )
     */
   public function countanswertime(){
        info(json_encode($this->request->all()));
        $resource_id = $this->request->get('resource_id');
        $log_id = $this->request->get('log_id');
        $all_params = $this->request->only(['resource_id', 'log_id']);
        $current_type = $this->request->get('type');
        //逻辑
    }
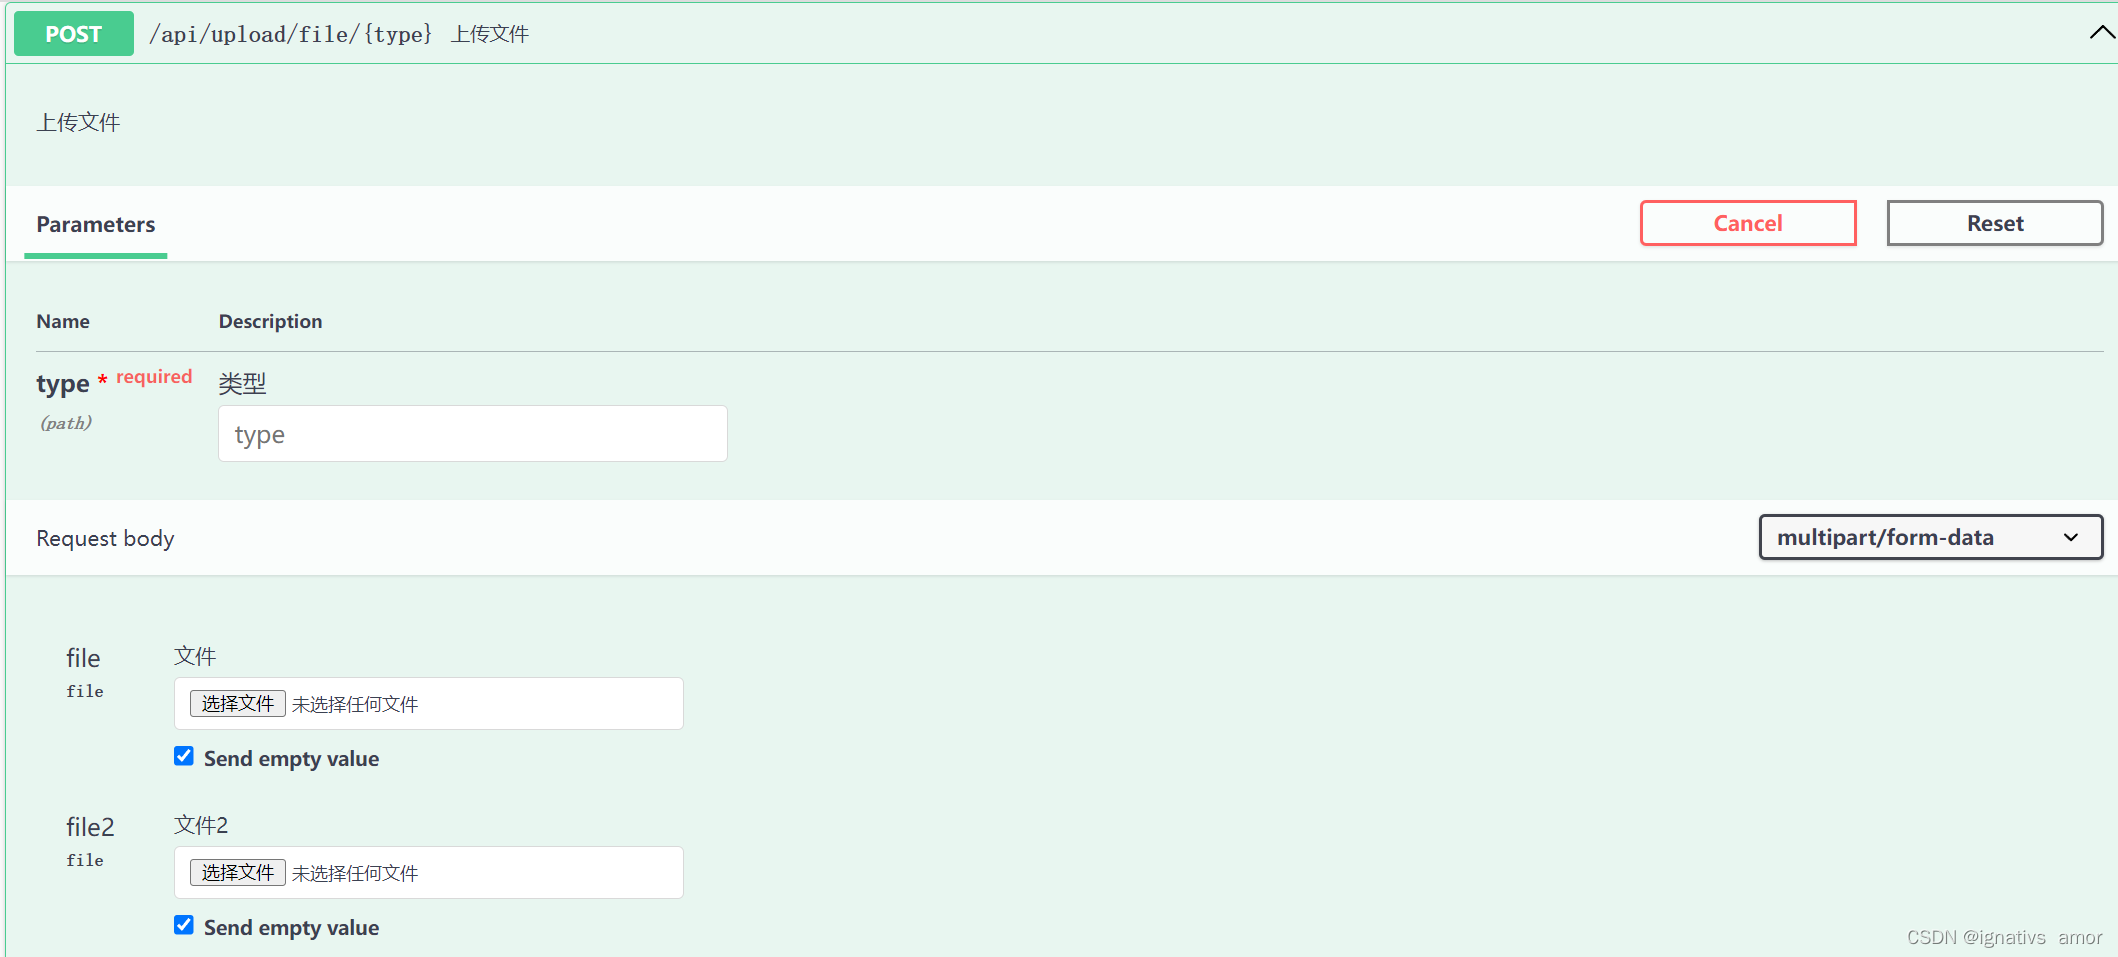
5、文件上传
备注:这里是支持多文件上传,删除一个就是单文件上传
    /**
     * @oa\post(summary="上传文件",path="/api/upload/file/{type}",tags={"upload"},description="上传文件",
     *     security={{"bearer":{} }},
     *     @oa\parameter(name="type",in="path",required=true,description="类型"),
     *     @oa\requestbody(
     *         @oa\mediatype(
     *             mediatype="multipart/form-data",
     *             @oa\schema(
     *                 @oa\property(property="file",type="file",description="文件"),
     *                 @oa\property(property="file2",type="file",description="文件2")
     *             )
     *         )
     *     ),
     *     @oa\response(response="200",description="获取成功",
     *     @oa\mediatype(mediatype="application/json",
     *             @oa\schema(
     *                 @oa\property(property="img_url",description="路径",type="string"),
     *                 @oa\property(property="original_name",description="原始名称",type="string"),
     *             )
     *         )
     *      )
     * )
     */
    public function postuploadfile($case){
        $file = $this->request->file('file');
         //逻辑
    }
更多的使用方法可以参考官网例子:https://github.com/zircote/swagger-php/tree/master/examples/petstore-3.0
三、可能遇到的问题
1、线上环境无法正常访问
可能是你nginx 配置的问题,因为,laravel-swagger 是通过file_content_get() 的方式 echo 输出js 的。而你的nginx 配置判断,如果是 .js 或者css 是静态文件,所以到不了index.php ,更执行不了 file_content_get 函数了。
这时候去掉js的缓存
2、errorexception : required @oa\info() not found
在终端输入命令
php artisan l5-swagger:generate
提示异常:
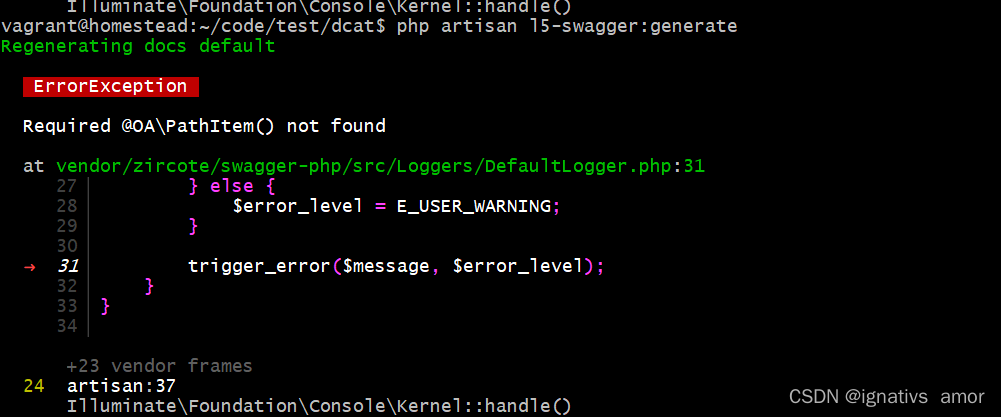
这是因为在运行之前,您必须在控制器中至少有一个方法,并带有描述路由的注释
<?php
namespace app\http\controllers;
use illuminate\foundation\auth\access\authorizesrequests;
use illuminate\foundation\bus\dispatchesjobs;
use illuminate\foundation\validation\validatesrequests;
use illuminate\routing\controller as basecontroller;
/**
 * @oa\info(title="swagger使用测试", version="1.0")
 */
class controller extends basecontroller
{
    use authorizesrequests, dispatchesjobs, validatesrequests;
}
然后使用命令php artisan make:controller projectscontroller生成一个控制器,随便写个方法,然后在方法前添加注释即可:
/**
 * @oa\get(
 *     path="/projects",
 *     @oa\response(response="200", description="display a listing of projects.")
 * )
 */
 public function index(){
}然后再执行php artisan l5-swagger:generate命令,就正常了

到此这篇关于laravel swagger 使用完整教程的文章就介绍到这了,更多相关laravel swagger 使用内容请搜索代码网以前的文章或继续浏览下面的相关文章希望大家以后多多支持代码网!


发表评论