一、要求
1.配置不同ip访问
2.配置不同端口访问
3.配置域名访问
二、前期准备
1.安装gcc g++的依赖库
yum -y install gcc gcc-c++

2.安装 pcre的依赖库
yum -y install pcre pcre-devel

3.安装zlib的依赖库
yum -y install zlib zlib-devel

4.安装openssl的依赖库
yum -y install openssl openssl-devel

5.解压nginx的安装包
tar -zxvf nginx-1.24.0.tar.gz

6.进入到解压的nginx安装目录里面
cd nginx-1.24.0/

7.将nginx安装到/usr/local/下
./configure --prefix=/usr/local/

8.编译
make
make install


9.进入到nginx的安装目录
cd /usr/local/nginx

10.进入到nginx的sbin模块,并且启动nginx
cd sbin/
./nginx
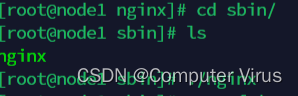
11.查看启动是否成功
ps -ef | grep nginx

三、配置nginx
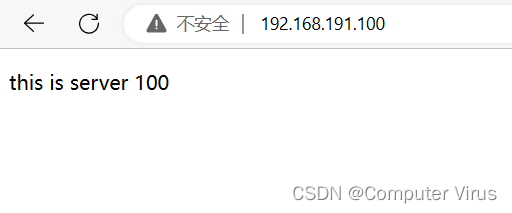
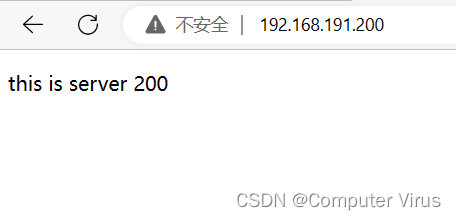
1.配置两个网卡(192.168.191.100和192.168.191.200)
nmcli connection modify ens33 +ipv4.addresses 192.168.191.100/24
nmcli connection modify ens33 +ipv4.addresses 192.168.191.200/24

2.启动ens33网卡
nmcli connection up ens33

3.进入 /usr/local/nginx/html/配置我们的网页内容
cd /usr/local/nginx/html/
4.创建文件
make ip
make name
make port

5.在文件下创建相关文件

6.配置虚拟主机文件,进入到/usr/local/nginx/conf/
cd /usr/local/nginx/conf

7.编辑nginx.conf文件
vim nginx.conf

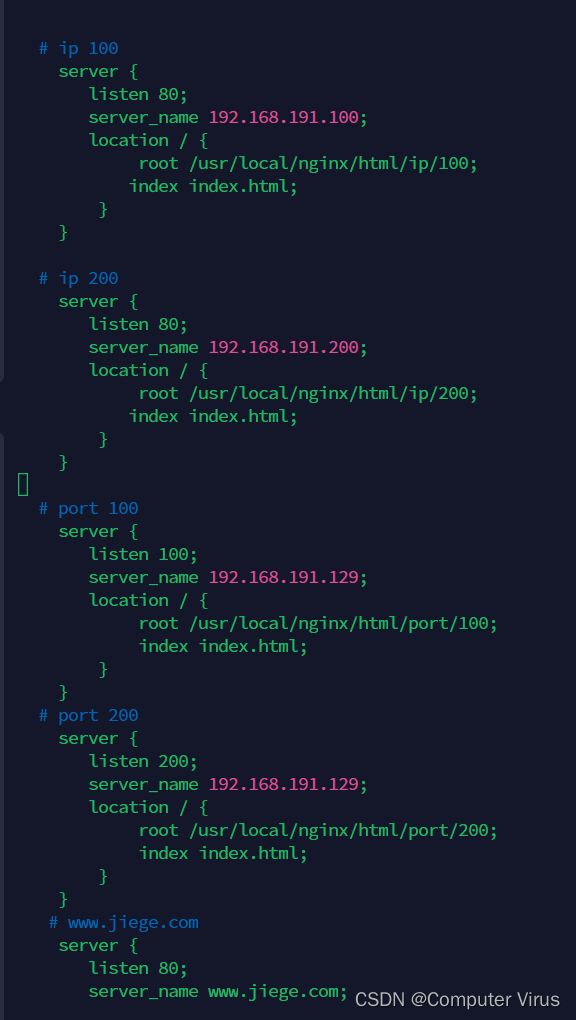
8.编辑以下内容
# ip 100
server {
listen 80;
server_name 192.168.191.100;
location / {
root /usr/local/nginx/html/ip/100;
index index.html;
}
}
# ip 200
server {
listen 80;
server_name 192.168.191.200;
location / {
root /usr/local/nginx/html/ip/200;
index index.html;
}
}
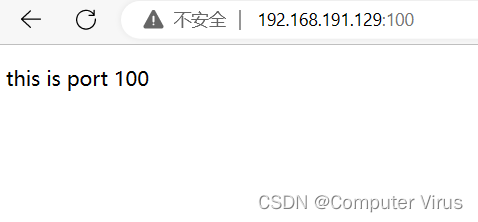
# port 100
server {
listen 100;
server_name 192.168.191.129;
location / {
root /usr/local/nginx/html/port/100;
index index.html;
}
}
# port 200
server {
listen 200;
server_name 192.168.191.129;
location / {
root /usr/local/nginx/html/port/200;
index index.html;
}
}
# www.jiege.com
server {
listen 80;
server_name www.jiege.com;
location / {
root /usr/local/nginx/html/name/jiege;
index index.html;
}
}
9.保存退出
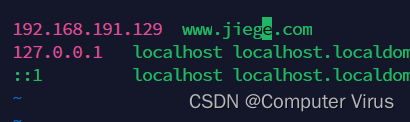
10.配置虚拟机本地host文件
vim /etc/hosts

11.编辑以下内容
192.168.191.129 www.jiege.com
12.配置本机(windows 10)host文件 (c:\windows\system32\drivers\etc的host文件)
192.168.191.129 www.jiege.com

13.启动nginx
/usr/local/nginx/sbin/./nginx


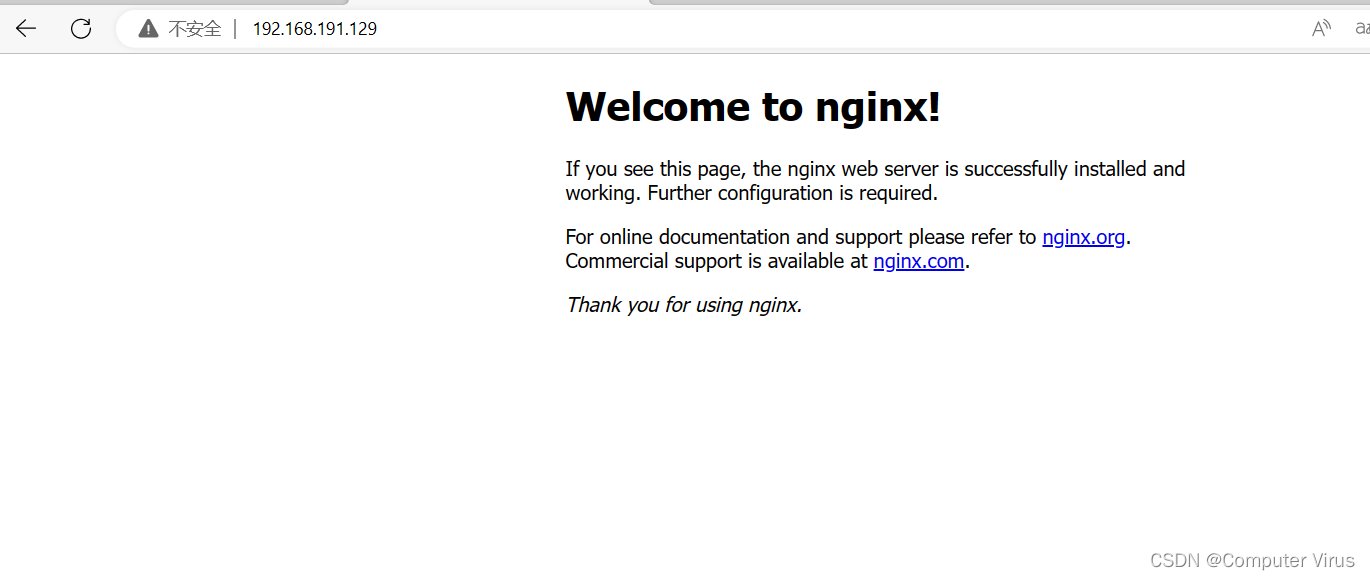
四、测试
基于ip
基于端口

基于域名

五、总结
在ubuntu下安装nginx也是同样的配置
到此这篇关于nginx启动、配置及测试的文章就介绍到这了,更多相关nginx启动、配置、测试内容请搜索代码网以前的文章或继续浏览下面的相关文章希望大家以后多多支持代码网!


发表评论