使用linux+nginx 作为unity webgl的服务器
建议使用命令行下载,使用源码编译可能编译不过。
自己创建一个uinty webgl项目,或者下载我上传的unity webgl项目
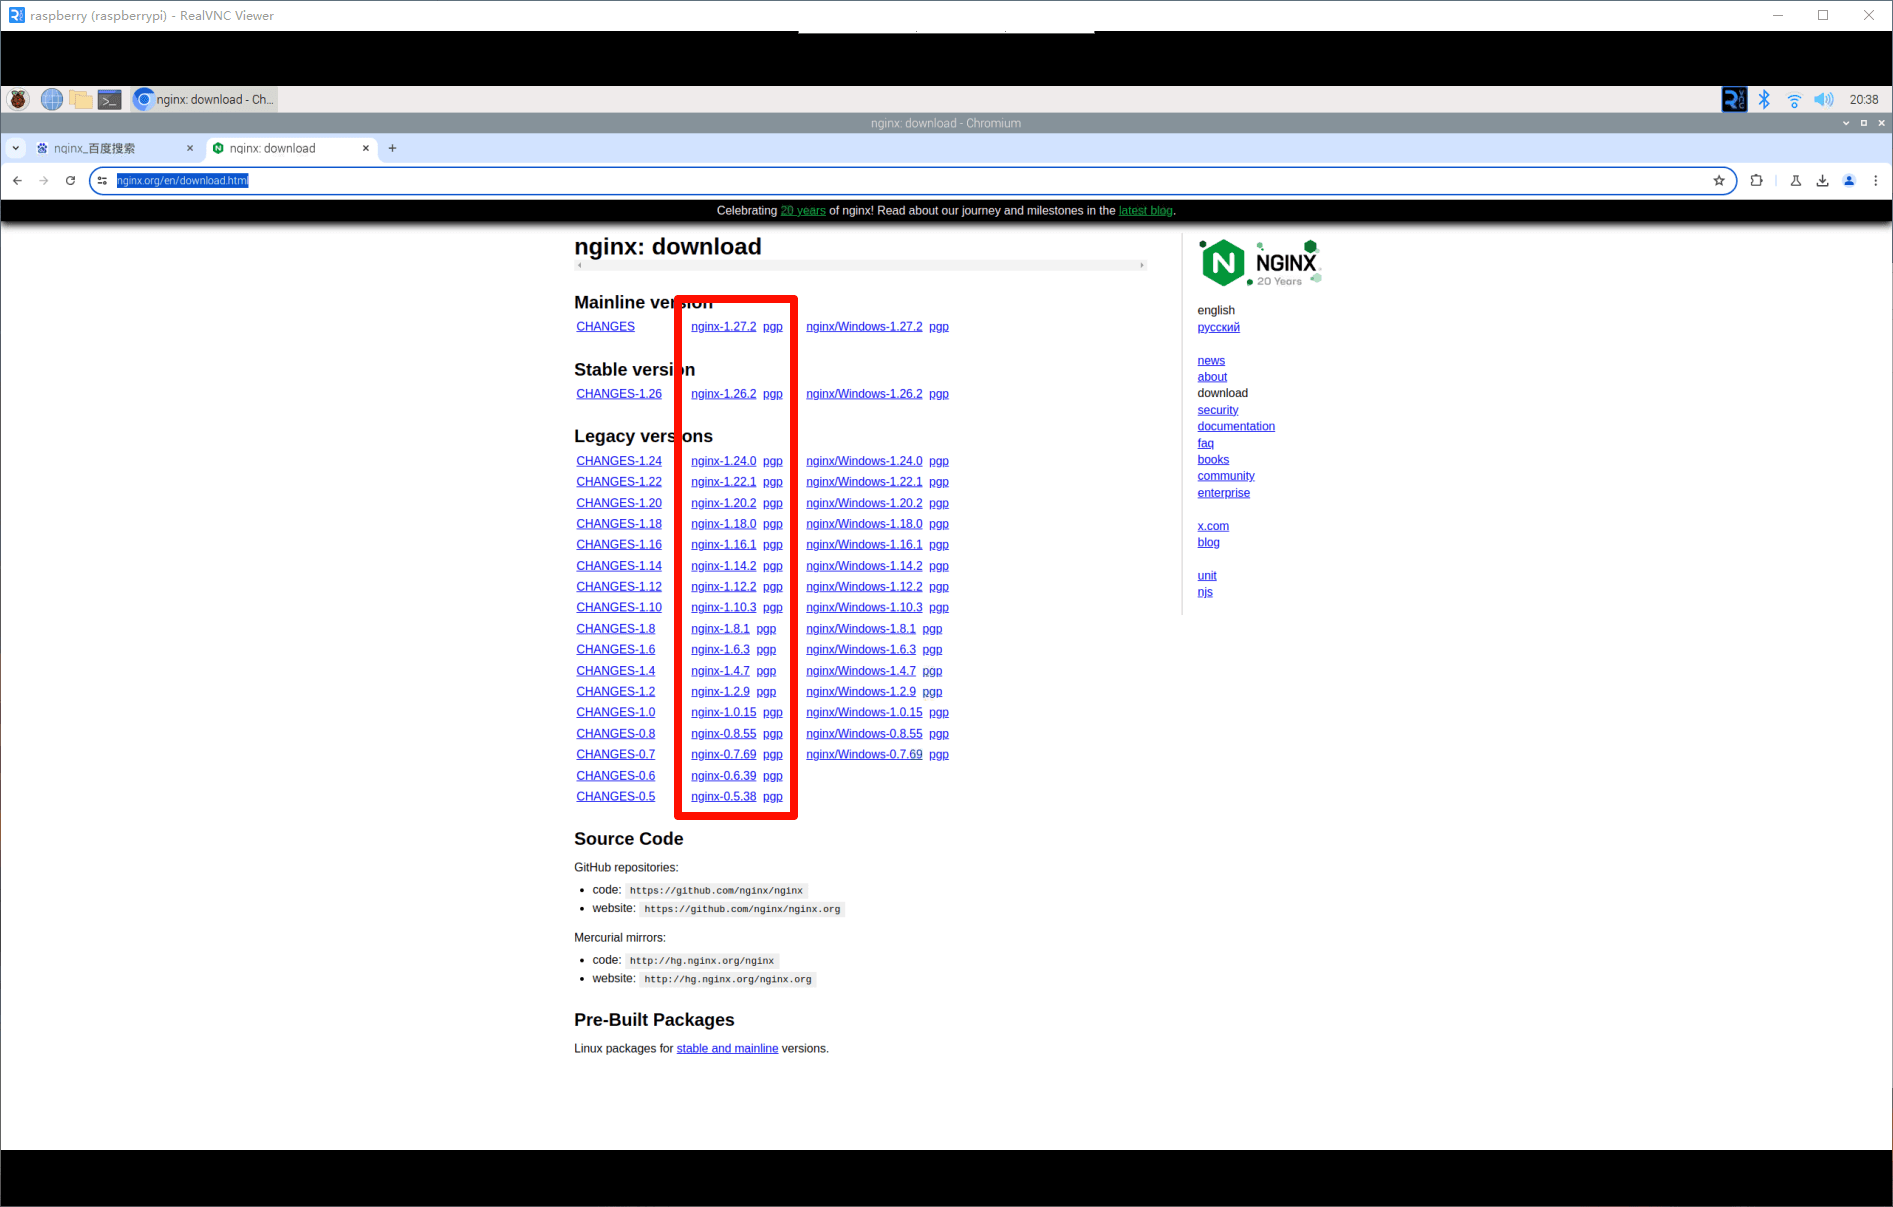
下载nginx 使用图形界面
下载nginx 或者使用命令行下载nginx
下载,这是用于linux的。
https://nginx.org/en/download.html
解压
tar -xvf nginx-1.26.2.tar.gz

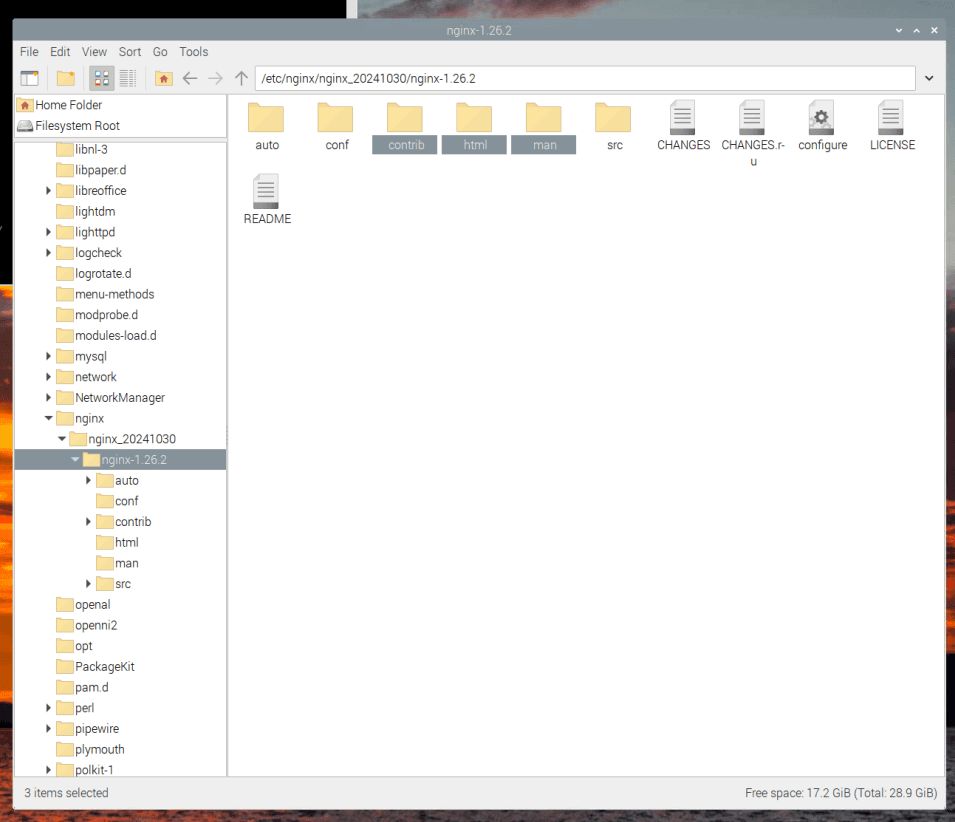
拷贝文件
//创建一个路径在/etc/nginx/nginx_20241030
sudo mkdir -p /etc/nginx/nginx_20241030
//拷贝解压文件到上面创建的路径
sudo cp -r nginx-1.26.2 /etc/nginx/nginx_20241030/
//看看文件在不在
ls /etc/nginx/nginx_20241030/
下载ngixn使用命令行
将unity webgl 文件拷贝到linux 图形界面和windows操作一样
解压zip的命令
命令行
将文件拷贝到u盘中,将u盘插入到linux机器上

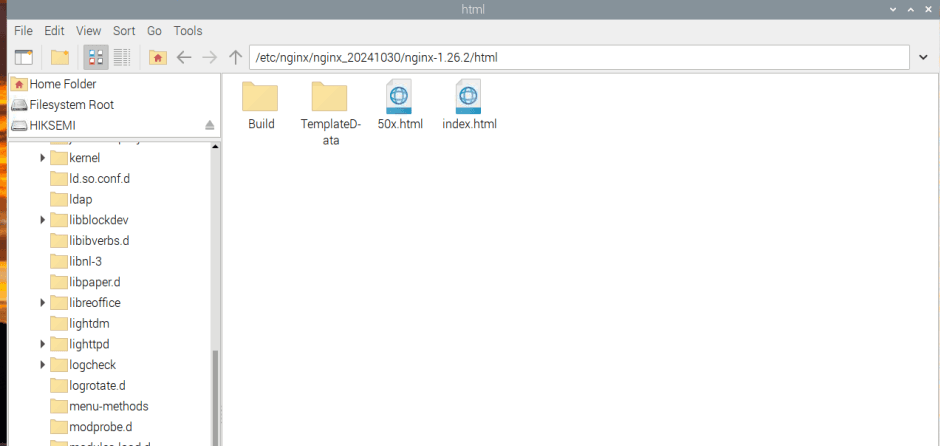
//找到u盘
raspberry@raspberrypi:~ $ lsblk
name        maj:min rm  size ro type mountpoint
sda           8:0    1 58.6g  0 disk
└─sda1        8:1    1 58.6g  0 part /media/raspberry/hiksemi
mmcblk0     179:0    0 29.7g  0 disk
├─mmcblk0p1 179:1    0  256m  0 part /boot
└─mmcblk0p2 179:2    0 29.5g  0 part /
//查看u盘文件
cd /media/raspberry/hiksemi/
ls
//复制文件到downloads
 sudo cp lookcubea.zip  /home/raspberry/downloads
//解压文件
确认已经安装了unzip
unzip -v
安装会输出版本号,记得先运行 cd ~  切换到home
么有安装就安装
sudo apt-get update
sudo apt-get install unzip
解压
cd /home/pi/downloads/
unzip lookcubea.zip
//将文件复制到nginx下
切换到文件夹内部
cd lookcubea/
编译nginx ,么有报错就是编译好了
sudo ./configure
复制文件
 sudo cp -r * /etc/nginx/nginx_20241030/nginx-1.26.2/html
切换到复制的文件夹
cd /etc/nginx/nginx_20241030/nginx-1.26.2/html
 查看文件
 ls
50x.html      build/        index.html        templatedata/
删除文件(如果有必要)
 sudo rm -rf lookcubea/
最后的效果
配置nginx
nginx的配置文件linux和windows的差不多,需要改的有html文件的路径,在linux中需要使用绝对路径
在windows中的路径配置,root是相对路径 root html;
         location / {
            root   html;
            index  index.html index.htm;
            # 添加 cors 头部
            add_header access-control-allow-origin *;
            add_header access-control-allow-methods 'get, post, options';
            add_header access-control-allow-headers 'dnt,x-mx-reqtoken,keep-alive,user-agent,x-requested-with,if-modified-since,cache-control,content-type,authorization';
            # 处理 options 请求
            if ($request_method = options) {
                add_header access-control-allow-origin *;
                add_header access-control-allow-methods 'get, post, options';
                add_header access-control-allow-headers 'dnt,x-mx-reqtoken,keep-alive,user-agent,x-requested-with,if-modified-since,cache-control,content-type,authorization';
                add_header content-length 0;
                add_header content-type text/plain;
                return 204;
            }
        }
在linux中需要使用绝对路径 root /etc/nginx/html;
         location / {
            root   /etc/nginx/html;
            index  index.html index.htm;
            # 添加 cors 头部
            add_header access-control-allow-origin *;
            add_header access-control-allow-methods 'get, post, options';
            add_header access-control-allow-headers 'dnt,x-mx-reqtoken,keep-alive,user-agent,x-requested-with,if-modified-since,cache-control,content-type,authorization';
            # 处理 options 请求
            if ($request_method = options) {
                add_header access-control-allow-origin *;
                add_header access-control-allow-methods 'get, post, options';
                add_header access-control-allow-headers 'dnt,x-mx-reqtoken,keep-alive,user-agent,x-requested-with,if-modified-since,cache-control,content-type,authorization';
                add_header content-length 0;
                add_header content-type text/plain;
                return 204;
            }
        }
切换到配置文件夹 cd /etc/nginx/nginx_20241030/nginx-1.26.2/conf 备份配置文件 sudo cp nginx.conf nginx.conf-save 编辑(如果会用nano) sudo nano nginx.conf 不会用nano 复制复制一个到到桌面,使用文本编辑器编辑,编辑好之后再覆盖回去 复制到桌面一份 sudo cp nginx.conf /home/raspberry/desktop 再复制回去 sudo cp /home/raspberry/desktop/nginx.conf /etc/nginx/nginx_20241030/nginx-1.26.2/conf/nginx.conf
启动nginx
方式1,使用命令行安装的 可以使用下面的命令
//启动
sudo systemctl start nginx
//重启
sudo systemctl restart nginx
//查看状态
sudo systemctl status nginx
方式2,如果是自己编译的
我的没编译出来,架构不行,arm64,很奇怪。
到此这篇关于如何使用linux+nginx 作为unity webgl的服务器的文章就介绍到这了,更多相关linux nginx unity webgl服务器内容请搜索代码网以前的文章或继续浏览下面的相关文章希望大家以后多多支持代码网!


发表评论