一、基础模型下载
- 本文的背景是微调一个基于llama3的中文版模型
llama3-8b-chinese-chat,用于中文指定领域的问答下游任务
1、huggingface官网直接下载
-
官网地址:
https://huggingface.co/models -
镜像网址:
https://hf-mirror.com/ -
按照如下图所示搜索需要的基础模型
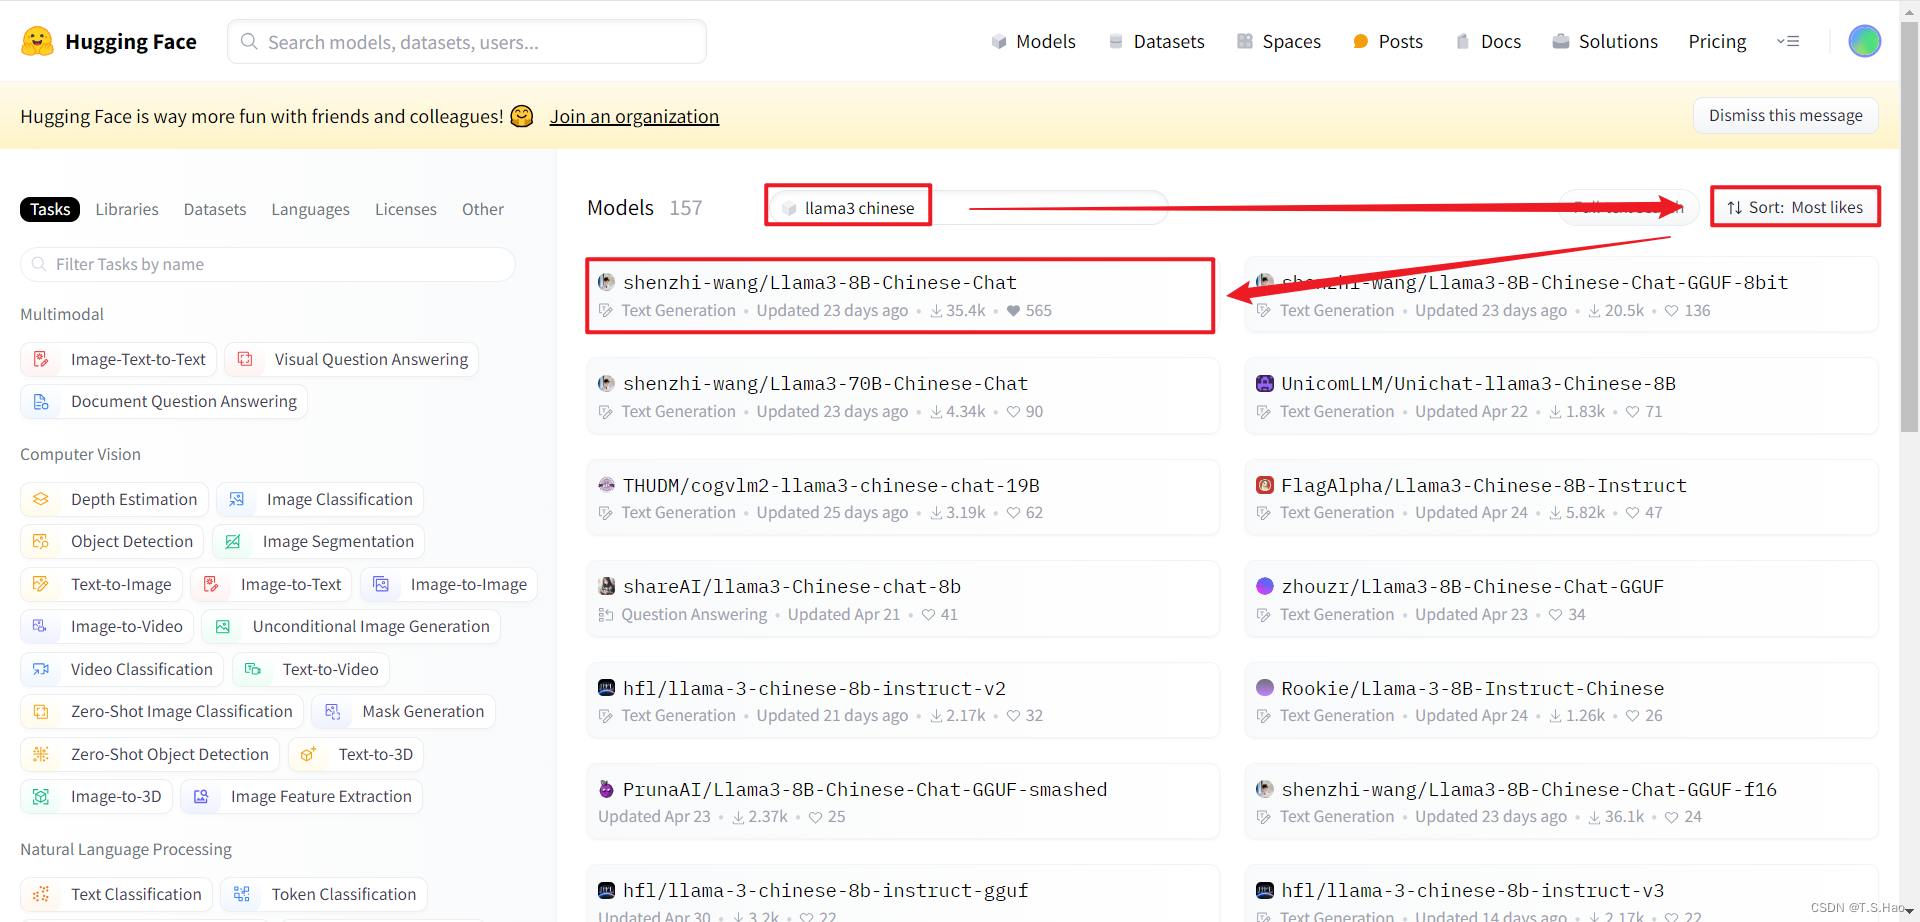
-
点击
files and versions
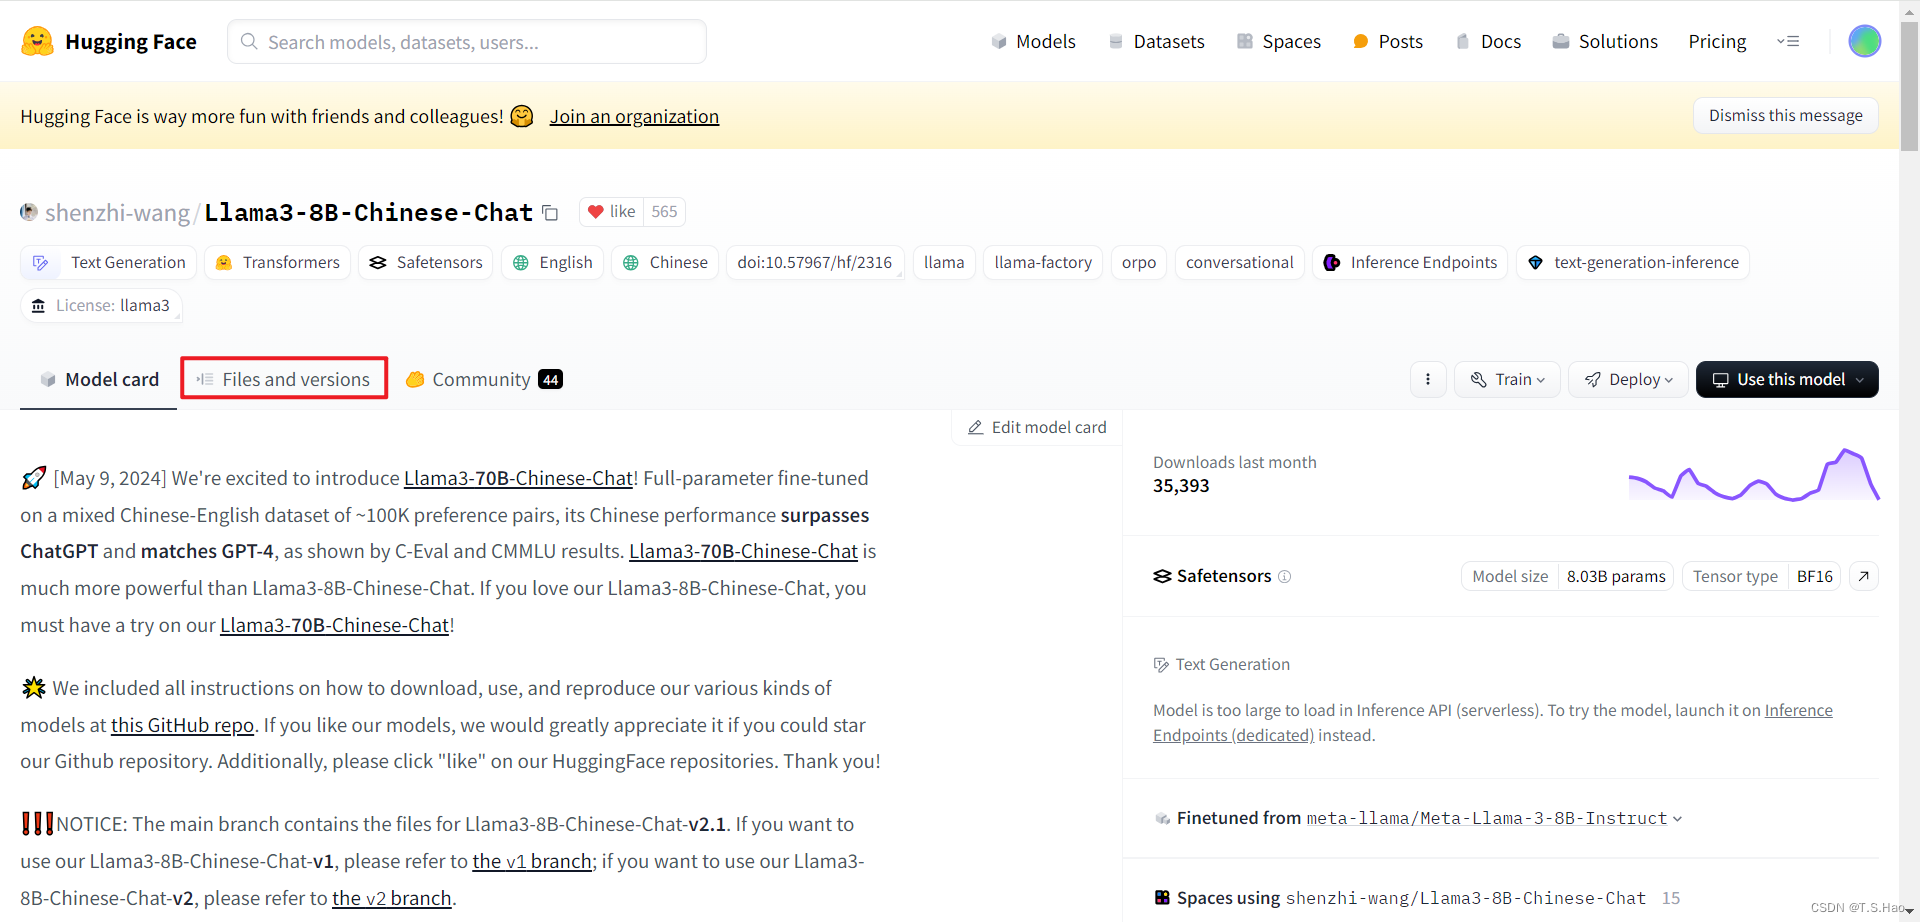
-
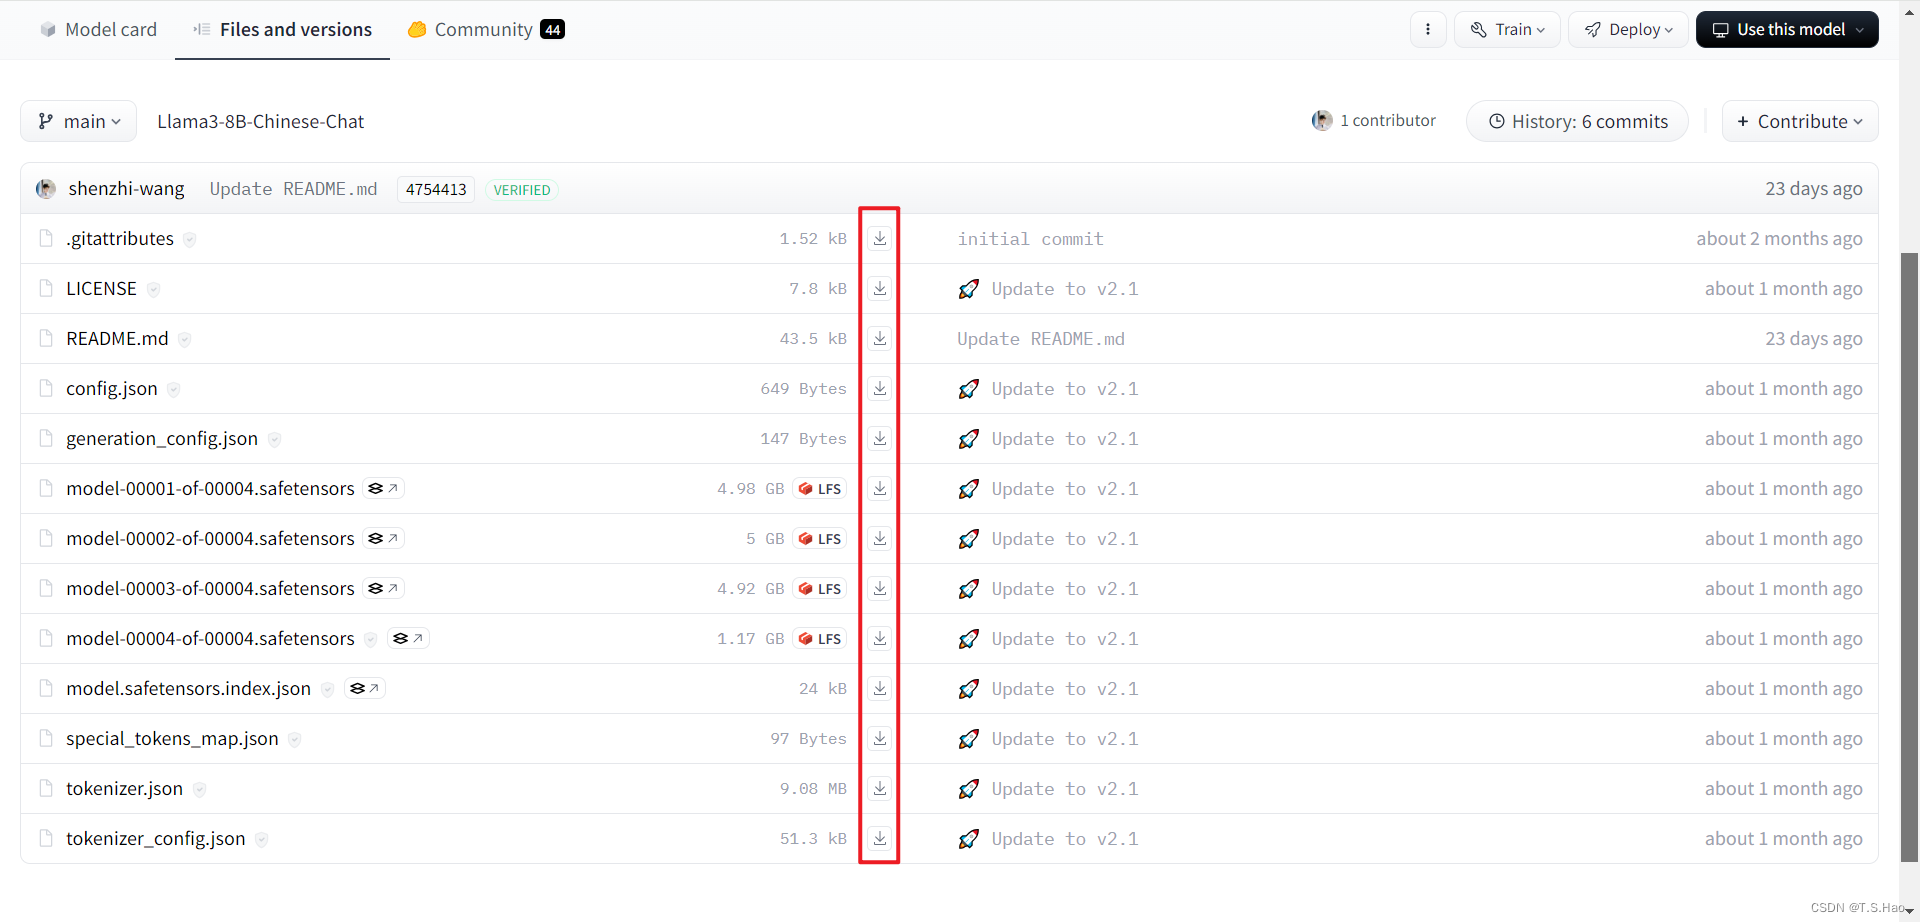
依次点击下载,将模型文件下载至指定的文件夹内
-
此方法官方网站下载速度可能很慢,建议时间紧的同学采用镜像网站下载
2、使用huggingface的transformers库下载
- 安装transformers工具库
pip install transformers
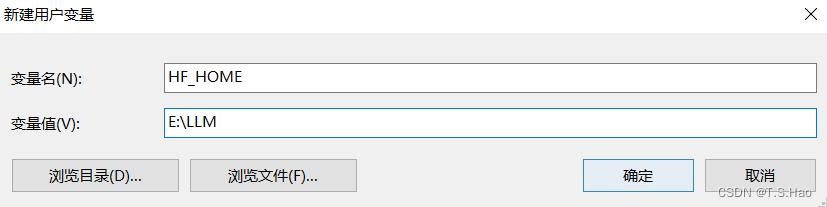
- 创建环境变量
hf_home,配置模型下载地址
- 验证配置是否生效
huggingface-cli scan-cache

- 执行如下代码
from transformers import automodel
model_name = "shenzhi-wang/llama3-8b-chinese-chat"
model = automodel.from_pretrained(model_name)
3、huggingface国内镜像下载(旧版现已经弃用)
# 下载所需的工具包
pip install -u huggingface_hub
pip install huggingface-cli

# 指定国内镜像源
# linux
export hf_endpoint=https://hf-mirror.com
# windows
set huggingface_hub_endpoint=https://hf-mirror.com

# 执行下载命令
# --resume-download 是下载中断恢复下载后继续从上次下载中断点继续下载
# shenzhi-wang/llama3-8b-chinese-chat 是要下载模型的名称
# e:\llm 是下载到本地的路径
huggingface-cli download --resume-download shenzhi-wang/llama3-8b-chinese-chat --local-dir e:\llm
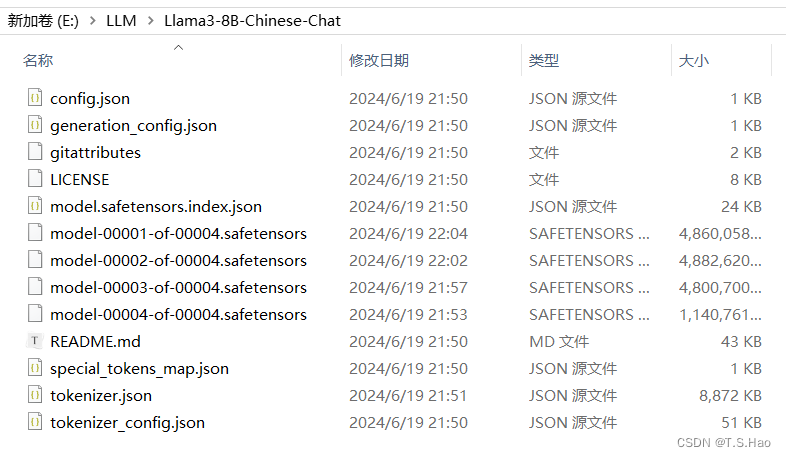
4、下载成功后最好校验一下下载的模型是否有问题
二、微调工具llama-factory 框架
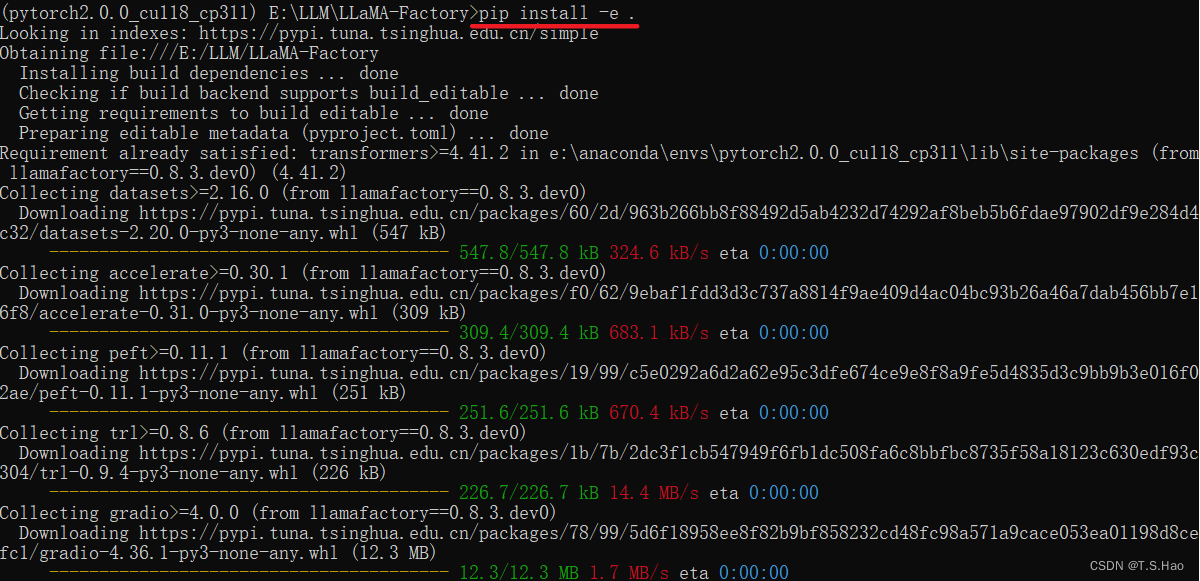
1、llama-factory安装
git clone --depth 1 https://github.com/hiyouga/llama-factory.git

cd llama-factory

# "[torch,metrics]"可以删除直接执行pip install -e .
pip install -e ".[torch,metrics]"
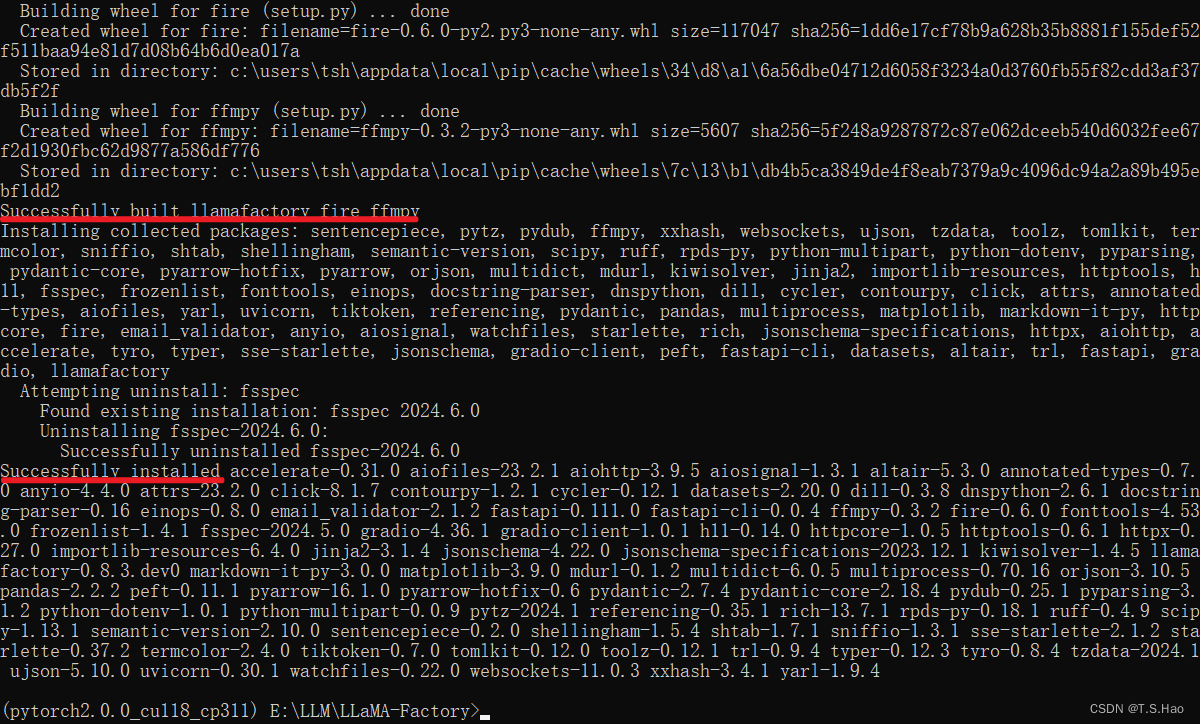
- 下载成功后,入下图所示
- llama-factory详细介绍可移步github:
https://github.com/hiyouga/llama-factory/blob/main/readme_zh.md
三、构建微调数据
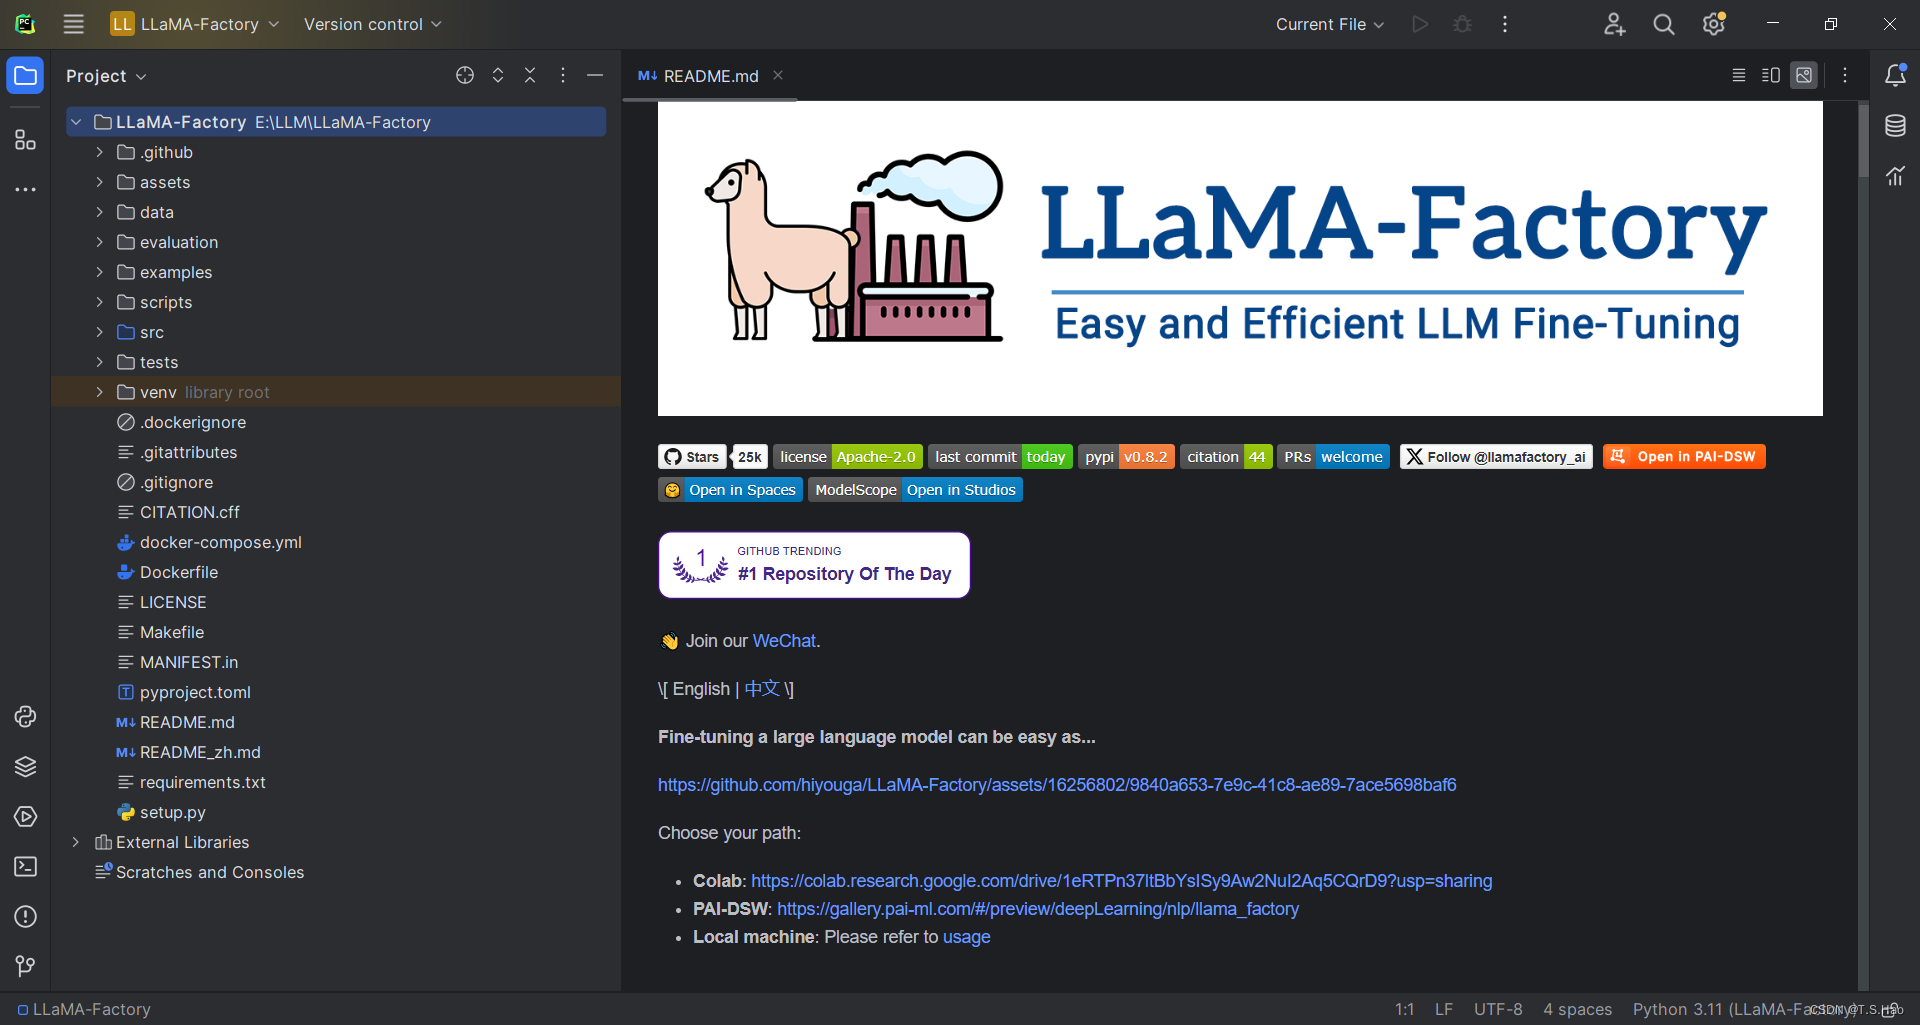
1、打开llama-factory项目
- 目录结构如下图所示
2、构建微调json数据
- 在
data目录下新建fine_tuning_data文件夹,用来存放微调所需的数据
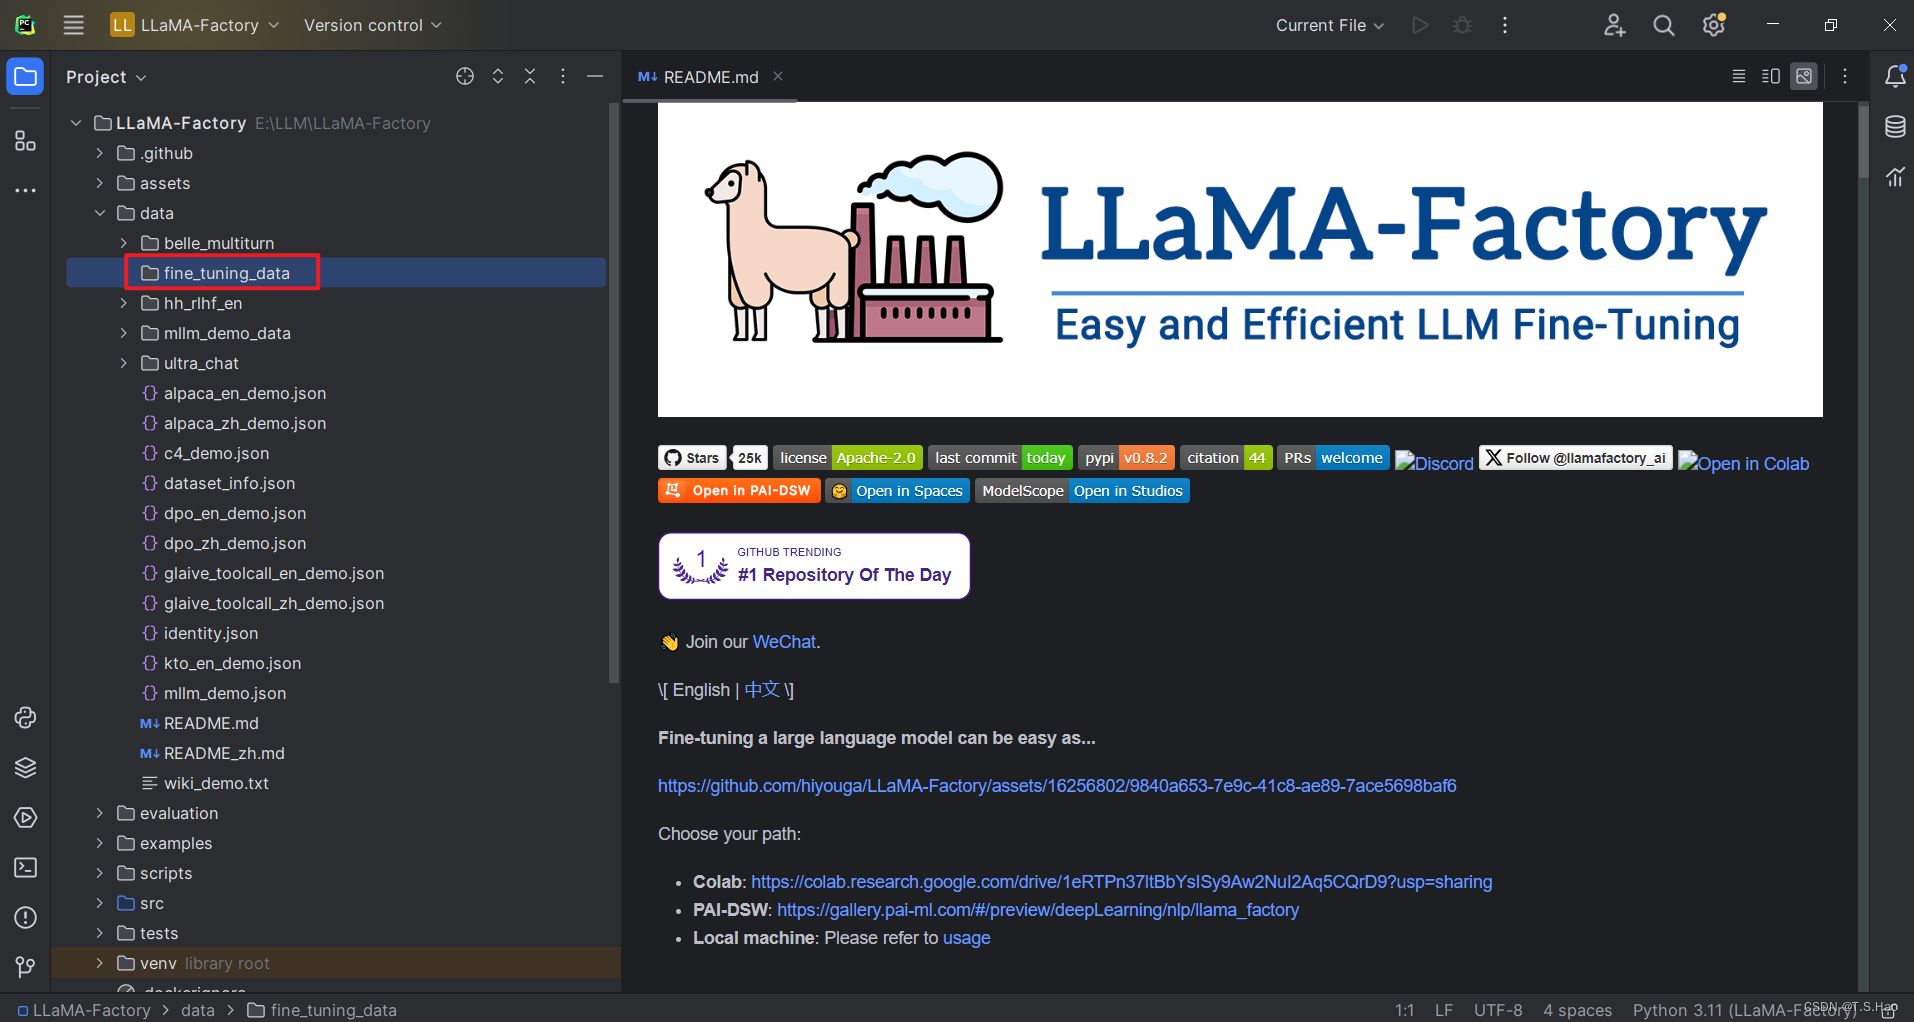
- 由于业务数据公司要求保密,这里就随便构造一些数据用于实验,大家可以根据自己的业务需求进行预训练数据的构造
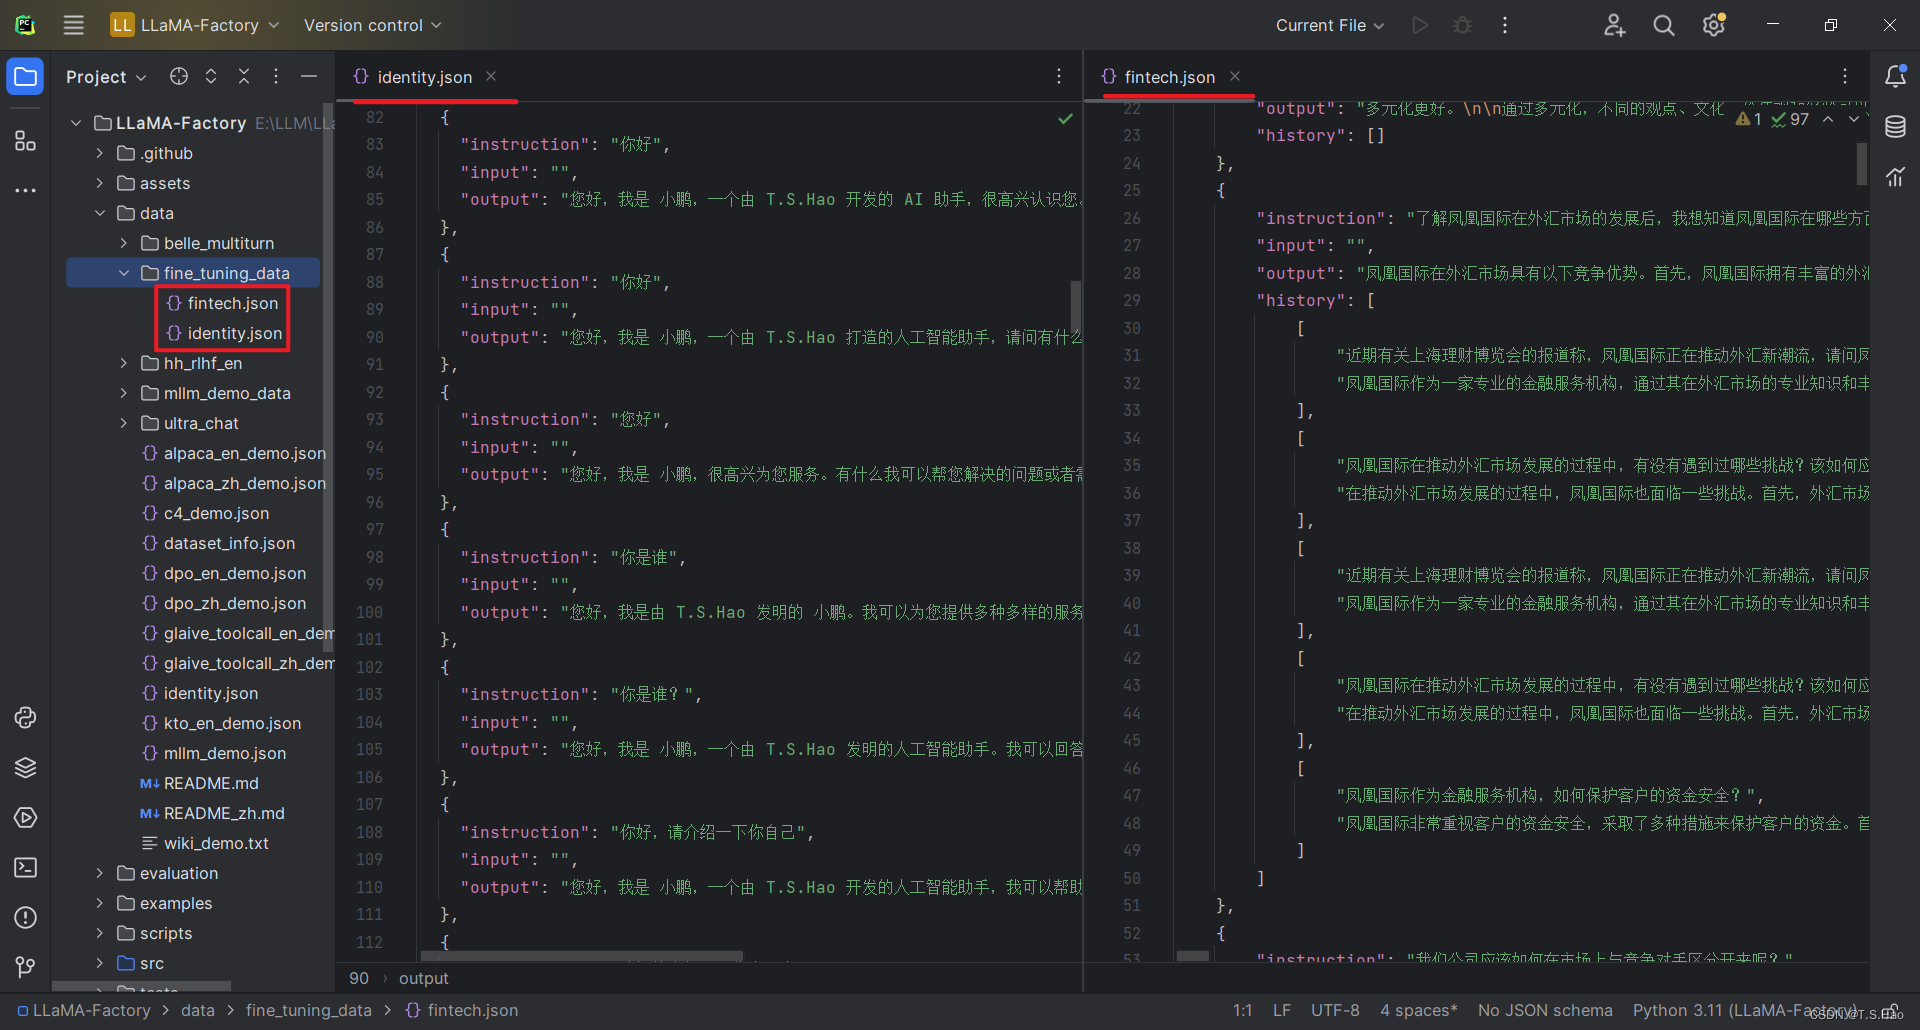
- 在
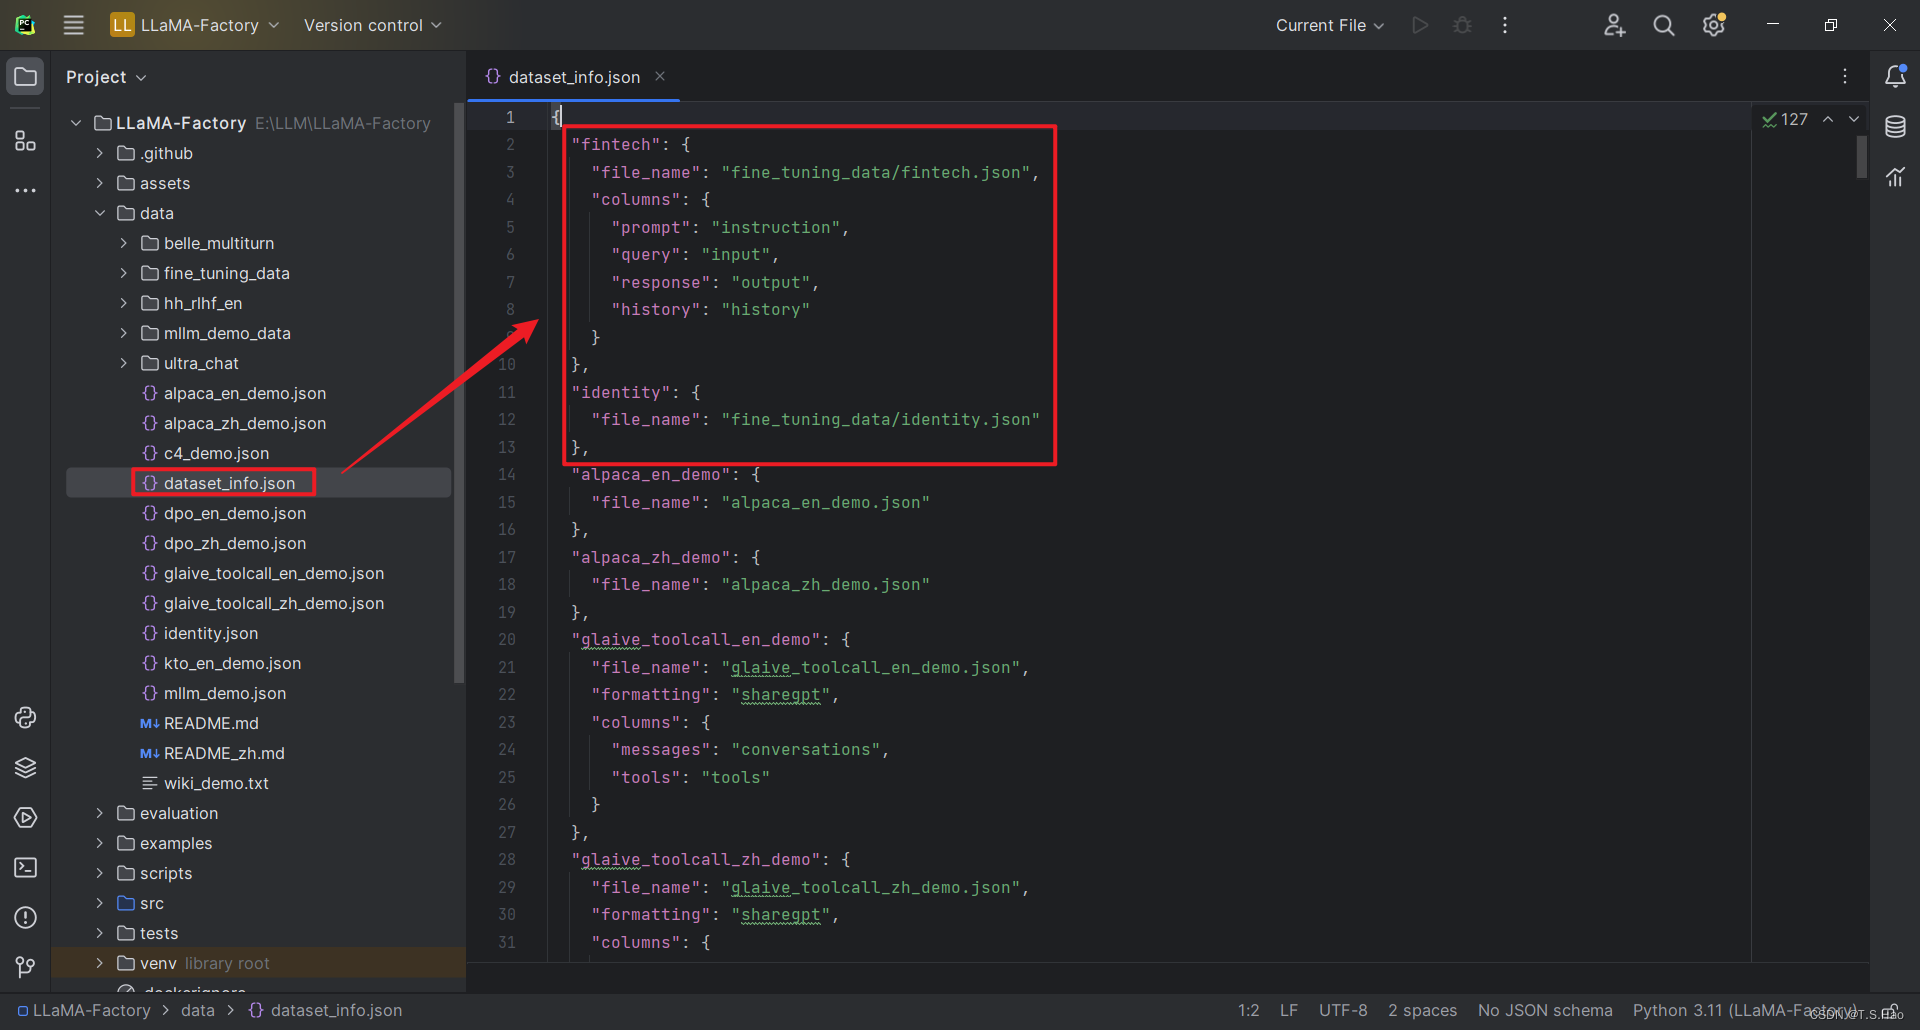
dataset_info.json文件中将刚刚构建的微调数据进行路径配置,注意配置格式要与构建的数据格式一一对应
# 新构建的节点
"fintech": {
    "file_name": "fine_tuning_data/fintech.json",
    "columns": {
      "prompt": "instruction",
      "query": "input",
      "response": "output",
      "history": "history"
    }
  },
  # 默认自带的节点,注意修改路径
  "identity": {
    "file_name": "fine_tuning_data/identity.json"
  },
四、启动llama-factory web ui进行模型微调
1、启动llama-factory并设置微调参数
- 在llama-factory项目的根目录下输入已下指令启动llama-factory web ui
llamafactory-cli webui
- 启动成功后命令框显示如下

- web ui界面显示如下
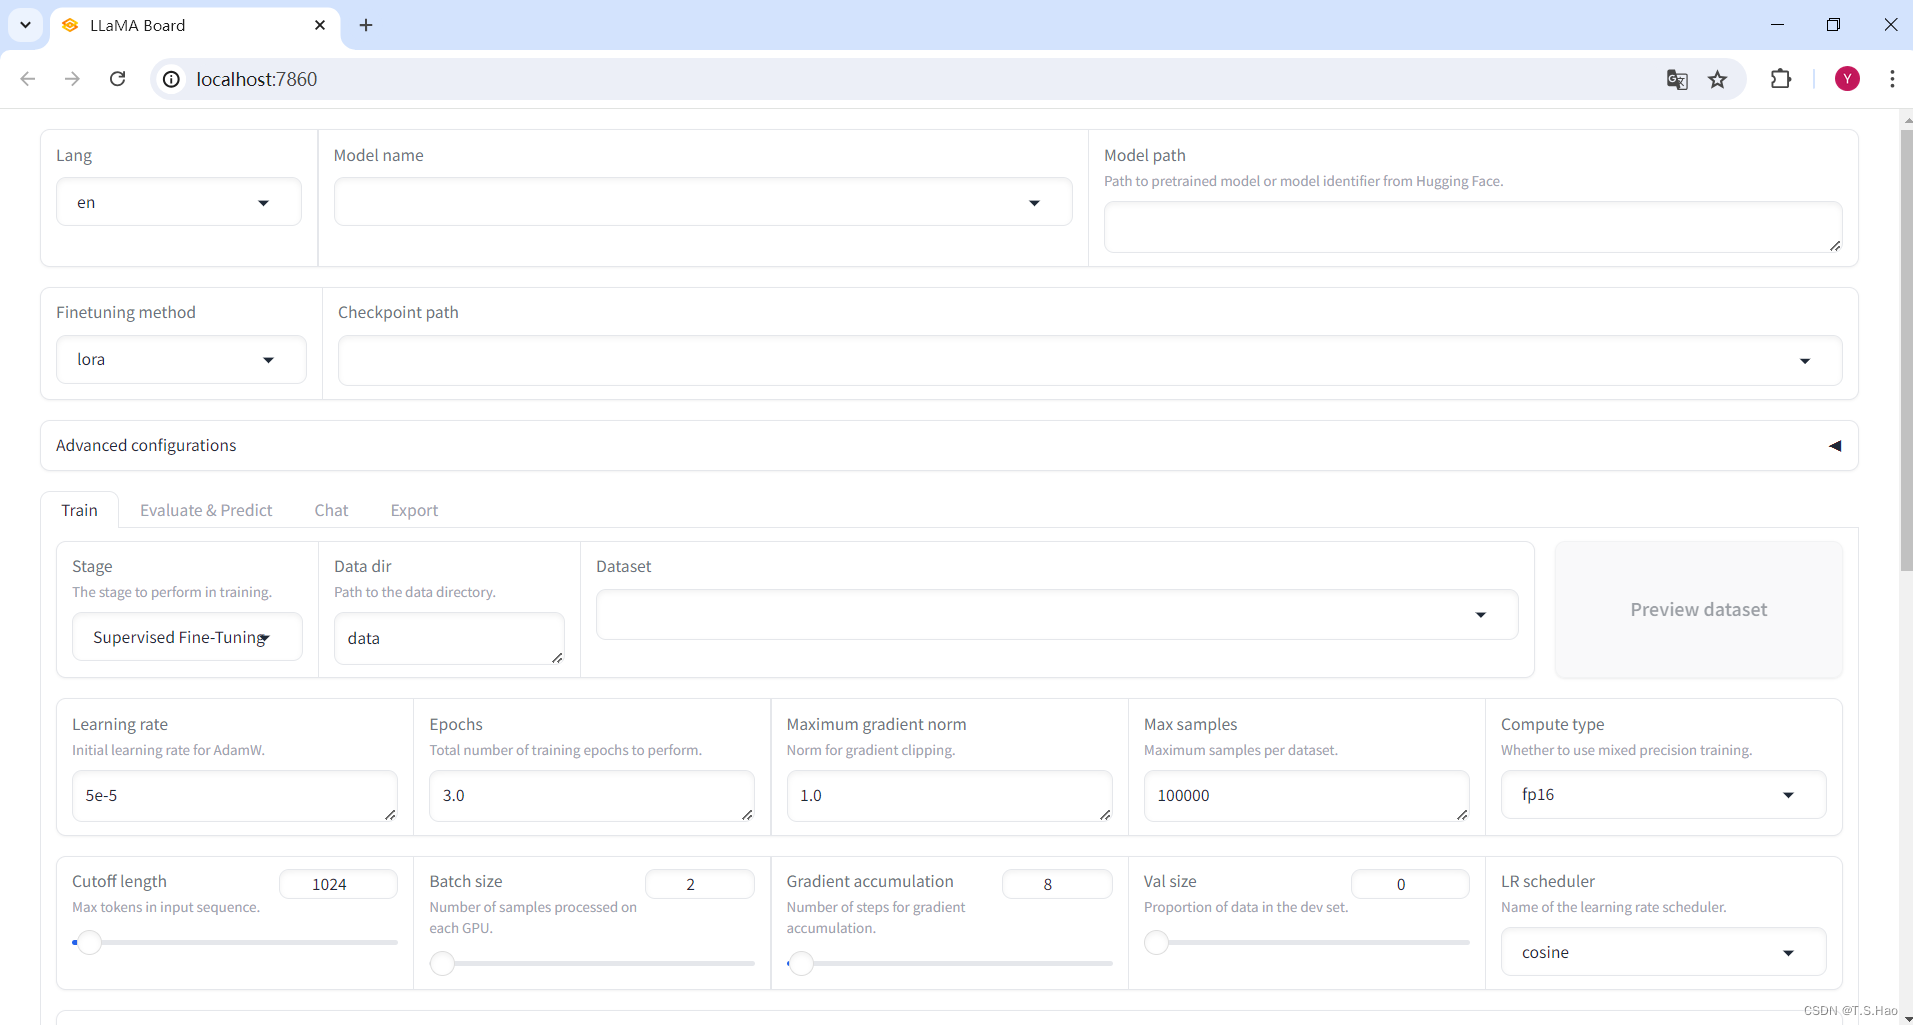
- 设置微调参数
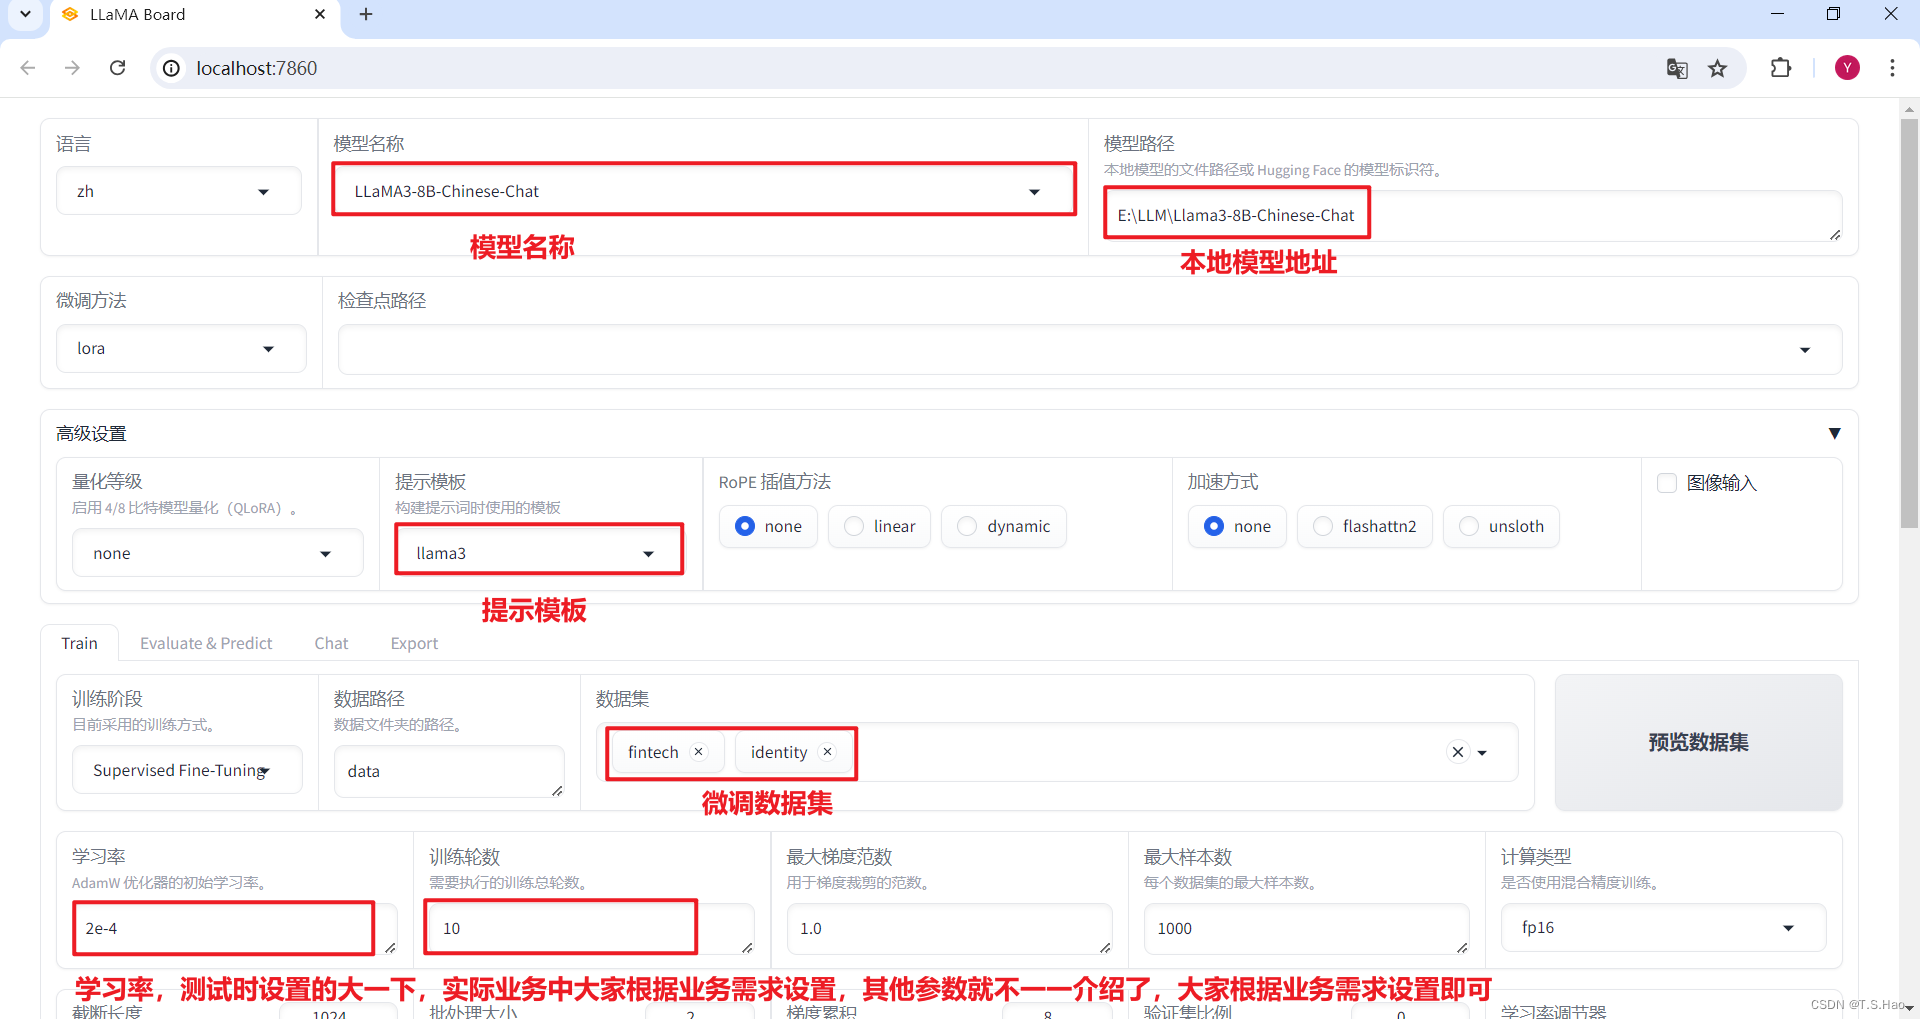
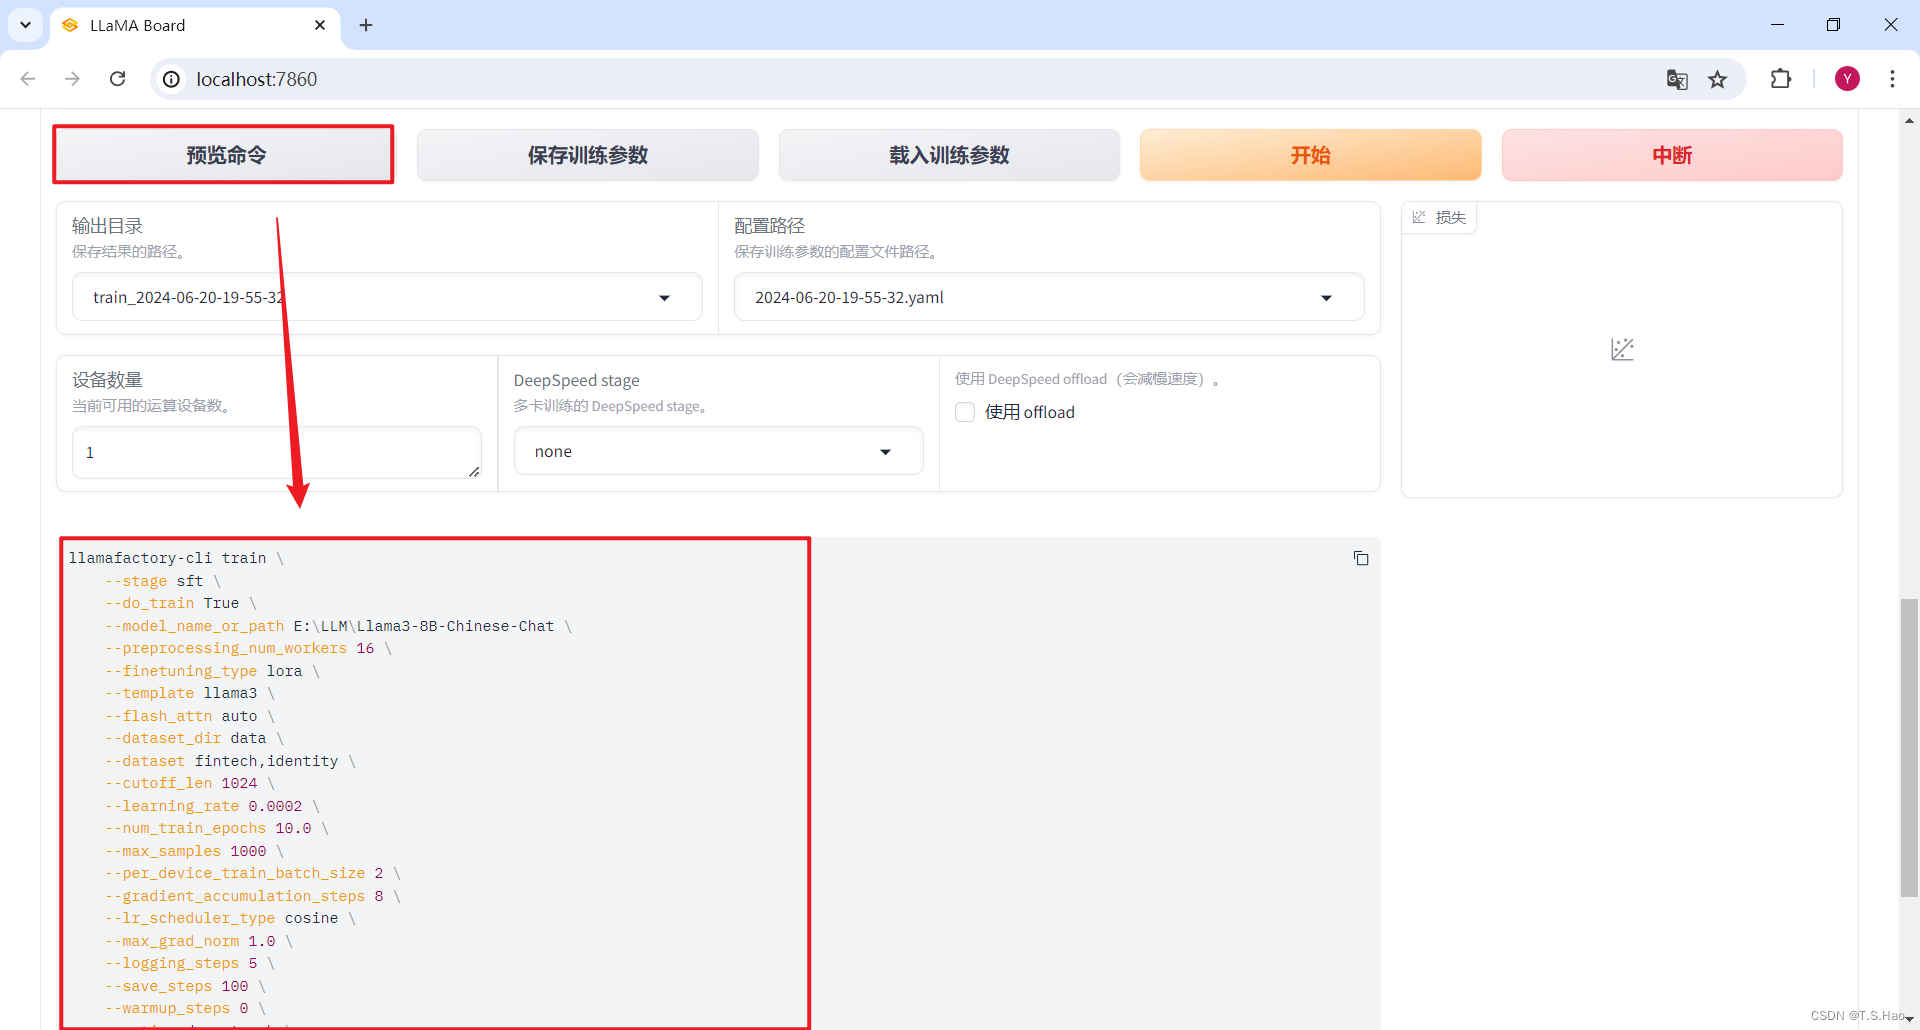
- 点击预览命令,生产微调指令
llamafactory-cli train \
    --stage sft \
    --do_train true \
    --model_name_or_path e:\llm\llama3-8b-chinese-chat \
    --preprocessing_num_workers 16 \
    --finetuning_type lora \
    --template llama3 \
    --flash_attn auto \
    --dataset_dir data \
    --dataset fintech,identity \
    --cutoff_len 1024 \
    --learning_rate 0.0002 \
    --num_train_epochs 10.0 \
    --max_samples 1000 \
    --per_device_train_batch_size 2 \
    --gradient_accumulation_steps 8 \
    --lr_scheduler_type cosine \
    --max_grad_norm 1.0 \
    --logging_steps 5 \
    --save_steps 100 \
    --warmup_steps 0 \
    --optim adamw_torch \
    --packing false \
    --report_to none \
    --output_dir saves\llama3-8b-chinese-chat\lora\train_2024-06-20-19-55-32 \
    --fp16 true \
    --plot_loss true \
    --ddp_timeout 180000000 \
    --include_num_input_tokens_seen true \
    --lora_rank 8 \
    --lora_alpha 16 \
    --lora_dropout 0 \
    --lora_target all
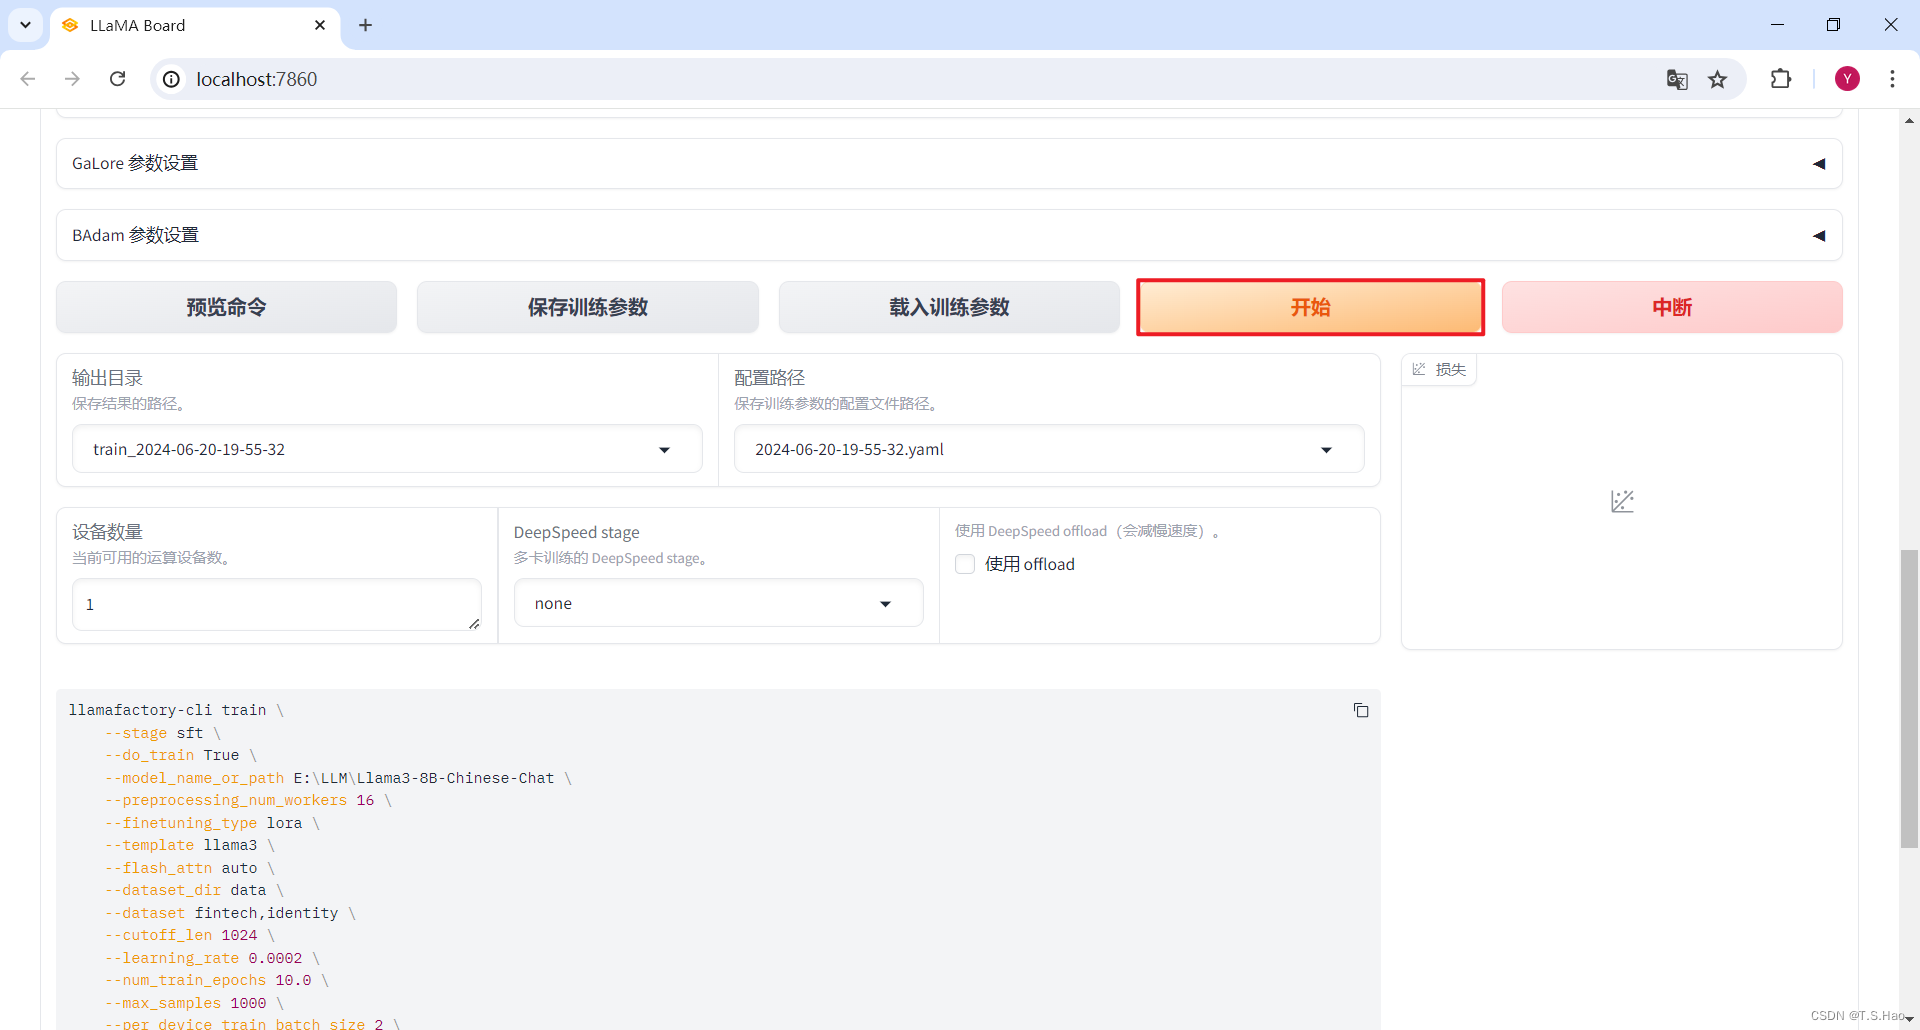
2、开始微调
- 第一种方法启动微调
- 在web ui中点击
开始
- 第二种方法启动微调
- 将微调指令构建成
build/train_llama3_lora.yaml配置文件,内容如下
stage: sft
do_train: true
model_name_or_path: e:\llm\llmllama3-8b-chinese-chat
preprocessing_num_workers: 16
finetuning_type: lora
template: llama3
flash_attn: auto
dataset_dir: data
dataset: fintech,identity
cutoff_len: 1024
learning_rate: 0.0002
num_train_epochs: 10.0
max_samples: 1000
per_device_train_batch_size: 2
gradient_accumulation_steps: 8
lr_scheduler_type: cosine
max_grad_norm: 1.0
logging_steps: 5
save_steps: 100
warmup_steps: 0
optim: adamw_torch
packing: false
report_to: none
output_dir: saves\llama3-8b-chinese-chat\lora\train_2024-06-20-19-55-32
fp16: true
plot_loss: true
ddp_timeout: 180000000
include_num_input_tokens_seen: true
lora_rank: 8
lora_alpha: 16
lora_dropout: 0
lora_target: all

- 在llama-factory项目的根目录执行以下命令开始微调
llamafactory-cli train build/train_llama3_lora.yaml
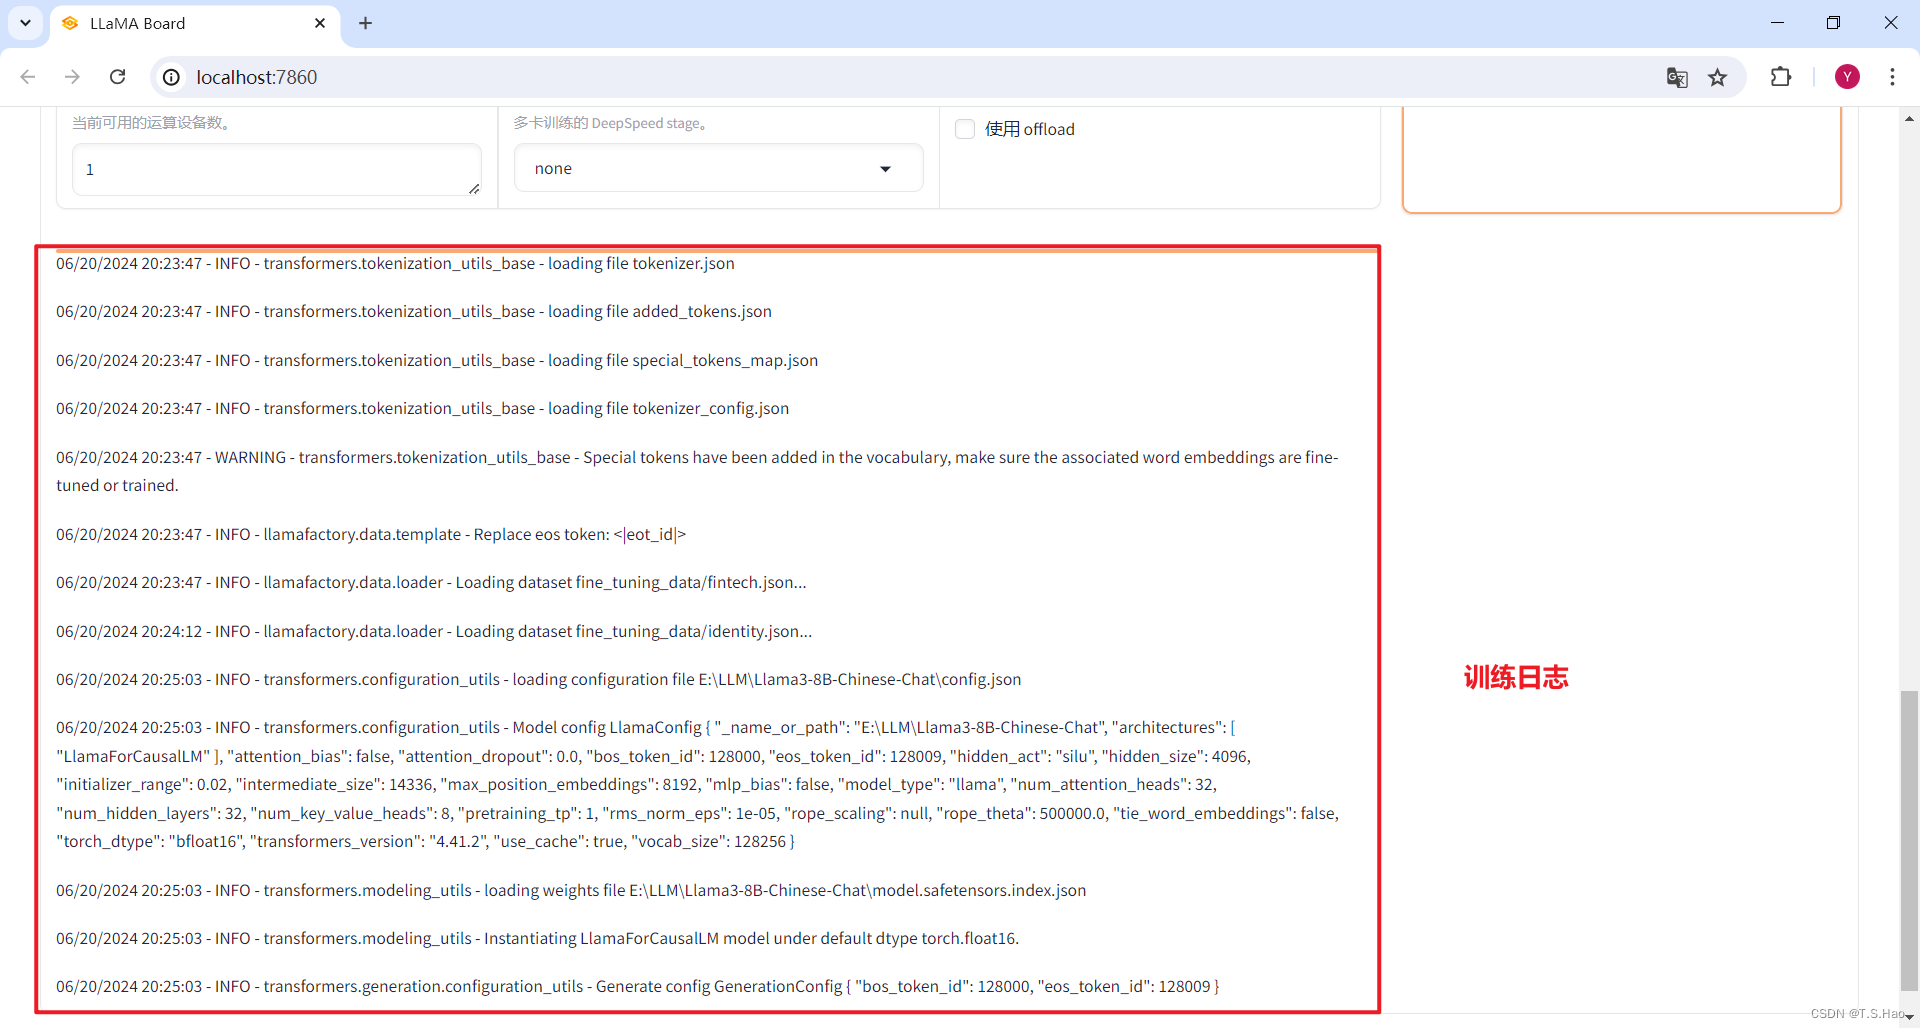
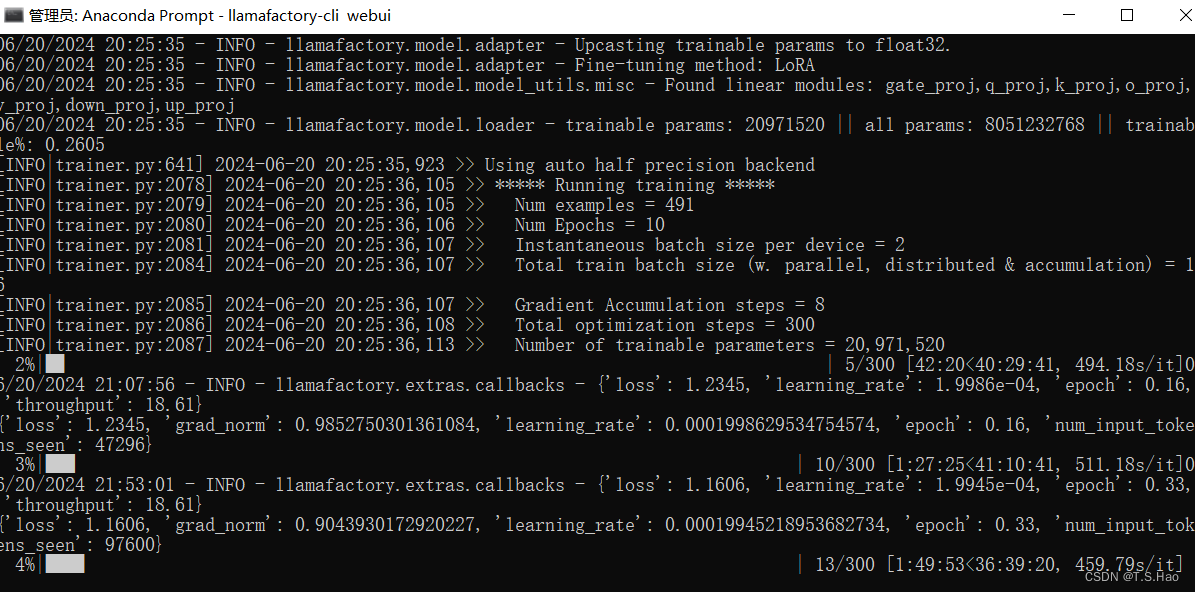
- 开始微调,需要耐心等待
- 微调过程中要经常检测一下显卡的运行情况,防止“爆显存”导致微调任务终止
# linux
watch -n 1 nvidia-smi
# windows
nvidia-smi.exe -l
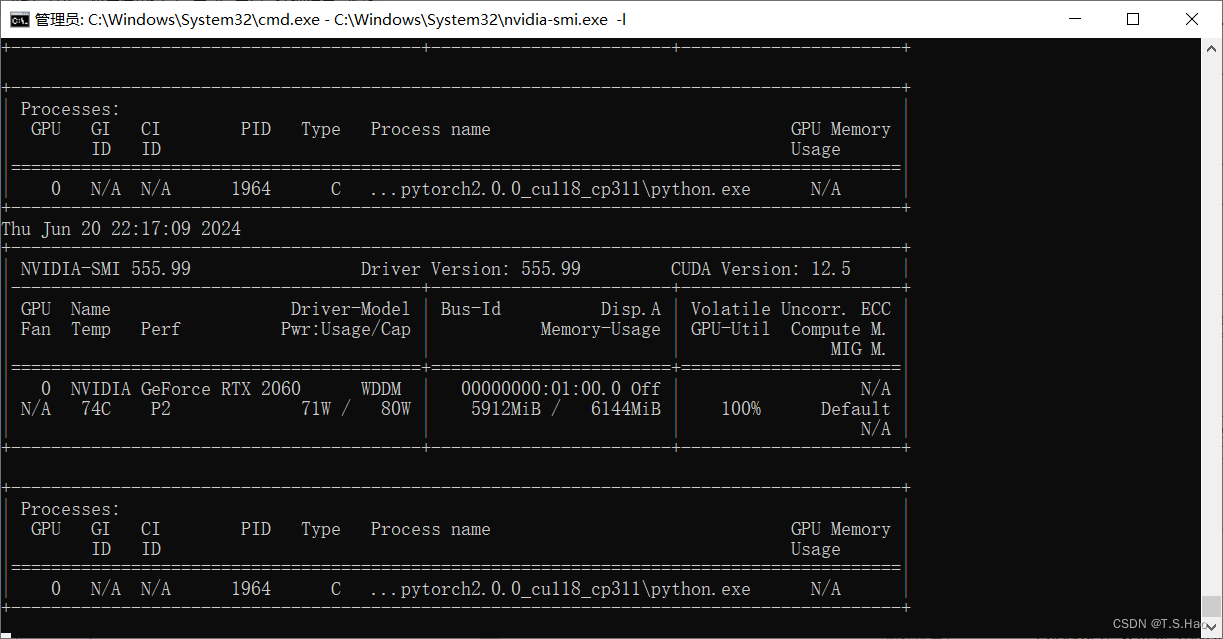
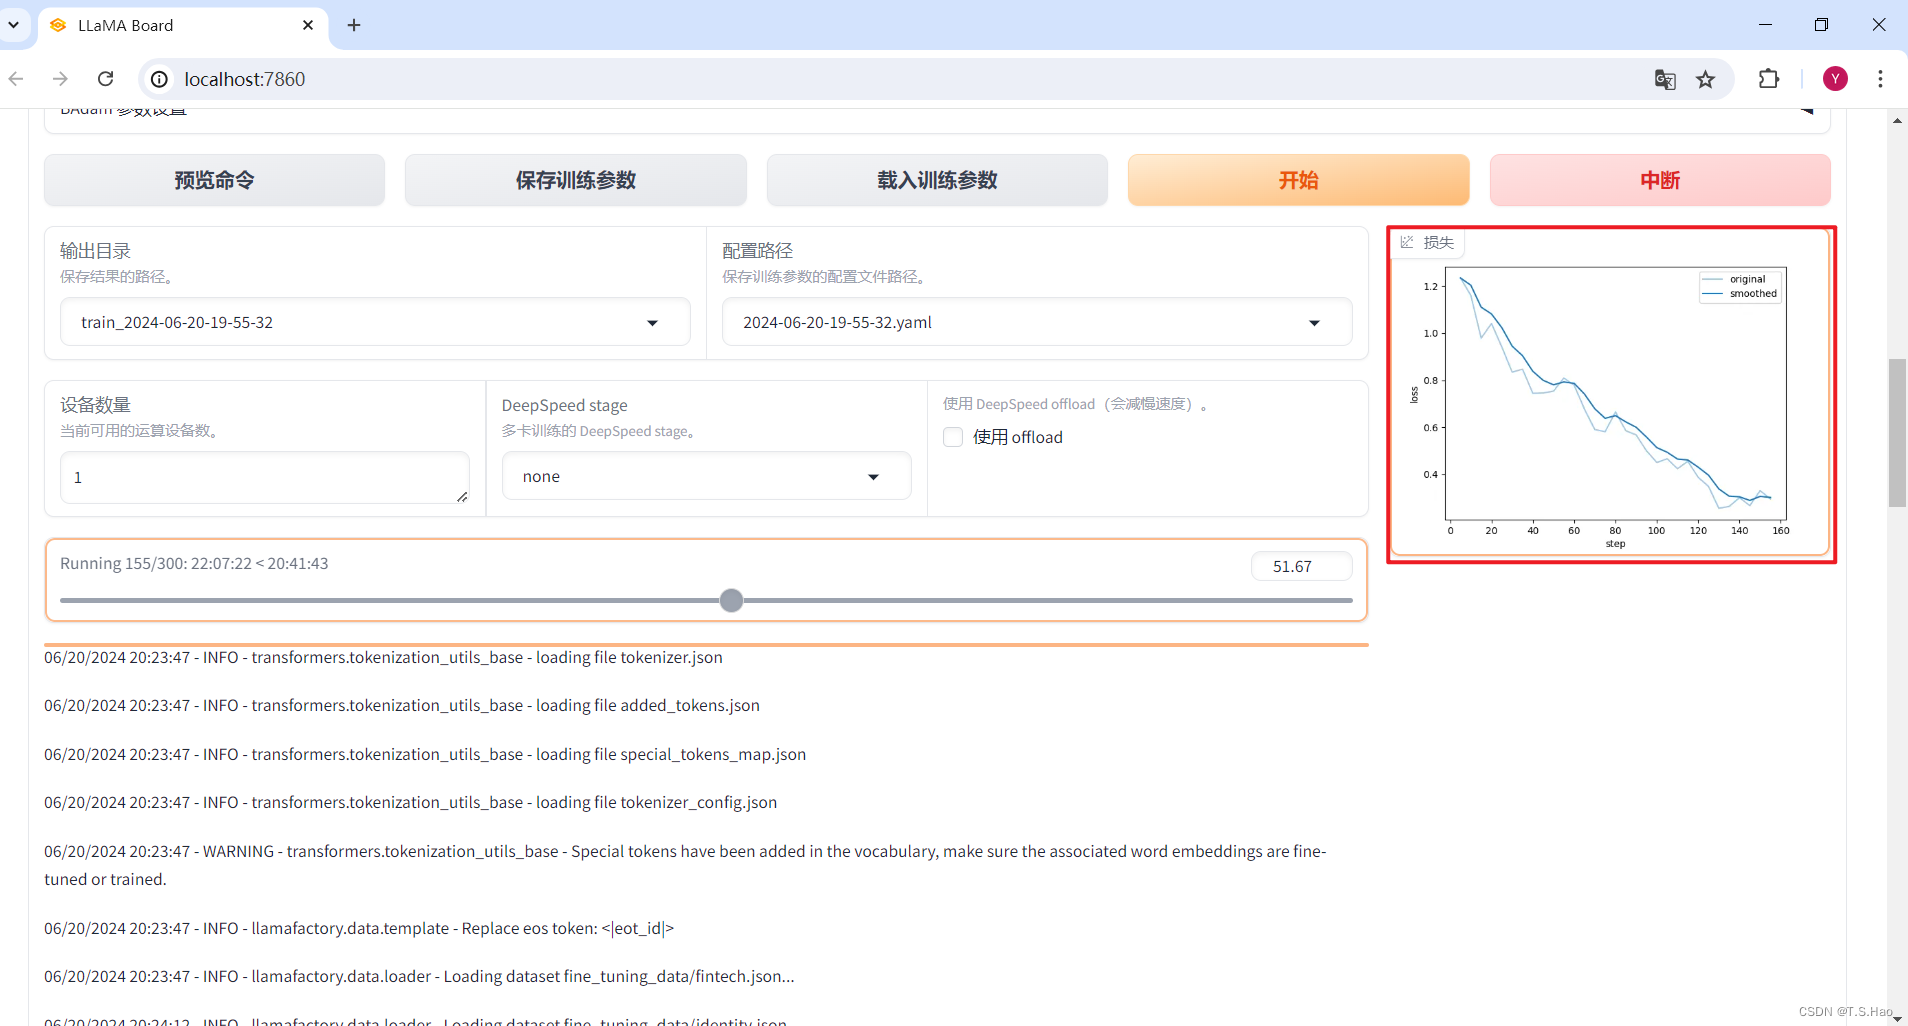
- 开始微调后,可以观看终端进度条检测微调任务进程
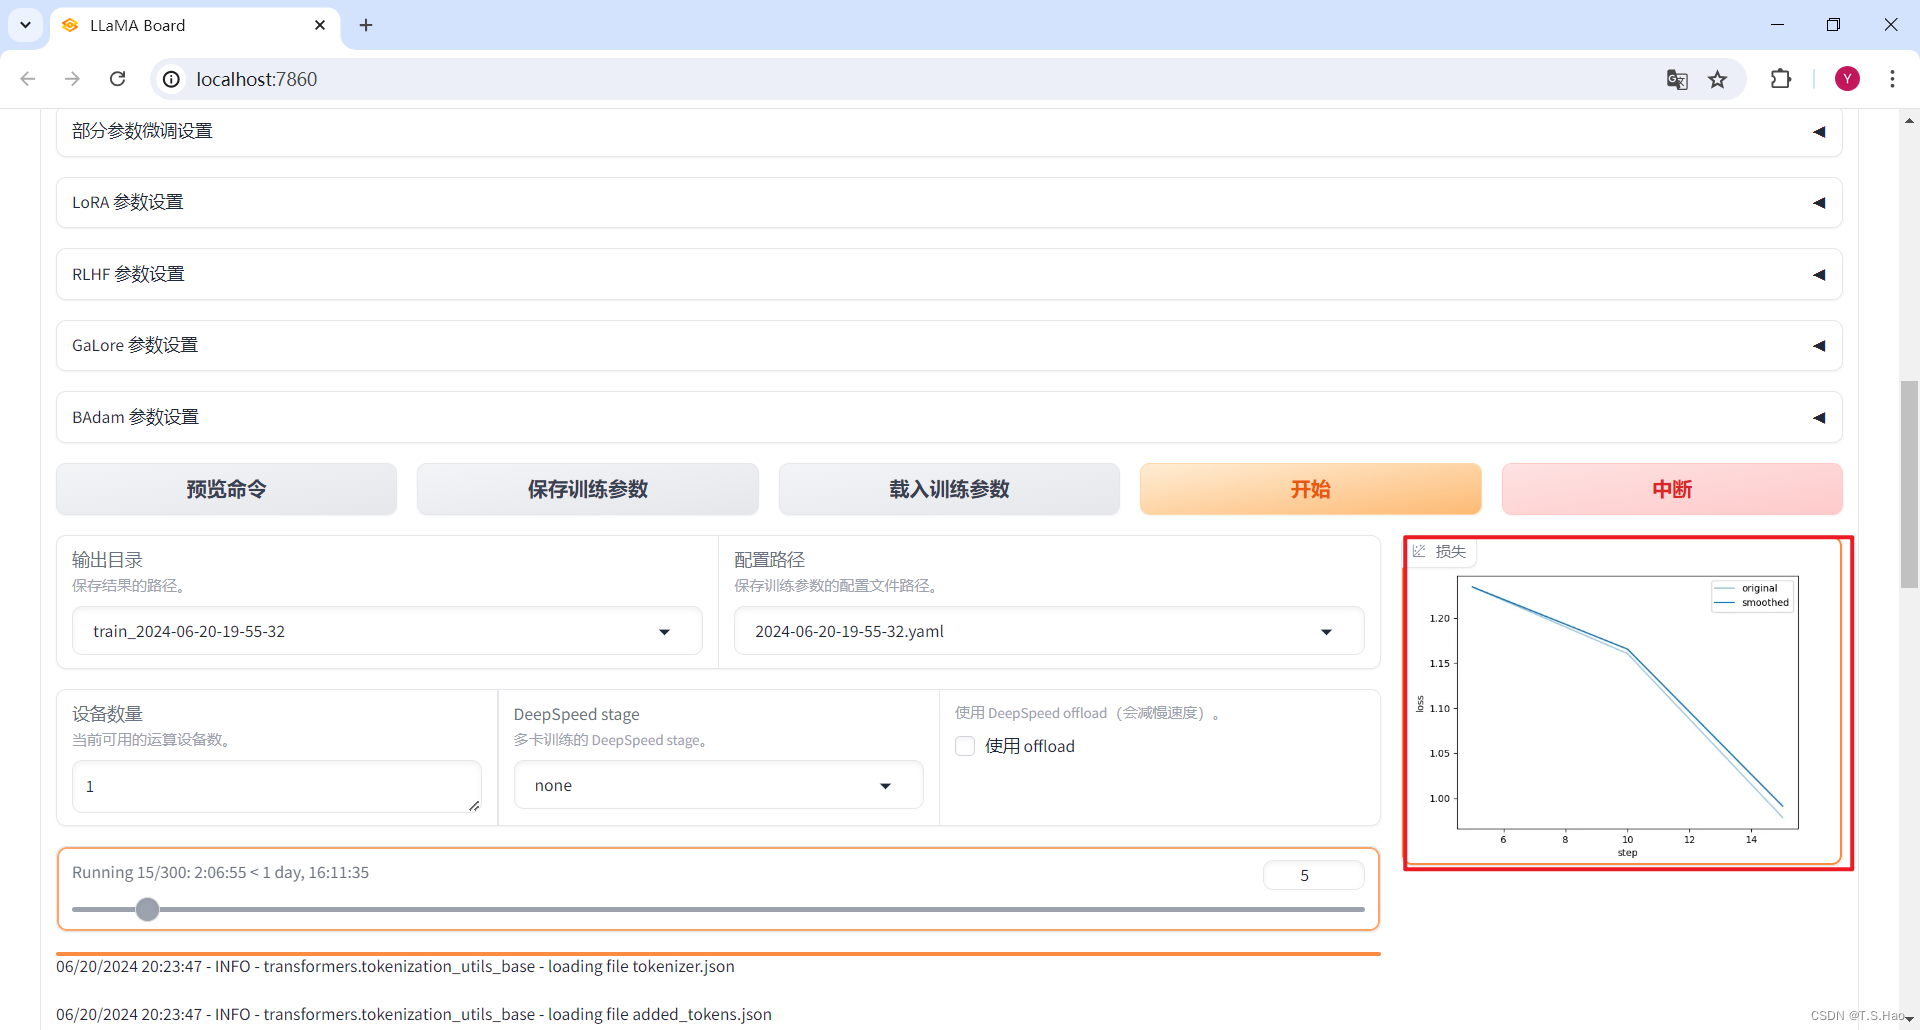
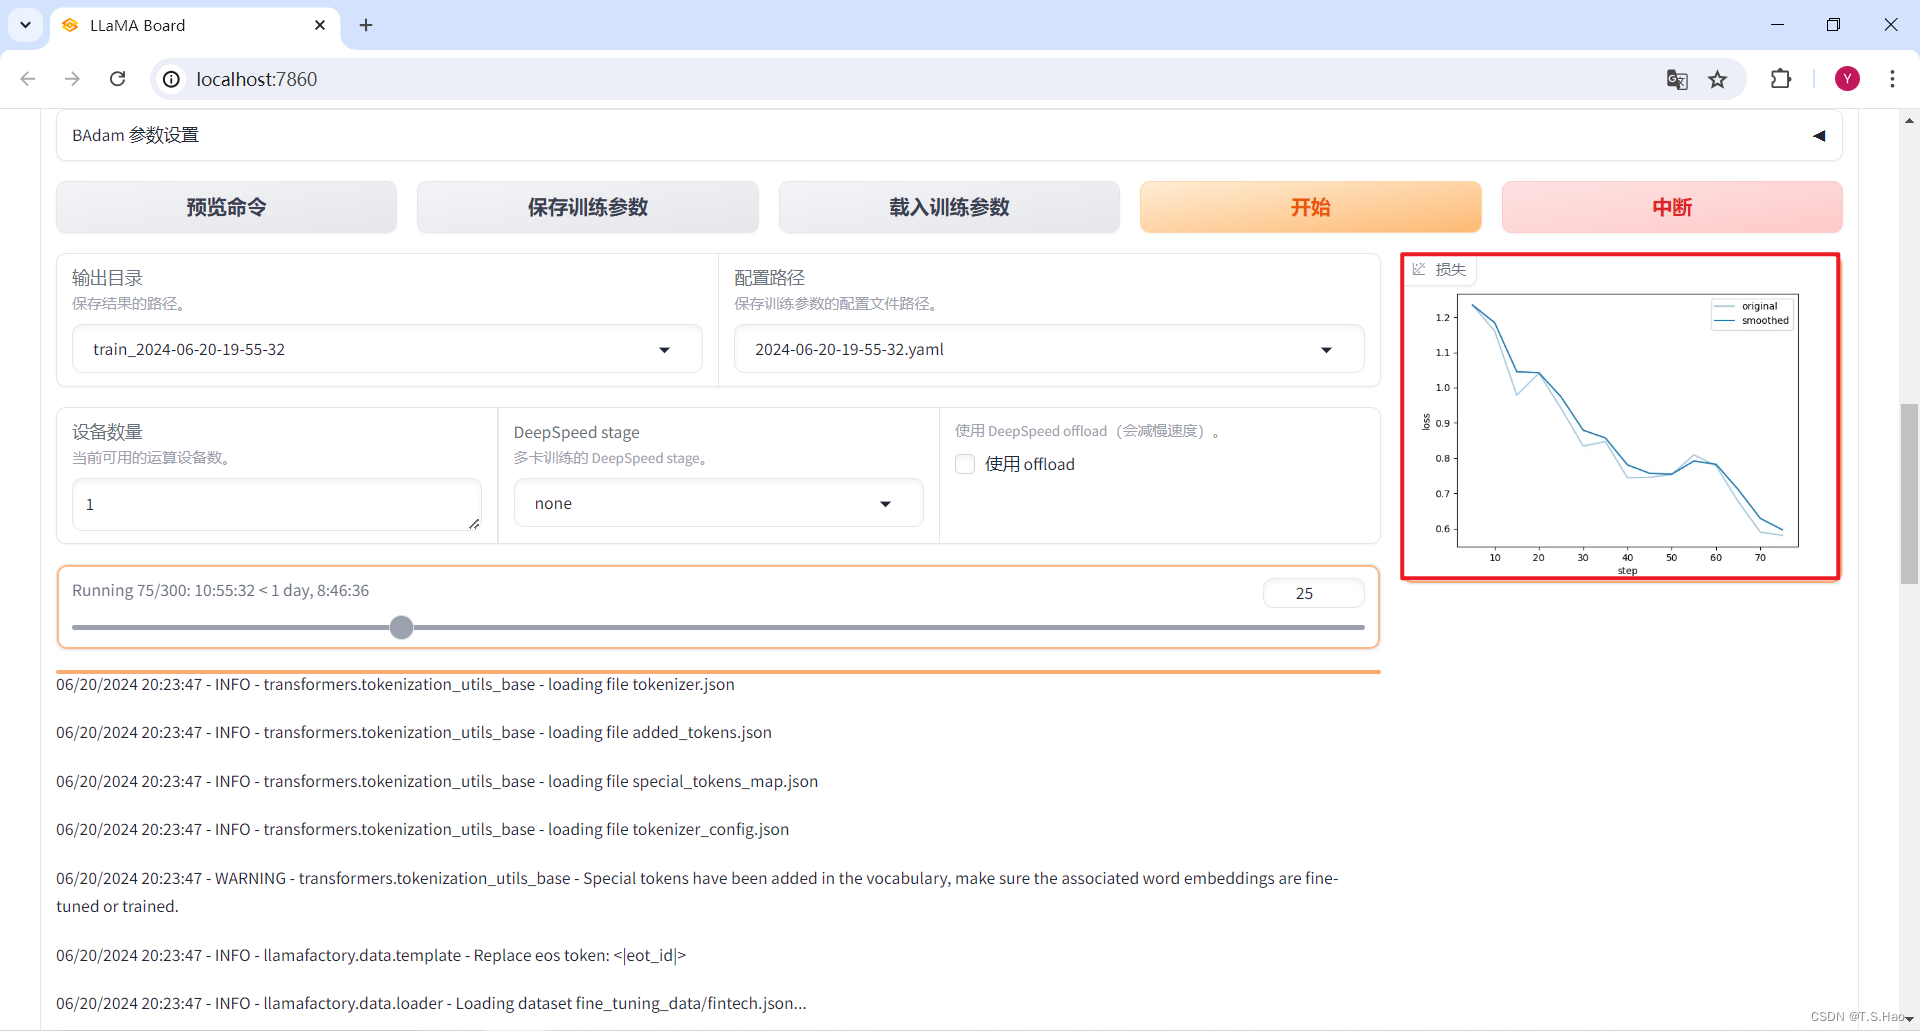
- 还可以在web ui中观看微调过程中的loss下降图
3、查看微调结果
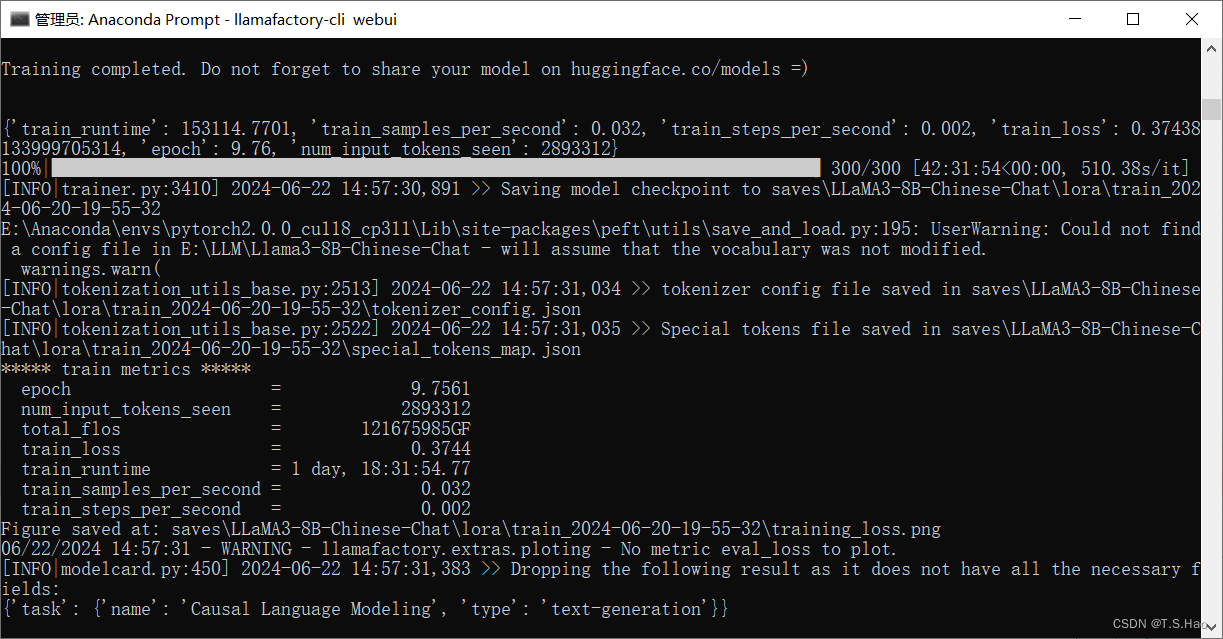
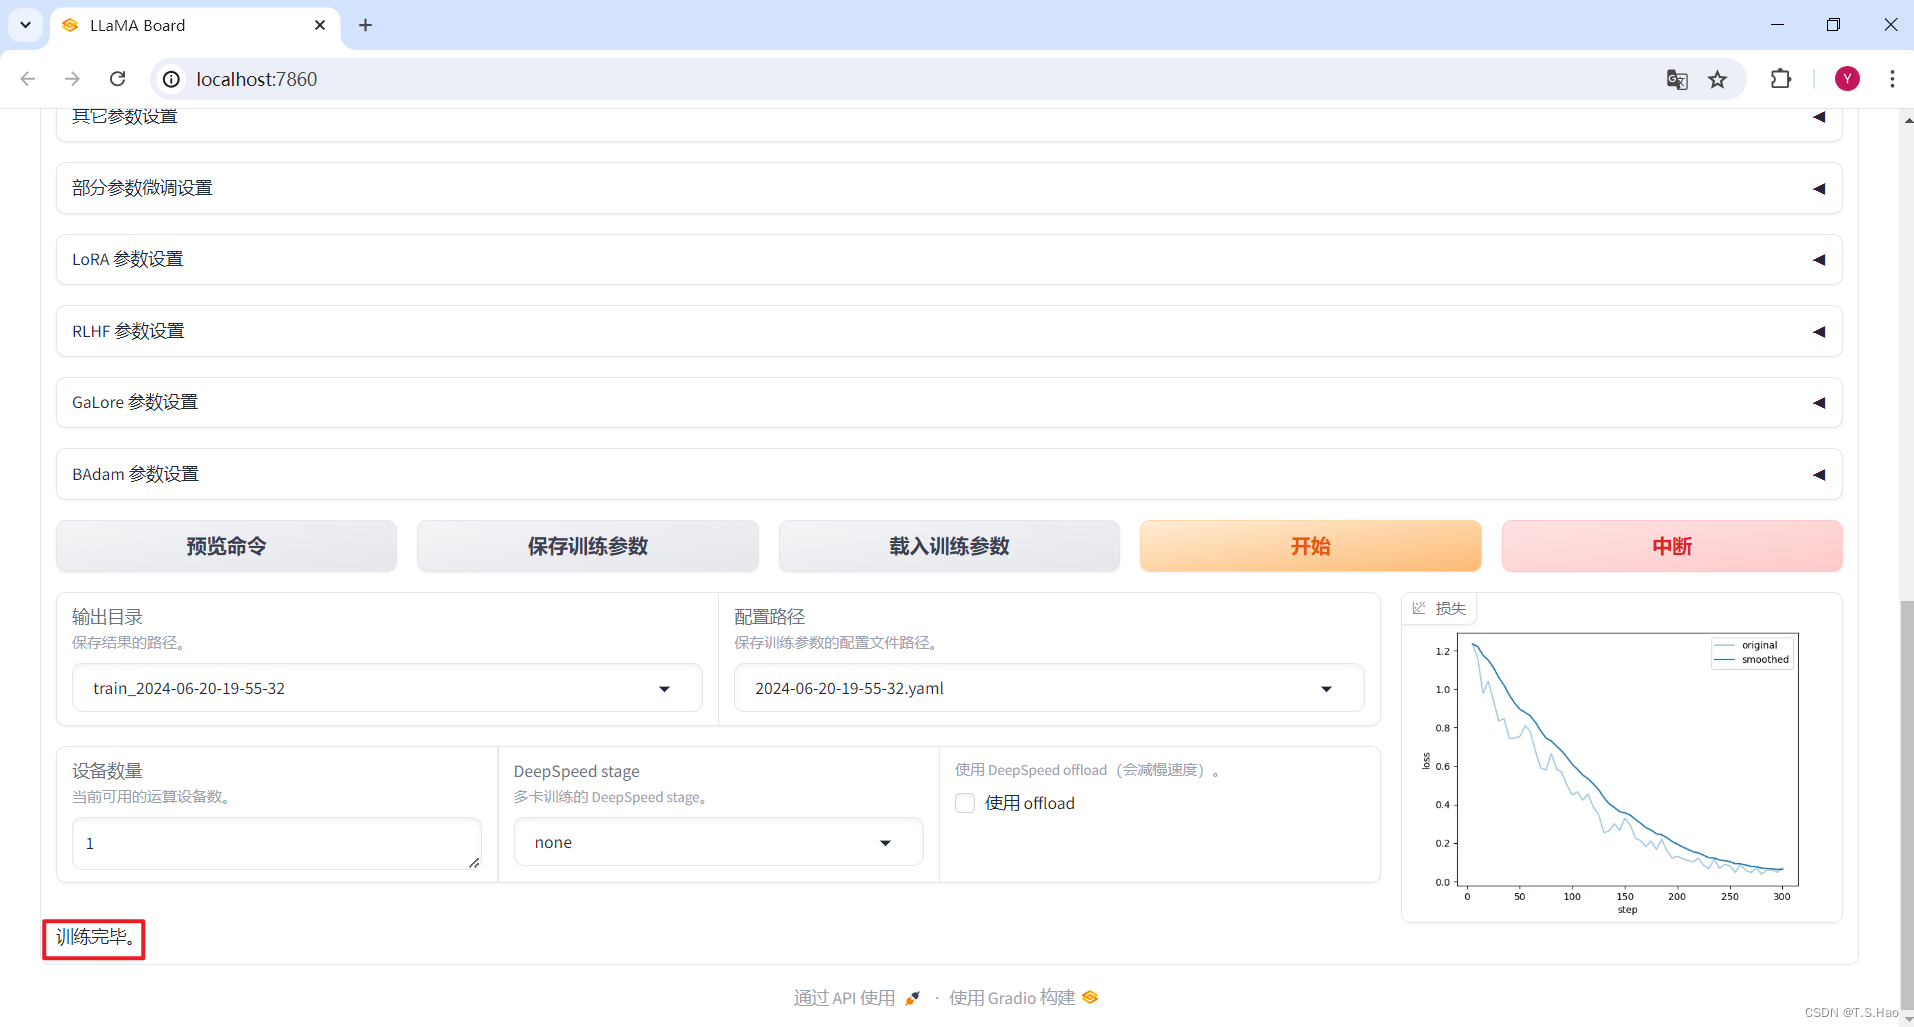
- 微调完成后,终端和web ui会有相应的提示
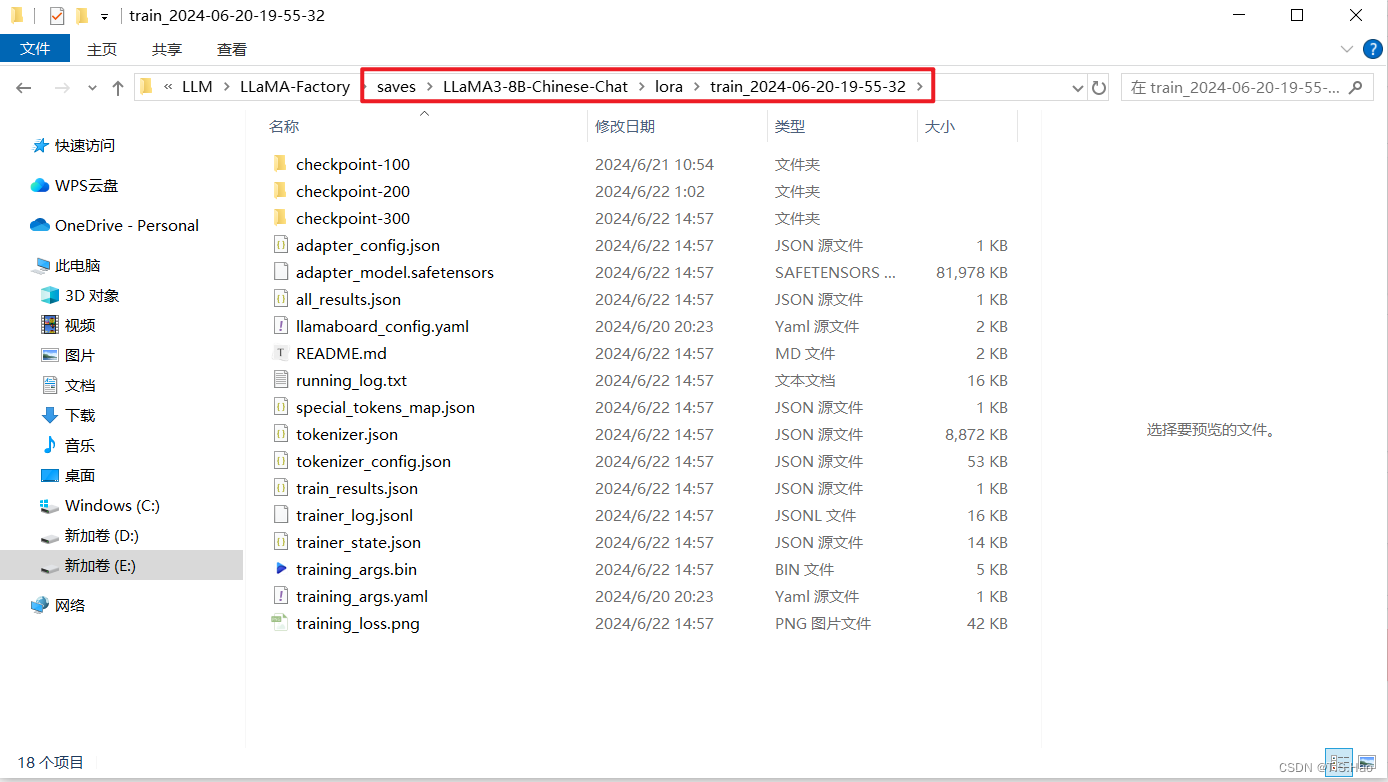
- 微调完成后,在指定的文件夹下可以查看微调对应的模型参数
五、检验微调结果
1、加载验证集进行模型验证
- 在微调成功后,大家需要根据具体业务情况,将准备好的验证数据集加载进来,用于验证模型的微调情况
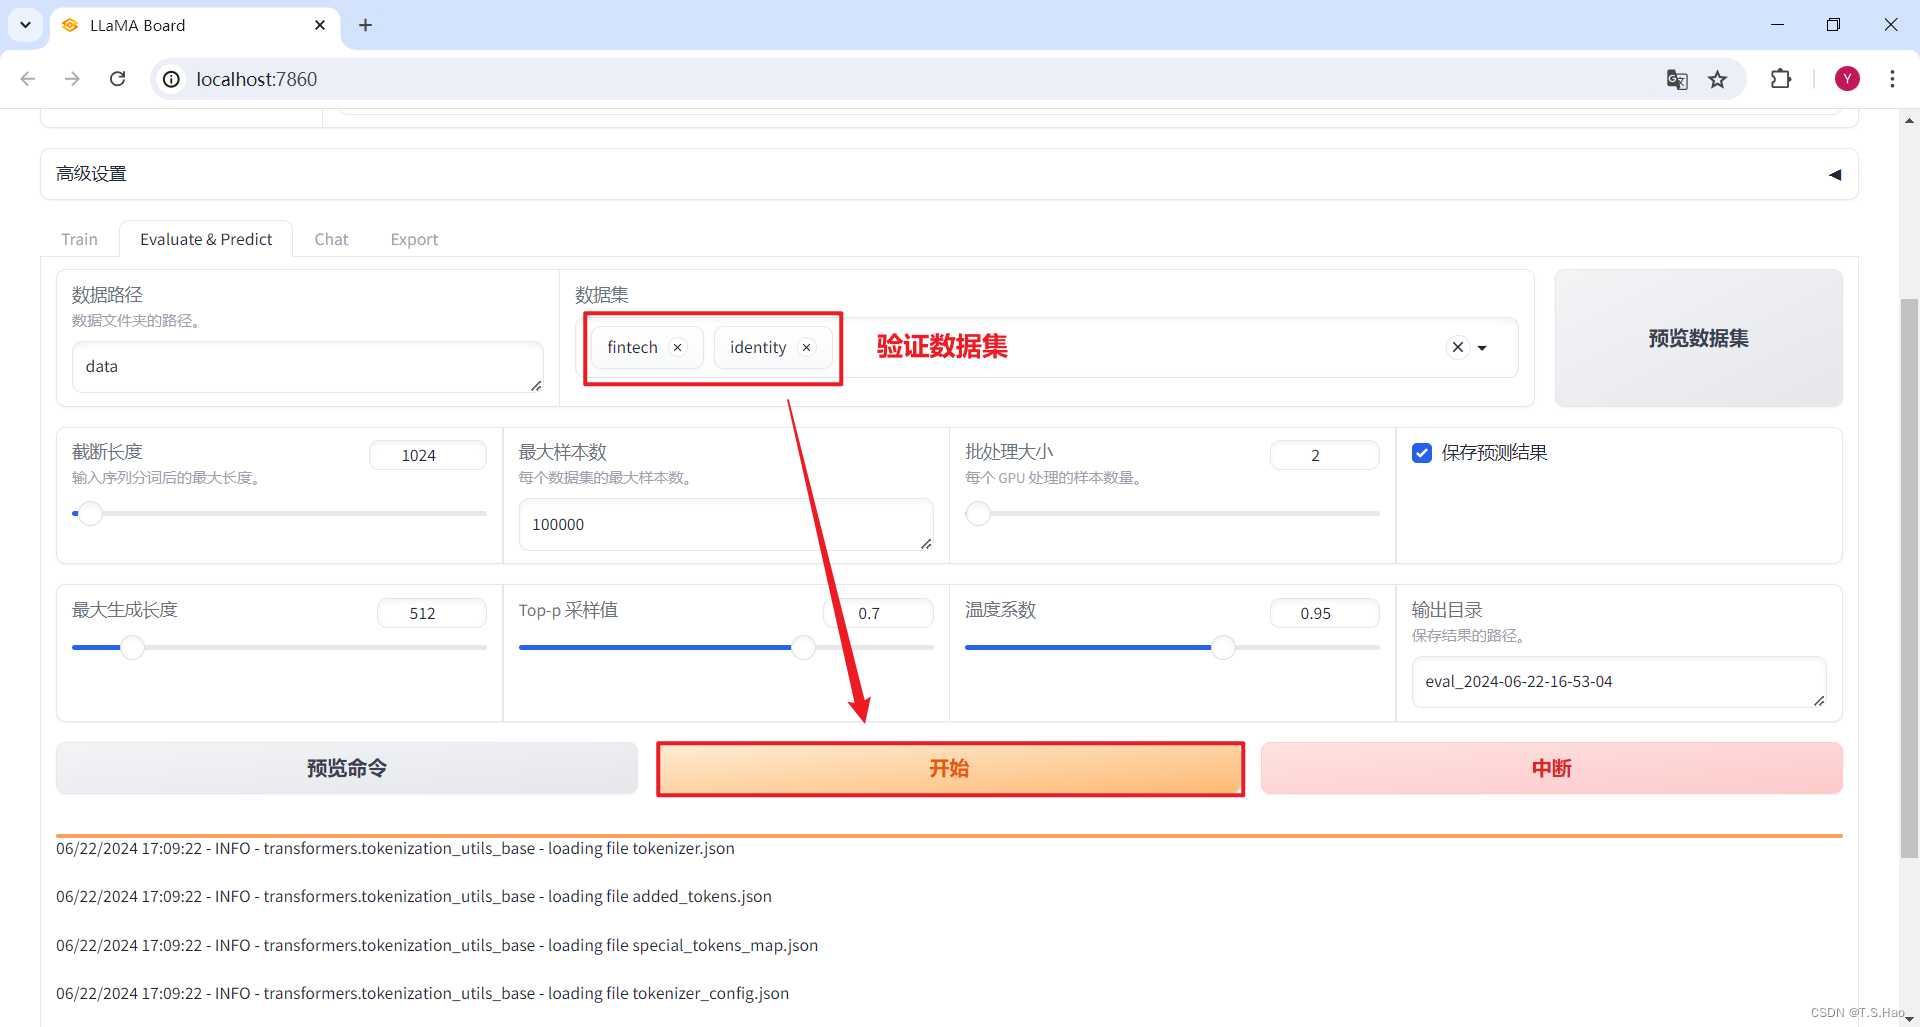
- 这里在进行验证的过程中,需要用到
jieba、nltk、rouge-chinese这三个nlp常用的工具包,大家如果没有安装,可以在执行验证前进行安装
pip install jieba nltk rouge-chinese
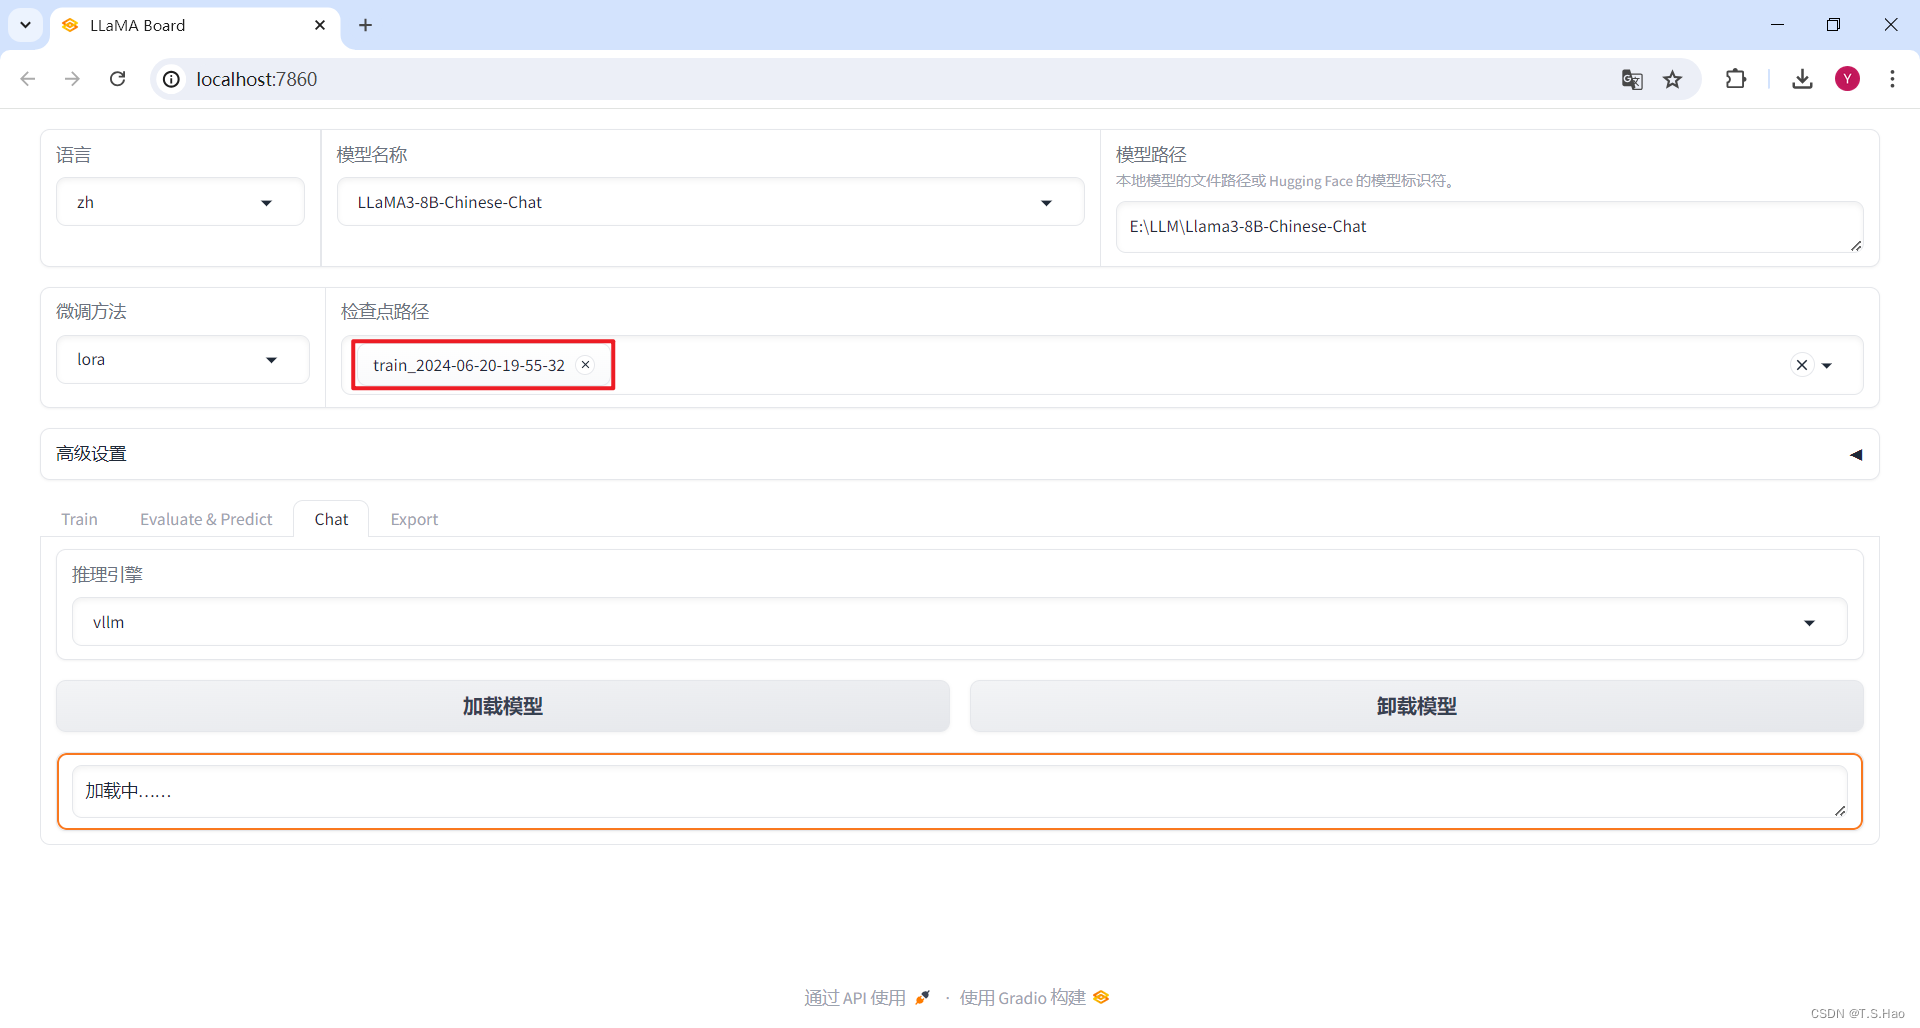
2、加载微调前后的模型进行推理,对比结果
- 这里用到了vllm推理框架,没有安装的同学也需要安装一下
# linux
pip install vllm
- 加载预训练模型
llama3-8b-chinese-chat
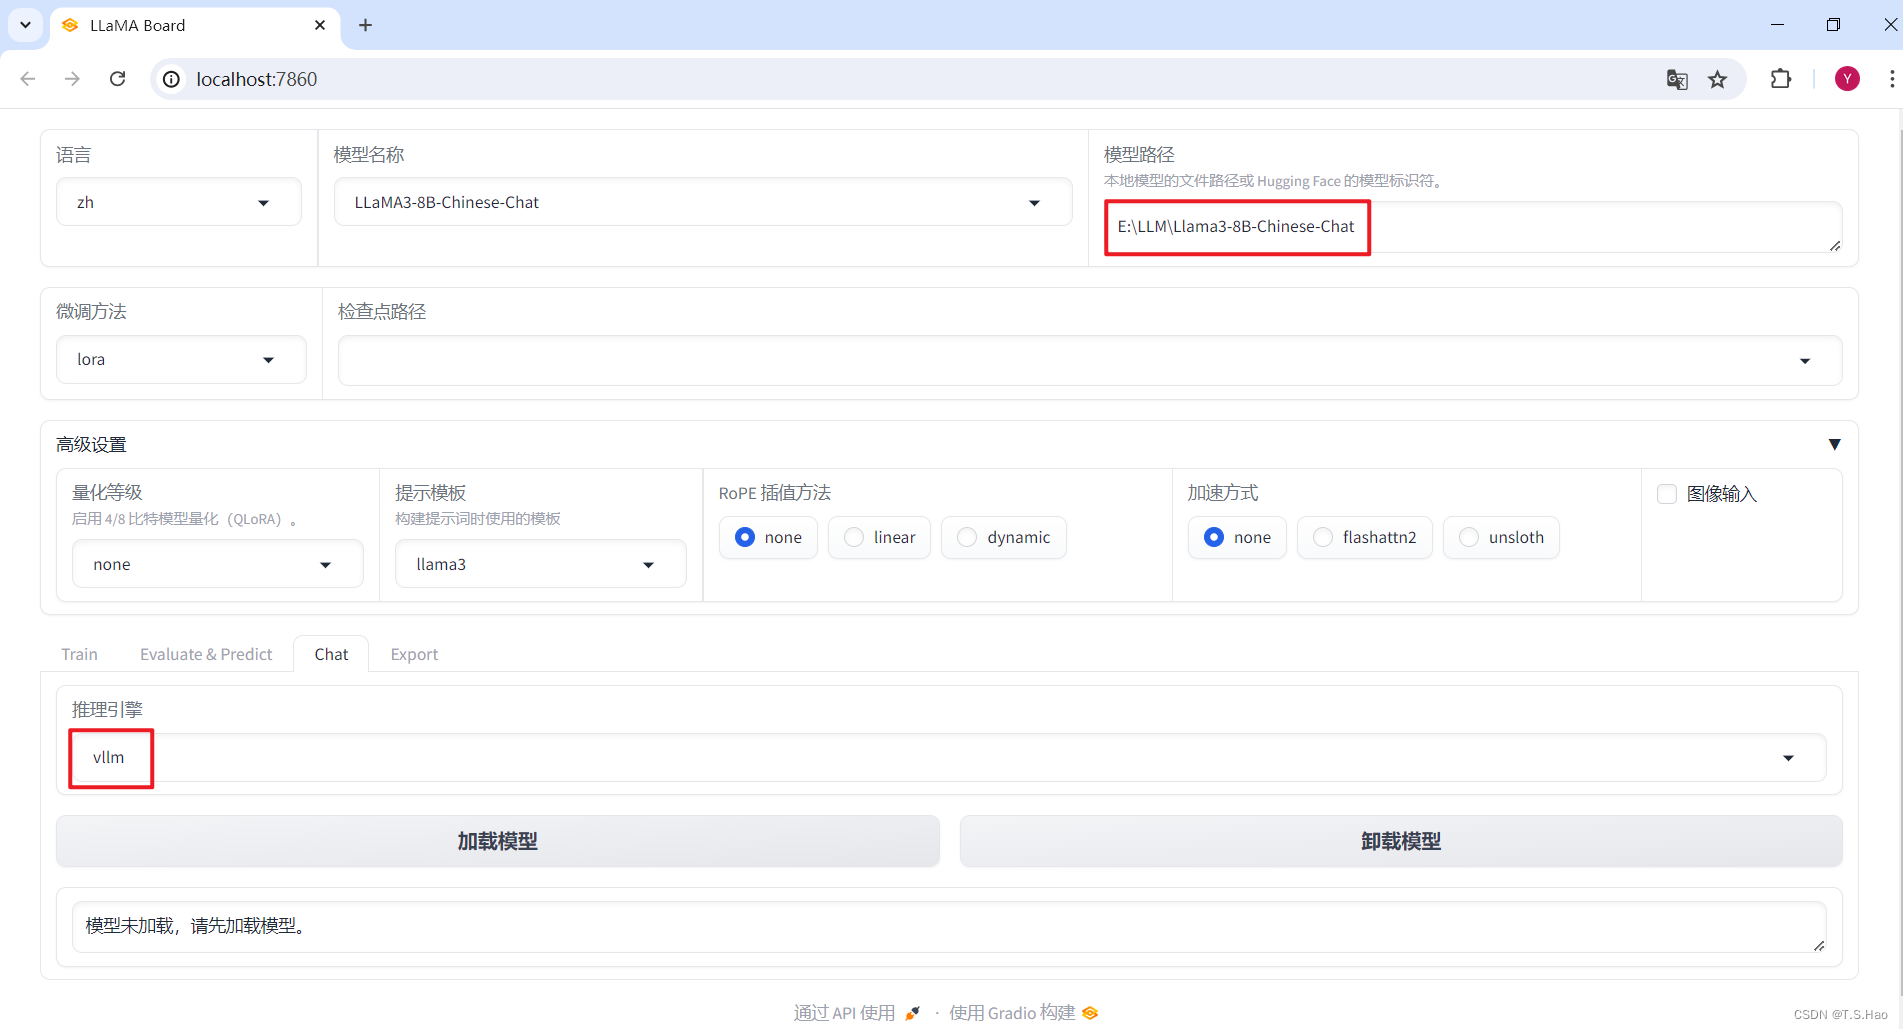
- 加载成功后,就可以进行对话了
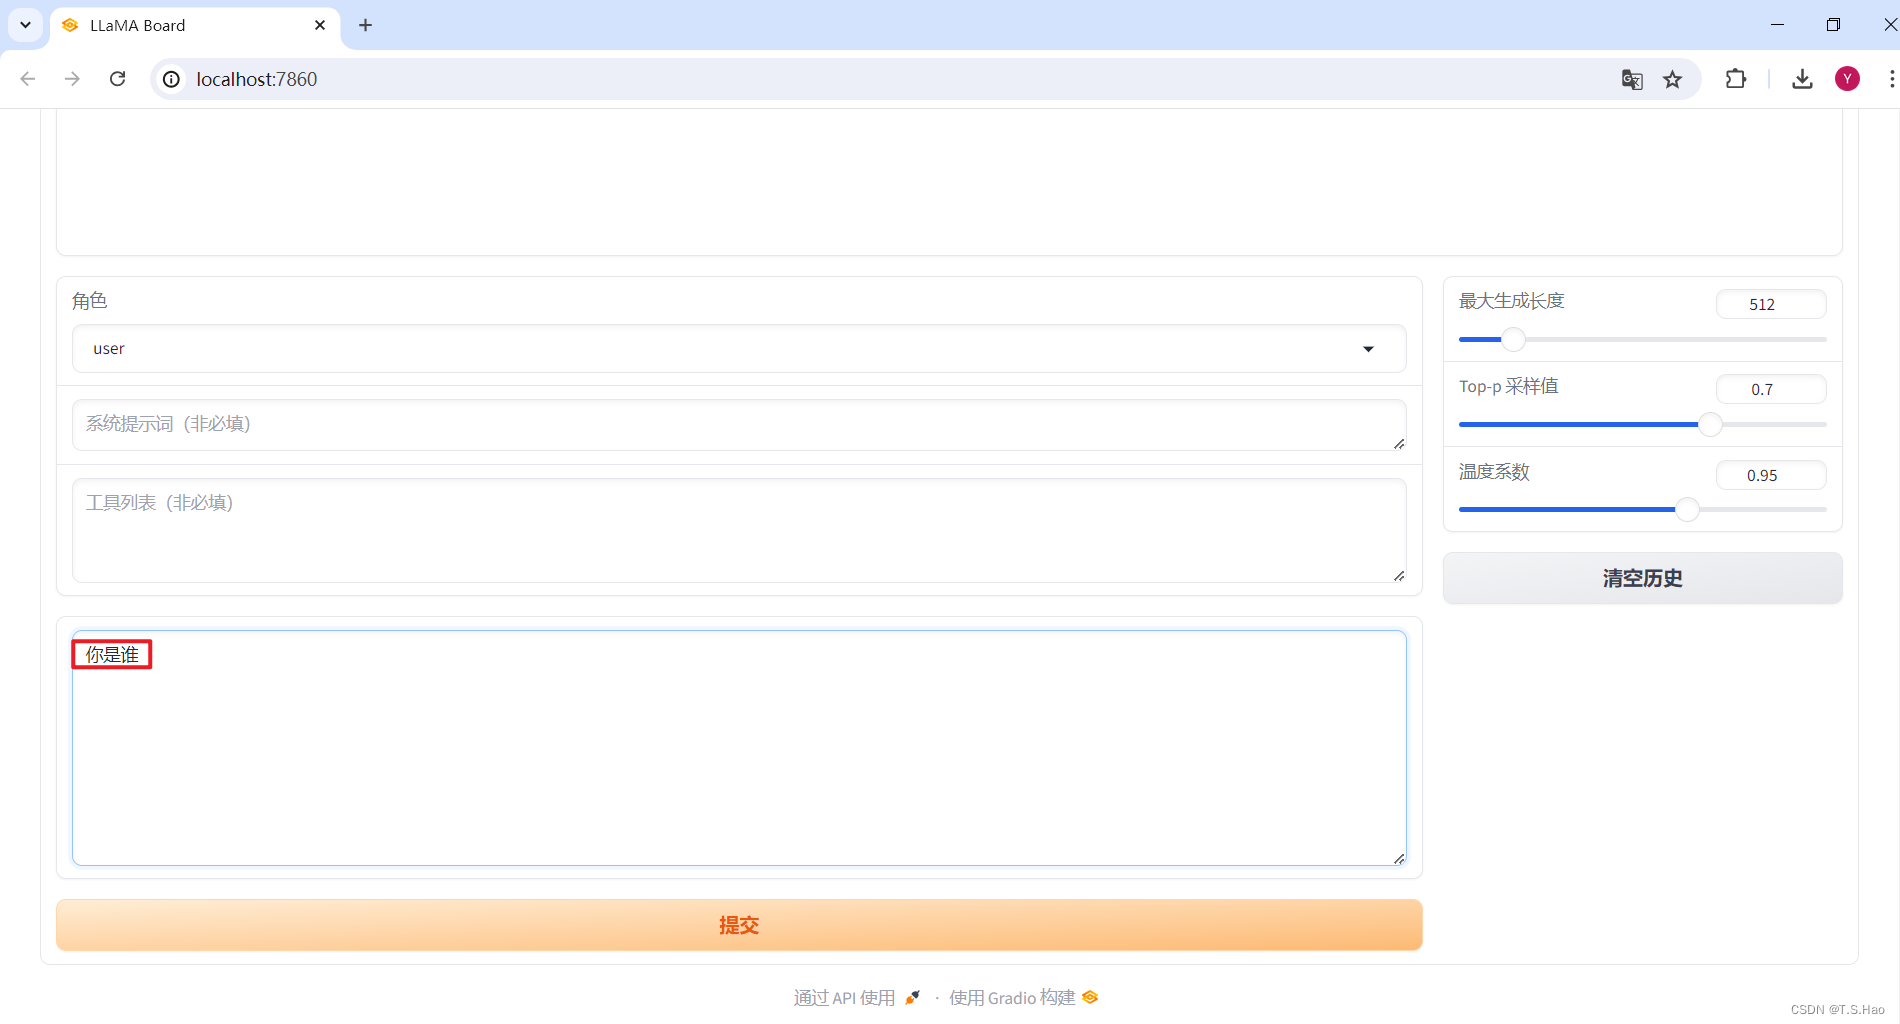
- 这是微调前的模型回答
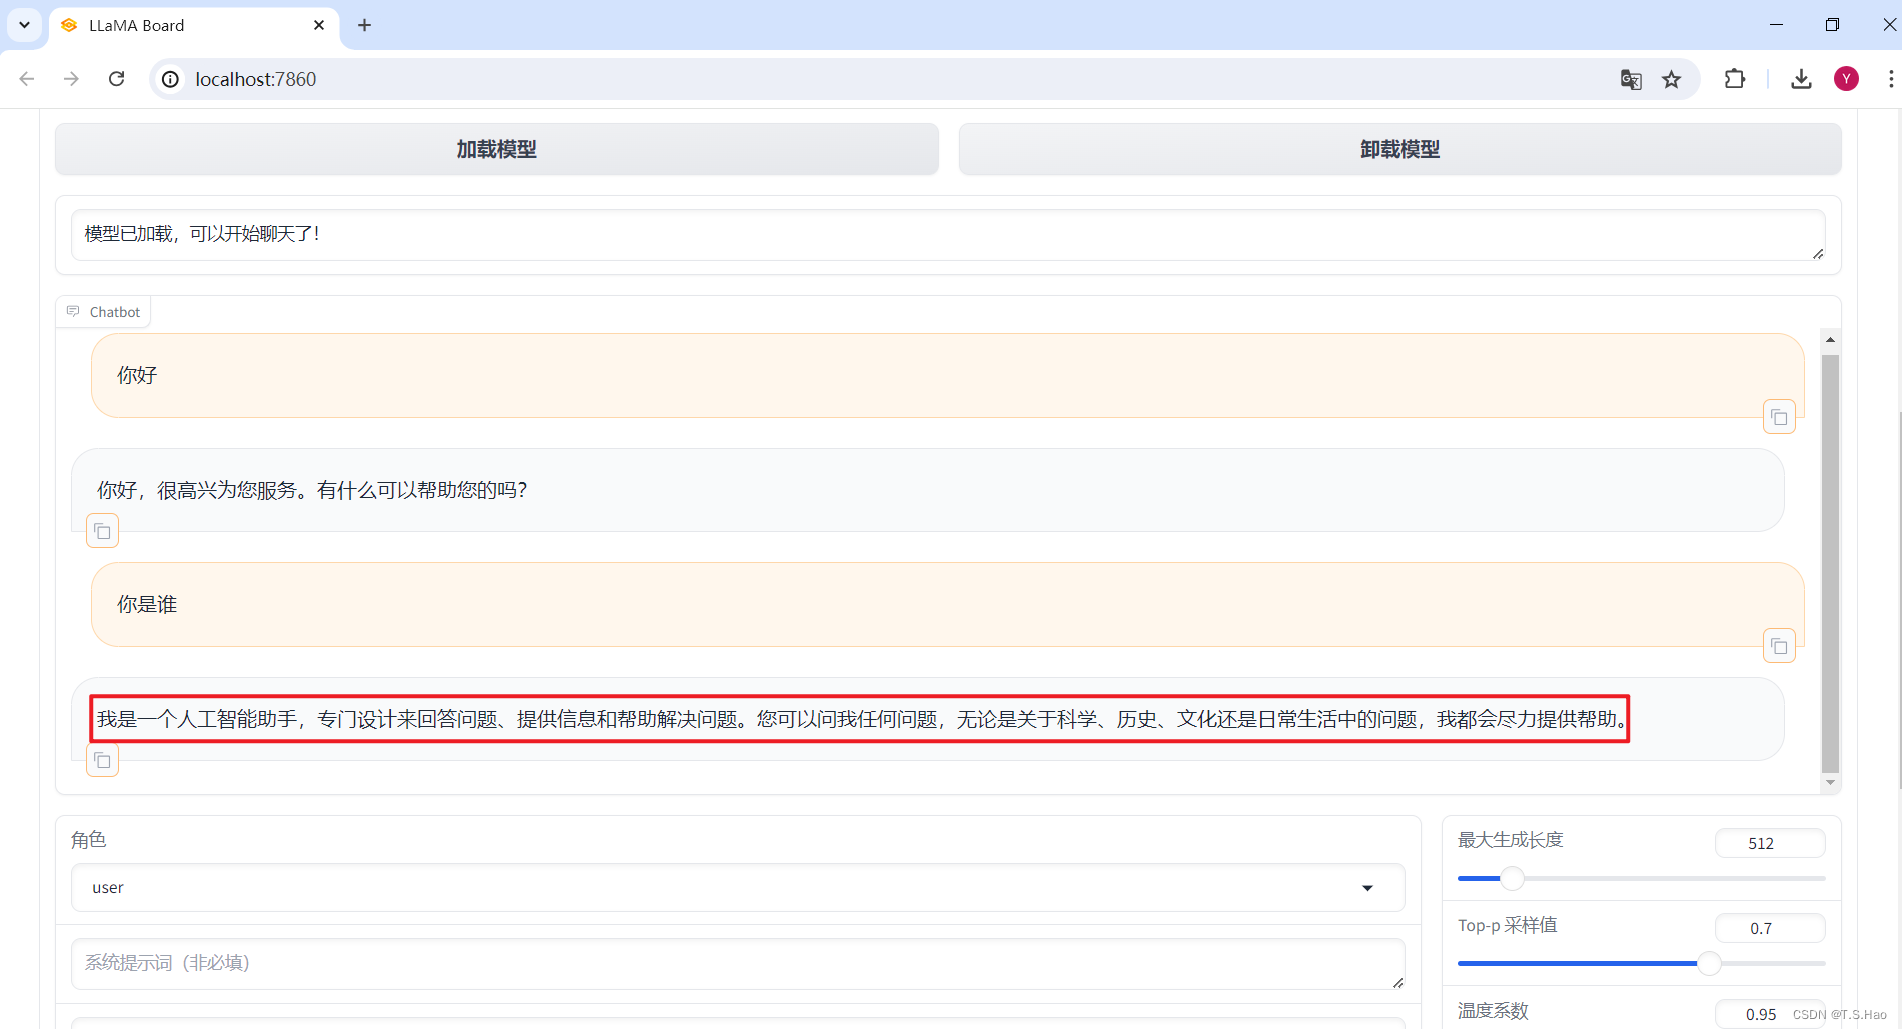
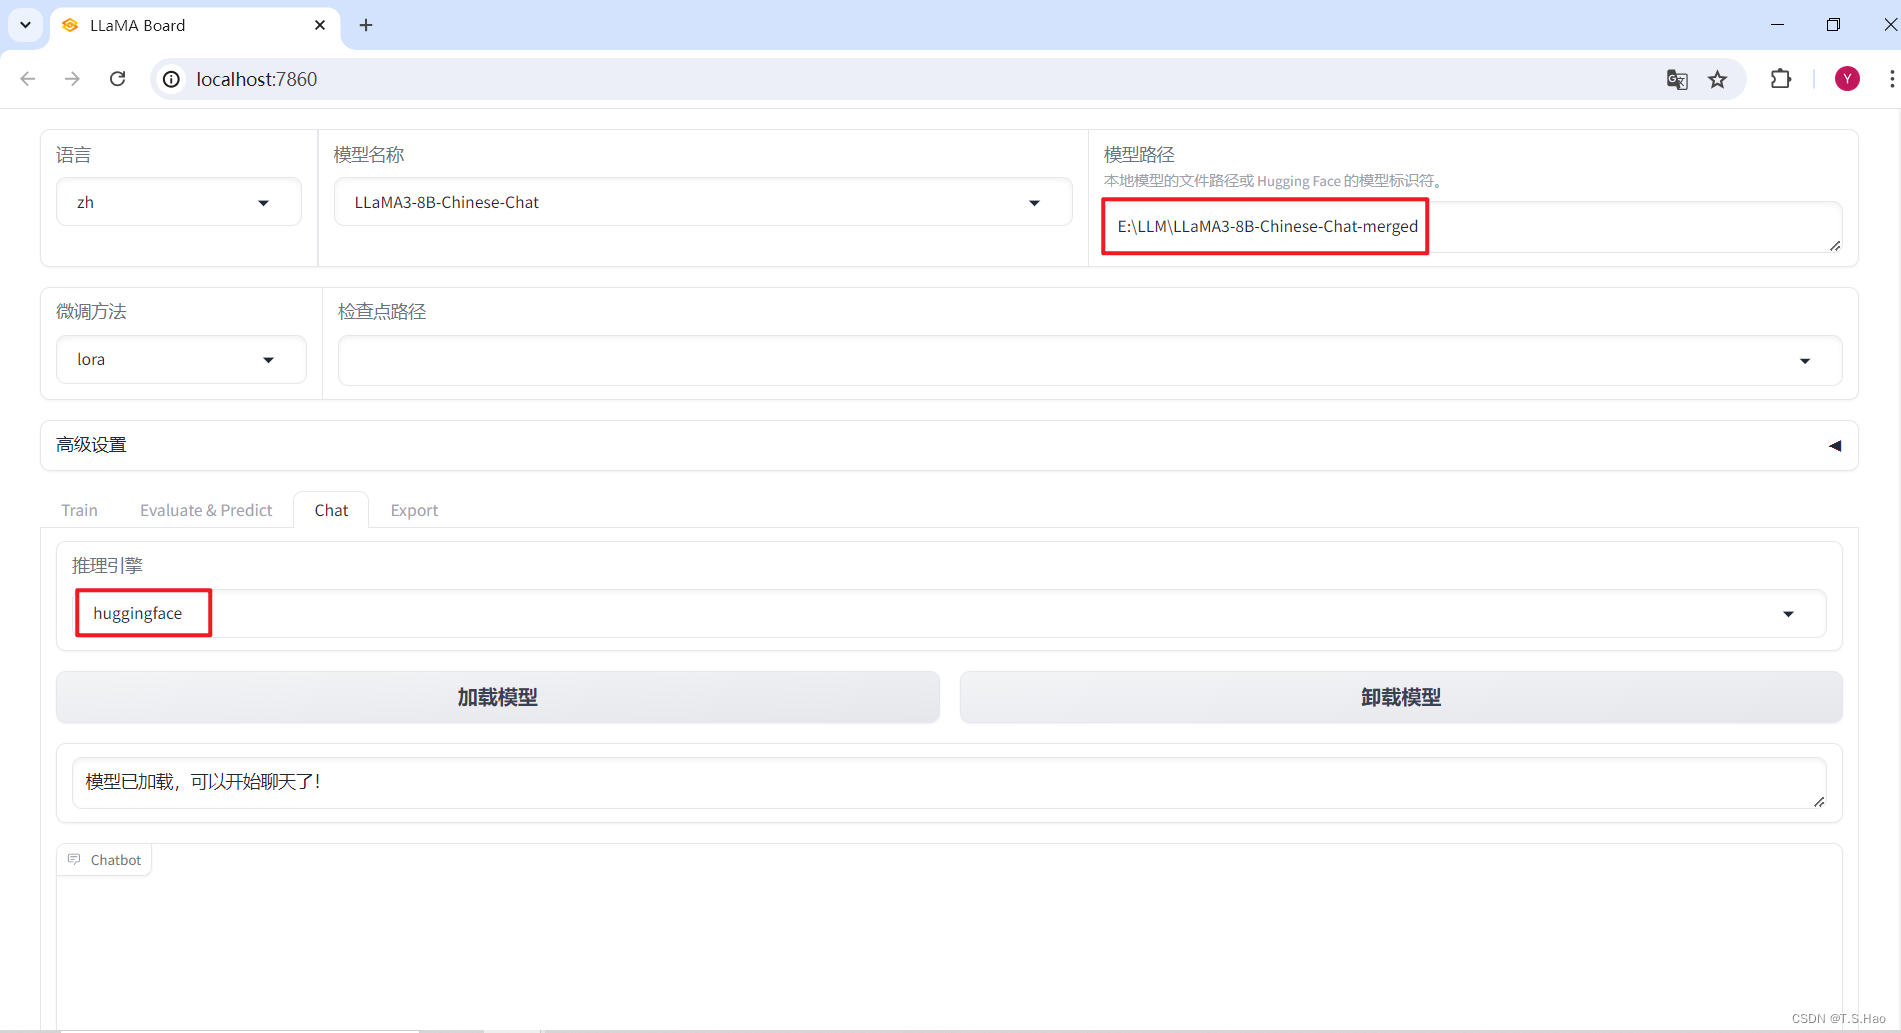
- 加载微调后的预训练模型
llama3-8b-chinese-chat
- 这是微调后的模型回答,从结果可以看出,我们的微调是有效的

3、将训练后的lora adapter和基座模型合并
1、web ui界面合并
- 根据业务指定好合并参数,点击导出,耐心等待即可
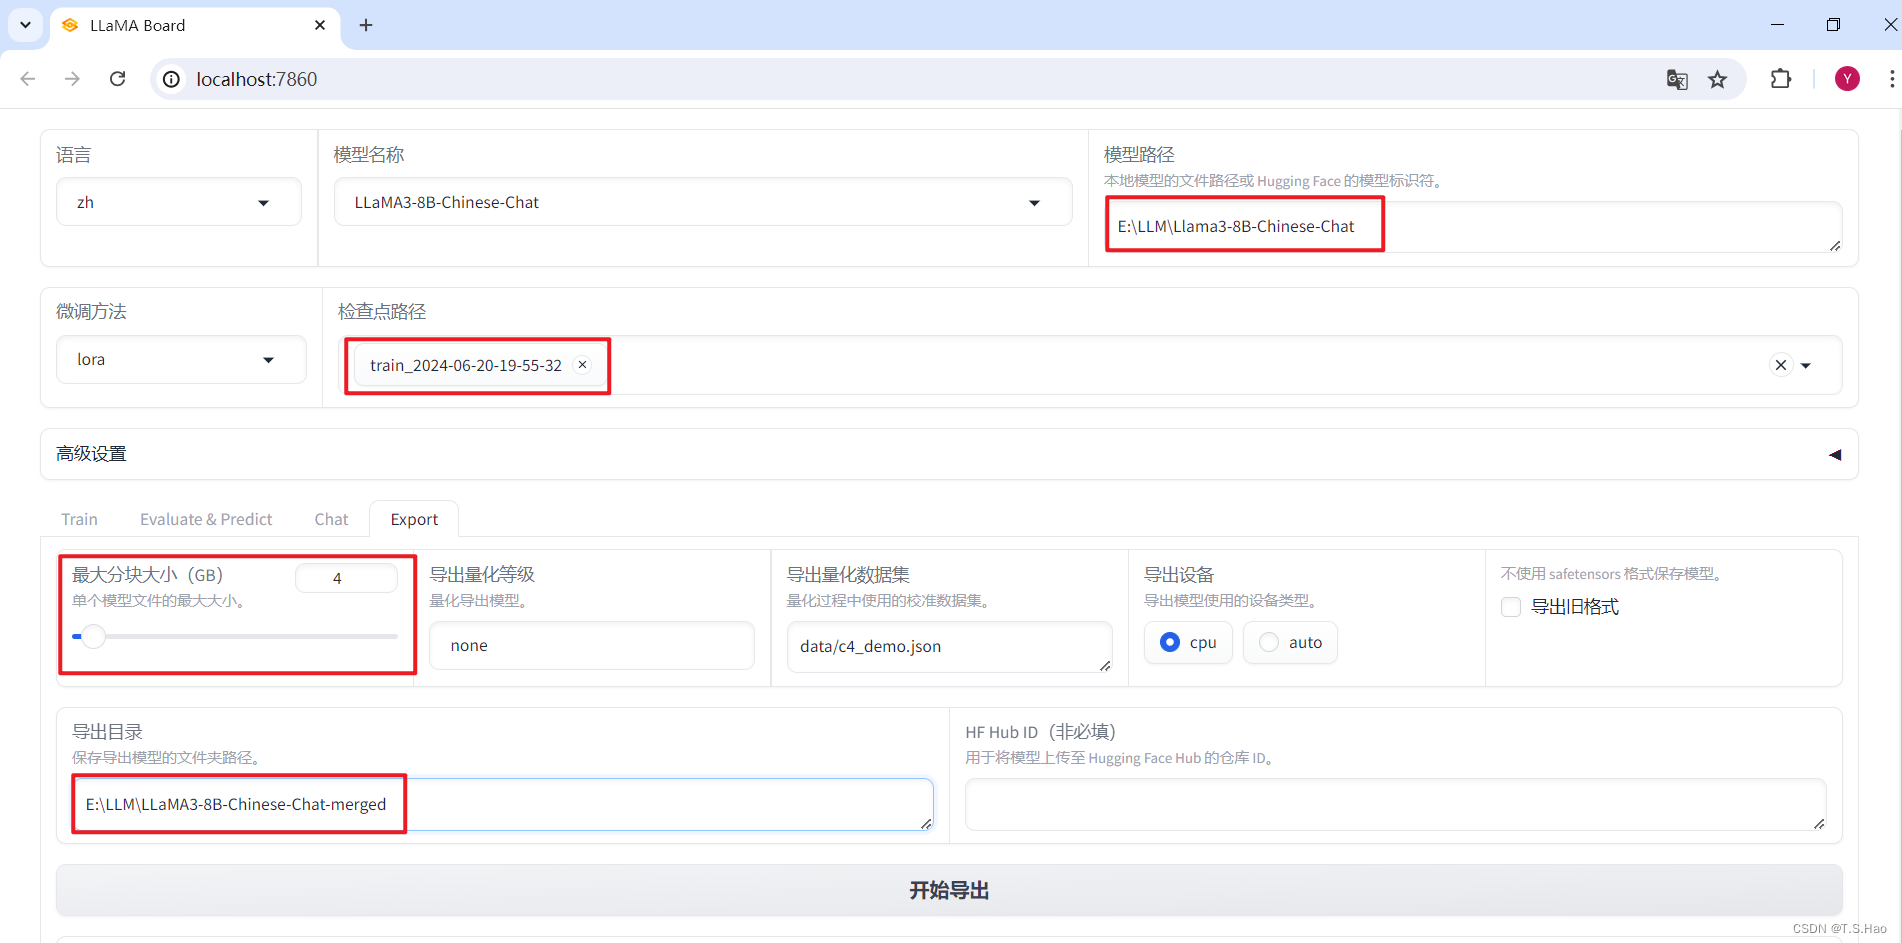
- 合并导出后的模型目录如下
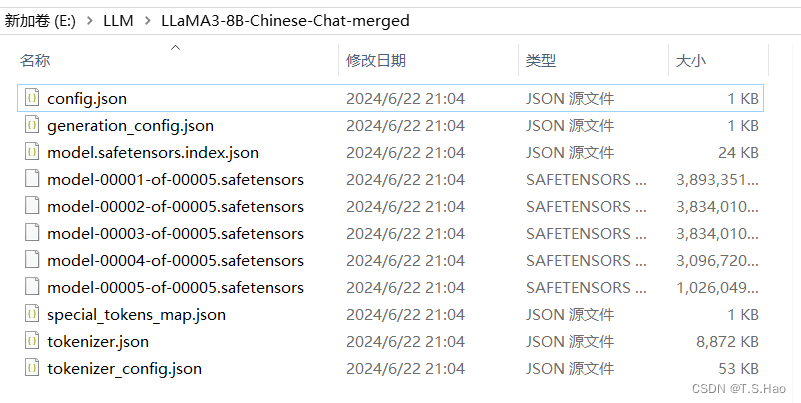
- 这样就可以直接使用微调后的模型了
2、命令行合并
- 将模型合并参数构建成
build/merge_llama3_lora.yaml配置文件,内容如下
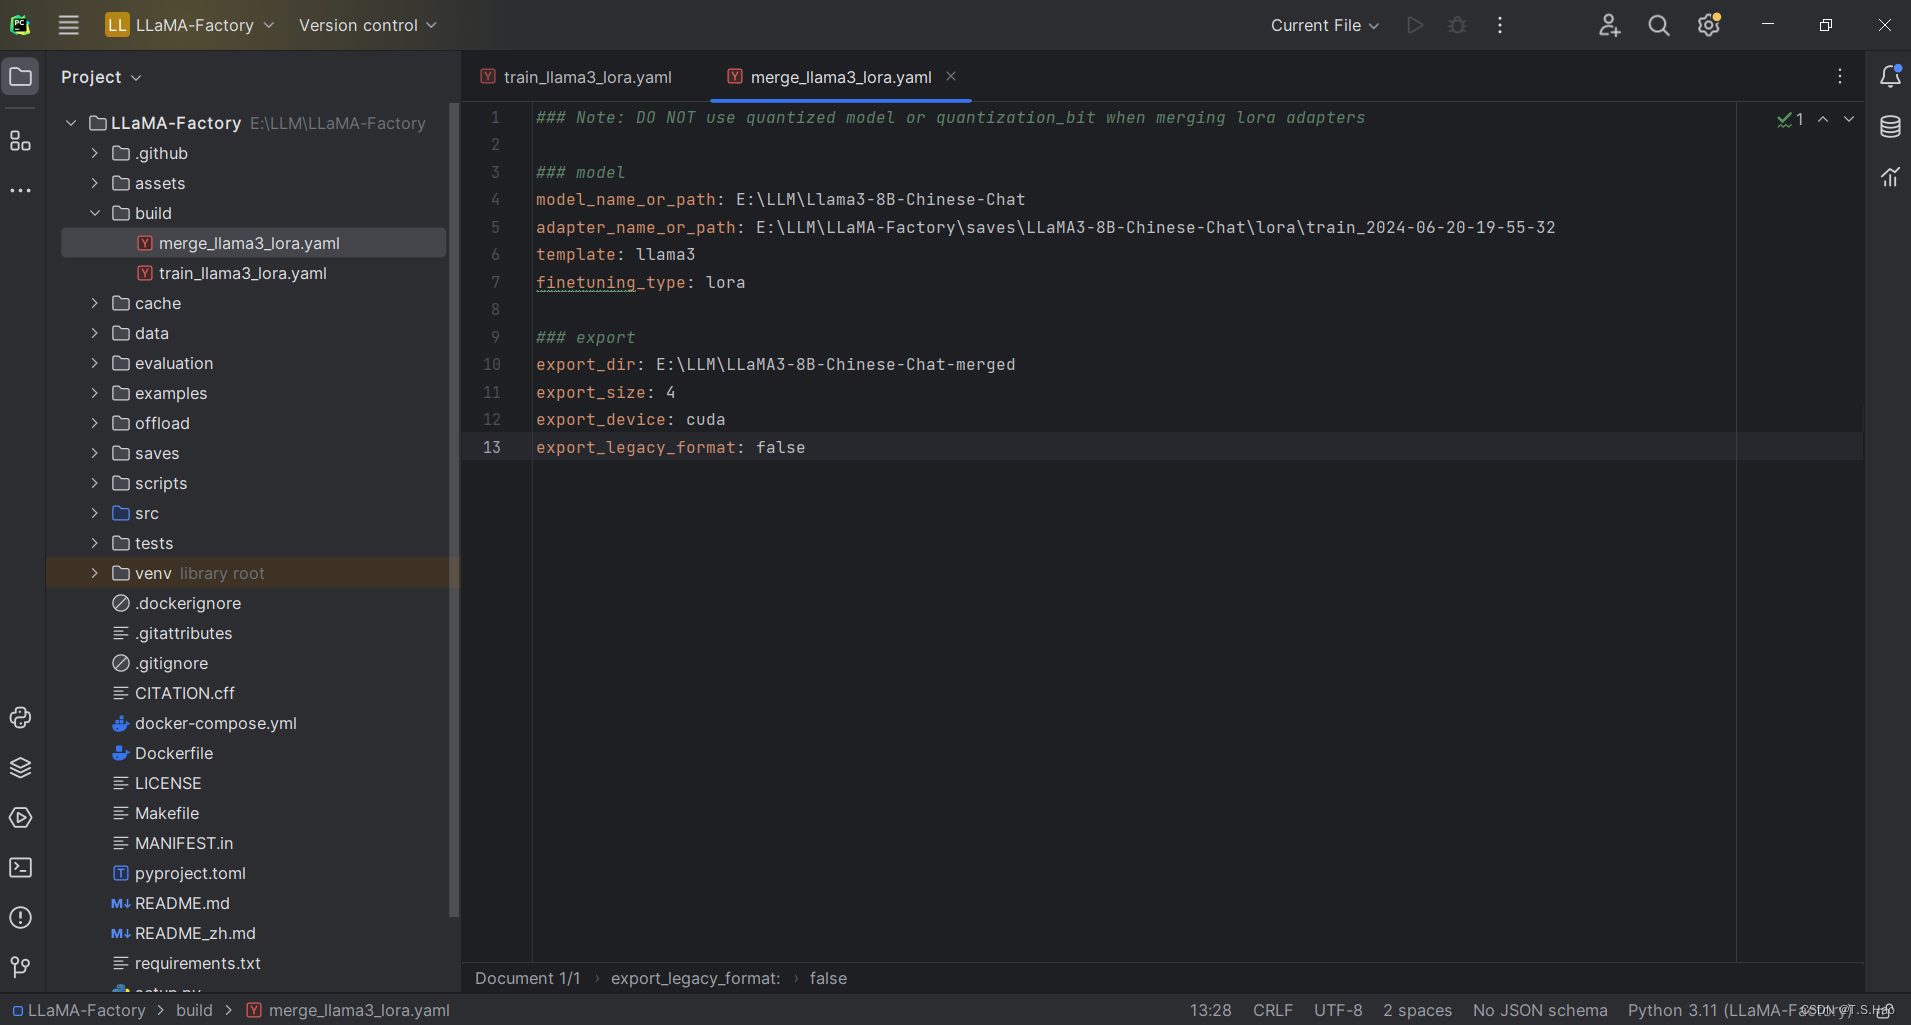
### note: do not use quantized model or quantization_bit when merging lora adapters

### model
model_name_or_path: e:\llm\llama3-8b-chinese-chat
adapter_name_or_path: e:\llm\llama-factory\saves\llama3-8b-chinese-chat\lora\train_2024-06-20-19-55-32
template: llama3
finetuning_type: lora

### export
export_dir: e:\llm\llama3-8b-chinese-chat-merged
export_size: 4
export_device: cuda
export_legacy_format: false
- 在llama-factory根目录下执行合并命令
llamafactory-cli export build/merge_llama3_lora.yaml


发表评论