本文主要是想通过以pytest + playwright + allure + bdd框架为demo的项目,介绍项目怎样与 github的持续集成工具github action进行集成并展示allure report,如果大家对框架搭建感兴趣,可以参考另一篇文章 。
1 github 基础知识
1.1 github action是什么
首先我们先来了解一下github action基础知识。github action是github 推出的持续集成的工具,持续集成由很多操作组成,比如获取代码、安装依赖、运行测试、上传测试结果等等。github 把这些操作就称为 actions。很多的actions在不同的项目里面是相同的,因此github是允许开发者把每个操作写成独立的脚本文件,存放到代码仓库,使得其他开发者可以引用的。
到目前当我们要集成一个项目到github action时,基本就只需要引用他人已经写好的多个action即可,整个持续集成过程,就变成了一个 actions 的组合。我们可以到官方网站搜索更多的actions。
引用action的语法: username/reponame@版本号。 如actions/setup-python@v5,就表示github.com/actions/setup-python这个仓库,它代表一个 action,作用是安装 python,@后面指出的是安装的版本号。后面集成到github action时还会详讲用法。
1.2 怎么集成到github action
知道了action之后,我们就来聊聊怎么将项目集成到github action :就是在我们仓库的根目录下,创建一个 workflow文件,放在.github/workflows目录下,workflow文件是一个 *.yml 文件——这个 yaml 文件就是 github action 的配置文件。
一些术语介绍:
- workflow (工作流程):持续集成一次运行的过程,就是一个 workflow。
- job (任务):一个 workflow 由一个或多个 jobs 构成,含义是一次持续集成的运行,可以完成多个任务。
- step(步骤):每个 job 由多个 step 构成,一步步完成。
- action (动作):每个 step 可以依次执行一个或多个命令(action)。
workflow 是由一个或多个 job 组成的可配置的自动化过程。workflow的配置文件字段比较多,可以参考官网介绍workflow syntax for github actions。下面是一些基本字段。
(1)name
workflow 的名称,github 在存储库的 action 页面上显示 workflow 的名称,如:
name: playwright pytest bdd demo ci
(2)on
触发 workflow 执行的 event 名称,比如:每当我提交代码到 github 上的时候执行workflow可以写为:
on:push
(3)on.<push|pull_request>.<tags|branches>
指定触发事件时,可以限定分支或标签

(4)jobs.<job_id>.name
一个 workflow 由一个或多个 jobs 构成,含义是一次持续集成的运行,可以完成多个任务

每个 job 必须具有一个 id 与之关联。上面的 my_first_job 和 my_second_job 就是 job_id。
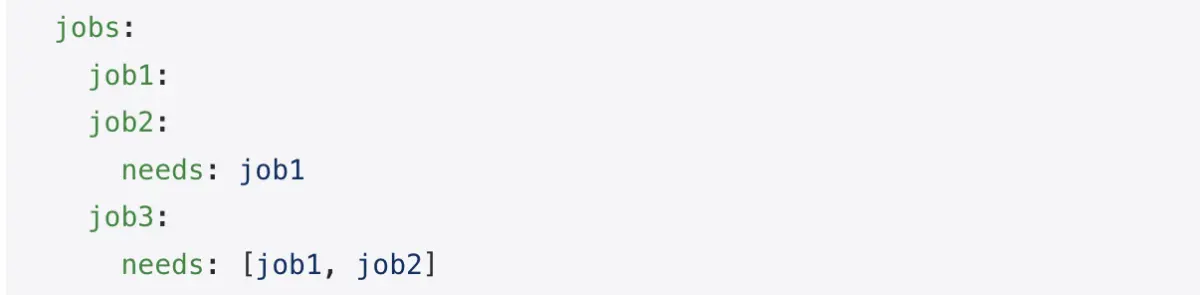
(5)jobs.<job_id>.needs
needs 可以标识 job 是否依赖于别的 job——如果 job 失败,则会跳过所有需要该 job 的 job
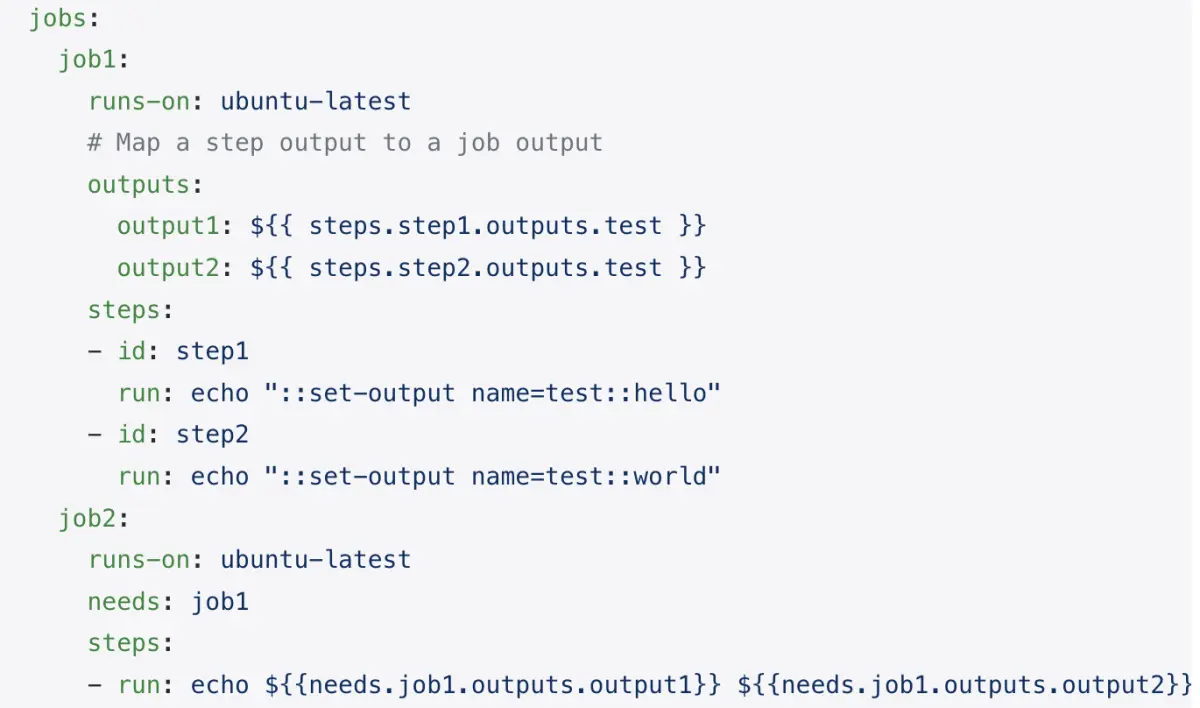
(6)jobs.<jobs_id>.outputs
用于和 need 打配合,outputs 输出=》need 输入
(7) jobs.<job_id>.runs-on
指定运行 job 的运行环境,github 上可用的运行器为:

(8)jobs.<job_id>.steps
steps字段指定每个 job 的运行步骤,可以包含一个或多个步骤。step 可以运行:
commands:命令行命令 setup tasks:环境配置命令(比如安装个 node 环境、安装个 python 环境) action(in your repository, in public repository, in docker registry):一段 action, 每个 step 都在自己的运行器环境中运行,并且可以访问工作空间和文件系统。
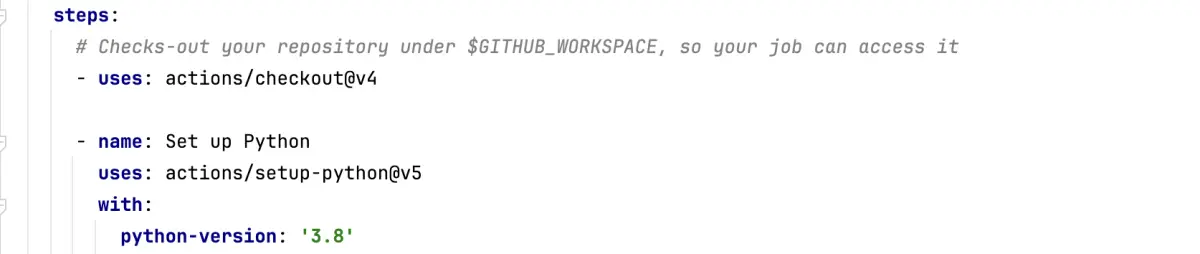
(9)jobs.<job_id>.steps.uses
上面已经讲到action,那么action在workflow怎么引用的?以一个安装python的例子说明:
2 实例:pytest + playwright + allure + bdd demo项目集成到github action
2.1 集成github action
搭建一个pytest + playwright + allure + bdd框架的demo项目并提交到github,添加yml文件到项目.github/workflows目录下,主要想实现的是能下载代码自动搭建环境跑测试、出报告,具体步骤细节:
获取代码库 ->安装python->安装pipenv来管理环境->安装项目依赖->安装浏览器->跑自动化测试用例->自动化测试报告作为附件上传
那么结合上述对workflow的了解以及查找一些已有的action,具体我们的workflow yml文件的内容:
# this is a basic workflow to help you get started with actions

name: playwright pytest bdd demo ci

# controls when the workflow will run
on:
  # triggers the workflow on push or pull request events but only for the "master" branch
  push:
    branches: [ "main" ]
  pull_request:
    branches: [ "main" ]
  schedule:
    - cron: '0 0,4,12 * * *'

  # allows you to run this workflow manually from the actions tab
  workflow_dispatch:

# a workflow run is made up of one or more jobs that can run sequentially or in parallel
jobs:
  # this workflow contains a single job called "build"
  test:
    # the type of runner that the job will run on
    runs-on: ubuntu-latest

    # steps represent a sequence of tasks that will be executed as part of the job
    steps:
      # checks-out your repository under $github_workspace, so your job can access it
      - uses: actions/checkout@v4

      - name: set up python
        uses: actions/setup-python@v5
        with:
          python-version: '3.8'
          allow-prereleases: true
          cache: 'pipenv'

      - name: install pipenv
        run: pip install pipenv

      - name: install dependencies
        run: |
          pipenv install wheel
          pipenv install

      - name: ensure browsers are installed
        run: pipenv run python -m playwright install

      - name: run test cases
        run: pipenv run python run.py

      - uses: actions/upload-artifact@v3
        if: always()
        with:
          name: playwright-traces_and_results
          #跑完的allure测试结果是放在项目report目录下的,打包该目录上传
          path: |
            report/
            *trace.zip
有了这个yml文件之后,每当我们push代码就会在action tab下触发一下ci,并会运行我们的测试

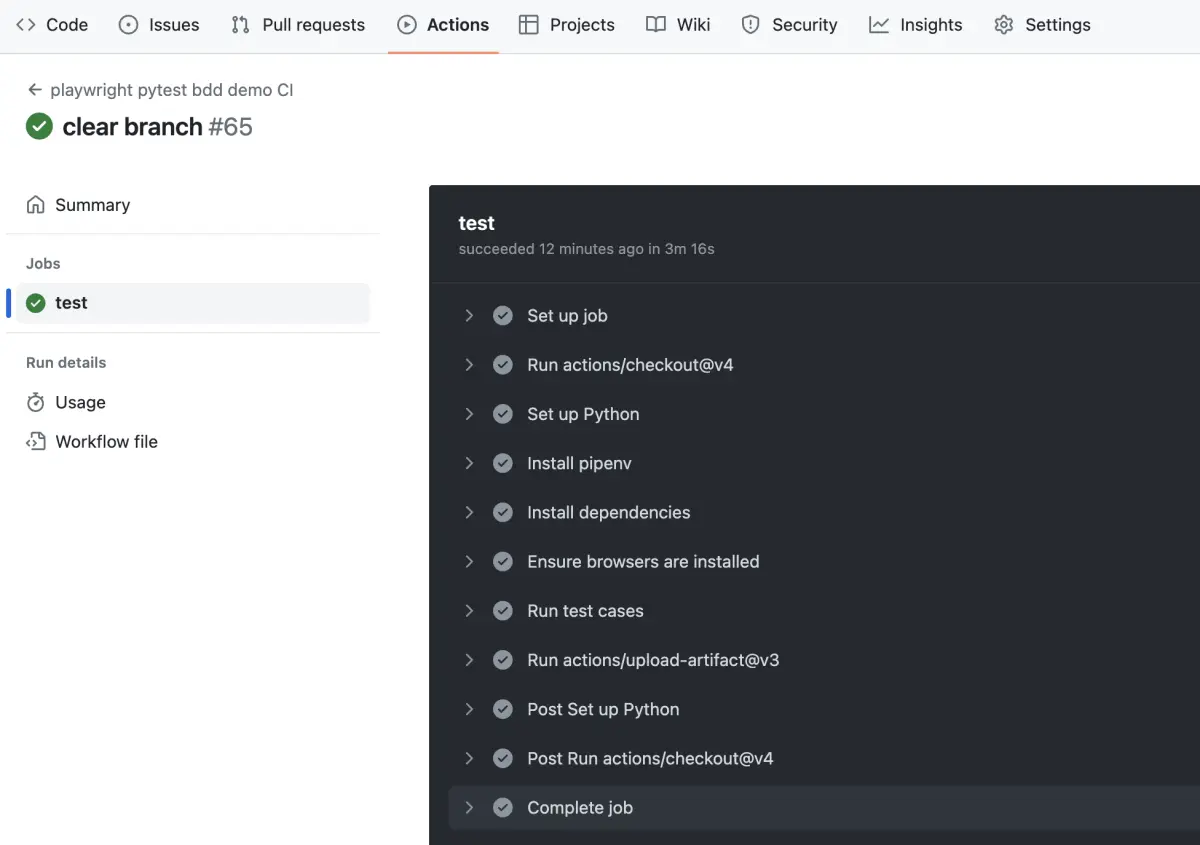
运行完之后,我们点进run完的workflow进入可以看到运行后上传的测试报告的附件文件

下载测试报告附件到本地解压后的文件内容如下,需要特定工具或运行allure命令打开查看报告。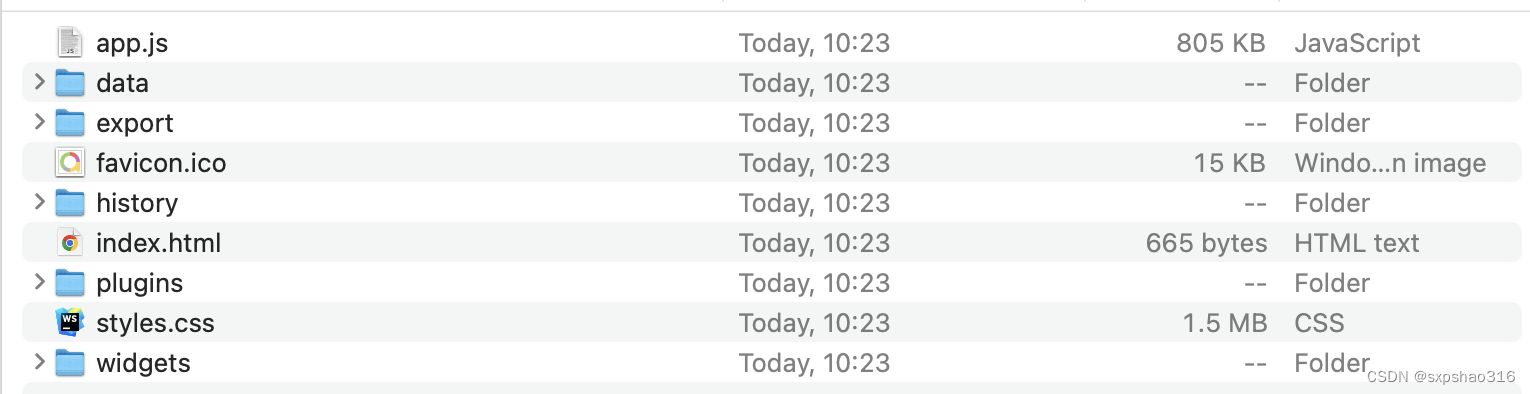
点击进入job我们还可以看到详细的运行步骤
至此,我们的测试流水线算是完成了,跑完了测试且生成了测试报告附件。但是当我们组内的其他人员想要直观的看到测试报告,需要下载附件并用一定的工具打开或运行一些allure命令,比较麻烦,这个是否可以优化以其他便捷的方式打开呢?带着这个问题,我们继续探索,发现了github另一个强大的功能github pages, 可用于在web 上实时发布网站代码。
2.2 集成github pages
github pages 是 github 提供给用户用来展示个人或者项目主页的静态网页系统。也就是说我们可以把项目代码写好后上传 github,然后利用 github pages 为这个项目生成一个静态页面,别人通过网址可以直接访问我们的页面。怎么用它来展示我们allure测试报告的html文件呢?
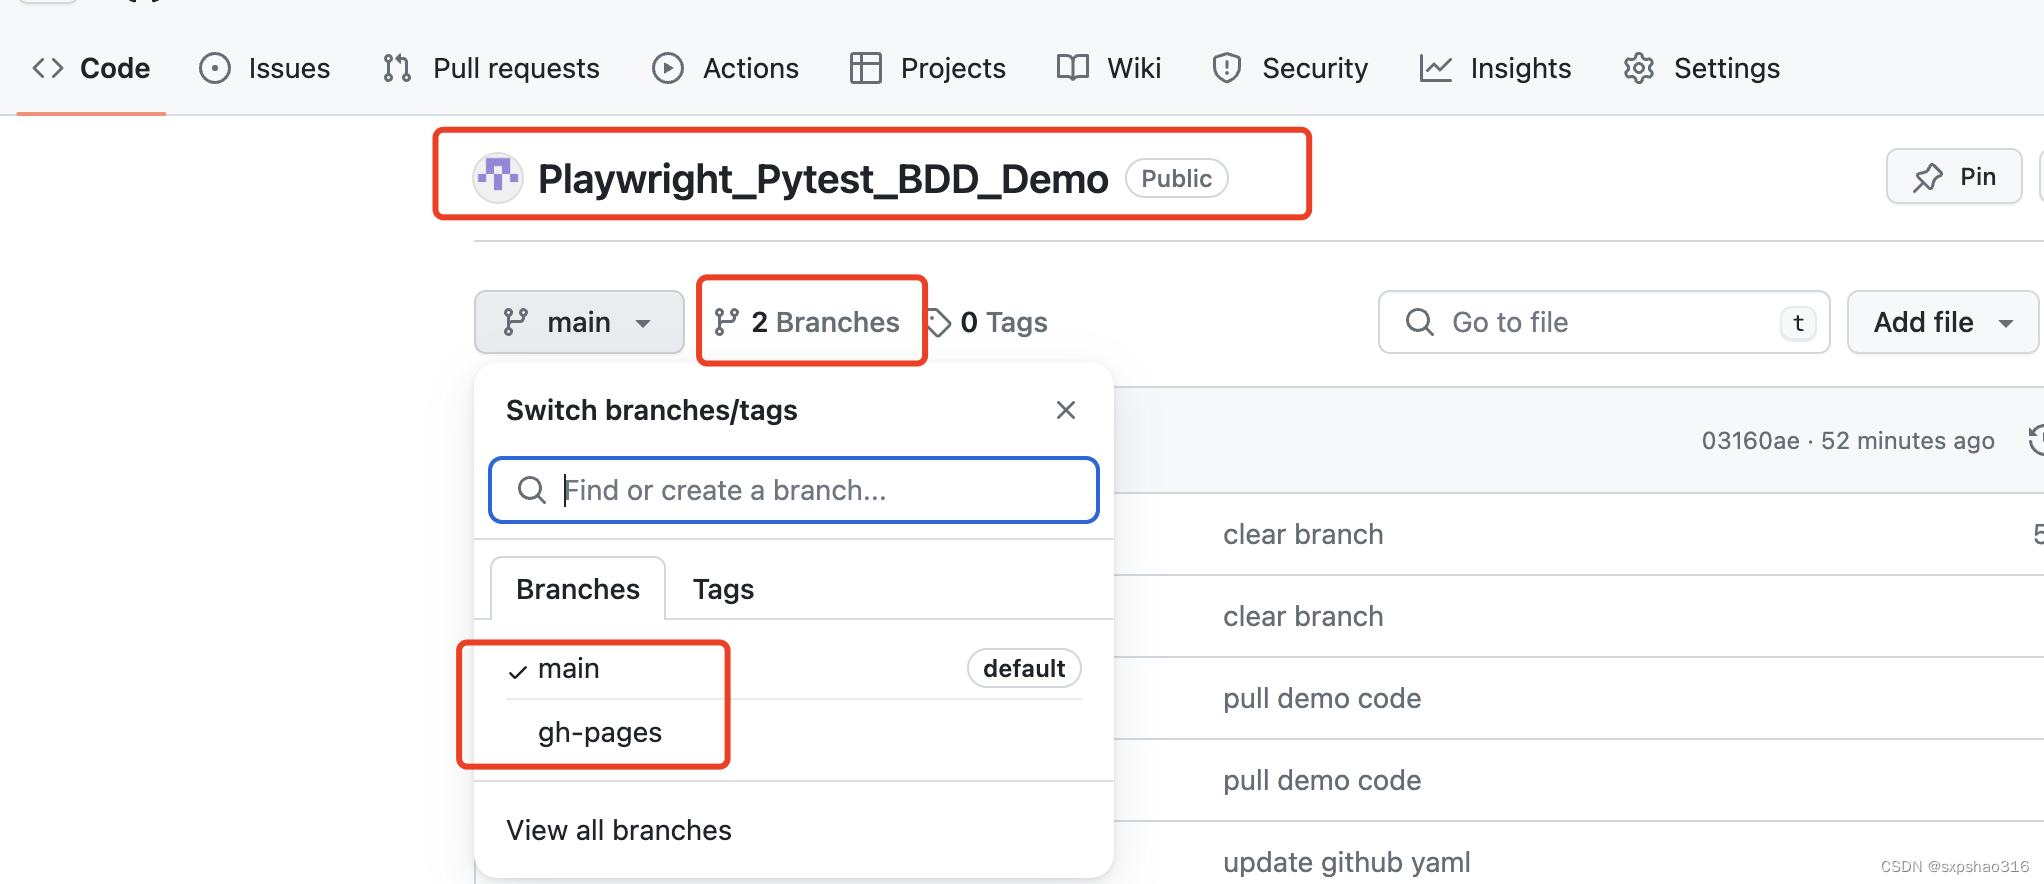
(1)进入到 上文提到的pytest + playwright + allure + bdd框架的demo项目github地址,创建一个空分支gh-pages,用此分支来展示测试报告静态文件。项目下就有两个分支了:
(2)settings下对pages进行设定branch分支为gh-pages,可以看到上方github page的访问站点更新显示如下:

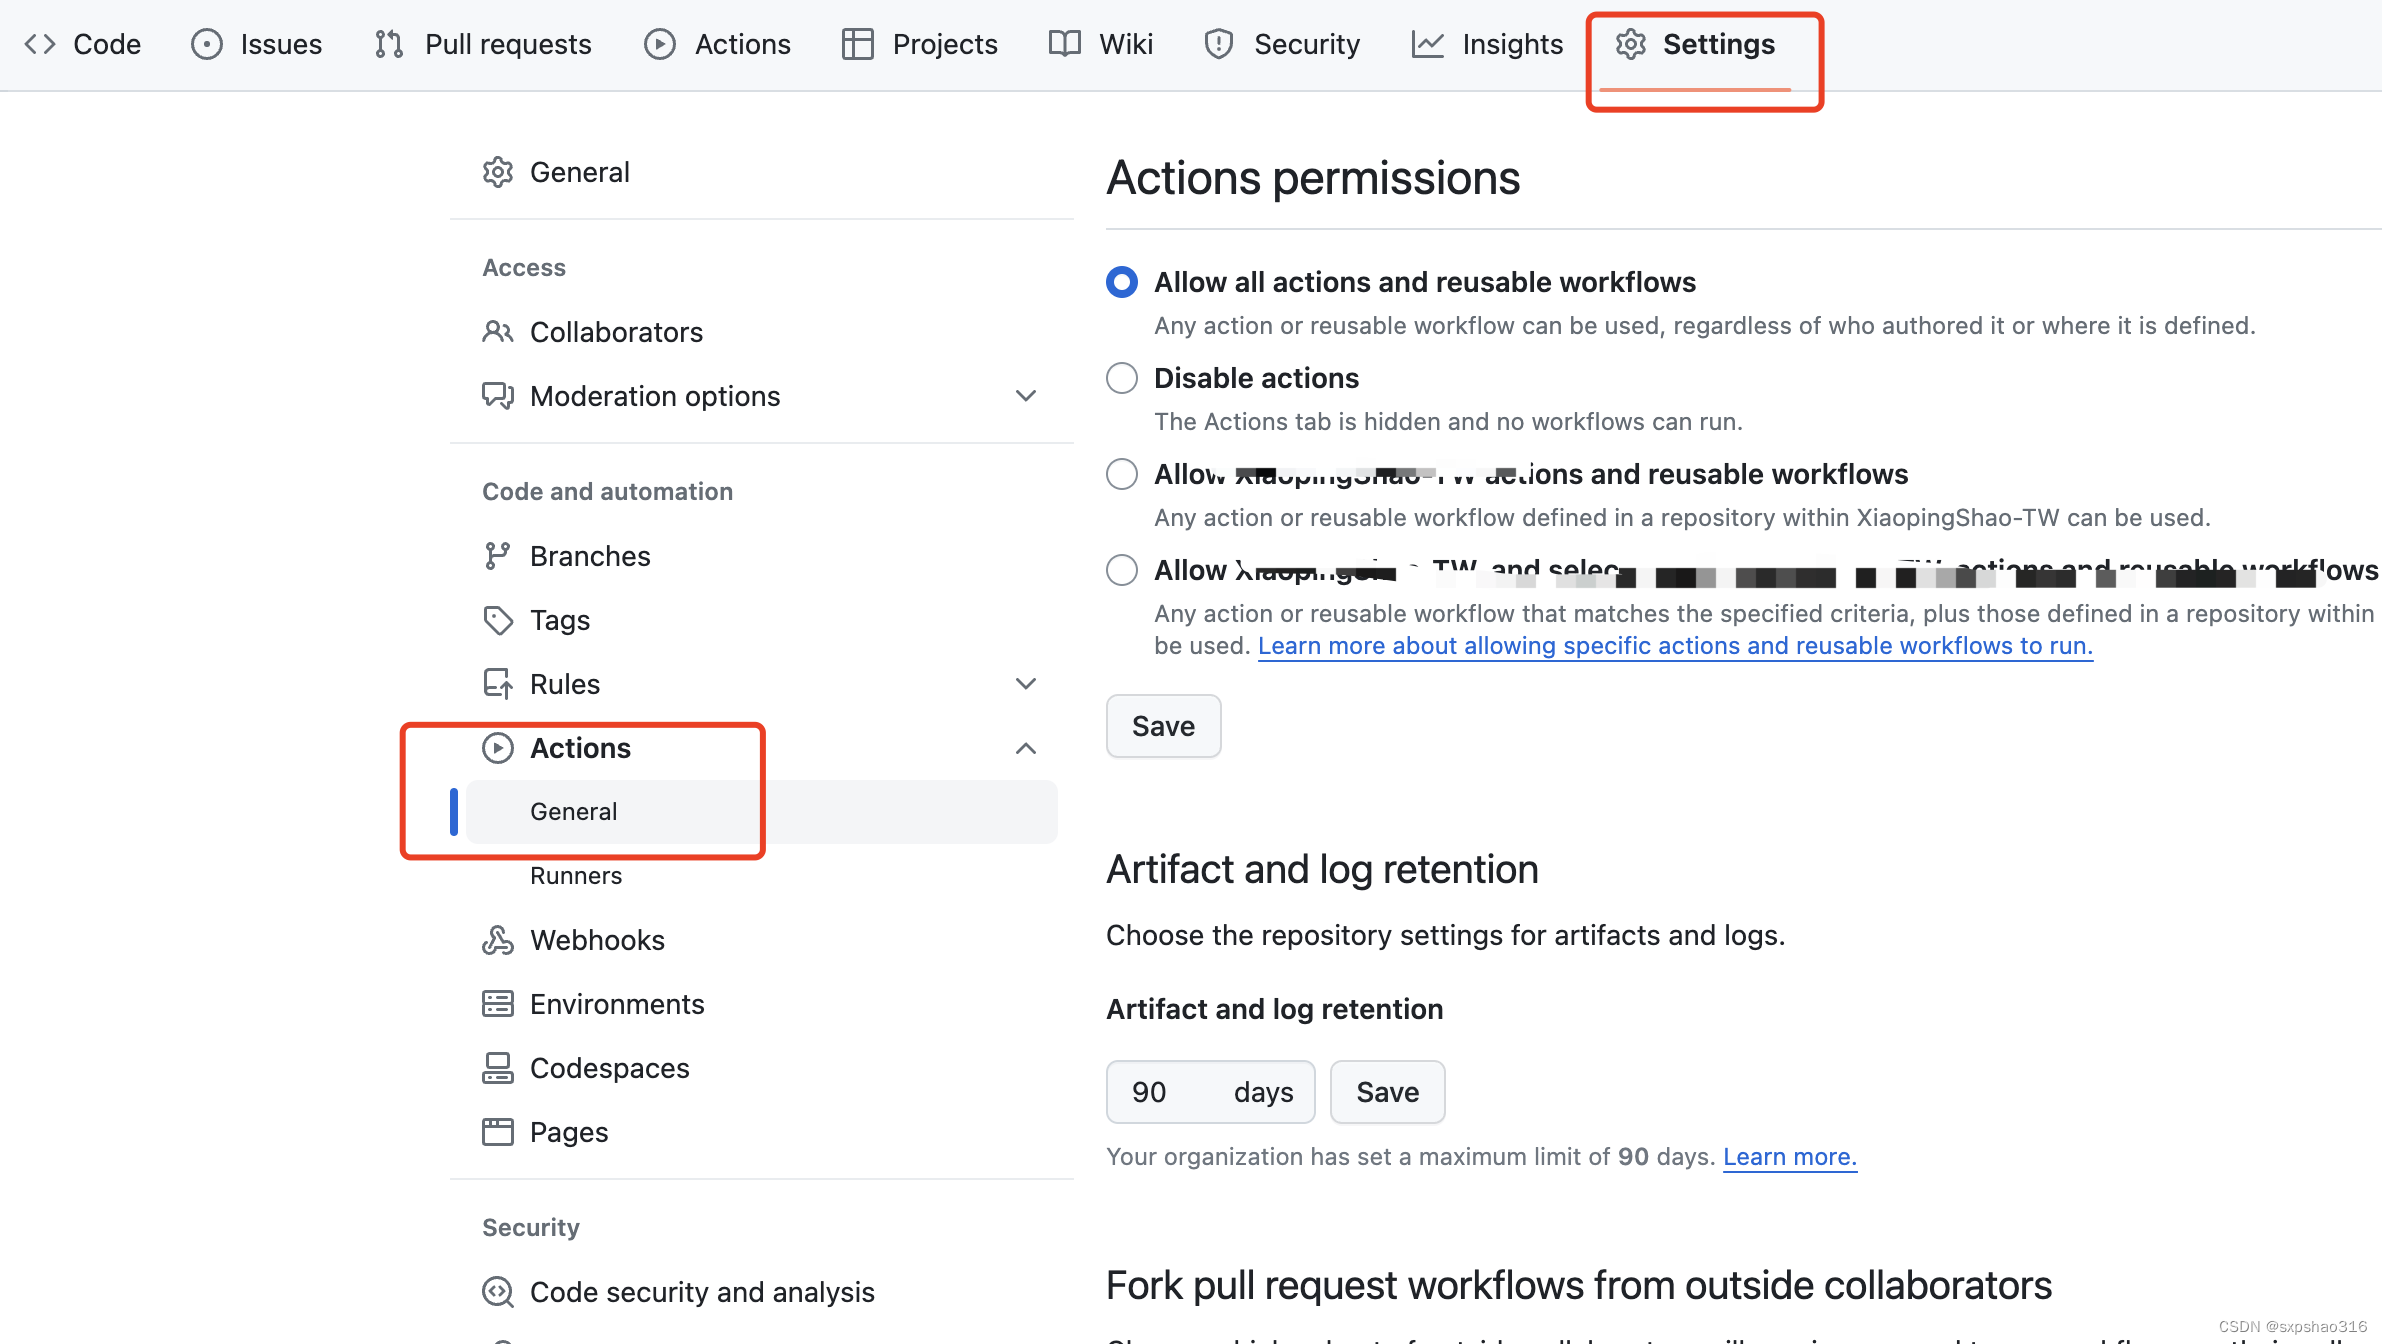
(3)到settings-action-general下设置运行workflow时授予github_token权限

(4)设定好一切之后,我们对workflow进行一些调整,通过gh-pages分支来发布测试报告,yml文件内容如下:
# this is a basic workflow to help you get started with actions
name: playwright pytest bdd demo ci
# controls when the workflow will run
on:
  # triggers the workflow on push or pull request events but only for the "master" branch
  push:
    branches: [ "main" ]
  pull_request:
    branches: [ "main" ]
  schedule:
    - cron: '0 0,4,12 * * *'
  # allows you to run this workflow manually from the actions tab
  workflow_dispatch:
# a workflow run is made up of one or more jobs that can run sequentially or in parallel
jobs:
  # this workflow contains a single job called "build"
  test:
    # the type of runner that the job will run on
    runs-on: ubuntu-latest
    # steps represent a sequence of tasks that will be executed as part of the job
    steps:
      # checks-out your repository under $github_workspace, so your job can access it
      - uses: actions/checkout@v4

      - name: set up python
        uses: actions/setup-python@v5
        with:
          python-version: '3.8'
          allow-prereleases: true
          cache: 'pipenv'

      - name: install pipenv
        run: pip install pipenv

      - name: install dependencies
        run: |
          pipenv install wheel
          pipenv install

      - name: ensure browsers are installed
        run: pipenv run python -m playwright install

      - name: run test cases
        run: pipenv run python run.py

      - uses: actions/upload-artifact@master
        with:
          name: test-allure-report
          path: report #  path to store the allure report
          retention-days: 20

      - name: get allure history # step to retrieve allure history
        uses: actions/checkout@v4
        if: always() # execute even if previous steps fail
        continue-on-error: true # continue execution even if the step fails
        with:
          ref: gh-pages # specify the branch to retrieve allure history from
          path: gh-pages # set the destination path for allure history

      - name: generate allure report action # step to generate allure report
        uses: simple-elf/allure-report-action@master
        if: always() # execute even if previous steps fail
        id: allure-report
        with:
          allure_results: temp # path to store the allure results
          allure_history: allure-history # specify the directory to store allure history
          allure_report: allure-report
          keep_reports: 20 # specify the number of previous reports to keep

      - name: deploy allure report to github pages # step to deploy allure report to github pages
        if: always() # execute even if previous steps fail
        uses: peaceiris/actions-gh-pages@v3
        with:
          github_token: ${{ secrets.github_token }} # provide the github token for authentication
          publish_branch: gh-pages # specify the branch to publish the report to
          publish_dir: allure-history # specify the directory containing the report
(5)push代码,会优先trigger 项目playwright pytest bdd demo ci运行测试,再自动产生一个名为pages-build-deployment的新ci,发布测试结果报告到pages
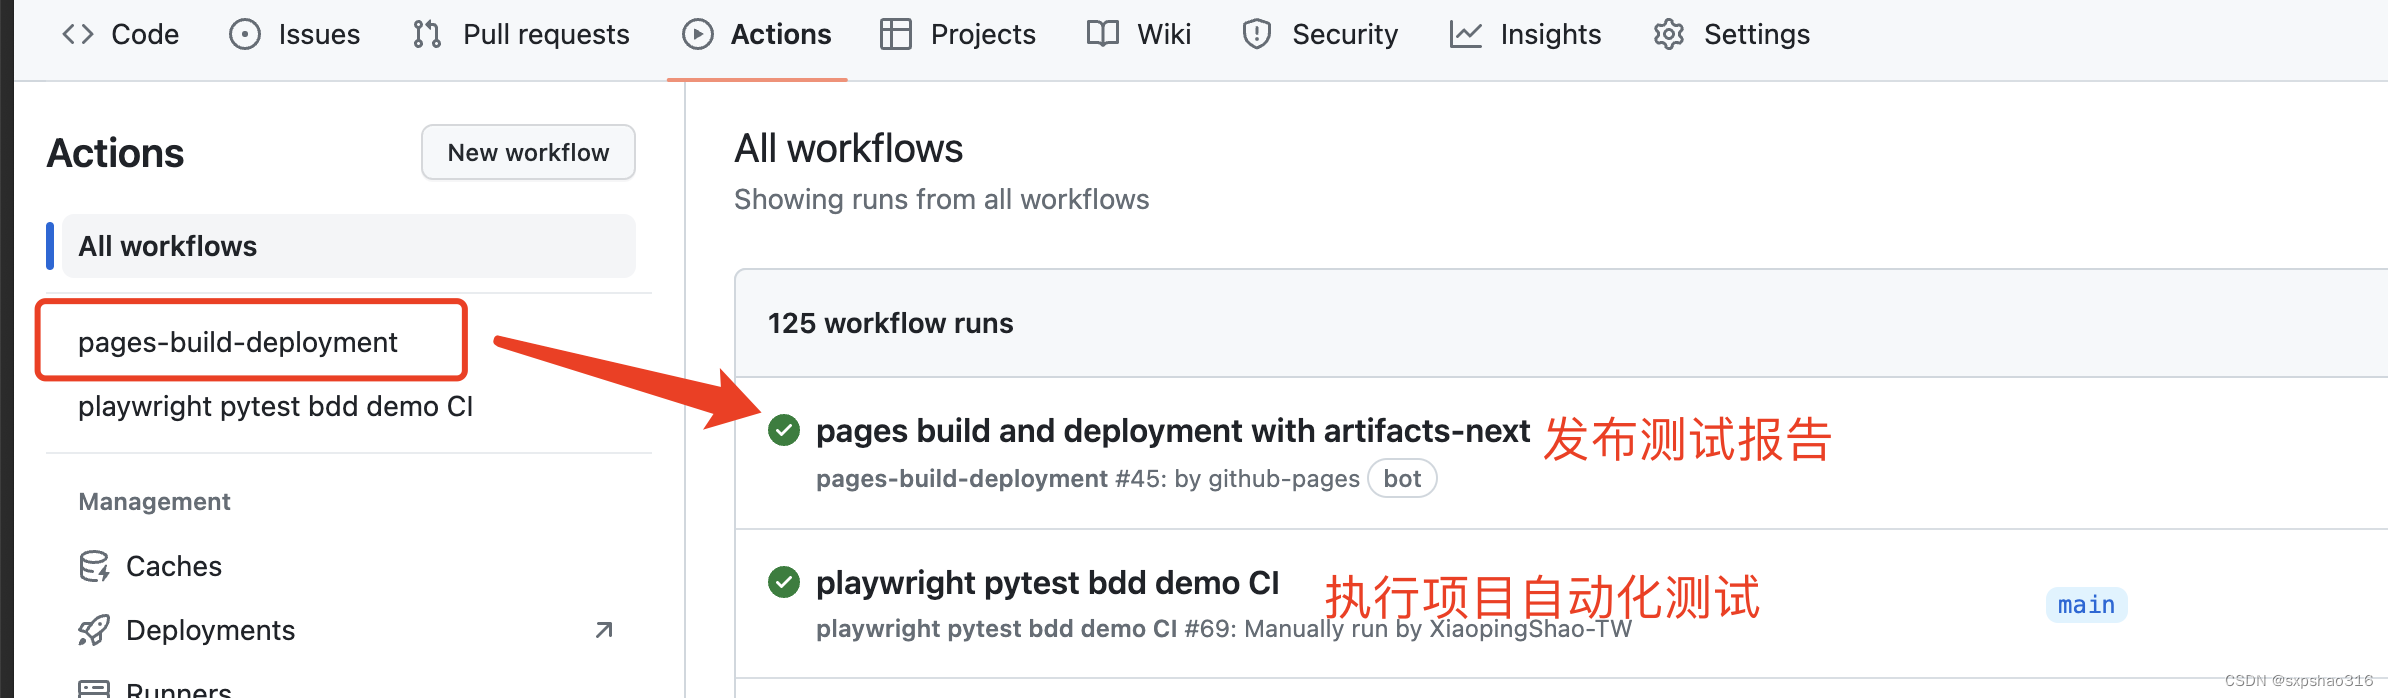
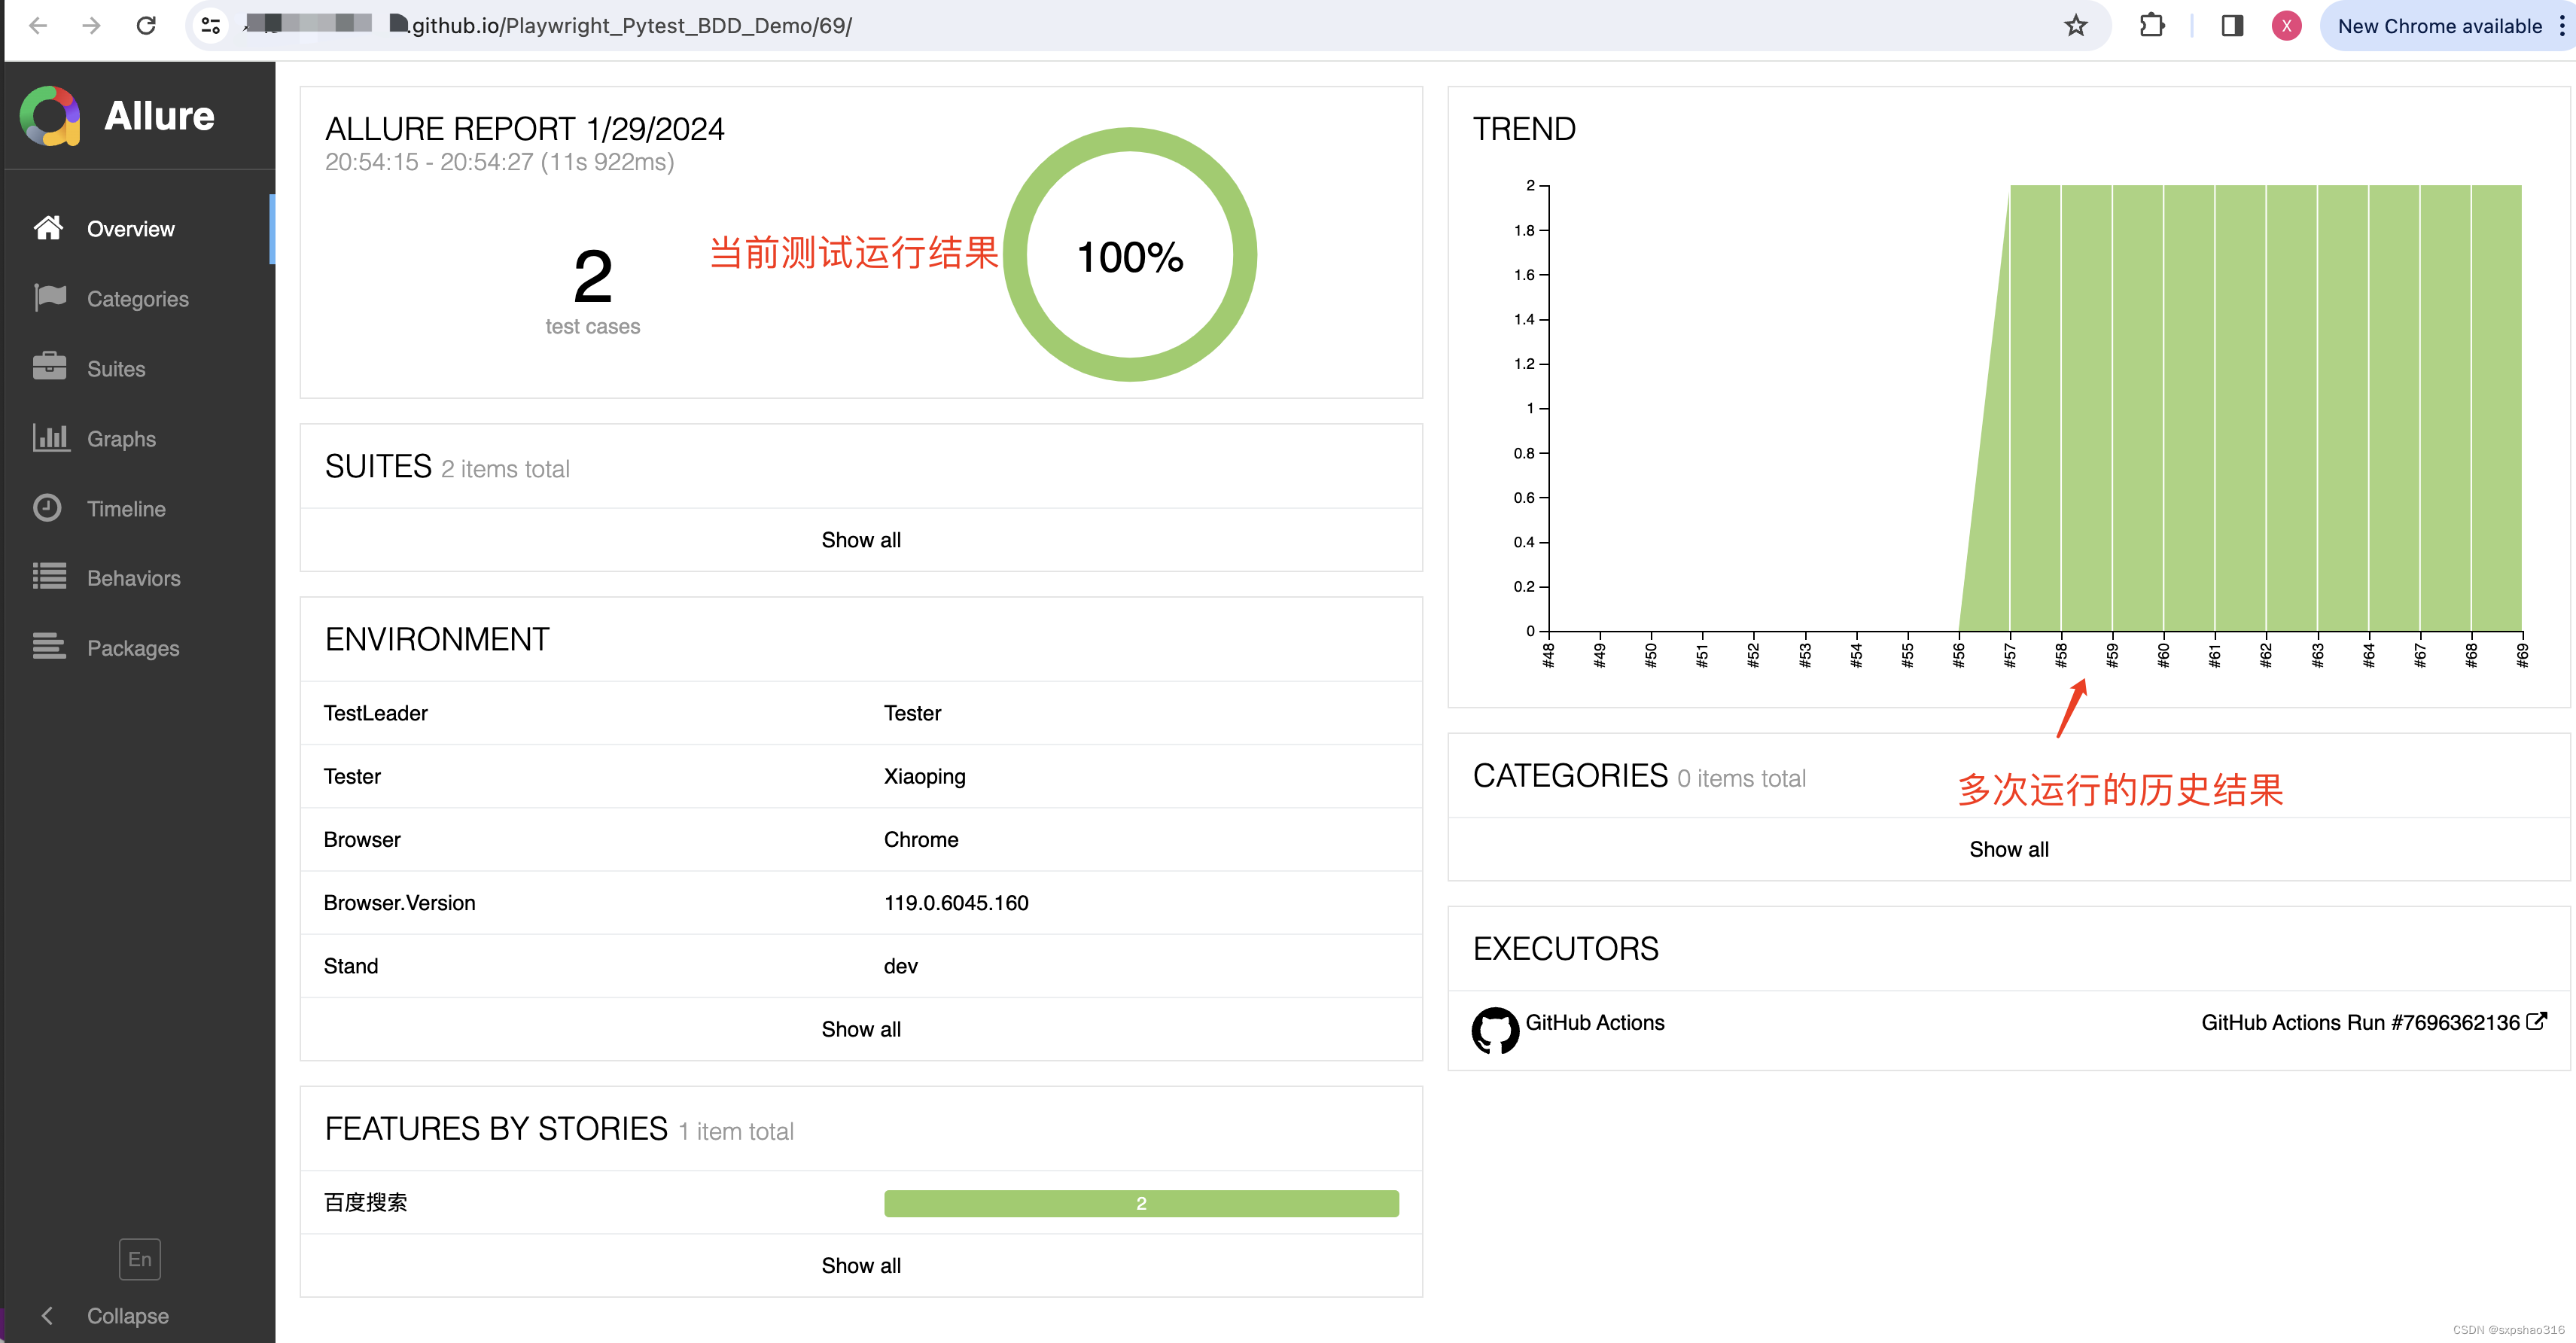
点击运行完的发布测试报告的ci,通过点击如下链接就可以打开报告了(速度有点慢)
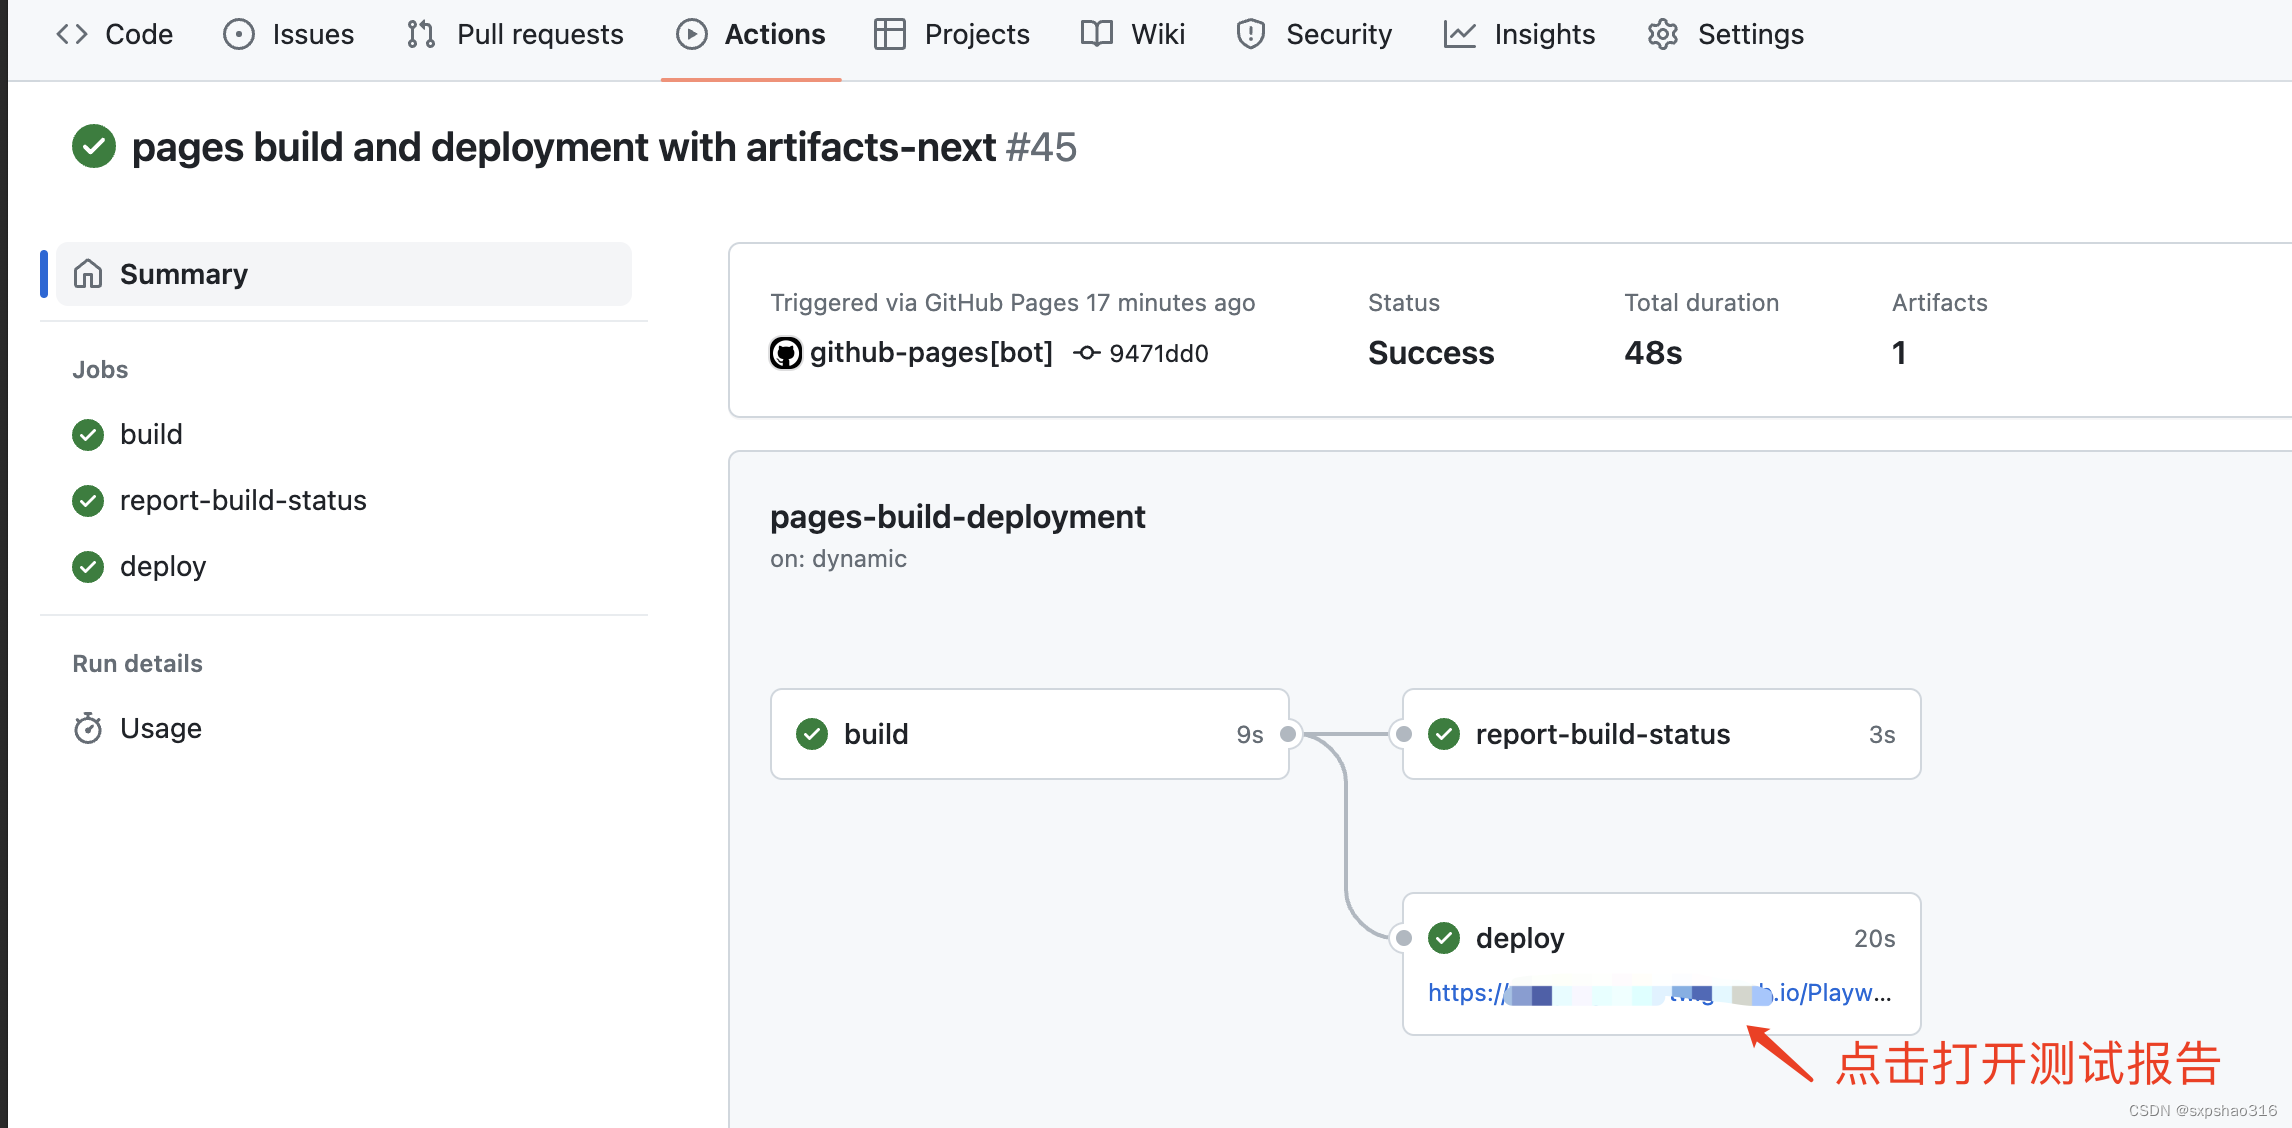
测试报告:
参考资料:
https://www.ruanyifeng.com/blog/2019/09/getting-started-with-github-actions.html


发表评论