不同厂商云服务器公网ip部署k8s集群(腾讯云+阿里云)
文章目录
前言
最近在学习k8s,之前自己有两台腾讯云的轻量服务器,内网ip搭建k8s集群成功。但是随着学习的深入,觉得两台服务器不能满足现有学习需求,于是薅起了羊毛,申请了两台免费三个月试用的阿里云服务器、由于不同厂商的云服务器内网ip不同,故选择尝试用公网ip的方式来搭建集群,以此记录我的搭建过程。
一、安装kubeadm
1、基础环境搭建
	#各个机器设置自己的域名  重启系统后生效
	hostnamectl set-hostname master

	# 重启服务器
	reboot

	# 设置hosts
	# 我这里是四台服务器 分别设置公网ip以及对应的主机名称
	cat >> /etc/hosts <<eof
	101.42.xxx.xxx master
	62.234.xxx.xxx node01
	123.57.xxx.xxx node03
	39.105.xxx.xxx node04
	eof

	systemctl restart networkmanager.service

	# 开启ip转发
	echo "1" >> /proc/sys/net/ipv4/ip_forward
	# 将 selinux 设置为 permissive 模式(相当于将其禁用)
	sudo setenforce 0
	sudo sed -i 's/^selinux=enforcing$/selinux=permissive/' /etc/selinux/config

	#关闭swap
	swapoff -a
	sed -ri 's/.*swap.*/#&/' /etc/fstab

	#允许 iptables 检查桥接流量
	cat <<eof | sudo tee /etc/modules-load.d/k8s.conf
	br_netfilter
	eof

	cat <<eof | sudo tee /etc/sysctl.d/k8s.conf
	net.bridge.bridge-nf-call-ip6tables = 1
	net.bridge.bridge-nf-call-iptables = 1
	eof
	sudo sysctl --system

	# 开启内核支持
	cat >> /etc/sysctl.conf << eof
	net.ipv4.ip_forward = 1
	net.bridge.bridge-nf-call-iptables = 1
	net.bridge.bridge-nf-call-ip6tables = 1
	eof

	sysctl -p

	# 开启ipvs支持
	yum -y install ipvsadm  ipset


	# 永久生效
	cat > /etc/sysconfig/modules/ipvs.modules <<eof
	modprobe -- ip_vs
	modprobe -- ip_vs_rr
	modprobe -- ip_vs_wrr
	modprobe -- ip_vs_sh
	modprobe -- nf_conntrack_ipv4
	eof
2、公网搭建集群的关键
	# 创建虚拟网卡
	cat > /etc/sysconfig/network-scripts/ifcfg-eth0:1 <<eof
	bootproto=static
	device=eth0:1
	ipaddr=39.105.xxx.xxx  # 你的公网ip
	prefix=32
	type=ethernet
	userctl=no
	onboot=yes
	eof

	# 重启网络
	systemctl restart network
3、安装kubelet、kubeadm、kubectl
	cat <<eof | sudo tee /etc/yum.repos.d/kubernetes.repo
	[kubernetes]
	name=kubernetes
	baseurl=http://mirrors.aliyun.com/kubernetes/yum/repos/kubernetes-el7-x86_64
	enabled=1
	gpgcheck=0
	repo_gpgcheck=0
	gpgkey=http://mirrors.aliyun.com/kubernetes/yum/doc/yum-key.gpg
	   http://mirrors.aliyun.com/kubernetes/yum/doc/rpm-package-key.gpg
	exclude=kubelet kubeadm kubectl
	eof
二、使用kubeadm引导集群
1、下载各个节点所需镜像
	sudo tee ./images.sh <<-'eof'
	#!/bin/bash
	images=(
	kube-apiserver:v1.20.9
	kube-proxy:v1.20.9
	kube-controller-manager:v1.20.9
	kube-scheduler:v1.20.9
	coredns:1.7.0
	etcd:3.4.13-0
	pause:3.2
	)
	for imagename in ${images[@]} ; do
	docker pull registry.cn-hangzhou.aliyuncs.com/lfy_k8s_images/$imagename
	done
	eof

	chmod +x ./images.sh && ./images.sh
2、初始化主节点
# 主节点初始化
	kubeadm init \
	--apiserver-advertise-address=101.42.xxxx \
	--control-plane-endpoint=master \
	--image-repository registry.cn-hangzhou.aliyuncs.com/lfy_k8s_images \
	--kubernetes-version v1.20.9 \
	--service-cidr=10.96.0.0/16 \
	--pod-network-cidr=192.168.0.0/16
	your kubernetes control-plane has initialized successfully!

	to start using your cluster, you need to run the following as a regular user:

	  mkdir -p $home/.kube
	  sudo cp -i /etc/kubernetes/admin.conf $home/.kube/config
	  sudo chown $(id -u):$(id -g) $home/.kube/config

	alternatively, if you are the root user, you can run:

	  export kubeconfig=/etc/kubernetes/admin.conf

	you should now deploy a pod network to the cluster.
	run "kubectl apply -f [podnetwork].yaml" with one of the options listed at:
	  https://kubernetes.io/docs/concepts/cluster-administration/addons/

	you can now join any number of control-plane nodes by copying certificate authorities
	and service account keys on each node and then running the following as root:

	  kubeadm join master:6443 --token ymmfzm.q9bsuda2xh3rj72y \
	    --discovery-token-ca-cert-hash sha256:ceb13c0ab88888bf9136c98db076b49cbbb9dcc8f122b4d8284d3985733f1ebb \
	    --control-plane

	then you can join any number of worker nodes by running the following on each as root:

	kubeadm join master:6443 --token ymmfzm.q9bsuda2xh3rj72y \
	    --discovery-token-ca-cert-hash sha256:ceb13c0ab88888bf9136c98db076b49cbbb9dcc8f122b4d8284d3985733f1ebb
  mkdir -p $home/.kube
  sudo cp -i /etc/kubernetes/admin.conf $home/.kube/config
  sudo chown $(id -u):$(id -g) $home/.kube/config
3、安装网络组件
	curl https://docs.projectcalico.org/v3.20/manifests/calico.yaml -o

	vi calico.yaml
	# 修改以下内容

	# /calico_ipv4pool_cidr 进行查找,取消注释,将值改为pod-network-cidr的值
	# the default ipv4 pool to create on startup if none exists. pod ips will be
	# chosen from this range. changing this value after installation will have
	# no effect. this should fall within `--cluster-cidr`.
	 - name: calico_ipv4pool_cidr
	   value: "10.244.0.0/16"

	# ....
	# /k8s,bgp 查找,同级新增如下
	 - name: cluster_type
	   value: "k8s,bgp"
	 - name: ip_autodetection_method
	   value: "interface=eth0"    # eth0为你网卡的名字

	# 启动calico
	kubectl apply -f calico.yaml
4、加入node节点
kubeadm join master:6443 --token ymmfzm.q9bsuda2xh3rj72y \
	    --discovery-token-ca-cert-hash sha256:ceb13c0ab88888bf9136c98db076b49cbbb9dcc8f122b4d8284d3985733f1ebb
5、验证集群状态
[root@maste ~]# kubectl get nodes -o wide
name     status                     roles                  age   version   internal-ip     external-ip   os-image                kernel-version                container-runtime
master   ready                      control-plane,master   19h   v1.20.9   101.42.xxx.xxx   <none>        centos linux 7 (core)   3.10.0-1160.11.1.el7.x86_64   docker://20.10.5
node01   ready                      <none>                 18h   v1.20.9   62.234.xxx.xxx   <none>        centos linux 7 (core)   3.10.0-1160.11.1.el7.x86_64   docker://20.10.5
node03   ready,schedulingdisabled   <none>                 19h   v1.20.9   123.57.xxx.xxx   <none>        centos linux 7 (core)   3.10.0-957.21.3.el7.x86_64    docker://20.10.5
node04   ready,schedulingdisabled   <none>                 18h   v1.20.9   39.105.xxx.xxx   <none>        centos linux 7 (core)   3.10.0-957.21.3.el7.x86_64    docker://20.10.5
6、部署dashboard
1)部署
kubectl apply -f https://raw.githubusercontent.com/kubernetes/dashboard/v2.3.1/aio/deploy/recommended.yaml
2)设置访问端口
kubectl edit svc kubernetes-dashboard -n kubernetes-dashboard
  externaltrafficpolicy: cluster
  ports:
  - nodeport: 32249
    port: 443
    protocol: tcp
    targetport: 8443
  selector:
    k8s-app: kubernetes-dashboard
  sessionaffinity: none
  type: nodeport
status:
  loadbalancer: {}
3)查询端口 (记得更改防火墙规则)
[root@maste ~]# kubectl get svc -a |grep kubernetes-dashboard
kubernetes-dashboard   dashboard-metrics-scraper            clusterip   10.96.122.67    <none>        8000/tcp                     18h
kubernetes-dashboard   kubernetes-dashboard                 nodeport    10.96.152.132   <none>        443:32249/tcp                18h
4)创建访问账号
vi dash.yaml
	apiversion: v1
	kind: serviceaccount
	metadata:
	  name: admin-user
	  namespace: kubernetes-dashboard
	---
	apiversion: rbac.authorization.k8s.io/v1
	kind: clusterrolebinding
	metadata:
	  name: admin-user
	roleref:
	  apigroup: rbac.authorization.k8s.io
	  kind: clusterrole
	  name: cluster-admin
	subjects:
	- kind: serviceaccount
	  name: admin-user
	  namespace: kubernetes-dashboard
kubectl apply -f dash.yaml
#获取访问令牌
kubectl -n kubernetes-dashboard get secret $(kubectl -n kubernetes-dashboard get sa/admin-user -o jsonpath="{.secrets[0].name}") -o go-template="{{.data.token | base64decode}}"
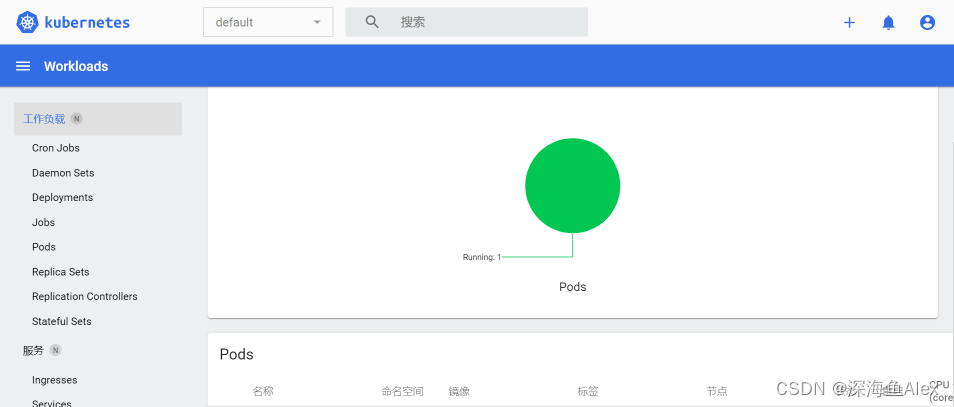
5)界面


发表评论