1、user指令
user:用于配置运行nginx服务器的 worker进程 的用户和用户组。
| 语法 | user user[group] |
|---|---|
| 默认值 | nobody |
| 位置 | 全局块 |
该属性也可以在编译的时候指定,语法如下:
./configure --user=user
./configure --group=group
如果两个地方都进行了设置,最终生效的是配置文件中的配置。
1.1、进入nginx解压的目录
[root@localhost conf]# cd /opt/tool/nginx/nginx-1.20.1/
[root@localhost nginx-1.20.1]# pwd
/opt/tool/nginx/nginx-1.20.1
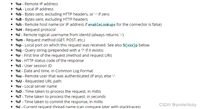
1.2、./configure --help
[root@localhost nginx-1.20.1]# ./configure --help
  --user=user                        set non-privileged user for
                                     worker processes
  --group=group                      set non-privileged group for
                                     worker processes
1.3、工作进程默认是nobody
[root@localhost nginx-1.20.1]# ps -ef | grep nginx
root       7337      1  0 18:12 ?        00:00:00 nginx: master process ./nginx
nobody     7338   7337  0 18:12 ?        00:00:00 nginx: worker process
root       7719   7193  0 18:48 pts/0    00:00:00 grep --color=auto nginx
[root@localhost nginx-1.20.1]# cat /usr/local/nginx/conf/nginx.conf

#user  nobody;
2、user指令的使用步骤:
2.1、设置一个用户信息"www"
修改nginx.conf配置文件中的#user nobody;为user www;
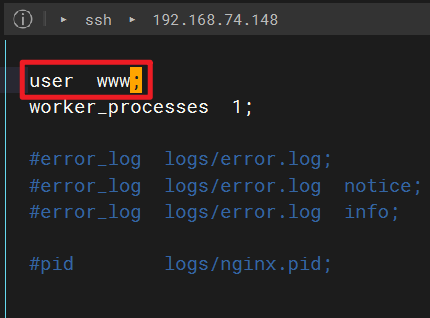
user www;
[root@localhost sbin]# pwd
/usr/local/nginx/sbin
[root@localhost sbin]# ./nginx -t
nginx: [emerg] getpwnam("www") failed in /usr/local/nginx/conf/nginx.conf:2
nginx: configuration file /usr/local/nginx/conf/nginx.conf test failed
发现配置文件测试失败,这个时候我们需要创建一个用户www
2.2、 创建一个用户
[root@localhost sbin]# useradd www
[root@localhost sbin]# ./nginx -t
nginx: the configuration file /usr/local/nginx/conf/nginx.conf syntax is ok
nginx: configuration file /usr/local/nginx/conf/nginx.conf test is successful
[root@localhost sbin]# ps -ef | grep nginx
root       7337      1  0 18:12 ?        00:00:00 nginx: master process ./nginx
nobody     7338   7337  0 18:12 ?        00:00:00 nginx: worker process
root       8006   7193  0 19:12 pts/0    00:00:00 grep --color=auto nginx
2.3、./nginx -s reload
[root@localhost sbin]# ./nginx -s reload
[root@localhost sbin]# ps -ef | grep nginx
root       7337      1  0 18:12 ?        00:00:00 nginx: master process ./nginx
www        8016   7337  0 19:13 ?        00:00:00 nginx: worker process
root       8018   7193  0 19:13 pts/0    00:00:00 grep --color=auto nginx
2.4、创建/root/html/index.html页面,添加如下内容
[root@localhost sbin]# cd /root/
[root@localhost ~]# mkdir html
[root@localhost ~]# cd html/
[root@localhost html]# vim index.html
<!doctype html>
<html>
<head>
<title>welcome to nginx!</title>
<style>
body {
width: 35em;
margin: 0 auto;
font-family: tahoma, verdana, arial, sans^bserif;
}
</style>
</head>
<body>
<h1>welcome to nginx!</h1>
<p>if you see this page, the nginx web server is
successfully installed and
working. further configuration is required.</p>
<p>for online documentation and support please refer
to
<a href="http://nginx.org/" rel="external nofollow" >nginx.org</a>.<br/>
commercial support is available at
<a href="http://nginx.com/" rel="external nofollow" >nginx.com</a>.</p>
<p><em>thank you for using nginx.</em></p>
<p><em>i am www</em></p>
</body>
</html>
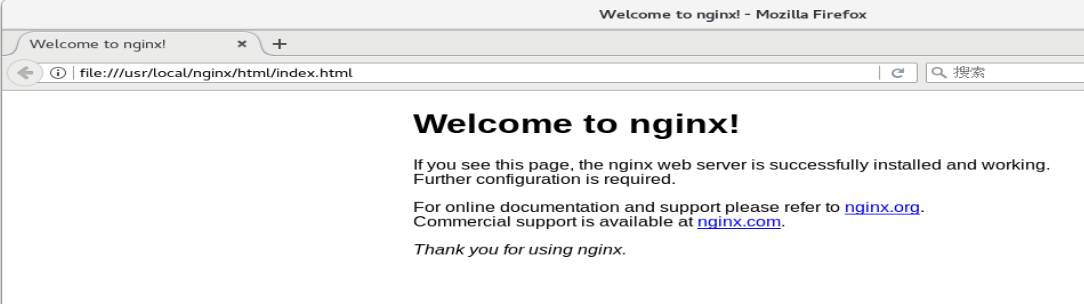
file:///usr/local/nginx/html/index.html
2.5、修改nginx.conf
location / {
root /root/html;
index index.html index.htm;
}
[root@localhost conf]# pwd
/usr/local/nginx/conf
[root@localhost conf]# vim nginx.conf
[root@localhost conf]# cd ../sbin/
[root@localhost sbin]# ./nginx -t
nginx: the configuration file /usr/local/nginx/conf/nginx.conf syntax is ok
nginx: configuration file /usr/local/nginx/conf/nginx.conf test is successful
[root@localhost sbin]# ./nginx -s reload
2.6、测试启动访问
页面会报403拒绝访问的错误

到此这篇关于nginx全局块的user指令的实现示例的文章就介绍到这了,更多相关nginx全局块user指令内容请搜索3w代码以前的文章或继续浏览下面的相关文章希望大家以后多多支持3w代码!


发表评论