前言
在我们的日常开发过程中,经常使用nginx做文件读取服务器,因为配置非常简单,方便使用。只要通过ip和端口加上文件路径就可以读到文件或者图片了。但是,我们的安全问题该如何处理?并不是所有的人拿到图片路径就可以访问文件,这样很有可能造成文件泄露。
因此,我们想的是,在通过路径获取文件的时候,可以携带token信息,通过我们的系统服务进行token验证,如果token合法,才能成功获取图片,否则拒绝此次请求。
以下是具体的实现方式,通过nginx的auth_request模块:
1.配置nginx静态服务器
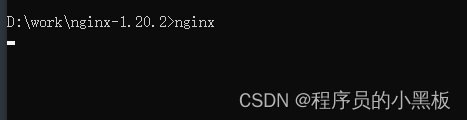
下载nginx,解压之后,打开conf文件夹下面的nginx.conf
设置静态文件路径,然后在根目录执行nginx启动,静态文件服务器就可以使用了
server {
        listen       8088;
        server_name  127.0.0.1;

        #charset koi8-r;

        #access_log  logs/host.access.log  main;

        location / {
            alias   d:/work/file/;
            index  index.html index.htm;
        }

        #error_page  404              /404.html;

        # redirect server error pages to the static page /50x.html
        #
        error_page   500 502 503 504  /50x.html;
        location = /50x.html {
            root   html;
        }

        # proxy the php scripts to apache listening on 127.0.0.1:80
        #
        #location ~ \.php$ {
        #    proxy_pass   http://127.0.0.1;
        #}

        # pass the php scripts to fastcgi server listening on 127.0.0.1:9000
        #
        #location ~ \.php$ {
        #    root           html;
        #    fastcgi_pass   127.0.0.1:9000;
        #    fastcgi_index  index.php;
        #    fastcgi_param  script_filename  /scripts$fastcgi_script_name;
        #    include        fastcgi_params;
        #}

        # deny access to .htaccess files, if apache's document root
        # concurs with nginx's one
        #
        #location ~ /\.ht {
        #    deny  all;
        #}
    }
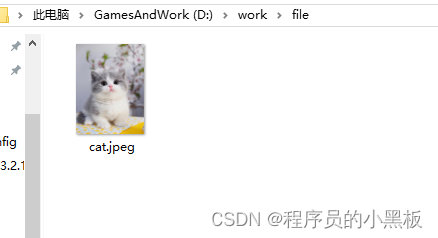
文件夹下放了一张图片,我们打开浏览器,输入http://127.0.0.1/cat.jpeg就可以访问到了
2.编写后台授权接口
正常我们都是通过hearder中携带授权token信息,所以我们后台写个接口,通过httpservletrequest获取header中的token信息,再进行业务的验证就可以了,auth_request模块是根据返回的http状态值来判断是否通过授权,200则为成功,401或者403为授权失败
    @requestmapping("/authfilevalid")
    @responsebody
    public void authfilevalid(httpservletrequest request,httpservletresponse response){
        string token = request.getheader("accesstoken");
        system.out.println("获取的token:"+token);
        if(token != null){
            //验证token是否合法
        }else{
            response.setstatus(httpstatus.unauthorized.value());
        }
    }
3.修改nginx配置文件
server {
        listen       8088;
        server_name  127.0.0.1;

        #charset koi8-r;

        #access_log  logs/host.access.log  main;

        location / {
            alias   d:/work/file/;
            # 设置鉴权的请求
            auth_request /authfilevalid;
            # 从查询参数中获取 token,并赋值给token变量
            set $token $arg_token;
            # 自定义验证失败时的处理页面
            error_page 401 = /auth-required;
        }

        location = /authfilevalid {
            internal; # 只允许内部访问
            proxy_pass http://127.0.0.1:8080/authfilevalid;
            proxy_pass_request_body off;
            proxy_set_header content-length "";
            proxy_set_header x-original-uri $request_uri;
            # 设置accesstoken 的值为token
            proxy_set_header accesstoken "$token";
        }

        location = /auth-required {
             return 401; # 返回 401 状态码
        }

        #error_page  404              /404.html;

        # redirect server error pages to the static page /50x.html
        #
        error_page   500 502 503 504  /50x.html;
        location = /50x.html {
            root   html;
        }

        # proxy the php scripts to apache listening on 127.0.0.1:80
        #
        #location ~ \.php$ {
        #    proxy_pass   http://127.0.0.1;
        #}

        # pass the php scripts to fastcgi server listening on 127.0.0.1:9000
        #
        #location ~ \.php$ {
        #    root           html;
        #    fastcgi_pass   127.0.0.1:9000;
        #    fastcgi_index  index.php;
        #    fastcgi_param  script_filename  /scripts$fastcgi_script_name;
        #    include        fastcgi_params;
        #}

        # deny access to .htaccess files, if apache's document root
        # concurs with nginx's one
        #
        #location ~ /\.ht {
        #    deny  all;
        #}
    }
注意:
set $token $arg_token中的arg_是参数前缀固定写法,实则是获取的查询参数中的token值
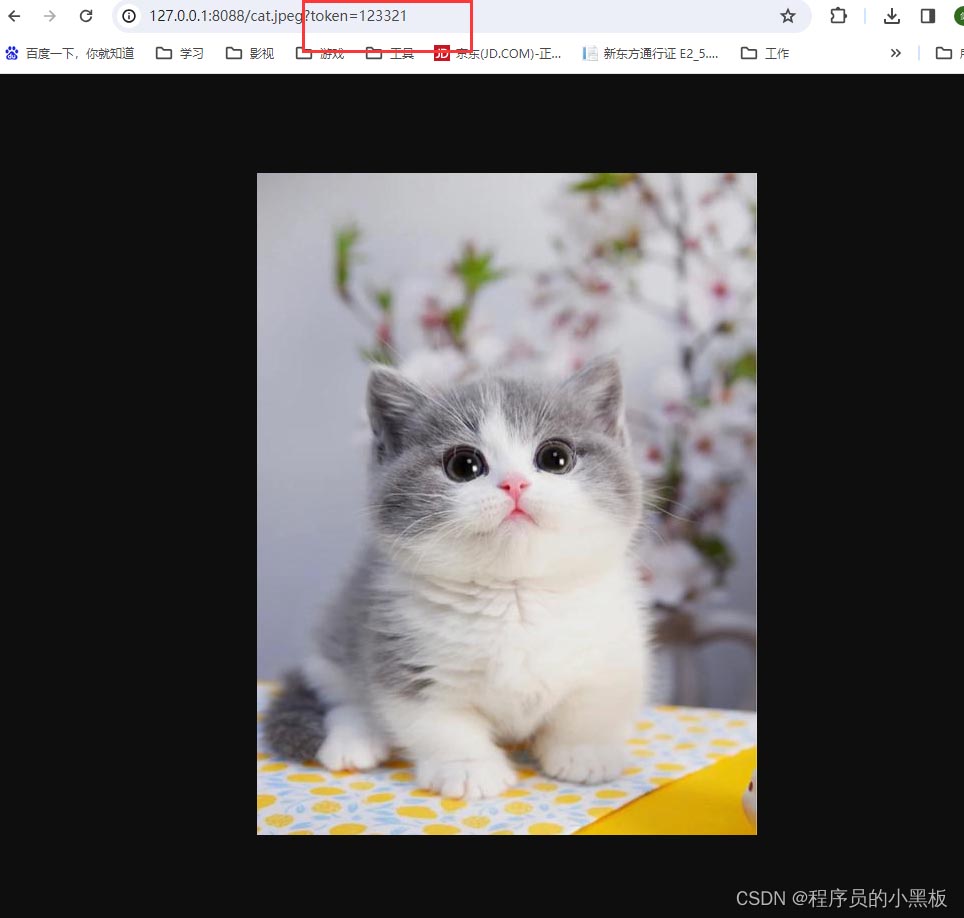
例如http://127.0.0.1:8088/cat.jpeg?token=xxxxx
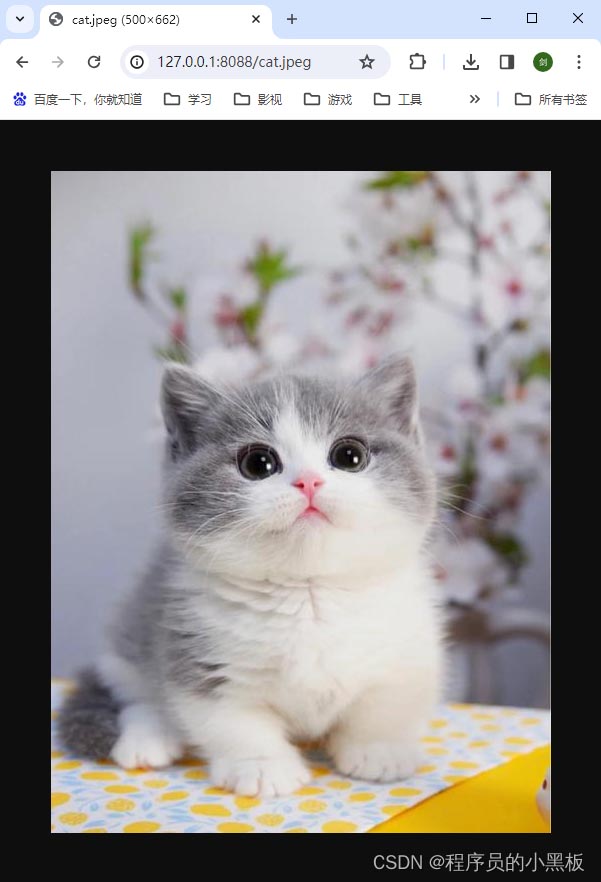
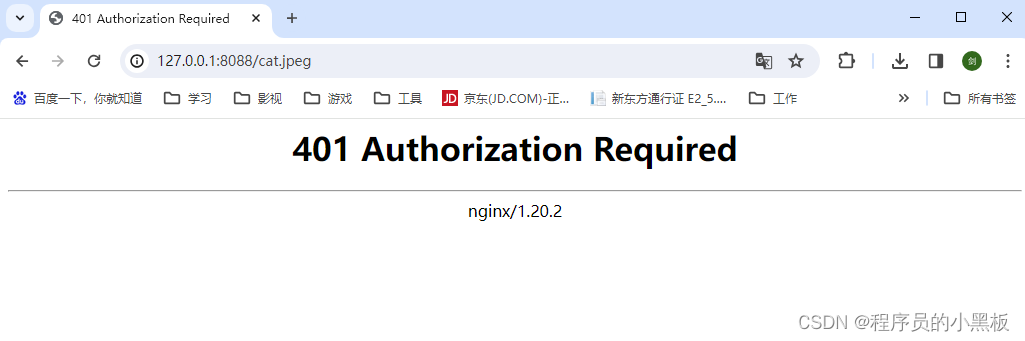
4.测试
重新启动nginx,启动后台web,浏览器访问http://127.0.0.1:8088/cat.jpeg,就可以看到下面的结果了
- 前端:
- 后台:
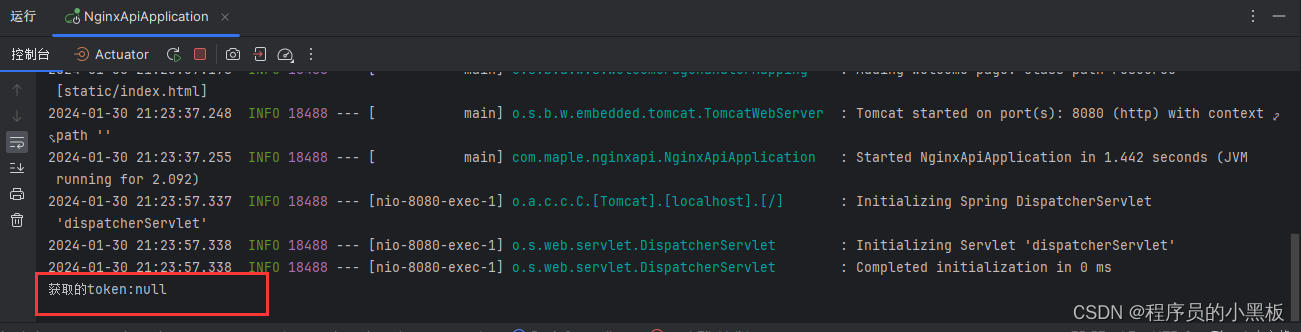
我们可以看到,再次访问图片返回了401,这时候我们已经没有权限去访问图片了
这次我们随便设置一下token值,后台并没有进行验证token的正确性,便于测试只是验证了非空
- 前端:
- 后端:

如此我们便实现了nginx调用后台接口授权的整个流程、
总结
以上为个人经验,希望能给大家一个参考,也希望大家多多支持代码网。


发表评论