nodejs—path 路径模块
1. 什么是 path 路径模块
path 模块是 node.js 官方提供的、用来处理路径的模块。它提供了一系列的方法和属性,用来满足用户对路径的处理需求。 例如:
(1) path.join() 方法,用来将多个路径片段拼接成一个完整的路径字符串
(2)path.basename() 方法,用来从路径字符串中,将文件名解析出来
如果要在 javascript 代码中,使用 path 模块来处理路径,则需要使用如下的方式先导入它:

2. 路径拼接
1. path.join() 的语法格式
使用 path.join() 方法,可以把多个路径片段拼接为完整的路径字符串,语法格式如下: 参数解读:
(1) ...paths <string> 路径片段的序列
(2) 返回值: <string>
2. path.join() 的代码示例
使用 path.join() 方法,可以把多个路径片段拼接为完整的路径字符串:

const path = require('path')
const fs = require('fs')
// 注意:  ../ 会抵消前面的路径
// const pathstr = path.join('/a', '/b/c', '../../', './d', 'e')
// console.log(pathstr)  // \a\b\d\e
// fs.readfile(__dirname + '/files/1.txt')
fs.readfile(path.join(__dirname, './files/1.txt'), 'utf8', function(err, datastr) {
  if (err) {
    return console.log(err.message)
  }
  console.log(datastr)
})
注意:今后凡是涉及到路径拼接的操作,都要使用 path.join() 方法进行处理。不要直接使用 + 进行字符串的拼接。
3. 获取路径中的文件名
1. path.basename() 的语法格式
使用 path.basename() 方法,可以获取路径中的最后一部分,经常通过这个方法获取路径中的文件名,语法格式如下: 参数解读:
(1) path 必选参数,表示一个路径的字符串
(2) ext 可选参数,表示文件扩展名
(3) 返回: 表示路径中的最后一部分
2. path.basename() 的代码示例
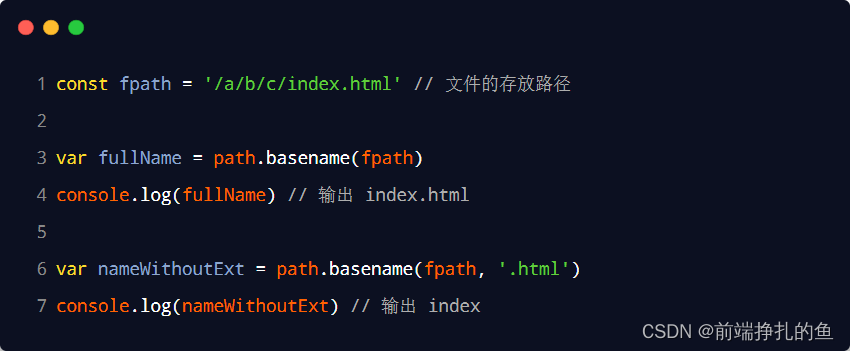
使用 path.basename() 方法,可以从一个文件路径中,获取到文件的名称部分:
const path = require('path')
// 定义文件的存放路径
const fpath = '/a/b/c/index.html'
// 获取完整的文件名
// const fullname = path.basename(fpath)
// console.log(fullname)
// 获取文件名(无扩展名)
const namewithoutext = path.basename(fpath, '.html')
console.log(namewithoutext)
4. 获取路径中的文件扩展名
1. path.extname() 的语法格式
使用 path.extname() 方法,可以获取路径中的扩展名部分,语法格式如下: 参数解读:

(1) path<string> 必选参数,表示一个路径的字符串
(2) 返回: <string> 返回得到的扩展名字符串
2. path.extname() 的代码示例
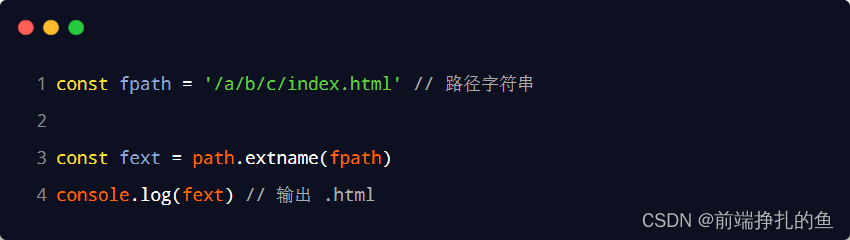
使用 path.extname() 方法,可以获取路径中的扩展名部分:
const path = require('path')
// 这是文件的存放路径
const fpath = '/a/b/c/index.html'
// 输出文件路径中的扩展名
const fext = path.extname(fpath)
console.log(fext)
5. 综合案例 - 时钟案例
1. 案例要实现的功能
将素材目录下的 index.html 页面, 拆分成三个文件,分别是:
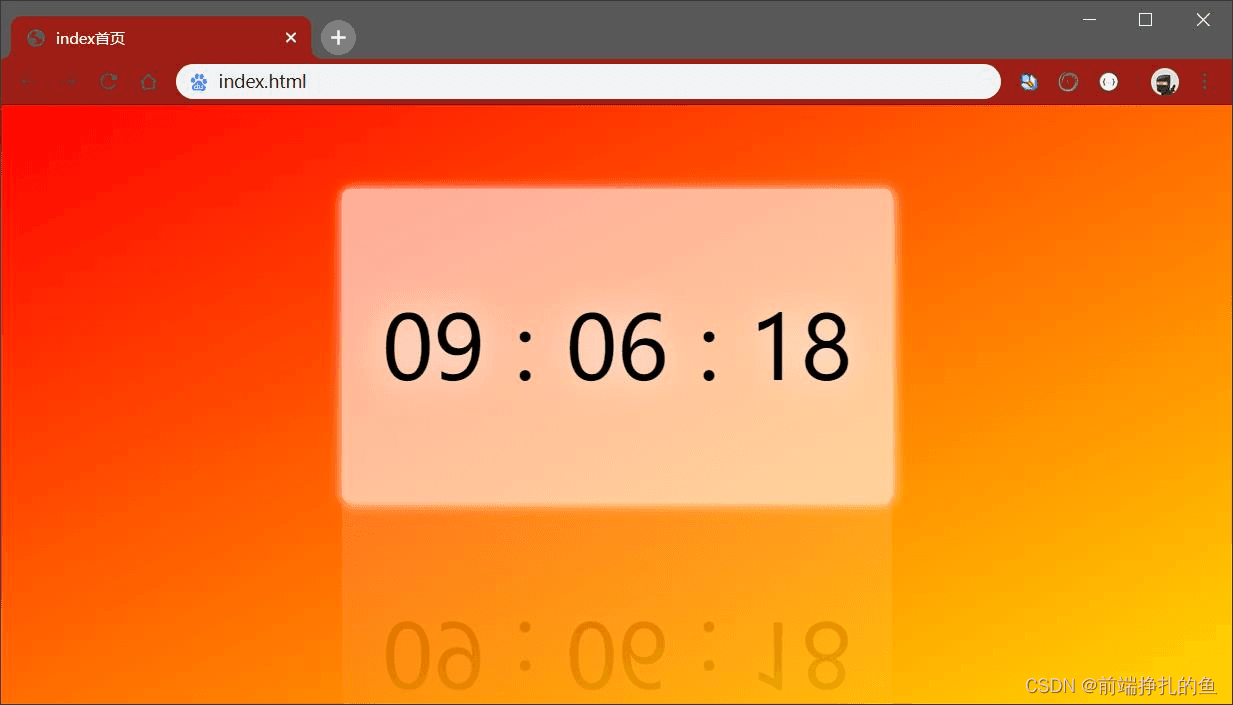
(1) index.css
(2) index.js
(3)index.html 并且将拆分出来的 3 个文件,存放到 clock 目录中。
2. 案例的实现步骤
① 创建两个正则表达式,分别用来匹配 <style> 和 <script> 标签
② 使用 fs 模块,读取需要被处理的 html 文件
③ 自定义 resolvecss 方法,来写入 index.css 样式文件
④ 自定义 resolvejs 方法,来写入 index.js 脚本文件
⑤ 自定义 resolvehtml 方法,来写入 index.html 文件
3.步骤
步骤1 - 导入需要的模块并创建正则表达式
步骤2 - 使用 fs 模块读取需要被处理的 html 文件
步骤3 – 自定义 resolvecss 方法
步骤4 – 自定义 resolvejs 方法
步骤5 – 自定义 resolvehtml 方法

4. 案例代码
(1)index.html
<!doctype html>
<html lang="en">
<head>
  <meta charset="utf-8">
  <meta name="viewport" content="width=device-width, initial-scale=1.0">
  <meta http-equiv="x-ua-compatible" content="ie=edge">
  <title>index首页</title>
  <style>
    html,
    body {
      margin: 0;
      padding: 0;
      height: 100%;
      background-image: linear-gradient(to bottom right, red, gold);
    }
    .box {
      width: 400px;
      height: 250px;
      background-color: rgba(255, 255, 255, 0.6);
      border-radius: 6px;
      position: absolute;
      left: 50%;
      top: 40%;
      transform: translate(-50%, -50%);
      box-shadow: 1px 1px 10px #fff;
      text-shadow: 0px 1px 30px white;
      display: flex;
      justify-content: space-around;
      align-items: center;
      font-size: 70px;
      user-select: none;
      padding: 0 20px;
      /* 盒子投影 */
      -webkit-box-reflect: below 0px -webkit-gradient(linear, left top, left bottom, from(transparent), color-stop(0%, transparent), to(rgba(250, 250, 250, .2)));
    }
  </style>
</head>
<body>
  <div class="box">
    <div id="hh">00</div>
    <div>:</div>
    <div id="mm">00</div>
    <div>:</div>
    <div id="ss">00</div>
  </div>
  <script>
    window.onload = function () {
      // 定时器,每隔 1 秒执行 1 次
      setinterval(() => {
        var dt = new date()
        var hh = dt.gethours()
        var mm = dt.getminutes()
        var ss = dt.getseconds()
        // 为页面上的元素赋值
        document.queryselector('#hh').innerhtml = padzero(hh)
        document.queryselector('#mm').innerhtml = padzero(mm)
        document.queryselector('#ss').innerhtml = padzero(ss)
      }, 1000)
    }
    // 补零函数
    function padzero(n) {
      return n > 9 ? n : '0' + n
    }
  </script>
</body>
</html>
(2) 时钟案例.js
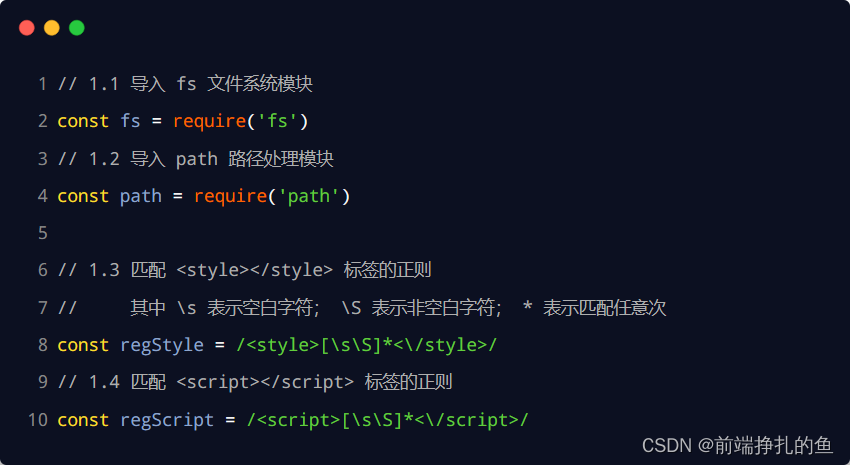
// 1.1 导入 fs 模块
const fs = require('fs')
// 1.2 导入 path 模块
const path = require('path')
// 1.3 定义正则表达式,分别匹配 <style></style> 和 <script></script> 标签
const regstyle = /<style>[\s\s]*<\/style>/
const regscript = /<script>[\s\s]*<\/script>/
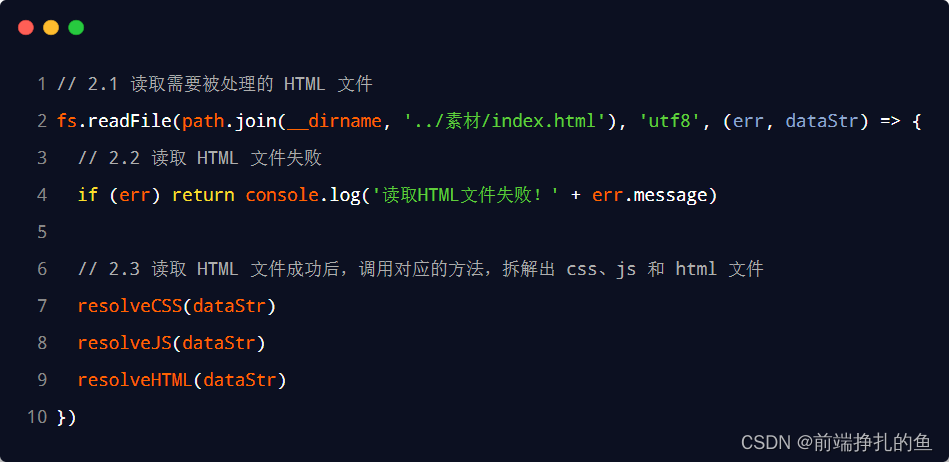
// 2.1 调用 fs.readfile() 方法读取文件
fs.readfile(path.join(__dirname, '../素材/index.html'), 'utf8', function(err, datastr) {
// 2.2 读取 html 文件失败
if (err) {
return console.log('读取html文件失败!' + err.message)
}
// 2.3 读取文件成功后,调用对应的三个方法,分别拆解出 css, js, html 文件
resolvecss(datastr)
resolvejs(datastr)
resolvehtml(datastr)
})
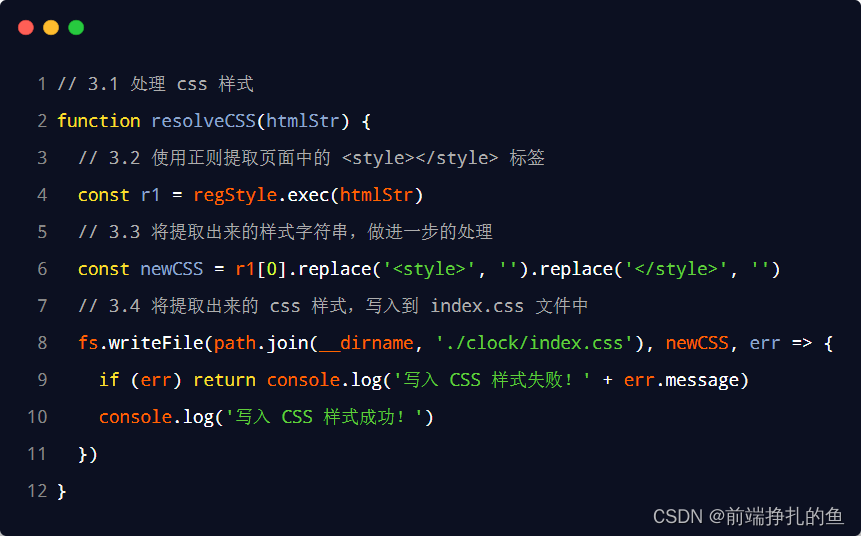
// 3.1 定义处理 css 样式的方法
function resolvecss(htmlstr) {
// 3.2 使用正则提取需要的内容
const r1 = regstyle.exec(htmlstr)
// 3.3 将提取出来的样式字符串,进行字符串的 replace 替换操作
const newcss = r1[0].replace('<style>', '').replace('</style>', '')
// 3.4 调用 fs.writefile() 方法,将提取的样式,写入到 clock 目录中 index.css 的文件里面
fs.writefile(path.join(__dirname, './clock/index.css'), newcss, function(err) {
if (err) {
return console.log('写入 css 样式失败!' + err.message)
}
console.log('写入样式文件成功!')
})
}
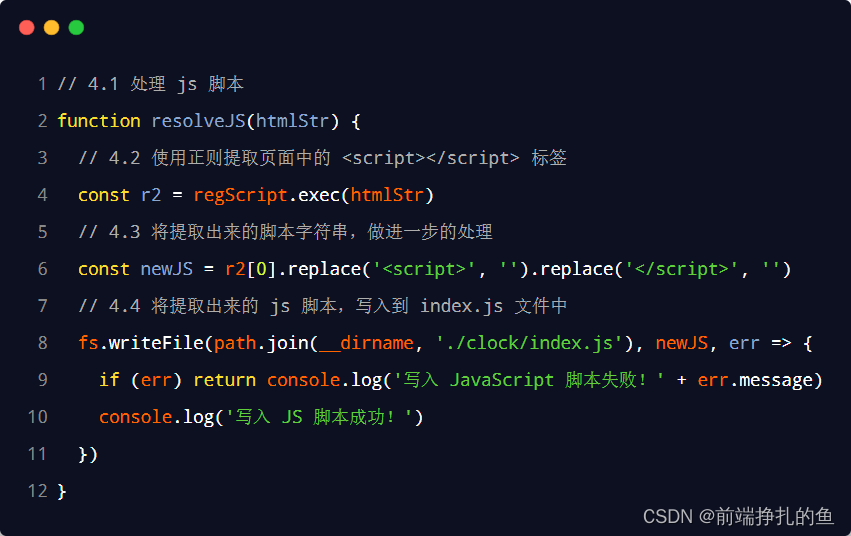
// 4.1 定义处理 js 脚本的方法
function resolvejs(htmlstr) {
// 4.2 通过正则,提取对应的 <script></script> 标签内容
const r2 = regscript.exec(htmlstr)
// 4.3 将提取出来的内容,做进一步的处理
const newjs = r2[0].replace('<script>', '').replace('</script>', '')
// 4.4 将处理的结果,写入到 clock 目录中的 index.js 文件里面
fs.writefile(path.join(__dirname, './clock/index.js'), newjs, function(err) {
if (err) return console.log('写入 javascript 脚本失败!' + err.message)
console.log('写入 js 脚本成功!')
})
}
// 5.1 定义处理 html 结构的方法
function resolvehtml(htmlstr) {
// 5.2 将字符串调用 replace 方法,把内嵌的 style 和 script 标签,替换为外联的 link 和 script 标签
const newhtml = htmlstr.replace(regstyle, '<link rel="stylesheet" href="./index.css" rel="external nofollow" />').replace(regscript, '<script src="./index.js"></script>')
// 5.3 写入 index.html 这个文件
fs.writefile(path.join(__dirname, './clock/index.html'), newhtml, function(err) {
if (err) return console.log('写入 html 文件失败!' + err.message)
console.log('写入 html 页面成功!')
})
}(3)index.css
    html,
    body {
      margin: 0;
      padding: 0;
      height: 100%;
      background-image: linear-gradient(to bottom right, red, gold);
    }
    .box {
      width: 400px;
      height: 250px;
      background-color: rgba(255, 255, 255, 0.6);
      border-radius: 6px;
      position: absolute;
      left: 50%;
      top: 40%;
      transform: translate(-50%, -50%);
      box-shadow: 1px 1px 10px #fff;
      text-shadow: 0px 1px 30px white;
      display: flex;
      justify-content: space-around;
      align-items: center;
      font-size: 70px;
      user-select: none;
      padding: 0 20px;
      /* 盒子投影 */
      -webkit-box-reflect: below 0px -webkit-gradient(linear, left top, left bottom, from(transparent), color-stop(0%, transparent), to(rgba(250, 250, 250, .2)));
    }
(4)index.js
    window.onload = function () {
      // 定时器,每隔 1 秒执行 1 次
      setinterval(() => {
        var dt = new date()
        var hh = dt.gethours()
        var mm = dt.getminutes()
        var ss = dt.getseconds()
        // 为页面上的元素赋值
        document.queryselector('#hh').innerhtml = padzero(hh)
        document.queryselector('#mm').innerhtml = padzero(mm)
        document.queryselector('#ss').innerhtml = padzero(ss)
      }, 1000)
    }
    // 补零函数
    function padzero(n) {
      return n > 9 ? n : '0' + n
    }
5. 案例的两个注意点
① fs.writefile() 方法只能用来创建文件,不能用来创建路径
② 重复调用 fs.writefile() 写入同一个文件,新写入的内容会覆盖之前的旧内容
补充:
node.js开发-path模块
path模块
path 模块提供了 操作路径 的功能,将介绍如下几个较为常用的几个 api:
| api | 说明 |
|---|---|
| path.resolve | 拼接规范的绝对路径 常用 |
| path.sep | 获取操作系统的路径分隔符 |
| path.parse | 解析路径并返回对象 |
| path.basename | 获取路径的基础名称 |
| path.dirname | 获取路径的目录名 |
| path.extname | 获得路径的扩展名 |
// 导入path模块
const path = require("path");
// resolve 解决
console.log(path.resolve(__dirname, "index.html"));
// sep 分隔符
console.log(path.sep);
// parse 解析
let str = "f:\\work\\vscode-node.js\\3-path\\path.js";
console.log(path.parse(str));
// basename
console.log(path.basename(str));
// dirname
console.log(path.dirname(str));
// extname
console.log(path.extname(str));
到此这篇关于node.js开发 path路径模块详解的文章就介绍到这了,更多相关node.js path模块内容请搜索代码网以前的文章或继续浏览下面的相关文章希望大家以后多多支持代码网!


发表评论