摘要
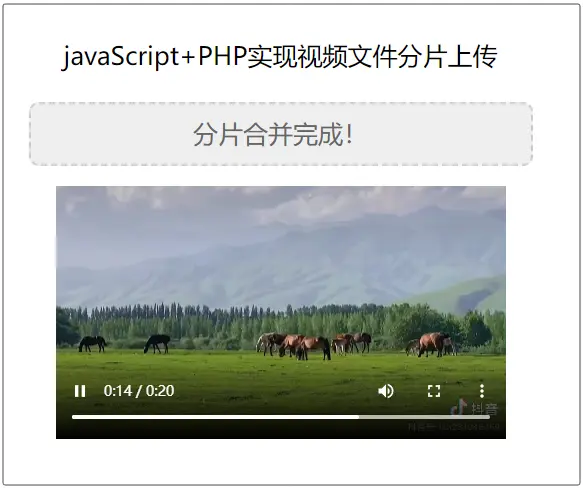
视频文件分片上传,整体思路是利用javascript将文件切片,然后循环调用上传接口 upload.php 将切片上传到服务器。这样将由原来的一个大文件上传变为多个小文件同时上传,节省了上传时间,这就是文件分片上传的其中一个好处。
上代码
index.html
通过前端将文件对象切分成多个小块,然后依次将这些小块的文件对象上传到服务器。
<!doctype html>
<html lang="en">
	<head>
		<meta charset="utf-8">
		<meta name="viewport" content="width=device-width, initial-scale=1.0">
		<title>视频文件分片上传</title>
		<style>
		    *{
		        padding: 0;
		        margin: 0;
		    }
		    .title {
		        text-align: center;
		        font-size: 25px;
		        margin-top: 50px;
		    }
		    .video_upload {
		        width: 500px;
		        height: 60px;
		        background: #eee;
		        margin: 30px auto 0;
		        border: 2px dashed #ccc;
		        border-radius: 10px;
		        position: relative;
		        cursor: pointer;
		        text-align: center;
		        font-size: 25px;
		        line-height: 60px;
		        color: #666;
		    }
		    #fileinput {
		        width: 100%;
		        height: 100%;
		        position: absolute;
		        left: 0;
		        top: 0;
		        opacity: 0;
		        cursor: pointer;
		    }
		    #uploadbutton {
		        width: 130px;
		        height: 40px;
		        border: none;
		        outline: none;
		        border-radius: 10px;
		        font-size: 17px;
		        margin: 10px auto;
		    }
		    #ret {
		        text-align: center;
		        font-size: 16px;
		        margin-top: 20px;
		    }
		    #ret video {
		        width: 450px;
		    }
		</style>
	</head>
	<body>

        <p class="title">javascript+php实现视频文件分片上传</p>
        <div class="video_upload">
            <span class="text"> + </span>
            <input type="file" id="fileinput" accept="video/*">
        </div>
		<button id="uploadbutton" style="display:none;">开始上传</button>
		<p id="ret"></p>

		<script>

			// 定义全局变量
			let videofile = null;
			let chunksize = 1024 * 1024; // 1mb 分片大小

			// 当文件选择框的值改变时触发该函数
			function handlefileselect(event) {
			    const filelist = event.target.files;
			    if (filelist.length > 0) {
			        videofile = filelist[0];
			        console.log("选择了文件: ", videofile.name);
			        document.queryselector('.video_upload .text').textcontent = videofile.name;
			        document.queryselector('#uploadbutton').style.display = 'block';
			    }
			}

			// 分片并上传文件
			async function uploadfile() {
			    if (!videofile) {
			        console.error("请选择一个视频文件");
			        return;
			    }

			    const filesize = videofile.size;
			    let start = 0;
			    let end = math.min(chunksize, filesize);
			    let chunkindex = 0;

			    // 获取文件名
			    const filename = videofile.name;

			    while (start < filesize) {
			        const chunk = videofile.slice(start, end); // 从文件中截取一个分片

			        // 使用formdata来构建multipart/form-data格式的请求体
			        const formdata = new formdata();
			        formdata.append('file', chunk);
			        formdata.append('chunkindex', chunkindex);
			        formdata.append('filename', filename); // 将文件名作为 formdata 的一部分

			        try {
			            const response = await fetch('upload.php', {
			                method: 'post',
			                body: formdata
			            });

			            if (!response.ok) {
			                throw new error('上传失败');
			            }

			            console.log('上传分片 ', chunkindex, ' 成功');
			        } catch (error) {
			            console.error('上传分片 ', chunkindex, ' 失败: ', error.message);
			            return;
			        }

			        start = end;
			        end = math.min(start + chunksize, filesize);
			        chunkindex++;
			    }

			    console.log('文件上传完成');

			    // 上传完成后发送通知给服务器进行合并
			    notifyserverformerge(filename);
			}

			// 发送通知给服务器进行合并
			async function notifyserverformerge(filename) {
			    try {
			        const response = await fetch('merge_chunks.php', {
			            method: 'post',
			            headers: {
			                'content-type': 'application/json'
			            },
			            body: json.stringify({ filename: filename })
			        });

			        if (!response.ok) {
			            throw new error('无法通知服务器进行合并');
			        }

			        const res_data = await response.json();

			        console.log('已通知服务器进行合并');
			        document.queryselector('.video_upload .text').textcontent = '分片合并完成!';
			        document.queryselector('#ret').innerhtml = '<video autoplay controls src="'+res_data.filepath+'"></video>';
			        document.queryselector('#uploadbutton').style.display = 'none';
			    } catch (error) {
			        console.error('通知服务器进行合并时发生错误: ', error.message);
			    }
			}

			// 注册文件选择框的change事件
			document.getelementbyid('fileinput').addeventlistener('change', handlefileselect);

			// 注册上传按钮的click事件
			document.getelementbyid('uploadbutton').addeventlistener('click', uploadfile);
		</script>

	</body>
</html>
upload.php
这个是用于接收前端传过来的每一段分片,然后上传到 uploads 文件夹,上传之后就是一段一段的小分片。
<?php

    // 设置允许跨域访问
    header("access-control-allow-origin: *");
    header("access-control-allow-methods: post");

    // 检查是否接收到文件和分片索引
    if (isset($_files['file']['error']) && isset($_post['chunkindex']) && isset($_post['filename'])) {

        $error = $_files['file']['error'];
        $chunkindex = $_post['chunkindex'];
        $filename = $_post['filename']; // 获取文件名

        // 检查是否有错误
        if ($error !== upload_err_ok) {
            http_response_code(500);
            echo json_encode(array(
                'error' => '文件上传失败'
            ));
            exit();
        }

        // 设置存储目录和文件名
        $uploaddir = './uploads/';
        $filepath = $uploaddir . $filename . '.' . $chunkindex;

        // 将分片移动到指定的目录
        if (move_uploaded_file($_files['file']['tmp_name'], $filepath)) {

            echo json_encode(array(
                'success' => '分片上传成功'
            ));
        } else {

            http_response_code(500);
            echo json_encode(array(
                'error' => '分片上传失败'
            ));
        }
    } else {

        http_response_code(400);
        echo json_encode(array(
            'error' => '缺少文件、分片索引或文件名'
        ));
    }

?>
merge_chunks.php
这个是用来合并分片的,当前端完成上传分片的操作,前端会异步告诉服务器你已经完成所有分片的上传,接下来将每个分片名告诉合并程序完成所有分片的合并,合并之后就是一个完整的视频文件。
<?php

    // 设置允许跨域访问
    header("access-control-allow-origin: *");
    header("access-control-allow-methods: post");
    header("content-type: application/json");

    // 获取请求体中的文件名
    $data = json_decode(file_get_contents("php://input") , true);
    $filename = isset($data['filename']) ? $data['filename'] : null;
    if ($filename) {

        $uploaddir = './uploads/';
        $finalfilepath = $uploaddir . $filename;
        $totalchunks = count(glob($uploaddir . $filename . '.*'));

        // 检查是否所有分片都已上传
        if ($totalchunks > 0) {

            // 所有分片都已上传,开始合并
            $finalfile = fopen($finalfilepath, 'wb');

            // 逐个读取分片并写入最终文件
            for ($i = 0; $i < $totalchunks; $i++) {
                $chunkfilepath = $uploaddir . $filename . '.' . $i;
                $chunkfile = fopen($chunkfilepath, 'rb');
                stream_copy_to_stream($chunkfile, $finalfile);
                fclose($chunkfile);
                unlink($chunkfilepath); // 删除已合并的分片

            }

            fclose($finalfile);
            http_response_code(200);
            echo json_encode(array(
                'success' => '文件合并成功',
                'filepath' => $finalfilepath
            ));
        } else {

            http_response_code(400);
            echo json_encode(array(
                'error' => '没有上传的分片'
            ));
        }
    } else {

        http_response_code(400);
        echo json_encode(array(
            'error' => '缺少文件名'
        ));
    }
?>
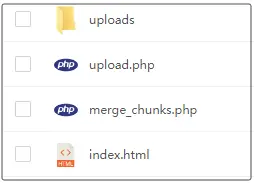
程序目录
请自行创建 uploads 目录。
以上就是javascript+php实现视频文件分片上传的示例代码的详细内容,更多关于javascript+php视频文件上传的资料请关注代码网其它相关文章!


发表评论