前言:本文记录一下在项目开发过程中,minio配置https证书的过程
1.生成私钥:(minio是自定义的名字)
openssl genrsa -des3 -out minio.key 2048
输入完这个命令会让输入两次密码,密码自定义就可以,两次输入需要一致

2.消除私钥key的密码
就是把上面那个文件的密码消除掉
openssl rsa -in minio.key -out minio.key
输入完命令让输入密码确认,这里输入第一步的密码

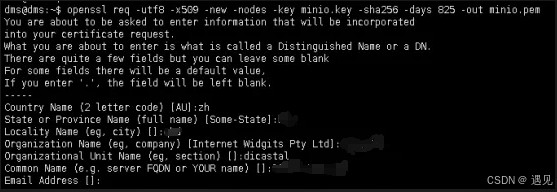
3.生成pem文件(这里的minio.key,是上面创建的文件)
openssl req -utf8 -x509 -new -nodes -key minio.key -sha256 -days 825 -out minio.pem
输入完命令会让输入以下几个信息:
country name (2 letter code) [au]:
state or province name (full name) [some-state]:
locality name (eg, city) []:
organization name (eg, company) [internet widgits pty ltd]:
organizational unit name (eg, section) []:
common name (e.g. server fqdn or your name) []:
email address []:
4.创建ca签名证书
生成私钥(server.key自定义名称)
openssl genrsa -out minio_server.key 2048
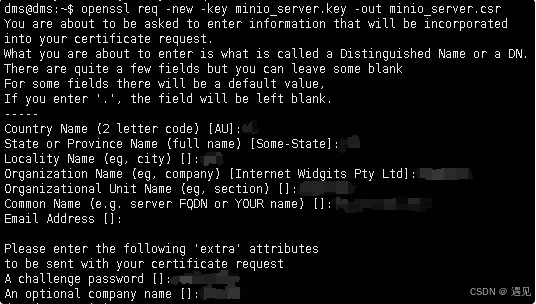
5.创建证书签名请求(server.key这个是第四步创建的文件)
openssl req -new -key minio_server.key -out minio_server.csr
输入完命令会让输入以下几个信息:
country name (2 letter code) [au]:
state or province name (full name) [some-state]:
locality name (eg, city) []:
organization name (eg, company) [internet widgits pty ltd]:
organizational unit name (eg, section) []:
common name (e.g. server fqdn or your name) []:
email address []:
please enter the following 'extra' attributes
to be sent with your certificate request
a challenge password []:
an optional company name []:
6.创建一个配置文件
vim minio_server.ext
authoritykeyidentifier=keyid,issuer
basicconstraints=ca:false
keyusage = digitalsignature, nonrepudiation, keyencipherment, dataencipherment
subjectaltname = @alt_names
[alt_names]
dns.1 = xx.xx.xxx.xxx
ip.1 = xx.xx.xxx.xxx
7.创建签名证书
openssl x509 -req -in minio_server.csr -ca minio.pem -cakey minio.key -cacreateserial -out minio_server.crt -days 3650 -sha256 -extfile minio_server.ext

8.得到所需证书文件
minio_server.crt
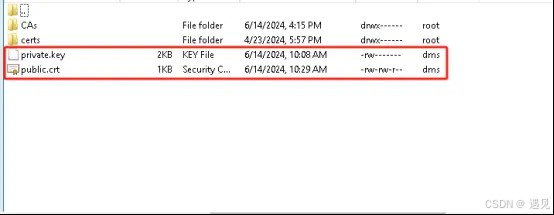
9.将上面生成的minio_server.key重命名为private.key
将上一步生成的minio_server.crt重命名为public.crt
10.配置证书
minio启动命令,将上面重命名后的private.key和public.crt放到/minio/config这个目录下
	sudo docker run -p 9000:9000 -p 9001:9001 -d --name minio
	-v /minio/data:/data
	-v /minio/config:/root/.minio/certs
	-e "minio_root_user=admin"
	-e "minio_root_password=minio@2024#qwe"
	minio/minio server /data --console-address ":9001"
最后:配置完https证书后,本地开发使用minio会报错,是因为证书不受信任的原因
解决方法:
1.配置证书到自己本地库:
cmd进本地jre的/lib/security/下
执行命令:
keytool -import -alias public -keystore cacerts -file d://public.crt(自己的路径,文件为上面生成的证书文件)
密钥口令输入:changeit
是否信任此证书:y
以上添加完之后可解决本地上传图片报错的问题
2.绕过https证书验证:
public ossclient(string configkey, ossproperties ossproperties) {
        this.configkey = configkey;
        this.properties = ossproperties;
        try {
            awsclientbuilder.endpointconfiguration endpointconfig =
                new awsclientbuilder.endpointconfiguration(properties.getendpoint(), properties.getregion());
            awscredentials credentials = new basicawscredentials(properties.getaccesskey(), properties.getsecretkey());
            awscredentialsprovider credentialsprovider = new awsstaticcredentialsprovider(credentials);
            clientconfiguration clientconfig = new clientconfiguration();
            if (ossconstant.is_https.equals(properties.getishttps())) {
                clientconfig.setprotocol(protocol.https);
                // 绕过https证书验证
                truststrategy truststrategy =(x509certificate[] chain, string authtype) ->true;
                sslcontext sslcontext =new sslcontextbuilder().loadtrustmaterial(null, truststrategy).build();
                sslconnectionsocketfactory sslsf =new sslconnectionsocketfactory(sslcontext, new string[]{"tlsv1.2"}, null, noophostnameverifier.instance);
                clientconfig.getapachehttpclientconfig().setsslsocketfactory(sslsf);
            } else {
                clientconfig.setprotocol(protocol.http);
            }
            amazons3clientbuilder build = amazons3client.builder()
                .withendpointconfiguration(endpointconfig)
                .withclientconfiguration(clientconfig)
                .withcredentials(credentialsprovider)
                .disablechunkedencoding();
            if (!stringutils.containsany(properties.getendpoint(), ossconstant.cloud_service)) {
                // minio 使用https限制使用域名访问 需要此配置 站点填域名
                build.enablepathstyleaccess();
            }
            this.client = build.build();

            createbucket();
        } catch (exception e) {
            if (e instanceof ossexception) {
                throw e;
            }
            throw new ossexception("配置错误! 请检查系统配置");
        }
    }
总结
以上为个人经验,希望能给大家一个参考,也希望大家多多支持代码网。


发表评论