在日常工作和报告制作中,将多个 powerpoint 演示文稿合并成一个 是常见需求。例如,公司季度报告可能包含来自不同部门的幻灯片,或需要将培训内容整合到统一文件中。通过 python 和 spire.presentation,你可以轻松实现幻灯片的合并,无需依赖 powerpoint 软件手动操作。
本文将演示如何使用 python 合并两个演示文稿,并说明如何选择 保留原始设计 或 使用目标演示文稿的母版设计,帮助你灵活处理不同场景下的合并需求。
本文使用的方法需要用到免费的 free spire.presentation for python,可通过 pypi 安装:pip install spire.presentation。
使用python轻松创建powerpoint演示文稿
环境准备与基础操作
在开始之前,我们需要安装spire.presentation库。打开你的终端或命令行工具,输入以下命令:
pip install spire.presentation
安装完成后,我们来尝试创建一个最简单的powerpoint演示文稿。
from spire.presentation.common import *
from spire.presentation import *

# 创建一个演示文稿对象
ppt = presentation()

# 保存演示文稿
ppt.savetofile("myfirstpresentation.pptx", fileformat.pptx2013)
ppt.dispose()

print("一个空白的powerpoint演示文稿已创建成功!")
这段代码将创建一个名为“myfirstpresentation.pptx”的空白ppt文件。虽然它目前没有任何内容,但我们已经迈出了自动化的第一步!
填充演示文稿内容
现在,让我们为演示文稿添加一些实际内容。
添加幻灯片与布局
powerpoint通常包含多种预设的幻灯片布局,例如标题页、标题和内容页等。spire.presentation允许我们选择这些布局。
from spire.presentation.common import *
from spire.presentation import *

ppt = presentation()

# 添加一张空白幻灯片 (默认布局)
slide1 = ppt.slides.append()

# 添加一张带有标题和内容的幻灯片
# 这里我们使用一个预设的布局,通常是layouttype.titleandcontent
slide2 = ppt.slides.append(slidelayouttype.titleandcontent)

# 保存演示文稿
ppt.savetofile("presentationwithslides.pptx", fileformat.pptx2013)
ppt.dispose()

print("已添加带有不同布局的幻灯片。")
添加文本并设置样式
向幻灯片添加文本是演示文稿的核心操作。我们可以设置文本的字体、大小、颜色等属性。
from spire.presentation.common import *
from spire.presentation import *
from system.drawing import color # 用于设置颜色

ppt = presentation()
slide = ppt.slides.append(slidelayouttype.titleandcontent)

# 获取幻灯片中的标题占位符
title_shape = slide.shapes.title

# 设置标题文本
if title_shape:
    title_shape.textframe.text = "python自动化ppt教程"
    # 设置标题文本样式
    text_range = title_shape.textframe.textrange
    text_range.fontheight = 36
    text_range.isbold = true
    text_range.fill.filltype = fillformattype.solid
    text_range.fill.solidcolor.color = color.get_darkblue()

# 获取幻灯片中的内容占位符
content_shape = slide.shapes[1] # 通常第二个形状是内容占位符

# 添加正文文本
if content_shape:
    content_shape.textframe.text = "本教程将指导你如何使用python自动化创建和编辑powerpoint演示文稿。\n\n" \
                                   "自动化可以显著提高工作效率,减少手动操作的重复性和错误。"

    # 获取第一个段落
    paragraph = content_shape.textframe.paragraphs[0]
    # 设置段落文本样式
    text_range_para = paragraph.textranges[0]
    text_range_para.fontheight = 18
    text_range_para.fill.filltype = fillformattype.solid
    text_range_para.fill.solidcolor.color = color.get_black()

    # 对第二个段落进行特殊设置
    paragraph2 = content_shape.textframe.paragraphs[1]
    text_range_para2 = paragraph2.textranges[0]
    text_range_para2.fontheight = 20
    text_range_para2.isitalic = true
    text_range_para2.fill.filltype = fillformattype.solid
    text_range_para2.fill.solidcolor.color = color.get_darkgreen()


ppt.savetofile("presentationwithtext.pptx", fileformat.pptx2013)
ppt.dispose()

print("已添加带有文本和样式的幻灯片。")
插入图片
视觉元素是演示文稿不可或缺的一部分。我们可以轻松地将本地图片插入到幻灯片中。
from spire.presentation.common import *
from spire.presentation import *
from system.drawing import rectanglef

ppt = presentation()
slide = ppt.slides.append()

# 假设你有一个名为 "example.png" 的图片文件在当前目录下
image_path = "example.png" # 请替换为你的图片路径

# 定义图片的位置和大小 (x, y, 宽度, 高度)
# 单位是点 (points),1英寸 = 72点
x, y, width, height = 100, 150, 400, 250
rect = rectanglef(x, y, width, height)

# 插入图片
picture = slide.shapes.appendembedimagebypath(shapetype.rectangle, image_path, rect)

ppt.savetofile("presentationwithimage.pptx", fileformat.pptx2013)
ppt.dispose()

print("已成功插入图片到幻灯片。")
注意:请确保 example.png 图片文件存在于代码运行的相同目录下,或者提供完整的图片路径。
创建表格 (可选)
如果篇幅允许,我们还可以展示如何创建和填充简单的表格。
from spire.presentation.common import *
from spire.presentation import *
from system.drawing import rectanglef, color

ppt = presentation()
slide = ppt.slides.append()

# 定义表格的位置和大小
rect = rectanglef(100, 100, 500, 200)

# 添加一个3行3列的表格
table = slide.shapes.appendtable(rect, 3, 3)

# 设置表格列宽和行高
table.setcolumnwidth(0, 100)
table.setcolumnwidth(1, 200)
table.setcolumnwidth(2, 200)
table.setrowheight(0, 30)
table.setrowheight(1, 50)
table.setrowheight(2, 50)

# 填充表格数据
table.rows[0].cells[0].textframe.text = "姓名"
table.rows[0].cells[1].textframe.text = "部门"
table.rows[0].cells[2].textframe.text = "成绩"

table.rows[1].cells[0].textframe.text = "张三"
table.rows[1].cells[1].textframe.text = "销售部"
table.rows[1].cells[2].textframe.text = "95"

table.rows[2].cells[0].textframe.text = "李四"
table.rows[2].cells[1].textframe.text = "市场部"
table.rows[2].cells[2].textframe.text = "88"

# 设置表头背景色
for i in range(table.columns.count):
    table.rows[0].cells[i].cellformat.fill.filltype = fillformattype.solid
    table.rows[0].cells[i].cellformat.fill.solidcolor.color = color.get_lightblue()
    table.rows[0].cells[i].textframe.textrange.fontheight = 16
    table.rows[0].cells[i].textframe.textrange.isbold = true

ppt.savetofile("presentationwithtable.pptx", fileformat.pptx2013)
ppt.dispose()

print("已成功创建并填充表格。")
进阶技巧与最佳实践
- 处理复杂排版: 对于更复杂的文本排版,如段落对齐、行距、项目符号等,
spire.presentation也提供了相应的属性进行设置。你可以通过探索textrange、paragraph和textframe对象的属性来完成。 - 代码复用: 将常用的ppt操作封装成函数,例如
add_title_slide(presentation, title_text)或add_image_slide(presentation, image_path, caption),可以大大提高代码的复用性和可维护性。 - 模板化: 可以先手动创建一个包含占位符和预设样式的ppt模板,然后使用python代码读取这个模板,并用实际数据填充占位符,这样能更好地保持演示文稿的品牌一致性。
- 错误处理: 在实际应用中,建议加入错误处理机制,例如检查文件是否存在、图片路径是否正确等,以提高程序的健壮性。
使用python 合并 powerpoint 幻灯片
1. 初始化演示文稿对象
from spire.presentation import *
from spire.presentation.common import *

# 创建两个 presentation 实例
pres1 = presentation()
pres2 = presentation()

# 加载两个演示文稿文件
pres1.loadfromfile("sample1.pptx")
pres2.loadfromfile("sample2.pptx")
操作说明:
presentation是 spire.presentation 的核心类,用于表示 powerpoint 演示文稿。loadfromfile()用于加载现有 pptx 文件,后续幻灯片操作都在这些对象上进行。
2. 合并幻灯片并保留原始设计
# 遍历第二个演示文稿中的幻灯片
for slide in pres2.slides:
    # 将每张幻灯片追加到第一个演示文稿中,保留原设计
    pres1.slides.appendbyslide(slide)

# 保存合并后的演示文稿
pres1.savetofile("output/mergepresentations.pptx", fileformat.pptx2016)
pres1.dispose()
pres2.dispose()
使用说明:
slides.appendbyslide(slide)会将目标幻灯片完整复制到第一个演示文稿中,并保留幻灯片原有的版式、背景和样式。- 适用于希望保持原始设计风格、不统一母版的场景。
- 保存文件后,合并结果中每张幻灯片都保持其原有外观。
效果展示:
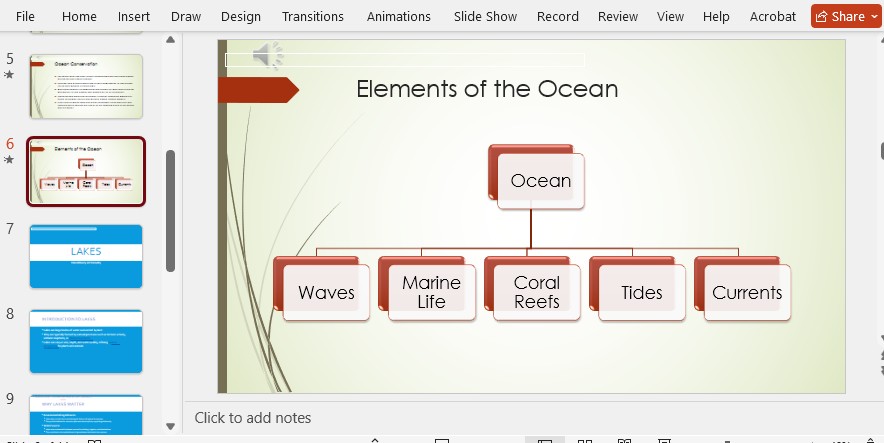
适用场景:
- 部门汇报或跨团队演示,每个演示文稿风格不同,需要保留原始设计。
- 幻灯片包含特定背景或定制动画,合并时不希望被母版覆盖。
3. 合并幻灯片并使用目标母版设计
# 遍历第二个演示文稿中的幻灯片
for slide in pres2.slides:
    # 将每张幻灯片追加到第一个演示文稿中,并使用第一个演示文稿的母版
    pres1.slides.appendbymaster(slide, pres1.masters[0])

# 保存合并后的演示文稿
pres1.savetofile("output/mergepresentationsdesign.pptx", fileformat.pptx2016)
pres1.dispose()
pres2.dispose()
操作说明:
slides.appendbymaster(slide, pres1.masters[0])会将目标幻灯片内容复制到第一个演示文稿中,但应用第一个演示文稿的母版设计。- 幻灯片的布局和内容会保留,但背景、主题颜色、字体样式会与目标母版保持一致。
- 适用于需要统一整体演示风格的场景。
效果展示:
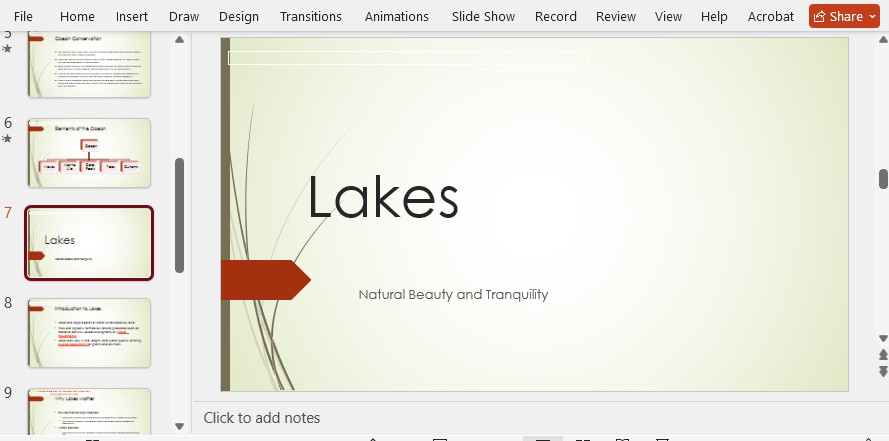
适用场景:
- 企业培训或公司汇报,需要合并内容但保持统一的视觉风格。
- 合并多个来源幻灯片并调整为同一模板风格。
4. 总结
通过上述方法,开发者可以灵活选择不同的合并策略:
| 功能类型 | 方法 | 使用说明 |
|---|---|---|
| 保留原始设计 | slides.appendbyslide(slide) | 幻灯片完整复制,保持原始版式和样式 |
| 使用目标母版设计 | slides.appendbymaster(slide, pres1.masters[0]) | 幻灯片内容复制到目标演示文稿,应用目标母版设计 |
| 保存 pptx 文件 | savetofile() | 保存修改后的演示文稿文件 |
| 释放资源 | dispose() | 释放演示文稿对象资源 |
使用 spire.presentation for python,开发者无需打开 powerpoint 即可批量处理幻灯片,灵活合并不同来源的演示文稿,同时可根据需求选择保留原设计或统一母版风格。
到此这篇关于使用python轻松实现创建与合并powerpoint幻灯片的文章就介绍到这了,更多相关python创建与合并powerpoint幻灯片内容请搜索代码网以前的文章或继续浏览下面的相关文章希望大家以后多多支持代码网!


发表评论