一、安装uv
1.1、linux/macos
curl -lssf https://astral.sh/uv/install.sh | sh
1.2、windows
powershell -c "irm https://astral.sh/uv/install.ps1 | iex"
1.3、使用pip安装
pip install uv
1.4 换源
设置环境变量法
# 设置清华镜像源
export uv_index_url=https://pypi.tuna.tsinghua.edu.cn/simple
export uv_extra_index_url=https://pypi.tuna.tsinghua.edu.cn/simple

# 或者设置阿里云镜像源
export uv_index_url=https://mirrors.aliyun.com/pypi/simple/
export uv_extra_index_url=https://mirrors.aliyun.com/pypi/simple/
配置文件法
mkdir -p ~/.config/uv
vim ~/.config/uv/uv.toml
[[index]]
url = "https://pypi.tuna.tsinghua.edu.cn/simple/"
default = true
二、创建新项目
2.1 创建项目
uv init my-project --python 3.10
2.2 创建虚拟环境
uv venv --python 3.10
或
uv venv
2.3 激活环境
source .venv/bin/activate
2.4 退出环境
deactivate
三、安装依赖
安装单个包
uv add requests
安装多个包
uv add pandas numpy matplotlib
安装特定版本
uv add "django==4.2.0"
从requirements.txt安装
uv add -r requirements.txt
安装开发依赖
uv add --dev pytest black flake8
一键安装pyproject.toml中的依赖
安装 dependencies
uv sync
安装 dev 依赖组
uv sync --group dev
一次性安装所有依赖组
uv sync --all-groups
为什么不全部放在 dependencies?
为了环境分离
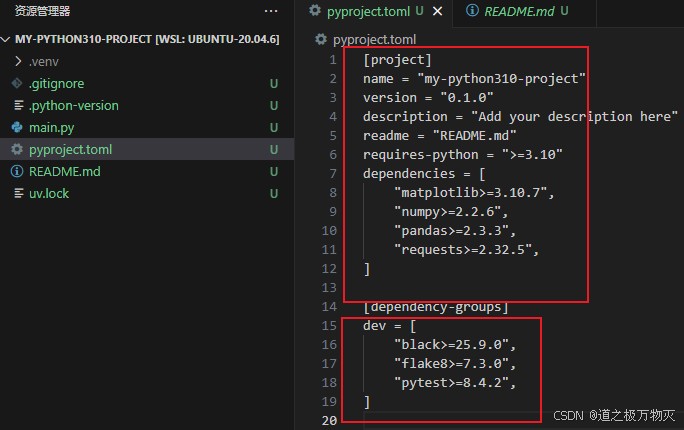
[project]
dependencies = [
    "matplotlib>=3.10.7",  # 生产必需
    "numpy>=2.2.6",        # 生产必需
]

[dependency-groups]
dev = [                    # 开发工具
    "black>=25.9.0",
    "pytest>=8.4.2",
]
test = [                   # 测试专用
    "pytest-cov>=5.0.0",
]
docs = [                   # 文档生成
    "sphinx>=7.0.0",
]
四、移除依赖
移除单个包
uv remove requests
移除多个包
uv remove pandas numpy
移除开发依赖
uv remove --dev pytest
五、更新依赖
更新所有包
uv sync --upgrade
更新特定包
uv add "requests --upgrade"
六、列出已安装依赖包
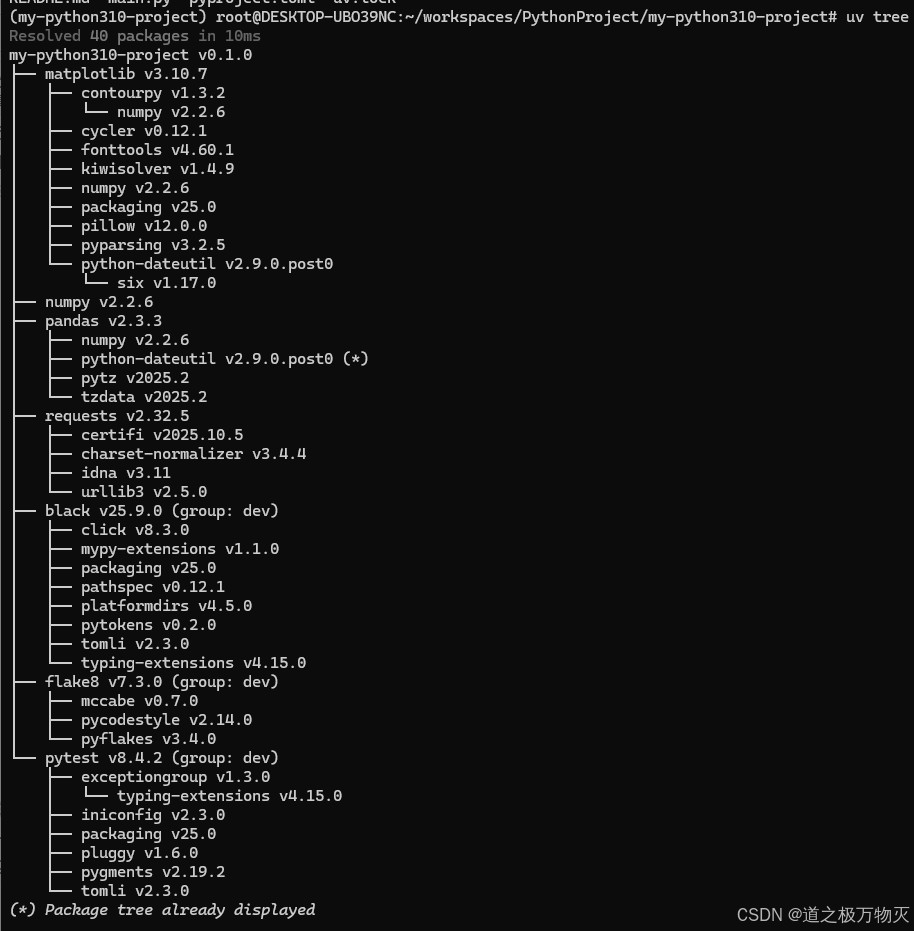
6.1 列出所有包
uv tree
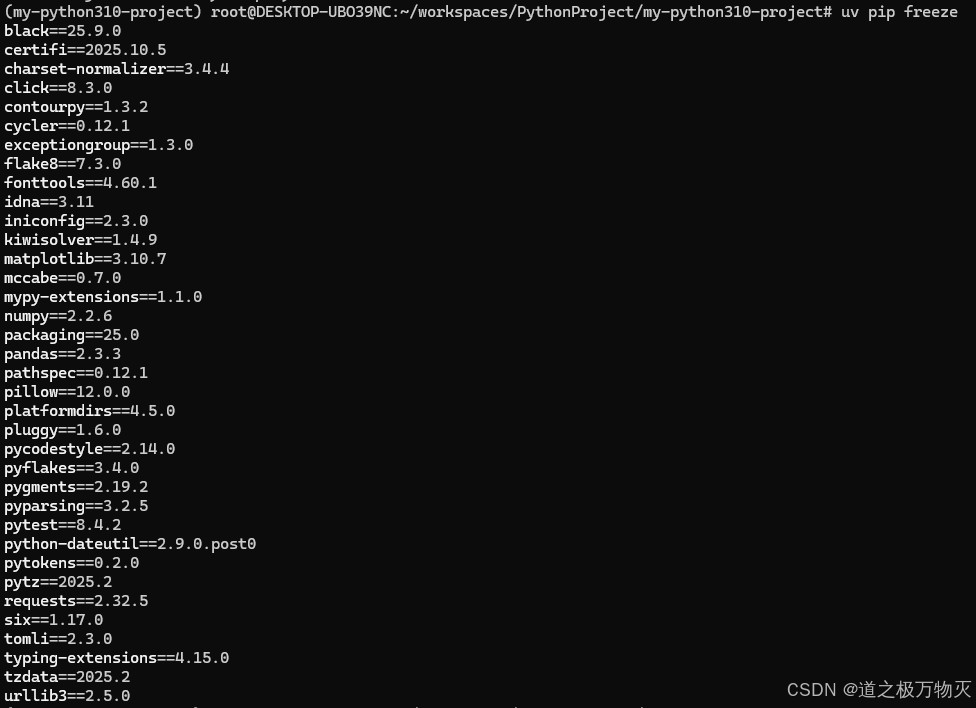
6.2 以requirements格式列出
uv pip freeze
到此这篇关于python通过uv进行虚拟环境管理的完整指南的文章就介绍到这了,更多相关python uv虚拟环境管理内容请搜索代码网以前的文章或继续浏览下面的相关文章希望大家以后多多支持代码网!


发表评论