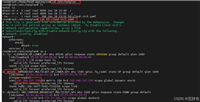
ubuntu(18.04 及更新版本,使用 netplan)
1. 查看网卡名称
ip a
记录网卡名称(如 ens33、eth0)。
2. 编辑 netplan 配置文件
sudo nano /etc/netplan/00-installer-config.yaml
(文件名可能不同,但位于 /etc/netplan/ 下,格式为 .yaml)
3. 配置静态 ip
修改文件内容如下(示例):
network:
  version: 2
  renderer: networkd  # 或 networkmanager(桌面版)
  ethernets:
    ens33:  # 你的网卡名称
      dhcp4: no
      addresses: [192.168.1.100/24]  # ip/子网掩码
      gateway4: 192.168.1.1  # 网关
      nameservers:
        addresses: [8.8.8.8, 1.1.1.1]  # dns
注意:
gateway4 在较新版本中可能已弃用,改用 routes(如 ubuntu 22.04+)。
桌面版建议使用 renderer: networkmanager。
4. 应用配置
sudo netplan apply
centos 7(使用 ifcfg 文件)
1. 查看网卡名称
ip a
记录网卡名称(如 ens33、eth0)。
2. 编辑网卡配置文件
sudo nano /etc/sysconfig/network-scripts/ifcfg-ens33
修改内容如下:
device=ens33
bootproto=none  # 静态 ip
onboot=yes
ipaddr=192.168.1.100
netmask=255.255.255.0  # 或 prefix=24
gateway=192.168.1.1
dns1=8.8.8.8
dns2=1.1.1.1
type=ethernet
3. 重启网络服务
sudo systemctl restart network
centos 8/stream(使用 nmcli 或 ifcfg)
方法 1:使用 nmcli(推荐)
sudo nmcli con modify "ens33" \
  ipv4.method manual \
  ipv4.addresses "192.168.1.100/24" \
  ipv4.gateway "192.168.1.1" \
  ipv4.dns "8.8.8.8,1.1.1.1"
激活配置:
sudo nmcli con up "ens33"
方法 2:手动编辑 ifcfg 文件(同 centos 7)
配置文件路径仍为 /etc/sysconfig/network-scripts/ifcfg-ens33,但需安装传统网络服务:
sudo dnf install network-scripts -y
验证配置
ip a show ens33  # 检查 ip
ping 8.8.8.8     # 测试网络连通性
nslookup google.com  # 测试 dns
常见问题
1. 网络服务重启失败
ubuntu:检查 netplan 文件缩进(yaml 对格式敏感)。
centos 7:确保 onboot=yes。
centos 8+:如果使用 network-scripts,需禁用 networkmanager:
sudo systemctl disable --now networkmanager
sudo systemctl enable --now network
2. 网关无法访问
确认网关 ip 是否正确(如 ip route show)。
检查防火墙是否拦截:
sudo systemctl stop firewalld  # 临时关闭(centos)
sudo ufw disable              # ubuntu
总结对比
| 系统 | 配置工具 | 配置文件路径 | 生效命令 |
|---|---|---|---|
| ubuntu | netplan | /etc/netplan/*.yaml | sudo netplan apply |
| centos 7 | ifcfg | /etc/sysconfig/network-scripts/ifcfg-* | sudo systemctl restart network |
| centos 8+ | nmcli 或 ifcfg | 同上(需安装 network-scripts) | sudo nmcli con up <名称> |
提示:
- 云服务器(如 aws/aliyun)可能需要额外配置云平台网络接口。
- 无线网卡配置需指定
wifis:(ubuntu)或type=wifi(centos)。
到此这篇关于ubuntu和centos中配置静态ip的方法详解的文章就介绍到这了,更多相关ubuntu centos配置静态ip内容请搜索代码网以前的文章或继续浏览下面的相关文章希望大家以后多多支持代码网!


发表评论