stack特性
在flutter中,你可以使用stack和positioned来创建悬浮 ui。stack允许你将多个小部件叠放在一起,而positioned则用于定位小部件在stack中的位置。
示例
以下是一个简单的示例,演示如何创建一个悬浮按钮:
import 'package:flutter/material.dart';

void main() {
  runapp(myapp());
}

class myapp extends statelesswidget {
  @override
  widget build(buildcontext context) {
    return materialapp(
      home: scaffold(
        appbar: appbar(
          title: text('floating ui example'),
        ),
        body: myfloatingui(),
      ),
    );
  }
}

class myfloatingui extends statefulwidget {
  @override
  _myfloatinguistate createstate() => _myfloatinguistate();
}

class _myfloatinguistate extends state<myfloatingui> {
  bool isfloatinguivisible = false;

  @override
  widget build(buildcontext context) {
    return stack(
      children: [
        // your main content goes here
        center(
          child: text(
            'main content',
            style: textstyle(fontsize: 20),
          ),
        ),

        // floating ui
        visibility(
          visible: isfloatinguivisible,
          child: positioned(
            bottom: 16,
            right: 16,
            child: floatingactionbutton(
              onpressed: () {
                // handle floating button tap
                print('floating button tapped');
              },
              child: icon(icons.add),
            ),
          ),
        ),
      ],
    );
  }

  // show/hide the floating ui based on some condition
  void togglefloatingui() {
    setstate(() {
      isfloatinguivisible = !isfloatinguivisible;
    });
  }
}
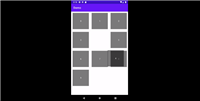
在这个例子中,myfloatingui是一个statefulwidget,它包含一个stack,其中包括了一个主要的内容(text)和一个悬浮的按钮(floatingactionbutton)。通过visibility小部件,可以根据条件来控制悬浮按钮的可见性。在这个例子中,isfloatinguivisible为true时悬浮按钮可见,为false时不可见。
到此这篇关于flutter使用stack实现悬浮ui的示例代码的文章就介绍到这了,更多相关flutter stack内容请搜索代码网以前的文章或继续浏览下面的相关文章希望大家以后多多支持代码网!


发表评论