本文系统讲解 linux 下 c 语言链表的使用原理、最佳实践及内核模块中的实战示例,适合嵌入式开发者、驱动工程师和系统软件开发者。
一、链表基础概念与内核链表优势
1.1 为什么使用链表?
- 动态插入/删除效率高(相比数组不需要整体移动元素)
- 内存利用率高(按需分配)
- 常用于队列、任务调度、资源池、驱动设备列表等场景
1.2 linux 内核链表与用户态链表的区别
| 项目 | 用户态实现 | 内核态实现 |
|---|---|---|
| 指针结构 | 自定义指针结构 | 使用 struct list_head |
| 安全性 | 程序员自行维护 | 提供安全宏/内联函数 |
| 插入/删除api | 手动实现 | 提供统一接口如 list_add |
| 迭代方式 | 手动循环 | 宏如 list_for_each_entry |
二、内核链表结构与宏解析
struct list_head {
    struct list_head *next, *prev;
};
常用宏/函数:
init_list_head(ptr)list_add(new, head):头插法list_add_tail(new, head):尾插法list_del(entry)list_empty(head)list_for_each_entry(pos, head, member)list_for_each_entry_safe(pos, n, head, member)
三、内核链表的优点
- 双向循环结构:从任意节点出发都能遍历完整链表
- 插入删除不涉及内容拷贝:仅修改指针
- 接口统一、安全可靠:可结合
container_of获取真实结构体指针
四、用户态链表示例
#include <stdio.h>
#include <stdlib.h>
#include <string.h>

typedef struct student {
    int id;
    char name[20];
    struct student *next;
} student_t;

void add_student(student_t **head, int id, const char *name) {
    student_t *new_node = malloc(sizeof(student_t));
    new_node->id = id;
    strncpy(new_node->name, name, sizeof(new_node->name));
    new_node->next = *head;
    *head = new_node;
}

void print_students(student_t *head) {
    while (head) {
        printf("id: %d, name: %s\n", head->id, head->name);
        head = head->next;
    }
}
五、双向循环链表在内核中的实现优势
5.1 插入效率
在头部插入只需两次指针操作:
list_add(&new_node->list, &head);
5.2 安全遍历删除
list_for_each_entry_safe(ptr, tmp, &head, list) {
    list_del(&ptr->list);
    kfree(ptr);
}
六、典型应用场景
| 场景 | 描述 |
|---|---|
| 设备驱动管理 | 管理设备结构体(如 net_device) |
| 定时器链表 | 内核定时器统一调度 |
| slab 分配器链表 | 管理对象缓存池 |
| 进程调度/等待队列 | 管理 pcb / wait queue |
| 协议栈管理 | tcp/udp 的 socket 链表 |
七、调试技巧与常见陷阱
7.1 打印链表内容
#define print_list(head) \
    list_for_each_entry(ptr, head, list) \
        printk(kern_info "node: %s\n", ptr->name);
7.2 常见错误
- 忘记初始化
init_list_head - 使用已释放节点(uaf)
- 非安全删除遍历(未使用
list_for_each_entry_safe)
八、实战案例:linux 内核模块中的链表使用
8.1 模块源码
// mylist_module.c
#include <linux/init.h>
#include <linux/module.h>
#include <linux/kernel.h>
#include <linux/slab.h>
#include <linux/list.h>

module_license("gpl");

struct student {
    int id;
    char name[20];
    struct list_head list;
};

static list_head(student_list);

static int __init mylist_init(void)
{
    int i;
    struct student *stu;

    printk(kern_info "loading student list module...\n");

    for (i = 1; i <= 5; ++i) {
        stu = kmalloc(sizeof(*stu), gfp_kernel);
        stu->id = i;
        snprintf(stu->name, sizeof(stu->name), "student%d", i);
        init_list_head(&stu->list);
        list_add_tail(&stu->list, &student_list);
    }

    return 0;
}

static void __exit mylist_exit(void)
{
    struct student *stu, *tmp;

    printk(kern_info "unloading student list module...\n");

    list_for_each_entry_safe(stu, tmp, &student_list, list) {
        list_del(&stu->list);
        kfree(stu);
    }
}

module_init(mylist_init);
module_exit(mylist_exit);
8.2 makefile 编译模块
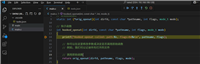
obj-m += mylist_module.o

all:
	make -c /lib/modules/$(shell uname -r)/build m=$(pwd) modules

clean:
	make -c /lib/modules/$(shell uname -r)/build m=$(pwd) clean
8.3 插入与卸载模块
$ make
$ sudo insmod mylist_module.ko
$ dmesg | tail -n 10
$ sudo rmmod mylist_module
$ dmesg | tail -n 10
总结:开发建议
| 建议项 | 内容 |
|---|---|
| 一定初始化链表头 | 使用 init_list_head 初始化 |
| 删除节点用安全宏 | list_for_each_entry_safe 防止遍历时删除崩溃 |
| 内存管理责任明确 | kmalloc/kfree 成对使用 |
| 多线程环境加锁 | 必要时配合 spinlock 或 mutex |
| 定位 bug 用 printk | 输出 prev, next, 数据字段调试链表结构 |
本文涵盖了从用户态链表构造到 linux 内核模块链表的实战应用,帮助你在驱动开发和内核开发中熟练掌握链表的构造与使用。
以上为个人经验,希望能给大家一个参考,也希望大家多多支持代码网。


发表评论