一:直接调用c++库
第一步:动态库封装(vs2017+qt5.12.10)
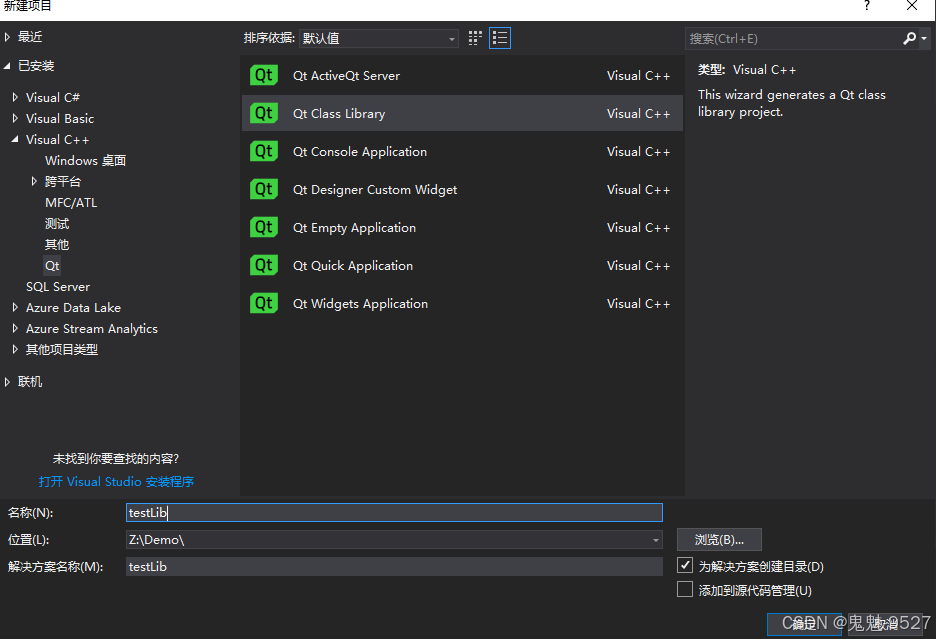
1、新建工程时,一定要选择qt下的qt class library 这个选项,如下图所示
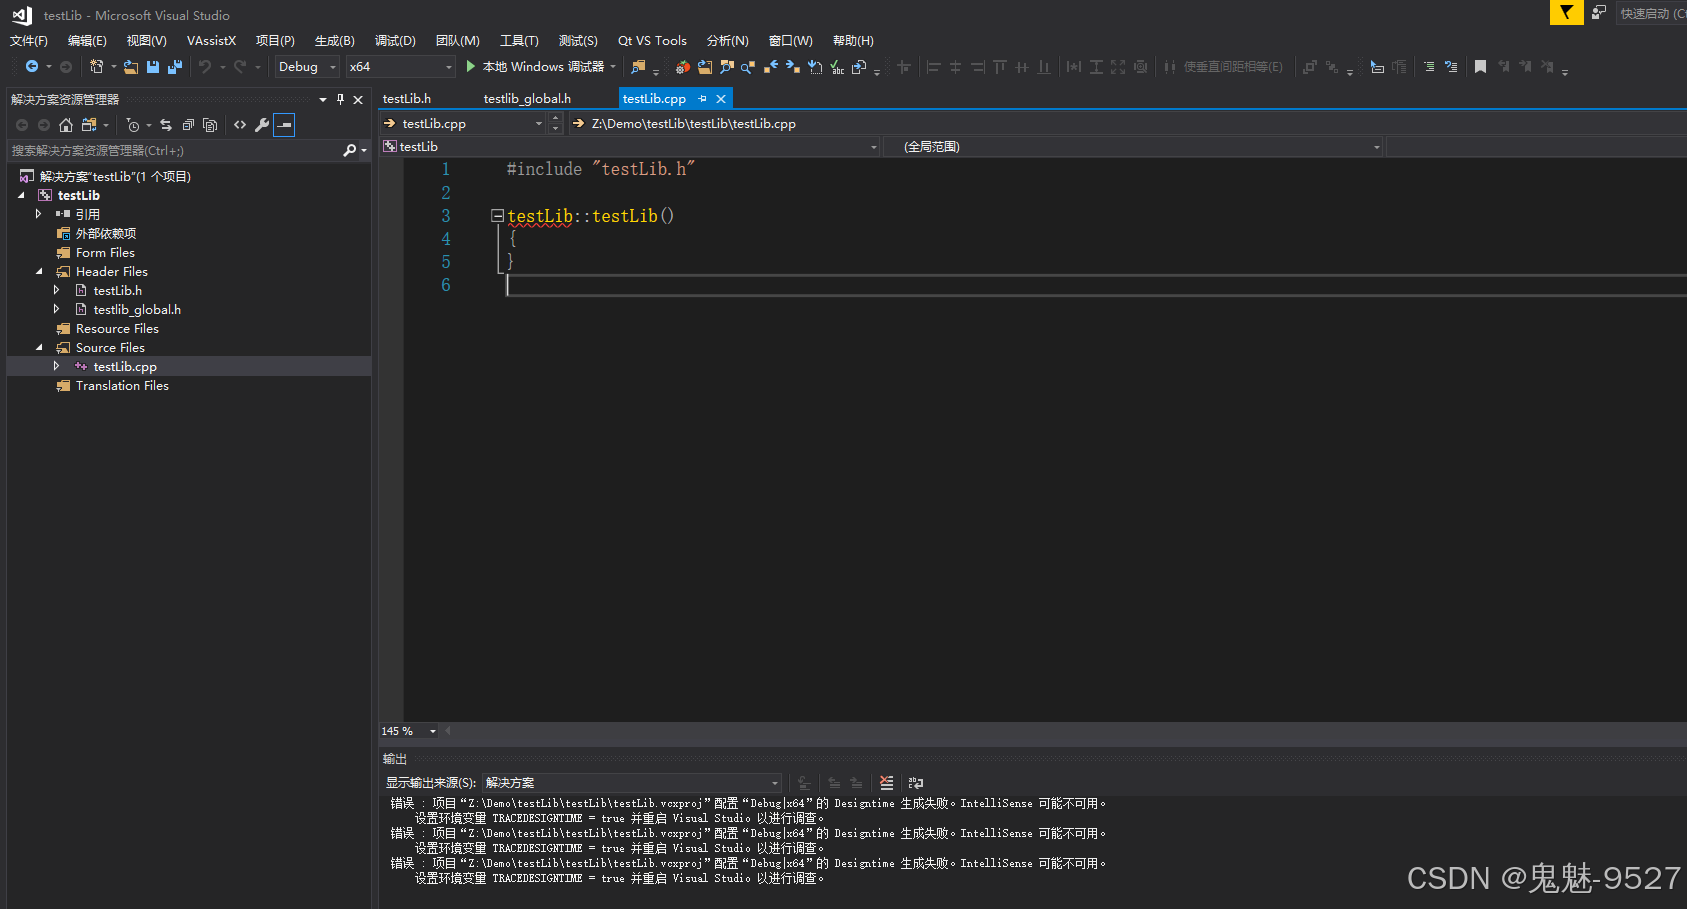
2、工程创建成功后,可以在解决方案下看到有testlib.h、testlib.cpp和testlib_global.h三个基础的文件生成,如下图所示
3、下面我们简单写一个打印“vs2017+qt5.12.10生成动态库”的输出函数
testlib_global.h
#pragma once

#include <qtcore/qglobal.h>
#include <qdebug>


#ifndef build_static
# if defined(testlib_lib)
#  define testlib_export q_decl_export
# else
#  define testlib_export q_decl_import
# endif
#else
# define testlib_export
#endif
testlib.h
#pragma once

#include "testlib_global.h"

class testlib_export testlib
{
public:
    testlib();

	/**************************************************
	* @author 鬼魅-9527
	* @brief : 说明
	* @param-in: 无
	* @param-out : 无
	* @return : 无
	* @date : 2025-01-01
	**************************************************/
	bool printfstring();
};
/*将接口转义供外部调用*/
extern "c"
{
	testlib obj;
	extern "c" _declspec(dllexport) bool __cdecl printfstring()
	{
		return obj.printfstring();
	}
}
testlib.cpp
#include "testlib.h"
testlib::testlib()
{
}
bool testlib::printfstring()
{
/*使用qstringliteral,否则中文输出会乱码*/
qdebug() << qstringliteral("vs2017+qt5.12.10生成动态库");
return true;
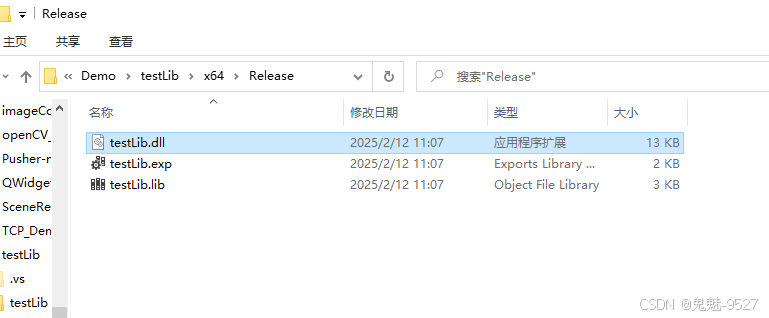
}4、下面我们可以编译生成动态库
第二步:python调用c++动态库
1、打开vs code 并在动态库目录下新建一个test.py文件
test.py
#导入python调用c++的ctypes库
import ctypes
# 加载dll
my_dll = ctypes.cdll("z:/demo/testlib/x64/release/testlib.dll")
# 调用dll中的函数
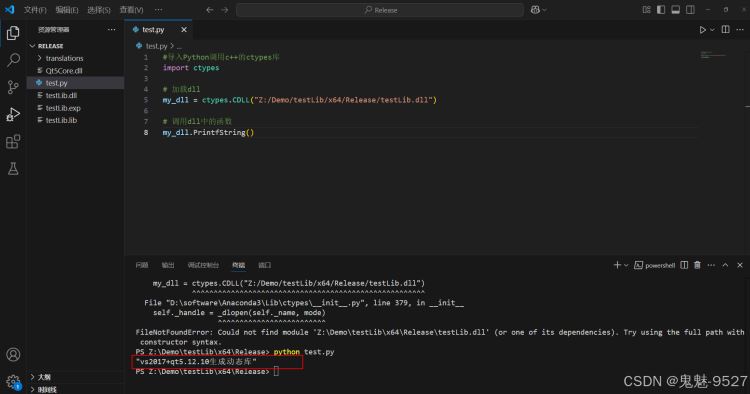
my_dll.printfstring()2、通过终端执行python test.py,如下所示
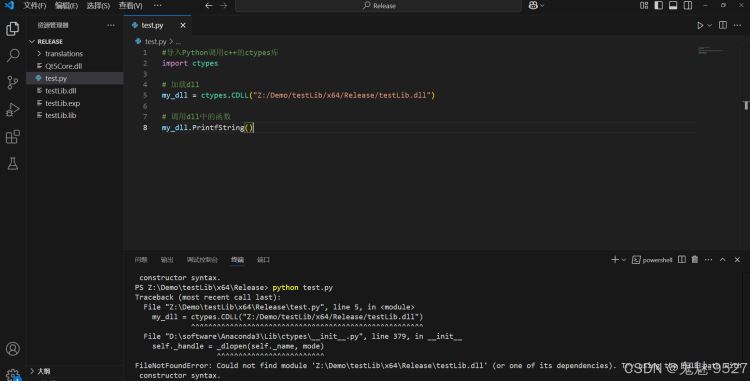
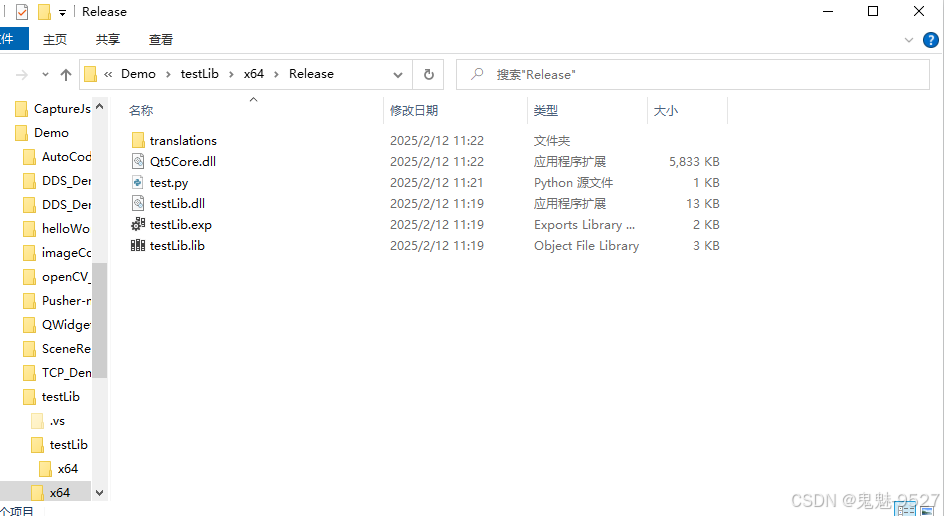
3、从输出结果可以看到提示加载库错误,这里出现错误的原因是,test.dll依赖的其他的库并没有找到,因此需要使用在test.dll目录下使用windeployqt打包test.dll依赖的库,如下图所示
3、再次在终端执行python test.py,如下所示,调用动态库打印输出执行成功。
二:调用传递参数c++库
在大多数情况下,我们使用动态库调用时,都涉及参数传递,以下是简单的参数传递列子。
第一步:动态库封装
testlib_global.h
#pragma once

#include <qtcore/qglobal.h>
#include <qdebug>


#ifndef build_static
# if defined(testlib_lib)
#  define testlib_export q_decl_export
# else
#  define testlib_export q_decl_import
# endif
#else
# define testlib_export
#endif
testlib.h
#pragma once

#include "testlib_global.h"

class testlib_export testlib
{
public:
    testlib();

	/**************************************************
	* @author 鬼魅-9527
	* @brief : 打印
	* @param-in: 无
	* @param-out : 无
	* @return : 是否成功
	* @date : 2025-01-01
	**************************************************/
	bool printfstring();
	/**************************************************
	* @author 鬼魅-9527
	* @brief : 参数传递
	* @param-in: num:数量,str;字符串
	* @return :字符串长度
	* @date : 2025-01-01
	**************************************************/
	int datainputandoutput(const int num, const char* str);
};

/*将接口转义供外部调用*/
extern "c"
{
	testlib obj;
	extern "c" _declspec(dllexport) bool __cdecl printfstring()
	{
		return obj.printfstring();
	}extern "c" _declspec(dllexport) int __cdecl datainputandoutput(const int num, const char* str)
	{
		return obj.datainputandoutput(num, str);
	}
}
testlib.cpp
#pragma once

#include "testlib_global.h"

class testlib_export testlib
{
public:
    testlib();

	/**************************************************
	* @author 鬼魅-9527
	* @brief : 打印
	* @param-in: 无
	* @param-out : 无
	* @return : 是否成功
	* @date : 2025-01-01
	**************************************************/
	bool printfstring();
	/**************************************************
	* @author 鬼魅-9527
	* @brief : 参数传递
	* @param-in: num:数量,str;字符串
	* @return :字符串长度
	* @date : 2025-01-01
	**************************************************/
	int datainputandoutput(const int num, const char* str);
};

/*将接口转义供外部调用*/
extern "c"
{
	testlib obj;
	extern "c" _declspec(dllexport) bool __cdecl printfstring()
	{
		return obj.printfstring();
	}extern "c" _declspec(dllexport) int __cdecl datainputandoutput(const int num, const char* str)
	{
		return obj.datainputandoutput(num, str);
	}
}
4、下面我们可以编译生成动态
第二步:python调用c++动态库
test.py
#导入python调用c++的ctypes库
import ctypes
# 加载dll
my_dll = ctypes.cdll("z:/demo/testlib/x64/release/testlib.dll")
# 调用dll中的函数
my_dll.printfstring()
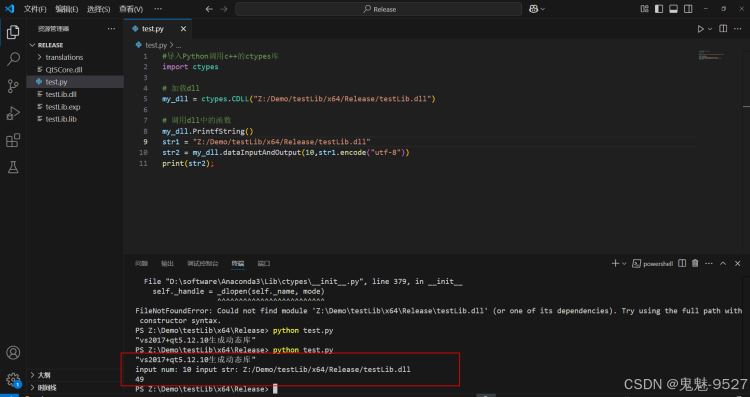
str1 = "z:/demo/testlib/x64/release/testlib.dll"
str2 = my_dll.datainputandoutput(10,str1.encode("utf-8"))
print(str2);通过终端执行python test.py,如下所示
到此这篇关于python调用c++动态库详细步骤(附源码)的文章就介绍到这了,更多相关python调用c++动态库内容请搜索代码网以前的文章或继续浏览下面的相关文章希望大家以后多多支持代码网!


发表评论