swagger(目前用openapi specification代替)是一个用于设计、构建、记录和使用rest api的强大工具。通过使用swagger,开发者可以定义api的结构,确保api的稳定性,并生成协作所需的文档。本文将探讨使用swagger的一些关键技巧,包括如何定义api、如何生成和展示文档等。
安装和配置swagger
在node.js项目中,可以利用swagger-ui-express和swagger-jsdoc等工具来集成swagger。这些工具能够帮助记录api和生成一个交互式的用户界面,用于测试api。
首先安装依赖:
npm install swagger-jsdoc swagger-ui-express --save
初始化swagger jsdoc
在项目中初始化swagger jsdoc以自动生成api文档。这通常在应用程序的入口文件(比如app.js或server.js)进行配置。
const swaggerjsdoc = require('swagger-jsdoc');
const swaggerui = require('swagger-ui-express');

const swaggerdefinition = {
  openapi: '3.0.0', // 使用openapi specification 3.0版本
  info: {
    title: '我的api文档',
    version: '1.0.0',
    description: '这是我的api文档的描述',
  },
  servers: [
    {
      url: 'http://localhost:3000',
      description: '开发服务器',
    },
  ],
};

const options = {
  swaggerdefinition,
  apis: ['./routes/*.js'], // 指向api文档的路径
};

const swaggerspec = swaggerjsdoc(options);

// 使用swaggerui提供可视化界面
app.use('/api-docs', swaggerui.serve, swaggerui.setup(swaggerspec));
确保把apis的路径设置成包含有注释的api文件所在的路径。
使用jsdoc注释编写文档
为了让swagger-jsdoc能够生成swagger文件,需要在路由文件或控制器文件中添加jsdoc注释。
/**
 * @swagger
 * /users:
 *   get:
 *     tags: [users]
 *     summary: 获取用户列表
 *     description: "返回当前所有用户的列表"
 *     responses:
 *       200:
 *         description: 请求成功
 *         content:
 *           application/json:
 *             schema:
 *               type: array
 *               items:
 *                 $ref: '#/components/schemas/user'
 */
上面的注释定义了get /users路由,并指定了其行为和预期的响应。
定义模型
为了更好地复用和管理代码,可以在swagger文档中定义模型(或称为schema)。
/**
 * @swagger
 * components:
 *   schemas:
 *     user:
 *       type: object
 *       required:
 *         - username
 *         - email
 *       properties:
 *         id:
 *           type: string
 *           description: 用户唯一标识
 *         username:
 *           type: string
 *           description: 用户名
 *         email:
 *           type: string
 *           format: email
 *           description: 用户邮箱地址
 */
这个模型定义了一个user对象,它有id、username和email属性。
swagger ui的使用
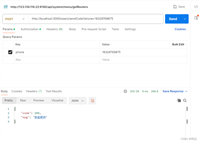
启动node.js应用后,通过访问http://localhost:3000/api-docs来查看swagger ui。swagger ui为你的api提供了一个交互式的用户界面,使得调用者可以无需编写代码就能测试api的各个端点。
维护和更新swagger文档
遵循良好的文档编写实践,确保每次api更新时,都同步更新相应的swagger注释。这有助于保持文档的准确性和有效性。
小结
通过使用swagger,开发者可以有效地设计和文档化rest api,提高api的可读性和可维护性,同时为其他开发者、前端团队和api消费者提供一个清晰和准确的api参考。掌握上述技巧可以更好地利用swagger来优化后端api服务器的开发流程。
实例1:express & swagger
从创建一个新的express应用程序开始:
npm init -y
npm install express --save
编写express服务器并加入swagger文档。
步骤1:创建express服务器
index.js:
const express = require('express');
const swaggerjsdoc = require('swagger-jsdoc');
const swaggerui = require('swagger-ui-express');

// 初始化express应用
const app = express();
const port = 3000;

// 定义swagger文档配置
const swaggeroptions = {
  swaggerdefinition: {
    openapi: '3.0.0',
    info: {
      title: '示例api',
      version: '1.0.0',
      description: '这是一个简单的express api应用示例',
    },
    servers: [
      {
        url: 'http://localhost:3000',
        description: '本地开发服务器',
      },
    ],
  },
  apis: ['./routes/*.js'], // 使用glob模式指定api文件位置
};

// 初始化swagger-jsdoc
const swaggerdocs = swaggerjsdoc(swaggeroptions);

// 提供swagger的ui界面
app.use('/api-docs', swaggerui.serve, swaggerui.setup(swaggerdocs));

// 定义一个简单的路由处理函数
app.get('/', (req, res) => {
  res.send('欢迎使用示例api');
});

// 监听指定的端口
app.listen(port, () => {
  console.log(`服务器正在监听 http://localhost:${port}`);
});
步骤2:创建路由并添加swagger注释
假设有一个用户相关的api,为此创建一个处理用户请求的路由文件。
routes/users.js:
/**
 * @swagger
 * /users:
 *   get:
 *     tags:
 *       - 用户
 *     summary: 获取用户列表
 *     description: 请求所有注册用户信息
 *     responses:
 *       200:
 *         description: 请求成功返回用户列表
 *         content:
 *           application/json:
 *             schema:
 *               type: array
 *               items:
 *                 $ref: '#/components/schemas/user'
 *
 * components:
 *   schemas:
 *     user:
 *       type: object
 *       properties:
 *         id:
 *           type: integer
 *           format: int64
 *           description: 用户的唯一标识符
 *         name:
 *           type: string
 *           description: 用户的姓名
 *         email:
 *           type: string
 *           format: email
 *           description: 用户的邮件地址
 */

const express = require('express');
const router = express.router();

// get请求 - 获取用户列表
router.get('/', (req, res) => {
  // 模拟一些用户数据
  const users = [
    { id: 1, name: '张三', email: 'zhangsan@example.com' },
    { id: 2, name: '李四', email: 'lisi@example.com' },
  ];
  res.json(users);
});

module.exports = router;
将此路由文件添加到express应用中:
修改index.js并在顶部添加以下内容:
const userroutes = require('./routes/users');
然后,在index.js中的swagger ui代码下面,添加以下代码,以将用户路由挂载到express应用:
app.use('/users', userroutes);
运行express服务器并访问http://localhost:3000/api-docs时,将看到带有用户路由的swagger ui界面,这个界面提供了一个交互式的api文档。
如此一来就为express api路由创建了swagger文档。通过添加更多路由和适当的swagger注释,可以继续为其他api端点拓展文档。
示例2:koa & swagger
如果使用的是koa.js框架而非express.js,依然可以使用swagger来生成api文档,但是整合方式会有所不同,因为koa的中间件机制和express略有差异。这里以koa和koa-router为例来实现增加swagger文档的步骤。
步骤1:创建koa服务器
首先,安装koa相关的依赖:
npm init -y
npm install koa koa-router --save
接下来,安装swagger相关的依赖:
npm install koa-swagger-decorator --save
然后,创建koa服务器和路由:
index.js:
const koa = require('koa');
const router = require('koa-router');
const { swagger, swaggerrouter } = require('./swagger');

const app = new koa();
const router = new router();

// 在路由中定义一个简单的get请求处理
router.get('/', async (ctx) => {
  ctx.body = '欢迎使用示例api';
});

// 将swagger路由装载到koa应用
swaggerrouter(app);

// 装载所有路由子项
app.use(router.routes()).use(router.allowedmethods());

const port = 3000;
app.listen(port, () => {
  console.log(`服务器运行在 http://localhost:${port}`);
});
步骤2:配置swagger文档并为路由添加注解
创建swagger配置文件:
swagger.js:
const { swaggerrouter } = require('koa-swagger-decorator');

const swaggerrouter = new swaggerrouter();

// swagger配置信息
swaggerrouter.swagger({
  title: 'koa 示例api',
  description: 'api文档',
  version: '1.0.0',

  // swagger文档页面的访问路径
  swaggerhtmlendpoint: '/swagger-html',
  // swagger文档的json访问路径
  swaggerjsonendpoint: '/swagger-json',

  // api服务器信息
  swaggeroptions: {
    host: 'localhost:3000',
  },
});

// 在这里可以批量加入路由定义或一个个添加
// swaggerrouter.mapdir(__dirname);

module.exports = {
  swagger: swaggerrouter.swagger.bind(swaggerrouter),
  swaggerrouter: swaggerrouter.routes.bind(swaggerrouter),
};
添加路由和swagger注解:
users.js:
const { request, summary, query, tags } = require('koa-swagger-decorator');
const router = require('koa-router')();

// 定义tag
const tag = tags(['用户']);

// 用户路由的swagger注解
router.get('/users', tag, summary('获取用户列表'), query({
  name: { type: 'string', required: false, description: '按姓名查询' }
}), async (ctx) => {
  // 这里可以根据name来获取用户信息
  // 为了示例使用静态数据
  const users = [
    { id: 1, name: '张三' },
    { id: 2, name: '李四' },
  ];
  ctx.body = { code: 0, data: users };
});

module.exports = router;
将此路由注解文件添加到koa应用中,方法是在index.js中添加下面的代码:
const userapi = require('./users');
swaggerrouter.use(userapi.routes());
注意:确保在代码中按自己实际的文件结构引入合适的路径。
以上代码将一个简单的koa应用转换为使用koa-swagger-decorator来生成swagger文档。启动该应用程序后,访问http://localhost:3000/swagger-html即可看到swagger ui。
示例3:egg & swagger
如果使用的是egg.js框架,并希望集成swagger来生成api文档,则需要使用一些与egg.js兼容的插件。egg.js是基于koa.js的更高层的框架,它有自己的插件系统。下面的举例将展示如何使用egg-swagger-doc这个egg.js插件为api生成swagger文档。
步骤1:安装egg-swagger-doc插件
首先,在egg.js项目中安装egg-swagger-doc插件:
npm install egg-swagger-doc --save
步骤2:启用插件
在egg.js的配置文件中启用swagger文档插件。通常会在config/plugin.js中启用:
// config/plugin.js
exports.swaggerdoc = {
  enable: true, // 启用swagger-ui插件
  package: 'egg-swagger-doc',
};
步骤3:配置swagger插件
配置swagger插件通常在config/config.default.js中进行:
// config/config.default.js
module.exports = (appinfo) => {
  const config = {};

  // ... 其他配置 ...

  // 配置egg-swagger-doc
  config.swaggerdoc = {
    dirscanner: './app/controller', // 配置自动扫描的控制器路径
    apiinfo: {
      title: 'egg.js api',  // api文档的标题
      description: 'swagger api for egg.js', // api文档描述
      version: '1.0.0',  // 版本号
    },
    schemes: ['http', 'https'], // 配置支持的协议
    consumes: ['application/json'], // 指定处理请求的提交内容类型 (content-type),如 application/json, text/html
    produces: ['application/json'], // 指定返回的内容类型
    securitydefinitions: {  // 配置api安全授权方式
      // e.g. apikey (下面是一些例子,需要自行定制)
      // apikey: {
      //   type: 'apikey',
      //   name: 'clientkey',
      //   in: 'header',
      // },
      // oauth2: {
      //   type: 'oauth2',
      //   tokenurl: 'http://petstore.swagger.io/oauth/dialog',
      //   flow: 'password',
      //   scopes: {
      //     'write:access_token': 'write access_token',
      //     'read:access_token': 'read access_token',
      //   },
      // },
    },
    enablesecurity: false,
    // enablevalidate: true,    // 是否启用参数校验插件,默认为true
    routermap: false, // 是否启用自动生成路由,默认为true
    enable: true,  // 默认启动swagger-ui
  };

  return config;
};
步骤4:使用jsdoc注释编写控制器代码
在egg.js控制器文件app/controller/home.js中,用jsdoc注释定义api:
'use strict';

const controller = require('egg').controller;

/**
 * @controller home api接口
 */
class homecontroller extends controller {
  /**
   * @summary 首页
   * @description 获取首页信息
   * @router get / 这里对应路由
   * @request query string name 名字
   * @response 200 baseresponse 返回结果
   */
  async index() {
    const { ctx } = this;
    ctx.body = `hello, ${ctx.query.name}`;
  }
}

module.exports = homecontroller;
这里利用了egg-swagger-doc所支持的jsdoc注解,定义了一个对应get /的api。
步骤5:启动egg.js应用并访问swagger文档
启动egg.js应用:
npm run dev
在浏览器中访问http://localhost:7001/swagger-ui.html(默认egg.js应用的端口是7001)查看swagger文档。
这就完成了在基于egg.js框架的项目中集成swagger文档的步骤。以上是一个简单的例子,实际开发中可能需要根据自己的业务需求进行相应的配置和编写。通过集成swagger,所开发的egg.js应用将获得一个自动化、易于阅读和管理的api文档。
以上就是node.js中swagger的使用指南详解的详细内容,更多关于node.js swagger的资料请关注代码网其它相关文章!


发表评论