00. 前言
鉴于qt官方ide太过难用,vscode+各种插件功能强大,遂采用vscode来写qt项目。
01. 环境搭建
1. 需要安装的软件:
- vscode,官方最新版就行
- qt,版本随意,本文主要针对较老版本使用qmake构建系统的项目
2. 环境变量:
qt环境变量,需要配置qt库跟mingw,尽量使用qt安装时自带的mingw

vscode插件,下面c/c++插件是必需的没意见吧
02. 开始配置
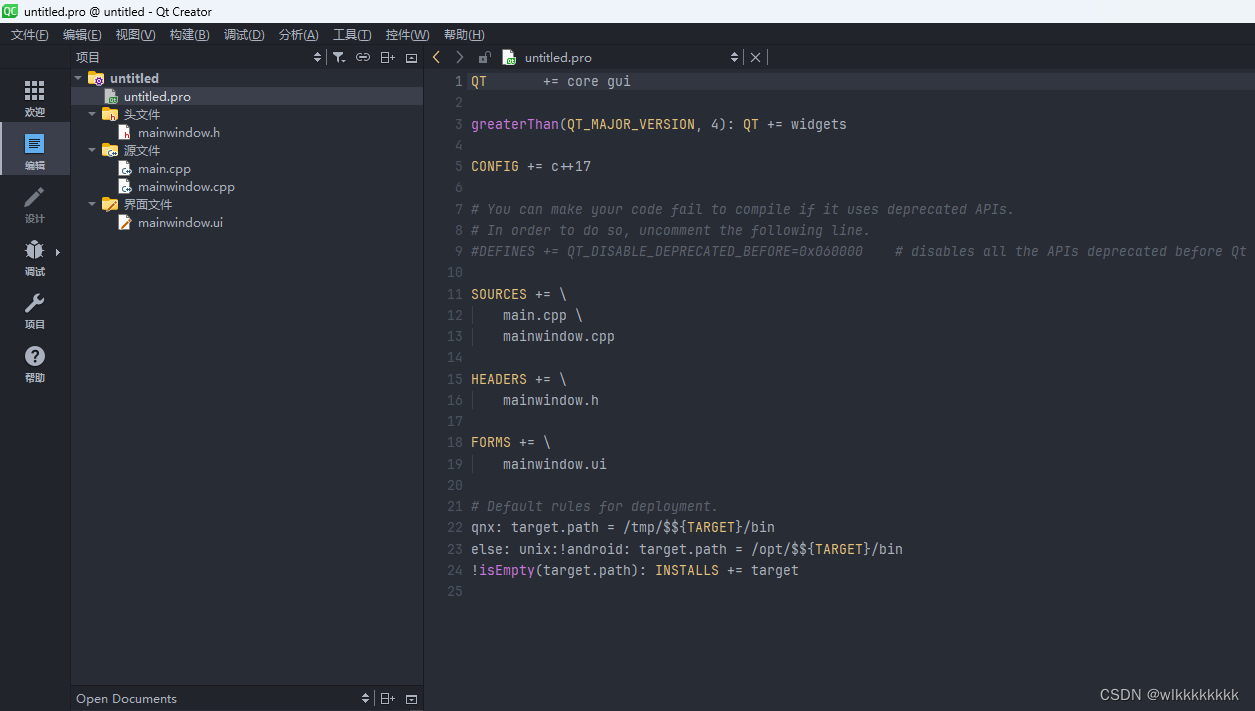
1. 创建项目项目
先用qt creator创建个qmake项目,最简单的空白窗口,项目结构如下
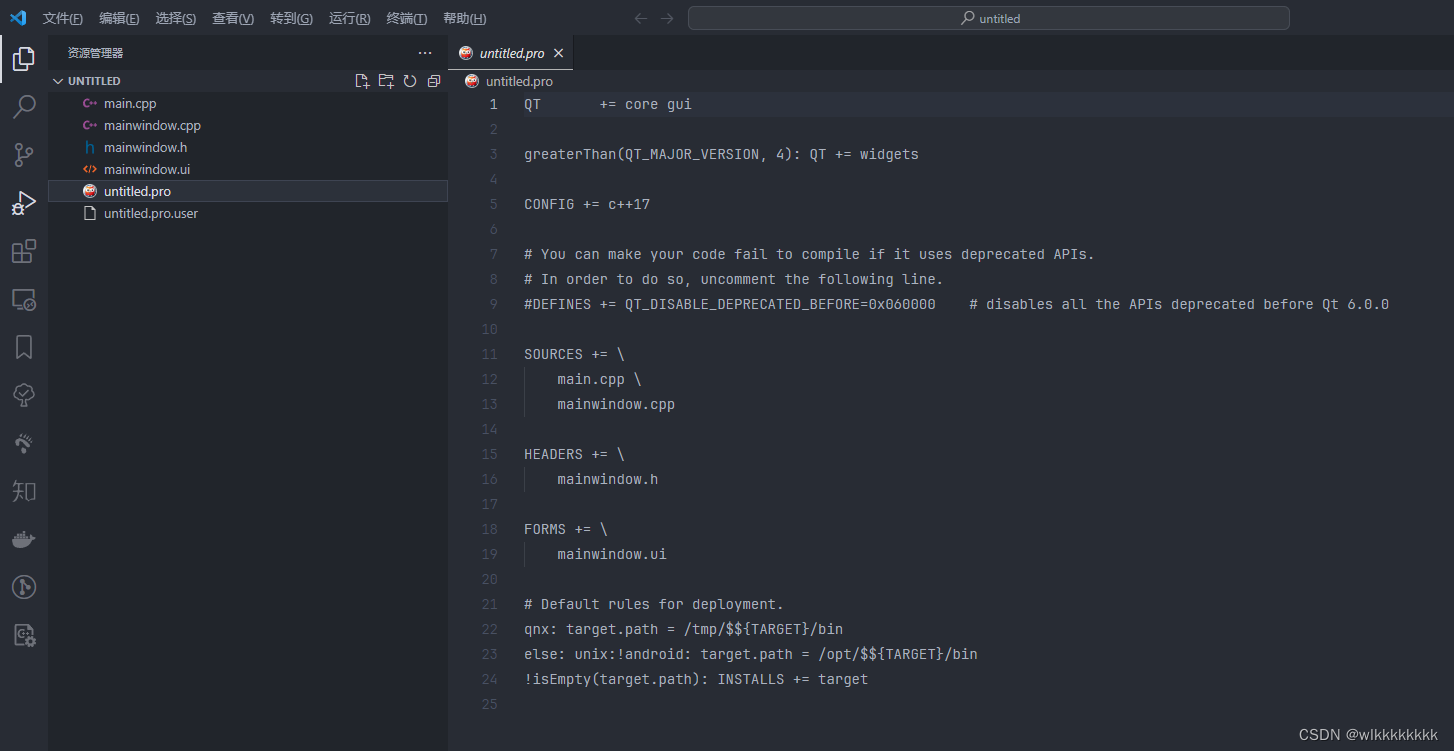
2. 使用vscode打开项目
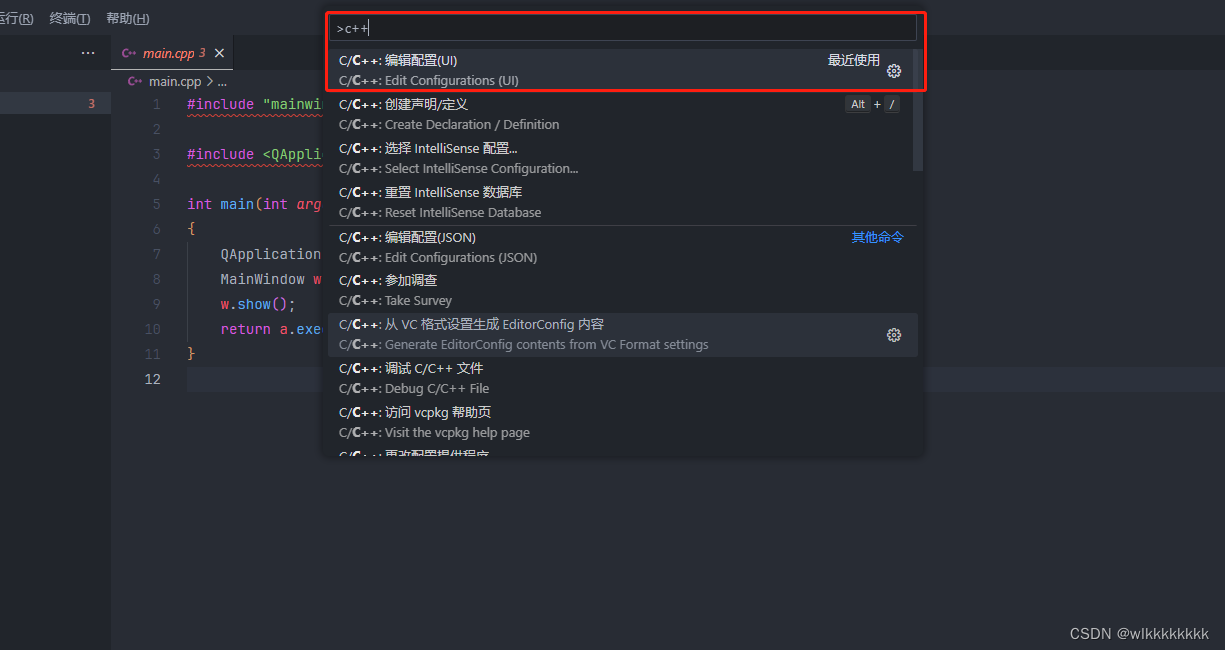
3. 配置c/c++插件
vscode快捷键ctrl+shift+p打开命令面板,输入c++,选择编辑配置
4. 编辑c/c++设置
编译器路径:下拉有得选就选你配置环境变量的qt版本,没有就自己复制路径过来

intellisense 模式:选择安装的gcc的架构,我安装的是64位qt,上面自带的gcc编译器也是64位,就选择windows-gcc-x64

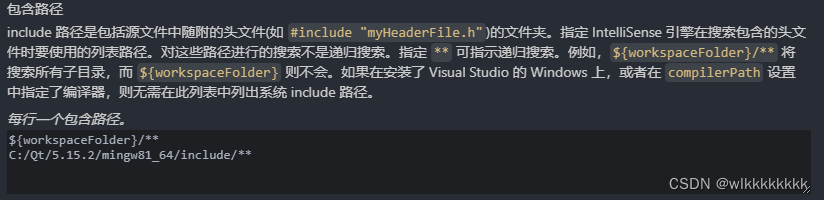
头文件路径:这个主要是实现头文件识别,要不然qt的头文件一直飘红,也没法自动跳转头文件,第一行是当前像目录下所有,第二行是安装的qt库的头文件路径
剩下的配置按需配置,不配置也不影响。选择编辑json可以查看c/c++插件json版本的配置

刚才配置的都在这里面了,现在引用qt头文件已经不报错了 c_cpp_properties.json
{
    "configurations": [
        {
            "name": "win32",
            "includepath": [
                "${workspacefolder}/**",
                "c:/qt/5.15.2/mingw81_64/include/**"
            ],
            "defines": [
                "_debug",
                "unicode",
                "_unicode"
            ],
            "intellisensemode": "windows-gcc-x64",
            "compilerpath": "c:/qt/tools/mingw810_64/bin/g++.exe"
        }
    ],
    "version": 4
}
5. 配置task.json
选择终端-运行任务-配置任务-使用模板创建task.json文件-others;这一步无所谓,就是搞个模板,用我下面贴的一样

配置编译qt项目的task,这一步其实是跟qt creator相同的,我们打开qt creator,选择项目,查看刚才的项目的项目构建配置
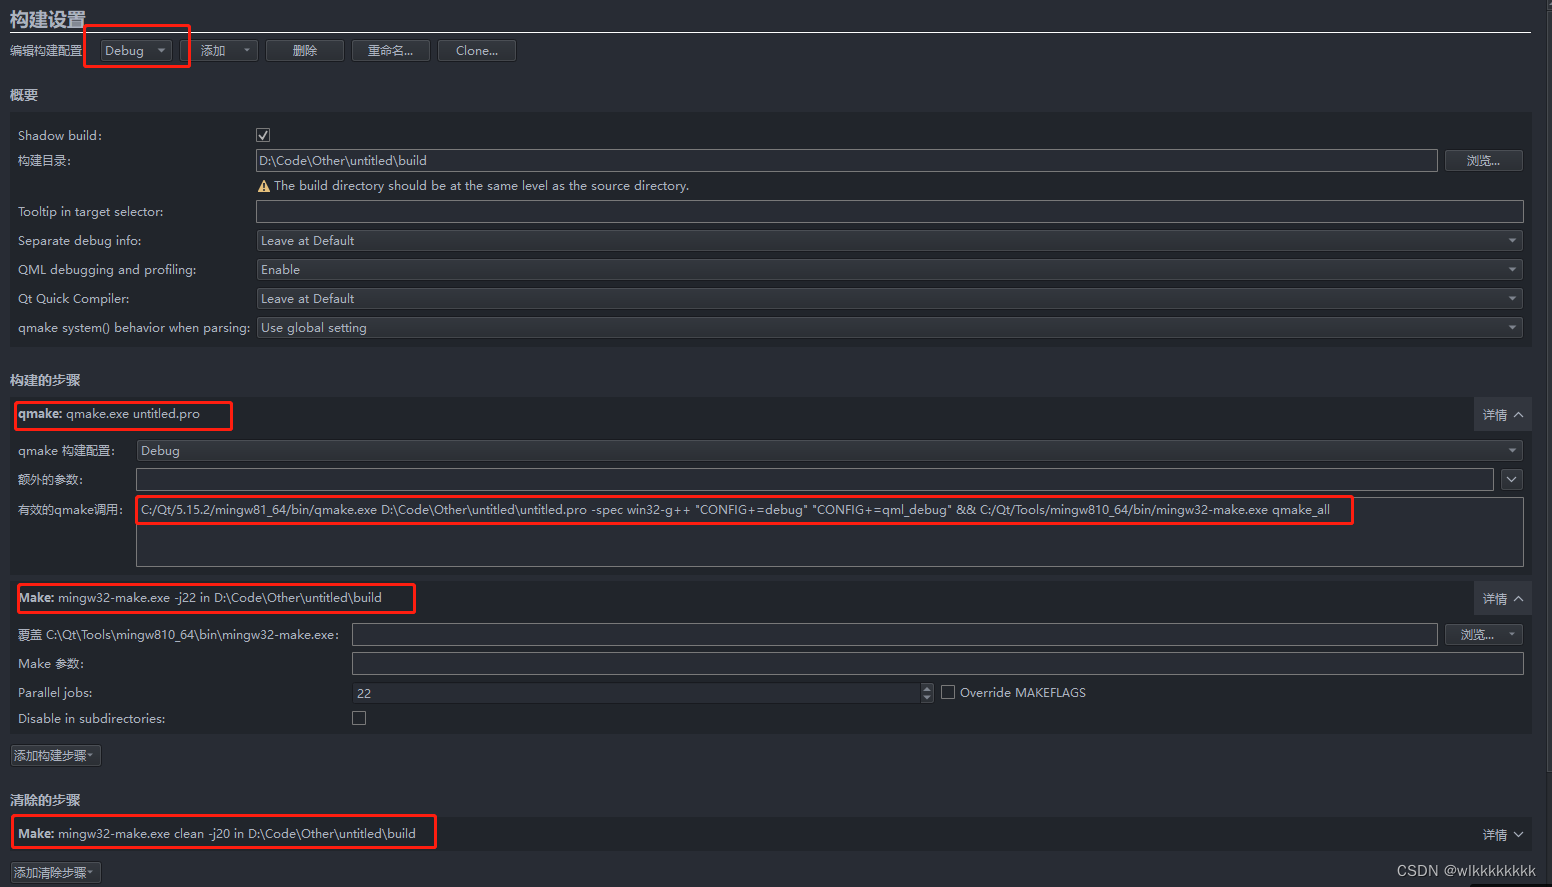
qt creator构建步骤分析如下:
设置构建目录,也就是编译出来的中间文件目录
qmake,这一步其实是用qmake将.pro配置文件编译成makefile,并且将其中涉及的.ui、.qrc等编译成cpp,都在构建目录中,下面是切换debug/release时不同的qmake编译命令
#debug
c:/qt/5.15.2/mingw81_64/bin/qmake.exe d:\code\other\untitled\untitled.pro -spec win32-g++ "config+=debug" "config+=qml_debug" && c:/qt/tools/mingw810_64/bin/mingw32-make.exe qmake_all

#release
c:/qt/5.15.2/mingw81_64/bin/qmake.exe d:\code\other\untitled\untitled.pro -spec win32-g++ "config+=qml_debug" && c:/qt/tools/mingw810_64/bin/mingw32-make.exe qmake_all
make,真正的编译cpp,mingw使用的式mingw32-make.exe
mingw32-make.exe -j22 in d:\code\other\untitled\build
clean,这里使用还是mingw32-make.exe
mingw32-make.exe clean -j20 in d:\code\other\untitled\build
将上面qt creator构建步骤转换为task.json就行了,我把debug、relese全流程都加上了,非常简单!
{
    // see https://go.microsoft.com/fwlink/?linkid=733558
    // for the documentation about the tasks.json format
    "version": "2.0.0",
    "tasks": [
        {
            //在当前项目目录创建build文件夹
            "label": "mkdir", //任务名称
            "type": "shell", //任务类型,定义任务是被作为进程运行还是在 shell 中作为命令运行。
            "options": {
                "cwd": "${workspacefolder}" //已执行程序或脚本的当前工作目录,设置当前项目文件夹
            },
            "command": "mkdir", //命令
            "args": [ //命令后面跟的参数
                "-force",
                "build"
            ]
        },
        {
            "label": "qmake-debug",
            "type": "shell",
            "options": {
                "cwd": "${workspacefolder}/build" //进入build目录
            },
            "command": "qmake", //qmake命令,这里没用完整路径,是因为配置到环境变量了 c:/qt/5.15.2/mingw81_64/bin/qmake.exe
            "args": [ //跟的参数是不是很熟悉,就是上面分析出来的qt creator执行流程
                "../${workspacefolderbasename}.pro", //在build目录上一级哦
                "-spec",
                "win32-g++",
                "\"config+=debug\"",
                "\"config+=console\""
            ],
            "dependson": [ //这是本条命令依赖的前置条件,就是上面创建build文件夹的task,直接执行本task会自动先调用依赖的task
                "mkdir" //其实可以手动执行一次,后面不用每次都执行创建目录的操作
            ]
        },
        {
            "label": "make-debug",
            "type": "shell",
            "options": {
                "cwd": "${workspacefolder}/build"
            },
            "command": "mingw32-make", //mingw这个也配置在环境变量了,不用写完整路径了 c:/qt/tools/mingw810_64/bin/mingw32-make.exe
            "args": [
                "-f",
                "makefile.debug", //-f 选择makefile,这是qmake编译出来的
                "-j7" //这个参数都知道吧,编译用的线程数量
            ],
            "dependson": [
                "qmake-debug"
            ]
        },
        {
            "label": "run-debug",
            "type": "process", //运行就不能选择shell执行了,要选择process
            "options": {
                "cwd": "${workspacefolder}/build/debug" //没在.pro配置destdir,会生成到build目录下面对应目录
            },
            "command": "${workspacefolderbasename}.exe", //执行的exe名字,一般当前项目文件夹的名称,自定义可以写其他的
            "dependson": [
                "make-debug"
            ]
        },
        /
        {
            "label": "qmake-release",
            "type": "shell",
            "options": {
                "cwd": "${workspacefolder}/build"
            },
            "command": "qmake",
            "args": [ //注意release跟debug参数的差异
                "../${workspacefolderbasename}.pro",
                "-spec",
                "win32-g++",
                "\"config+=qtquickcompiler\""
            ],
            "dependson": [
                // "mkdir" //不用每次都创建吧
            ]
        },
        {
            "label": "make-release",
            "type": "shell",
            "options": {
                "cwd": "${workspacefolder}/build"
            },
            "command": "mingw32-make",
            "args": [
                "-f",
                "makefile.release", //注意release跟debug参数的差异
                "-j7"
            ],
            "dependson": [
                "qmake-release"
            ]
        },
        {
            "label": "run-release",
            "type": "process",
            "options": {
                "cwd": "${workspacefolder}/build/release"
            },
            "command": "${workspacefolderbasename}.exe",
            "dependson": [
                "make-release"
            ]
        },
        {
            "label": "clean",
            "type": "shell",
            "options": {
                "cwd": "${workspacefolder}/build"
            },
            "command": "mingw32-make",
            "args": [
                "clean"
            ]
        }
    ]
}
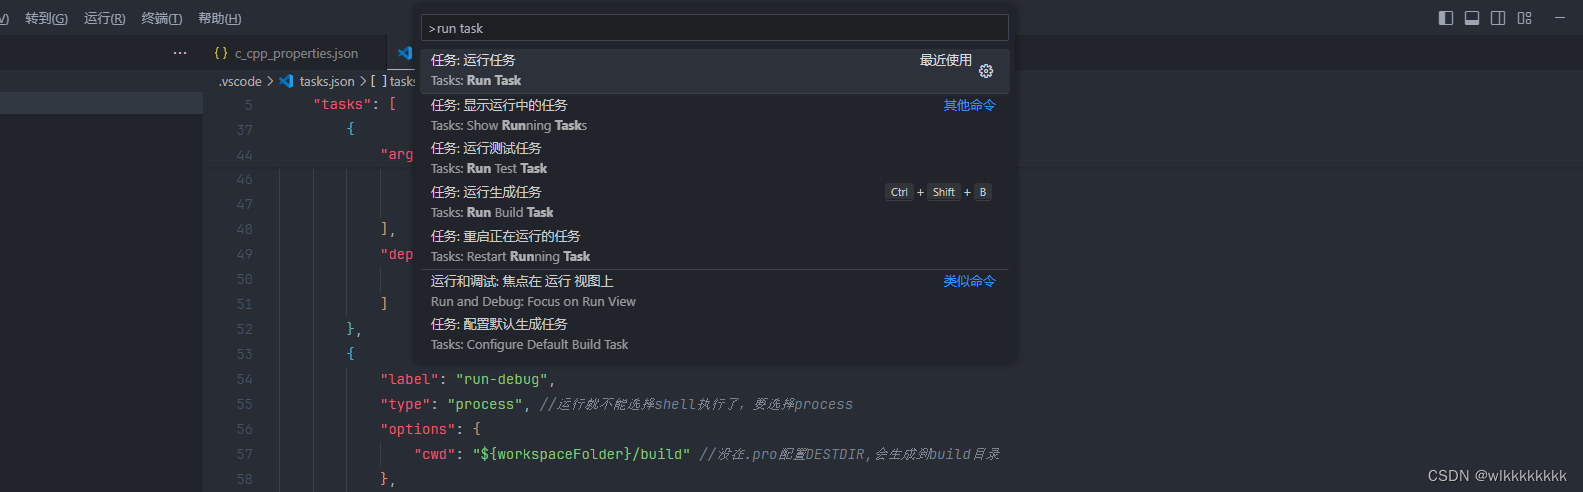
既然配置好了,那就可以开心的运行代码,有两种方式
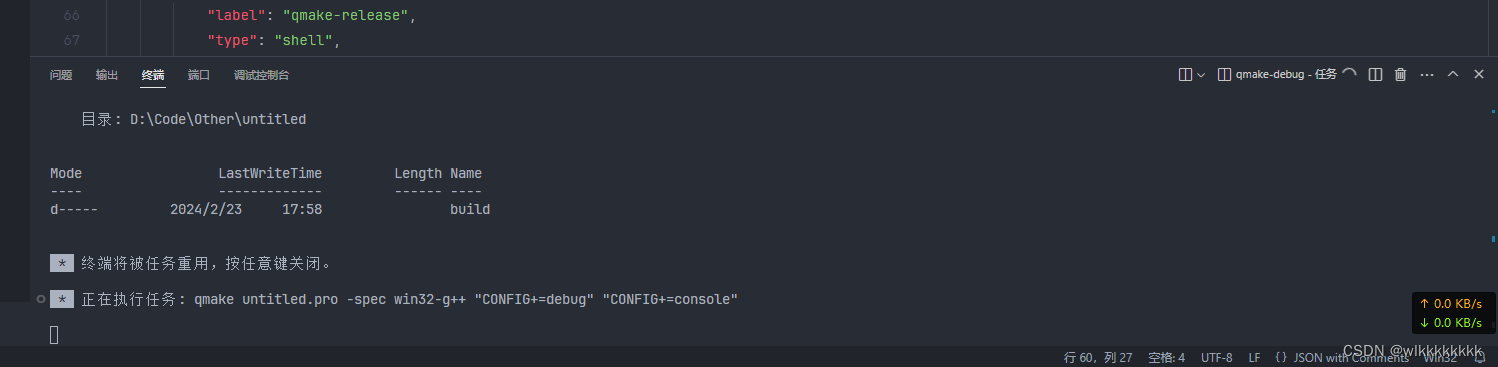
终端-运行任务-选择任务,我们配置的task都在里面了,选择run-debug/run-release就行,因为配置过depend[],前面qmake、make都被一条龙调用

既然是vscode,不用快捷键怎么可以,超级强大的ctrl+shift+p,输入run,和手点流程一样,回车,方向键选择run-debug/run-release回车执行就好了
一条龙调用的命令在控制台就会有输出了,exe启动后log也会在这输出
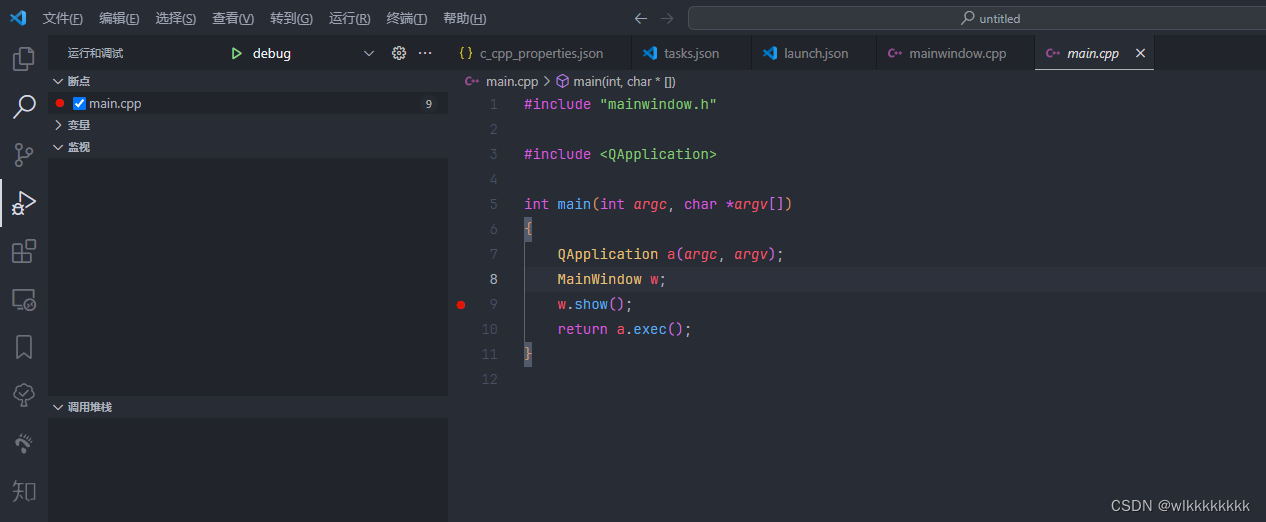
03. 配置断点调试
上面配置的是以debug/release方式运行程序,那么要打断点调试怎么办呢?
1.配置launch.json
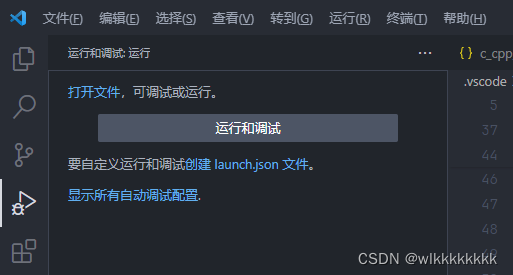
侧边栏选择调试,点击创建launch.json文件
选择c++就行,第一个第二个没关系,反正生成的几乎空白的模板

选择创建配置,选择gdb启动作为基础模板,来在上面修改
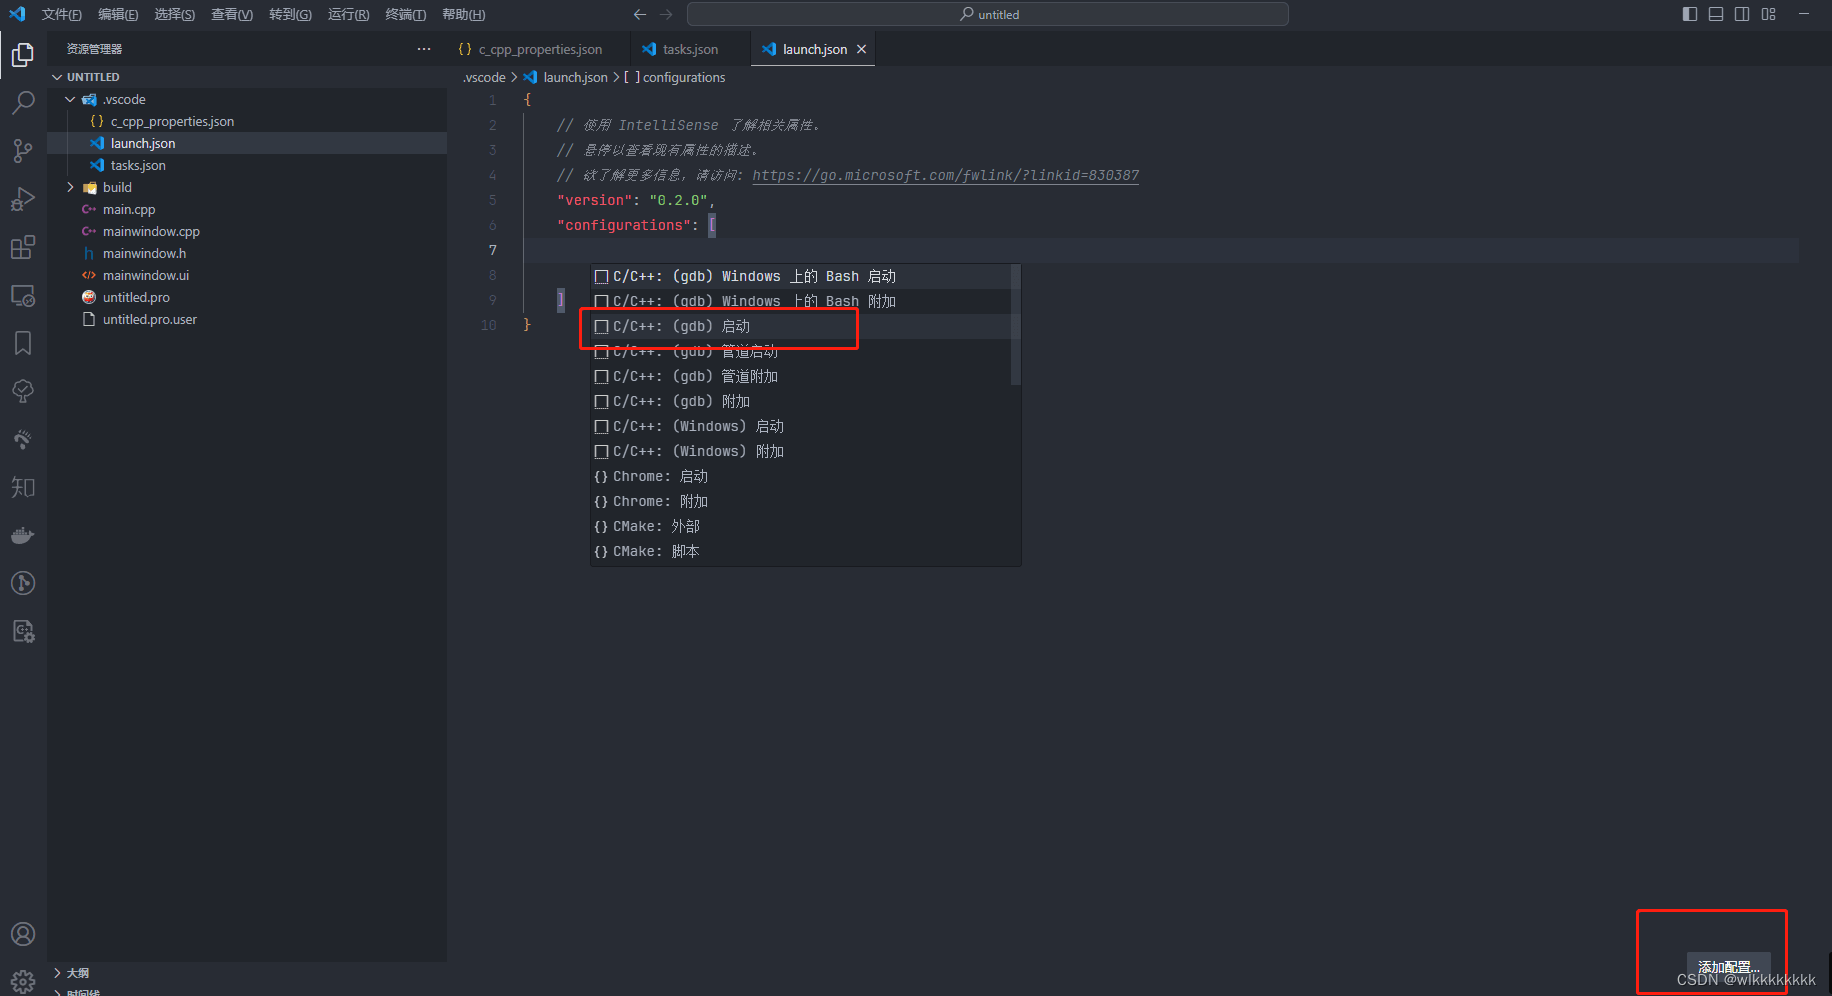
修改内容如下,我放了自动生成的模板跟修改后的,可以对比看下修改了那些地方,实际使用记得删除哈
{
    // 使用 intellisense 了解相关属性。
    // 悬停以查看现有属性的描述。
    // 欲了解更多信息,请访问: https://go.microsoft.com/fwlink/?linkid=830387
    "version": "0.2.0",
    "configurations": [
        {
            "name": "(gdb) 启动", //模板,实际使用记得删除
            "type": "cppdbg",
            "request": "launch",
            "program": "输入程序名称,例如 ${workspacefolder}/a.exe",
            "args": [],
            "stopatentry": false,
            "cwd": "${filedirname}",
            "environment": [],
            "externalconsole": false,
            "mimode": "gdb",
            "midebuggerpath": "/path/to/gdb",
            "setupcommands": [
                {
                    "description": "为 gdb 启用整齐打印",
                    "text": "-enable-pretty-printing",
                    "ignorefailures": true
                },
                {
                    "description": "将反汇编风格设置为 intel",
                    "text": "-gdb-set disassembly-flavor intel",
                    "ignorefailures": true
                }
            ]
        },
        {
            "name": "debug", //修改后
            "type": "cppdbg",
            "request": "launch",
            "program": "${workspacefolder}/build/debug/${workspacefolderbasename}.exe", //写完整路径
            "args": [],
            "stopatentry": false,
            "cwd": "${workspacefolder}", //工作目录,项目根目录
            "environment": [],
            "externalconsole": false,
            "mimode": "gdb",
            "midebuggerpath": "c:/qt/tools/mingw810_64/bin/gdb.exe", //选择mingw中的gdb
            "setupcommands": [
                {
                    "description": "为 gdb 启用整齐打印",
                    "text": "-enable-pretty-printing",
                    "ignorefailures": true
                }
            ],
            "prelaunchtask": "make-debug", //这跟depend[]很像啊,make就行了,用make编译出exe
        }
    ]
}
2. 运行调试
重新打开调试,刚才配置的调试配置已经存在了
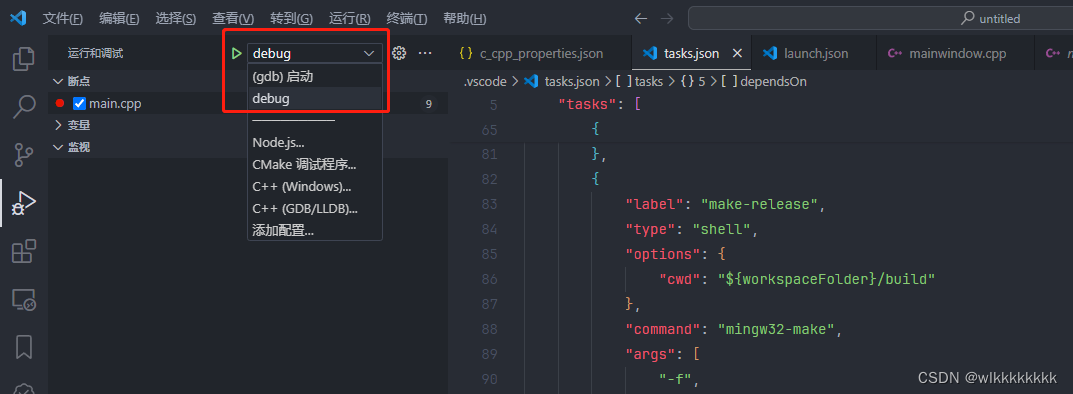
打个断点,点击绿色三角,运行下看看效果
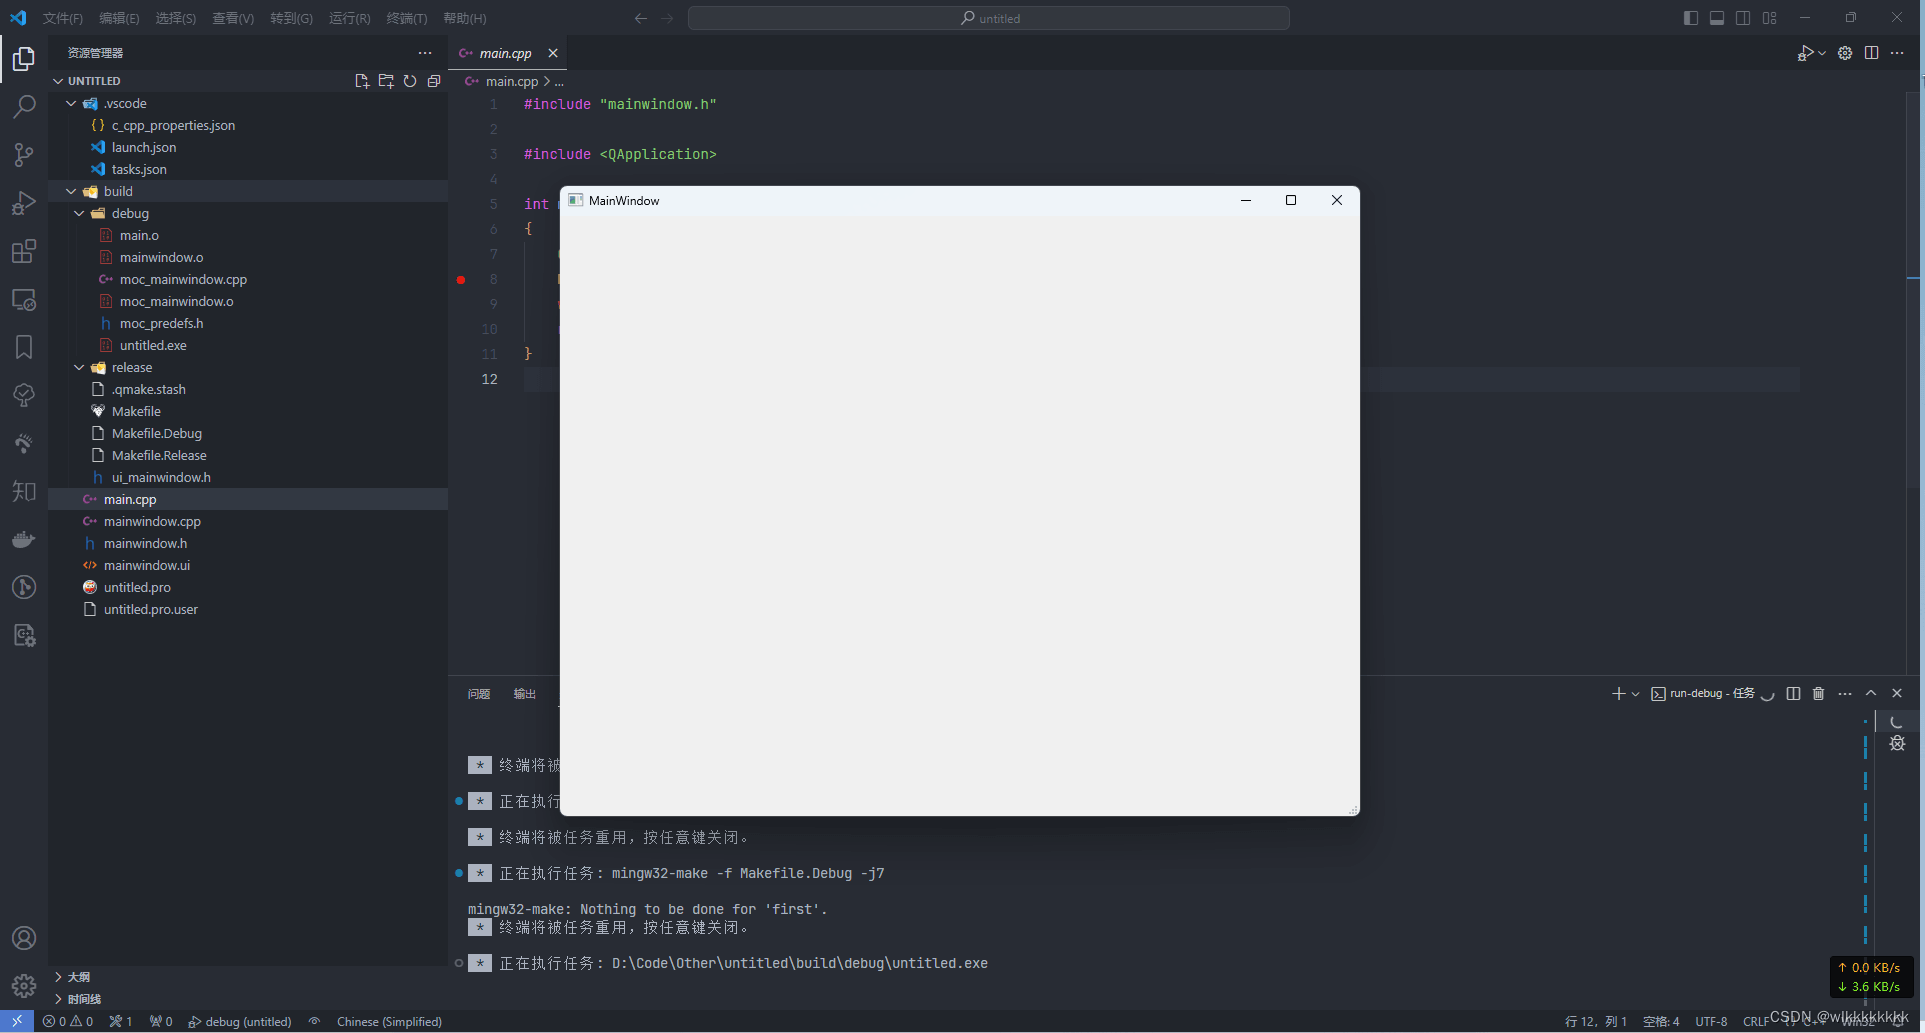
04. 运行效果
run-debug及自动生成的目录结构、控制台log,ctrl+c结束程序
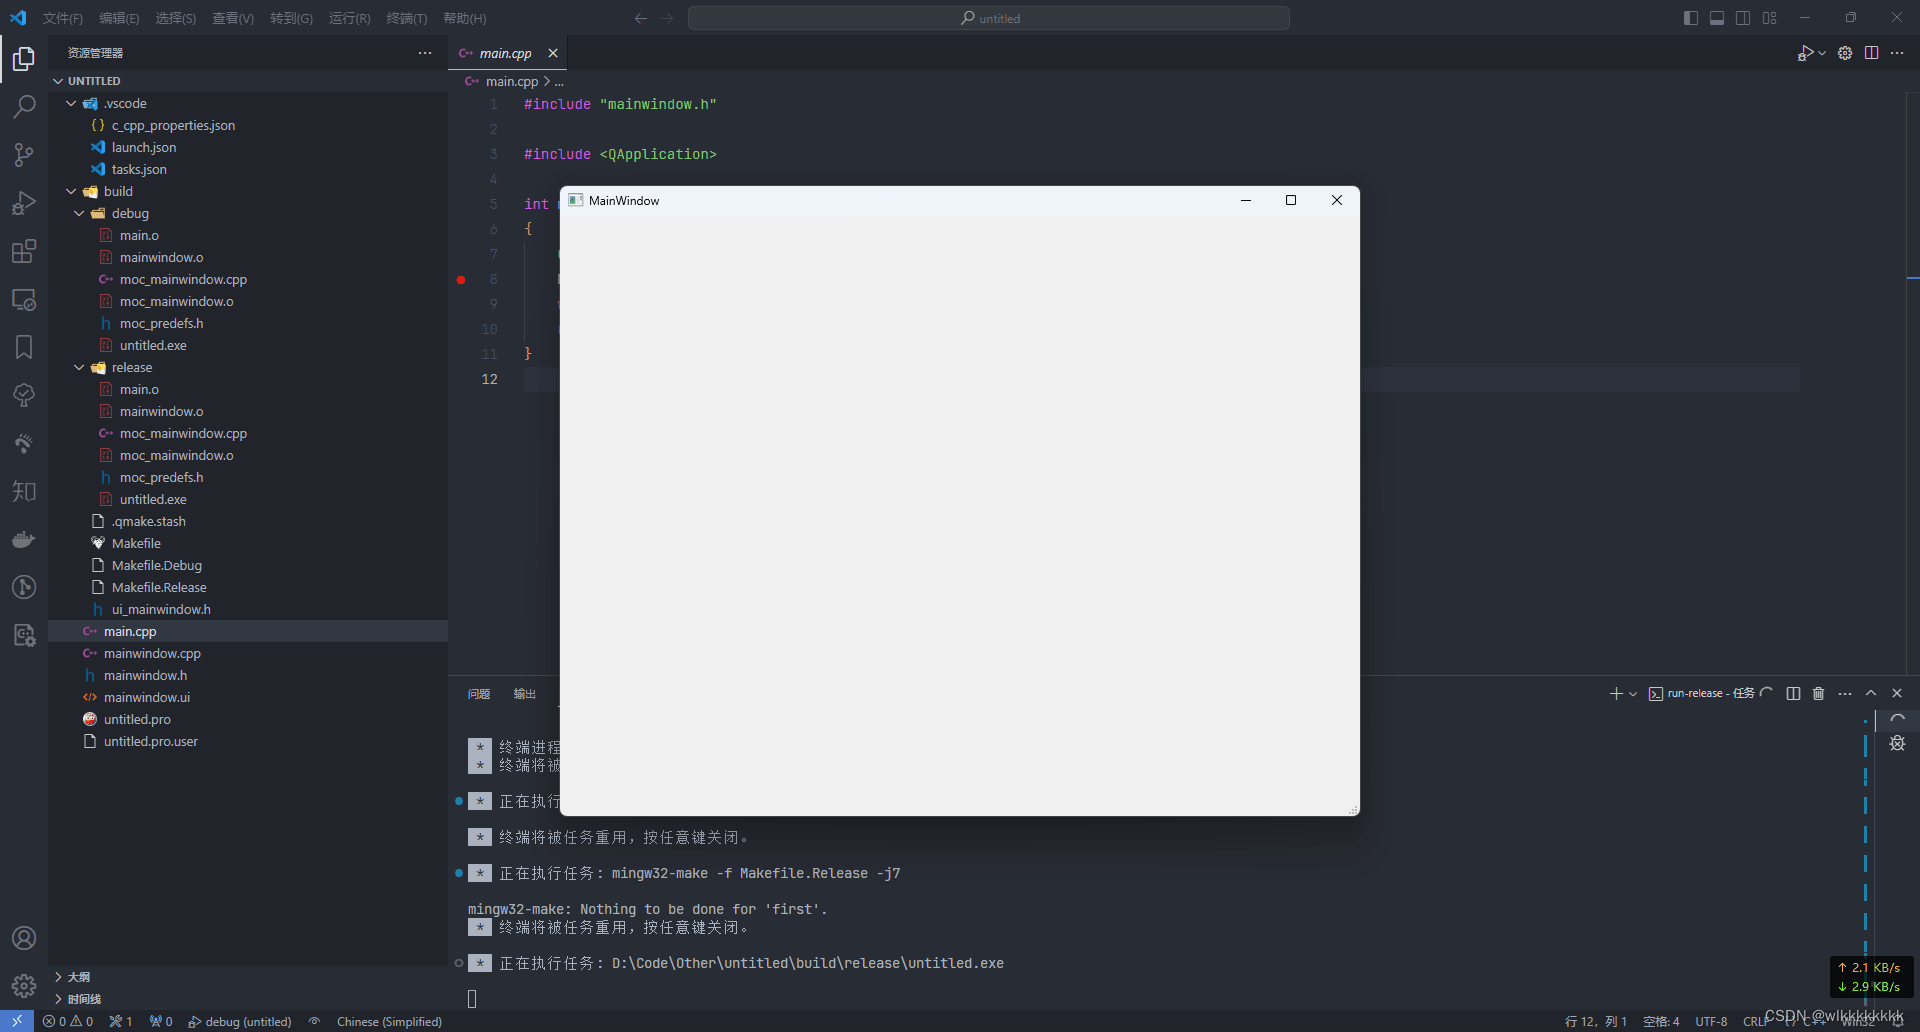
run-release
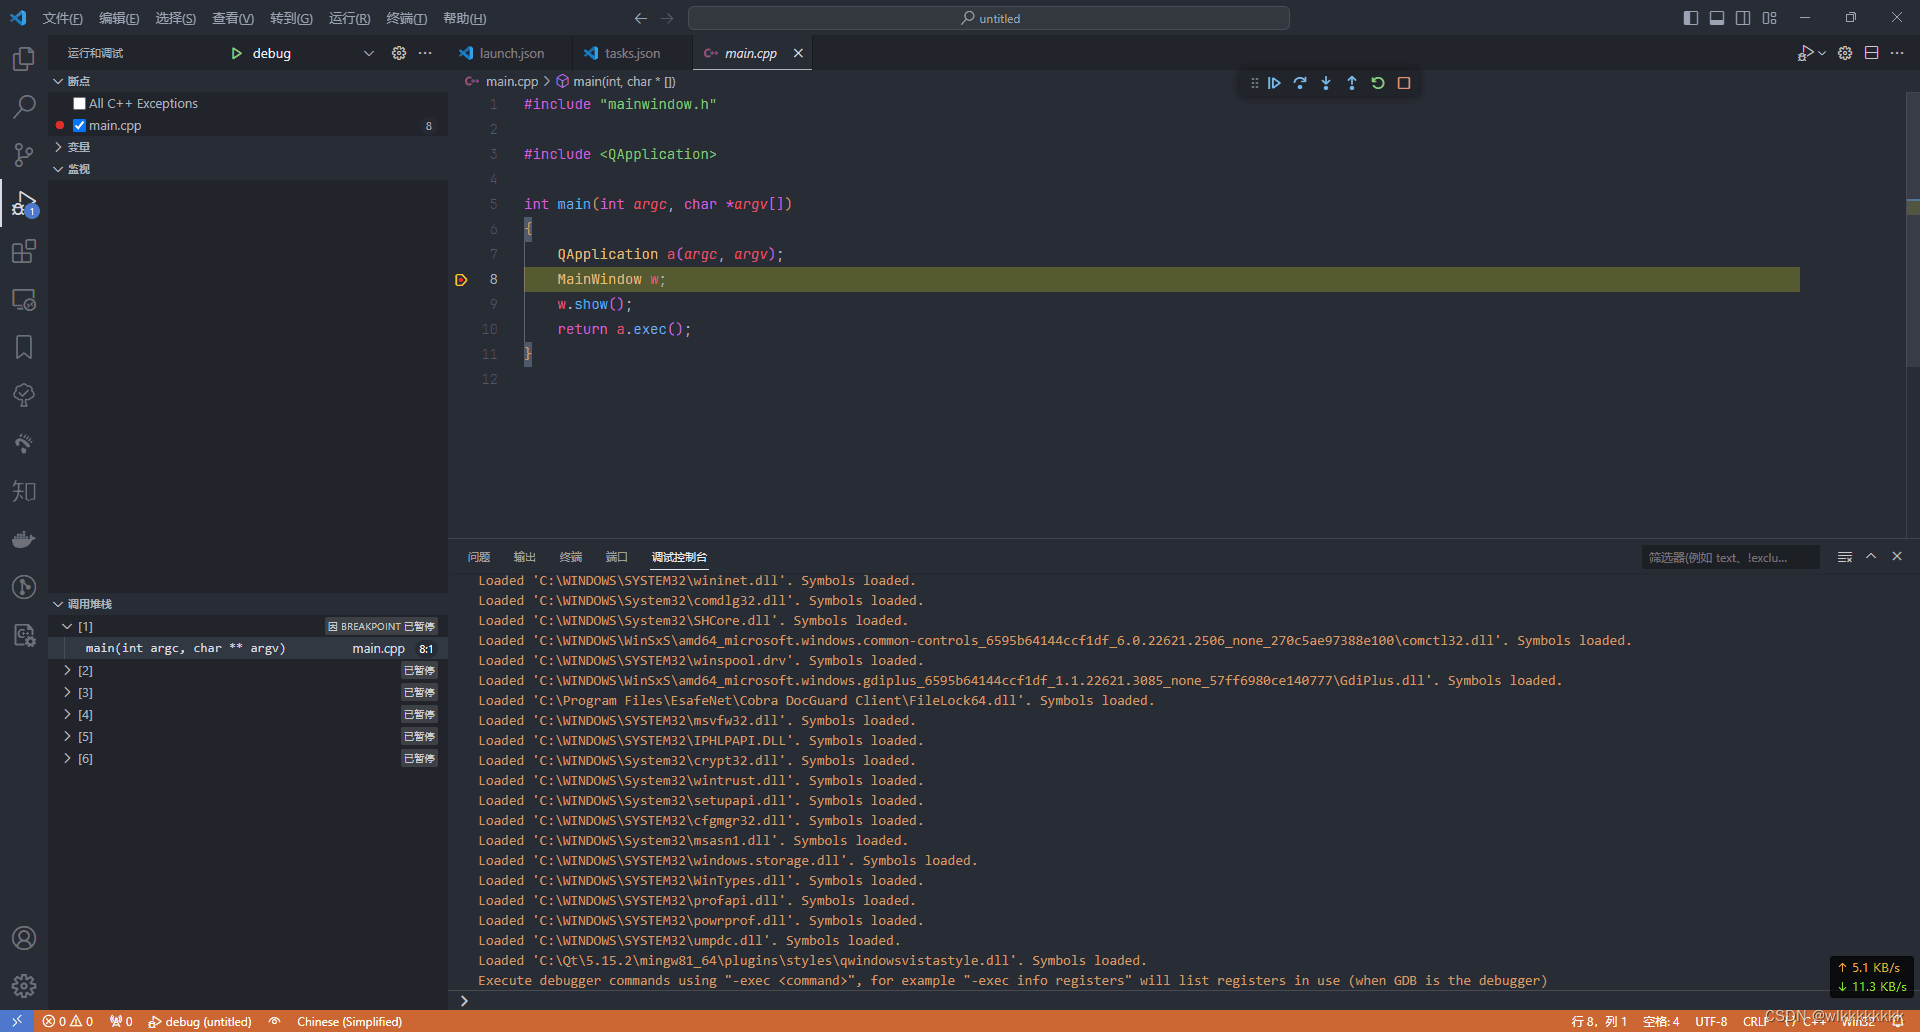
debug断点调试
到此这篇关于vscode+qt+qmake开发环境搭建(最全最详细)的文章就介绍到这了,更多相关vscode qt qmake环境搭建内容请搜索代码网以前的文章或继续浏览下面的相关文章希望大家以后多多支持代码网!


发表评论